Introduction
When an app is registered in Azure AD, when utilizing Consumer Credentials move it must be added with shopper ID and shopper Secret for authentication and authorization. Be aware that the validity of the shopper credentials (Consumer ID and Consumer Secret) might be configured to a minimal of 6 months and prolonged to three years. Extra about creating an Azure AD App might be discovered within the references part. The scope of this text is to validate if the Consumer ID and Consumer Secret are legitimate and checking that App can carry out the operations outlined in scope.
Within the article, we are going to undergo one of many App registrations in Azure and confirm the scope and permissions and validate the Consumer ID and Consumer Secret. Due to my colleague Sujit Nambiar for serving to in writing this text and troubleshooting the problems that got here throughout.
Validating Azure AD App
We’ll undergo the beneath steps to look at the main points of Azure AD app, the place we have to check it utilizing POSTMAN device.
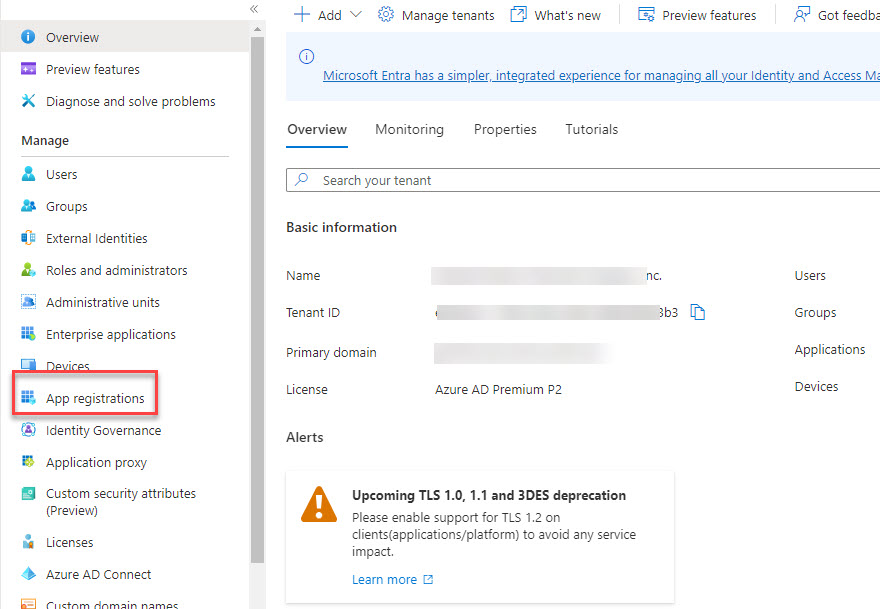
Step 1
Login to https://aad.portal.azure.com – Azure Lively Listing and click on on ‘Utility Registrations’.
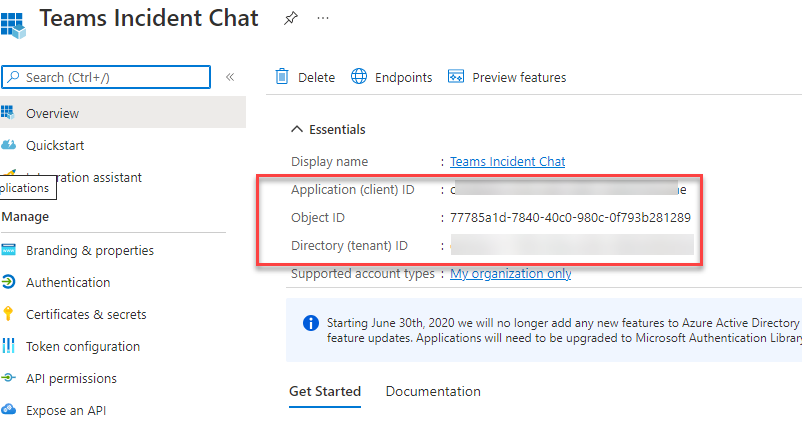
Step 2
Search for the Utility that you just want the main points for. In my case beneath are the main points that we are able to get following particulars
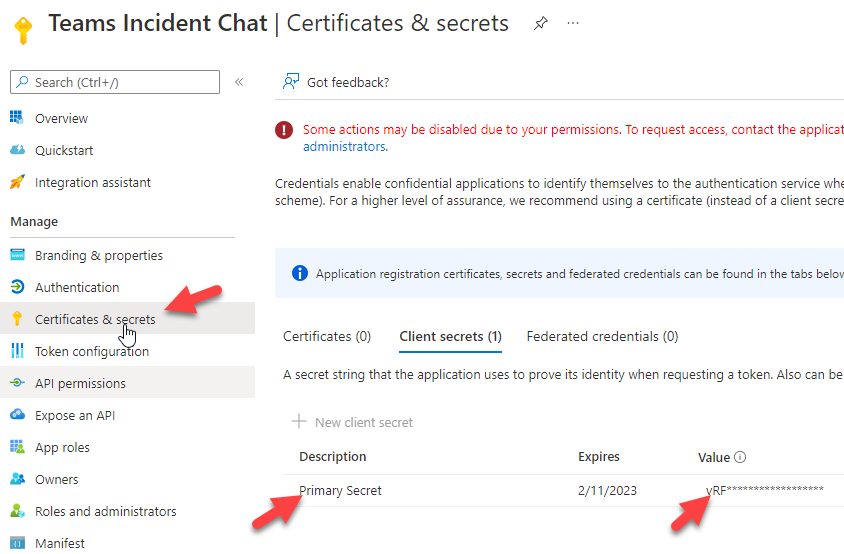
Be aware: Consumer Secret worth is barely proven throughout the time of creation underneath ‘certificates and secrets and techniques. After you navigate away then the shopper secret is hidden and proven as safe textual content.
Step 3
Evaluate the API permissions for the app and ensure it has required scopes configured and have the admin consent granted.
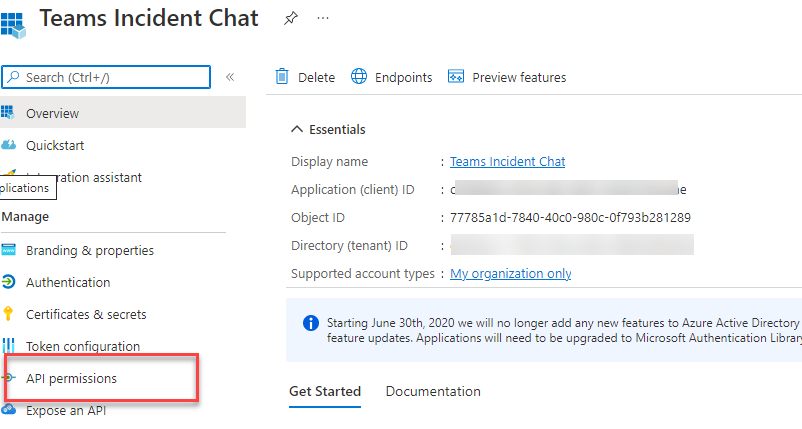
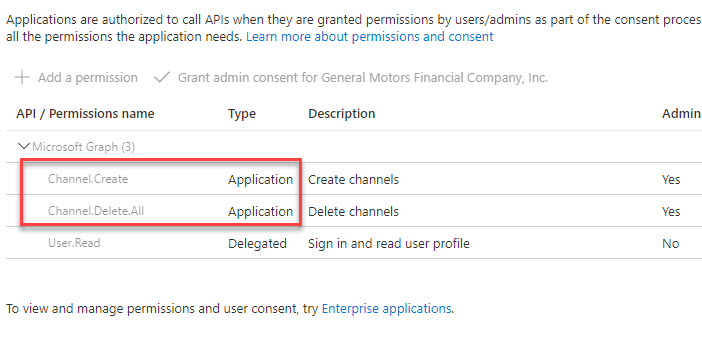
As proven in display screen seize it has following software permissions outlined. That is enough to create a channel and delete a channel utilizing Graph API endpoints.
- Channel.Create
- Channel.Delete.All
These steps conclude with the verifying Enterprise Azure AD App, after which validating the Azure AD App particulars.
Testing utilizing POSTMAN
On this part, we are going to use POSTMAN device to check the Graph API Finish Factors utilizing the above Azure AD App particulars.
Step 1
Open the POSTMAN device out of your machine. Please confer with references part on the way to set up POSTMAN on home windows 10.
Step 2
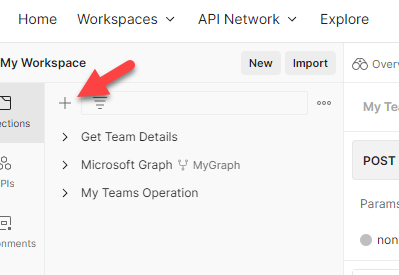
From the house web page, go to a workspace. You possibly can go to any workspace. For this text, I’m going to ‘My Workspace’.

Step 3
Within the subsequent web page, attempt to create a brand new assortment by clicking on + signal. It’s straightforward to confer with the operation we carried out for future references. This step just isn’t necessary however inspired.
Step 4
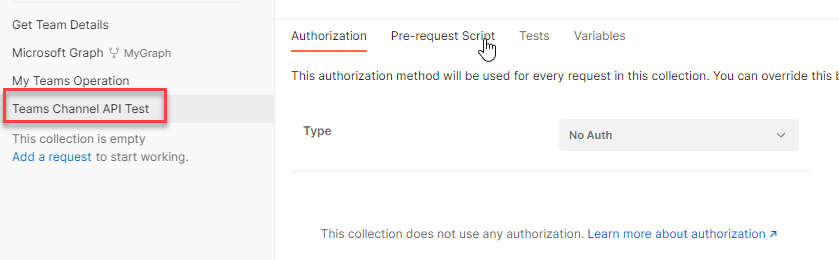
Rename the gathering as ‘Groups Channel API Check’.
Step 5
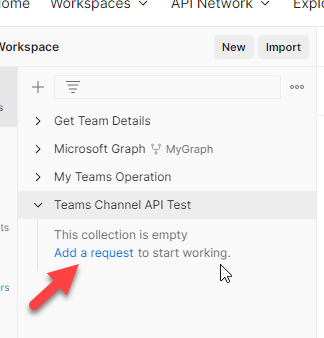
Within the subsequent step, click on on ‘Add a request’ hyperlink.
Step 6
Now rename the request to ‘Create Channel’. The graph endpoint to create the channel is
https://graph.microsoft.com/v1.0/groups/{TEAMID}/channels
The request kind is ‘POST’.
Step 7
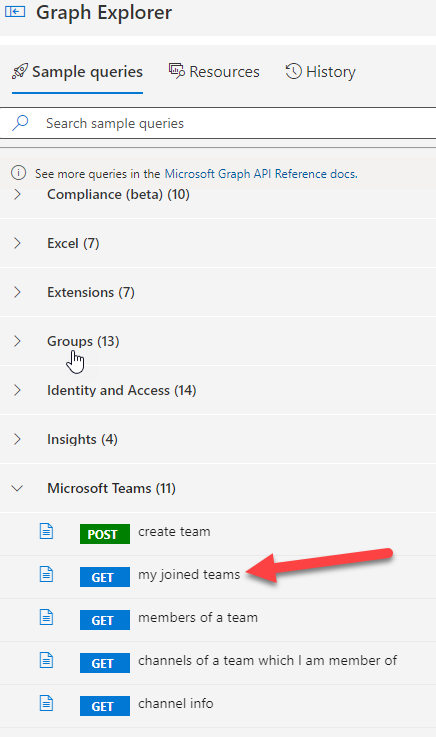
Now it’s required to get a Staff ID the place the channel must be created. The easy possibility is to go to Graph Explorer https://developer.microsoft.com/en-us/graph/graph-explorer and see the place you have got been added as proprietor or member. For this you possibly can login to graph explorer together with your group ID and search for pattern question name ‘my joined groups’.
Step 8
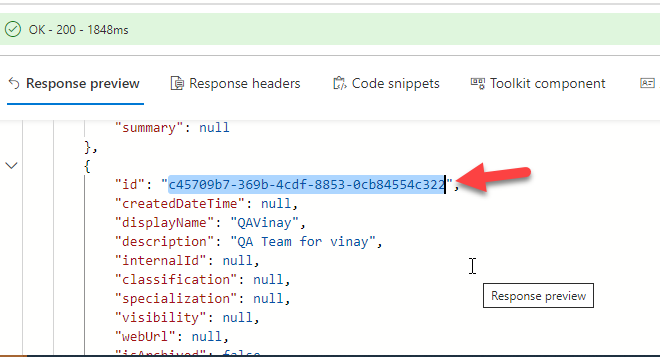
On success it ought to offer you 200 responses, then search for “id” property within the “worth” array. On this case, I’m taking the ID of a check time referred to as ‘QAVinay’ the place I’m a member. The ID property might be discovered from the JSON response.
Step 9
Now now we have the Staff ID, and we’re prepared to check the API from the POSTMAN. Return to POSTMAN device, format the URL as beneath. Change the request kind to ‘POST’. From step 6 from the earlier part, change the ‘Staff-ID’ with the ID worth you bought from the graph explorer.
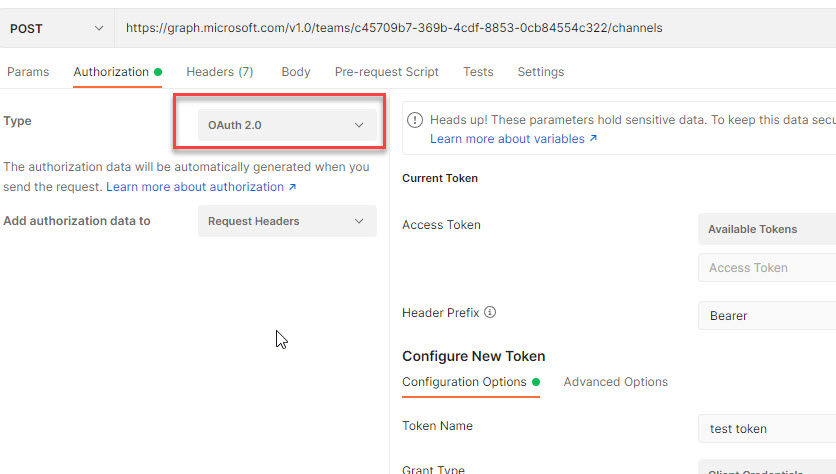
https://graph.microsoft.com/v1.0/groups/c45709b7-369b-4cdf-8853-0cb84554c322/channels
The display screen ought to seem like beneath. The URL must be altering primarily based on the ID property of your staff.

Step 10
Now go to ‘Authorization’ tab, choose the ‘Kind’ as ‘OAuth 2.0’.
Step 11
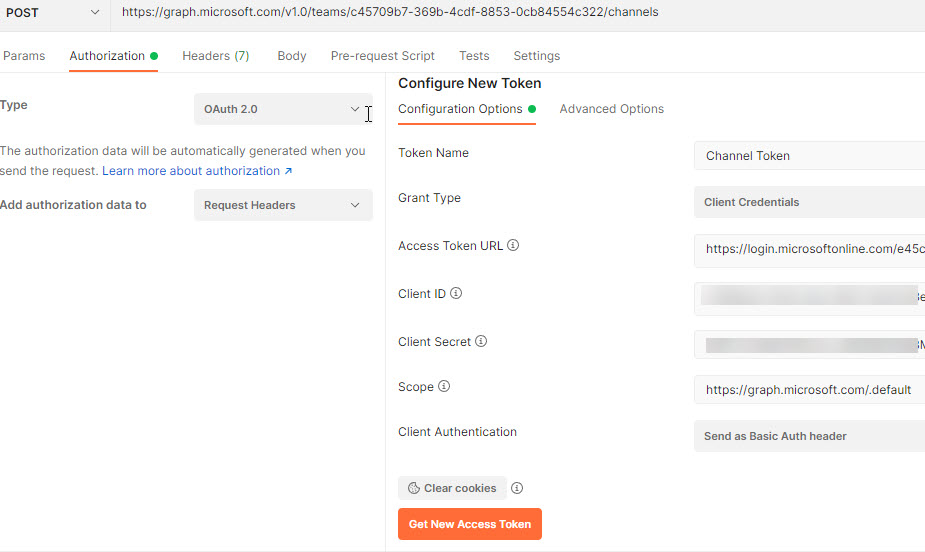
Within the configure new token part, Enter the next
- Token Identify: It may be something. I’m coming into as ‘Channel Token’.
- Grant Kind: ‘Consumer Credentials’. Since I have already got Consumer ID and Consumer Secret for the App. Be aware Consumer Secret can solely be seen as soon as the Consumer ID is created. After you navigate away and comeback will probably be showing as safe textual content. Ensure you observe the Consumer Secret whereas creating and configuring the App.
- Entry Token URL: it must be in format of https://login.microsoftonline.com/{TENANT-ID}/oauth2/v2.0/token. Exchange {TENANT-ID} together with your Azure AD Tenant ID. You will get the Tenant ID from the Azure AD App overview part as talked about within the above part.
- Consumer ID: the worth that you just received whereas configuring the ‘Certificates and Secrets and techniques’.
- Consumer Secret: the worth that you just received whereas configuring the ‘Certificates and Secrets and techniques’.
- Scope: https://graph.microsoft.com/.default. This is essential step. The default mainly will get the scopes which are outlined whereas creating the Azure AD App.
- Consumer Authentication: Go away it as default which is ‘Ship as Primary Auth Header’.
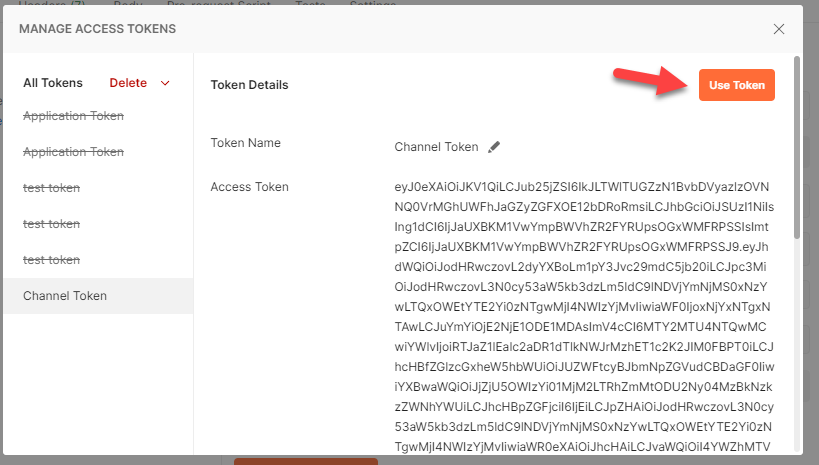
Step 12
On success, you get the beneath display screen
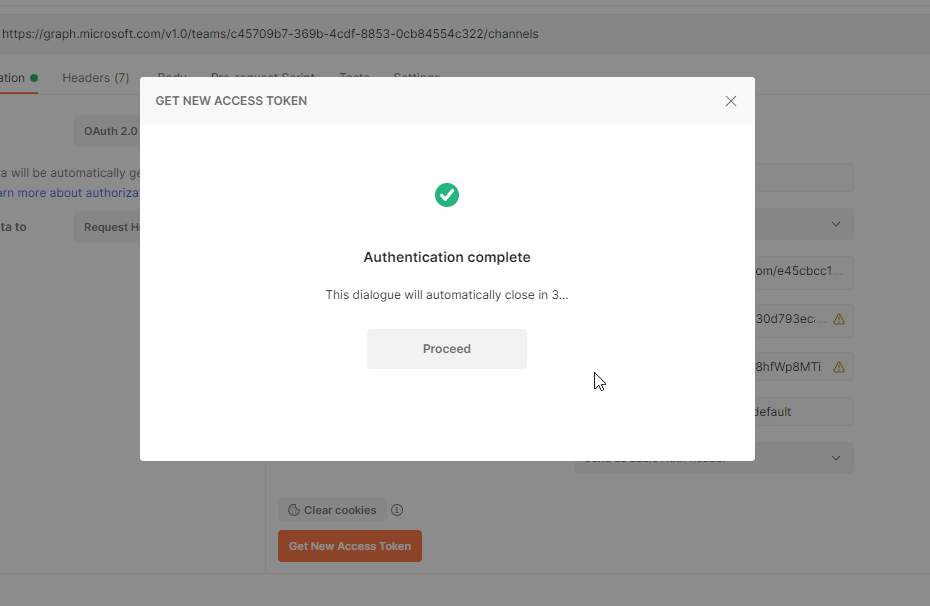
Step 13
Now click on on ‘Use Token’. Which implies this token will likely be used to work together with Graph Finish Factors.
Step 14
Now go to ‘Physique’ tab and choose the ‘uncooked’ and provides the properties within the JSON format.
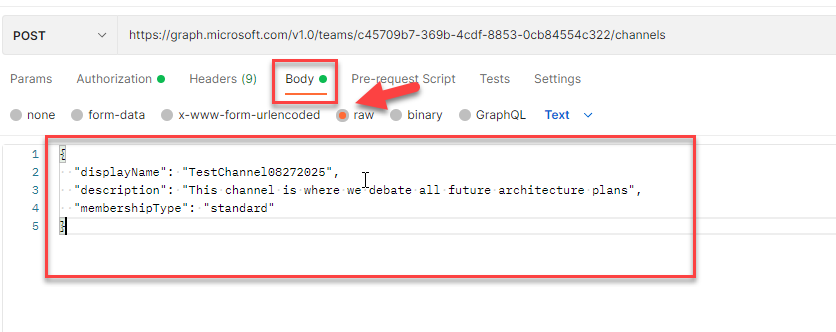
Step 15
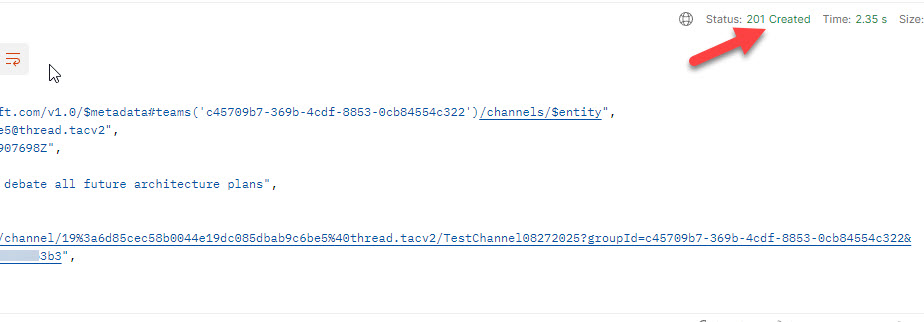
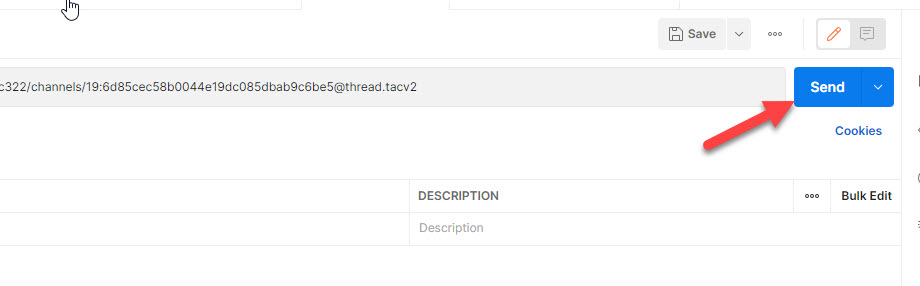
Now you might be prepared to check the Graph Finish Level to create channel. Click on on ‘Ship’.
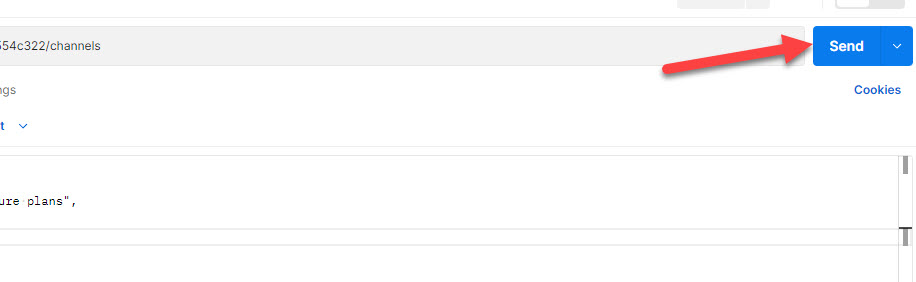
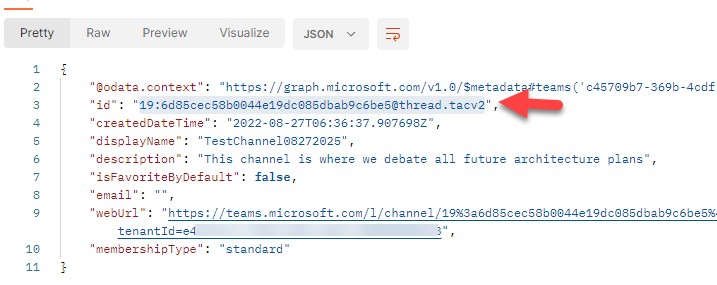
On success you’ll get the next response, with standing ‘201’.
Step 16
Validate the channel creation by going to respective groups.
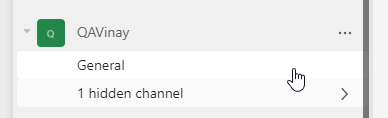
It initially reveals ‘1 hidden channel’ and on clicking on it, it reveals up
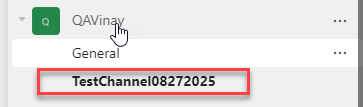
The above steps confirms that the channel creation is profitable, and the Azure AD Enterprise APP is working as anticipated and the APP has required API permissions outlined.
Step 17
In the identical approach, we are able to check for channel deletion. The Graph API finish level to delete the channel ID is
https://graph.microsoft.com/v1.0/groups/{TEAM-ID}/channels/{CHANNEL-ID}
Exchange the {TEAM-ID} and {CHANNEL-ID}
Step 18
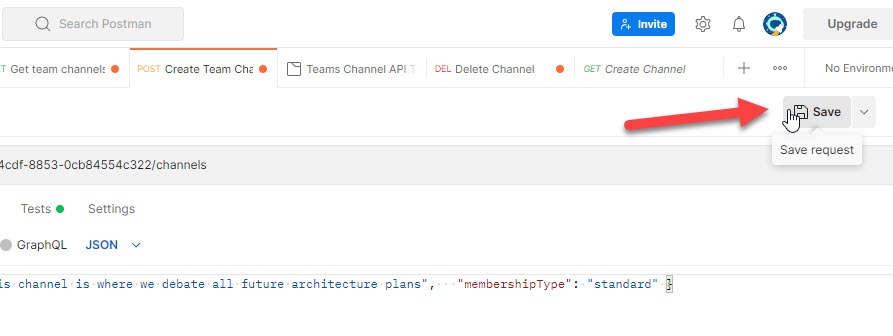
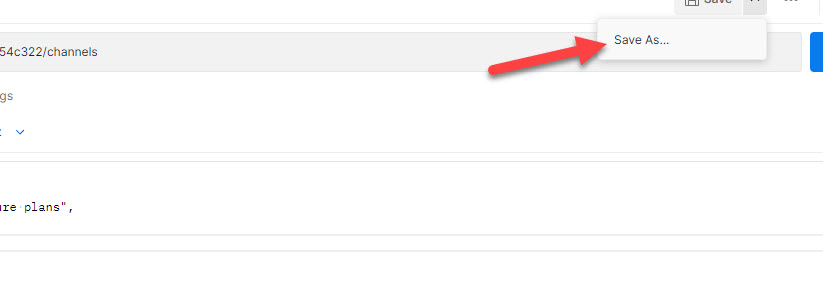
Now attempt to save the ‘Create Channel’ request in POSTMAN. This may assist in decreasing some repetitive steps for the subsequent operation. Furthermore you possibly can come again and execute this API check with very minimal clicks.
Step 19
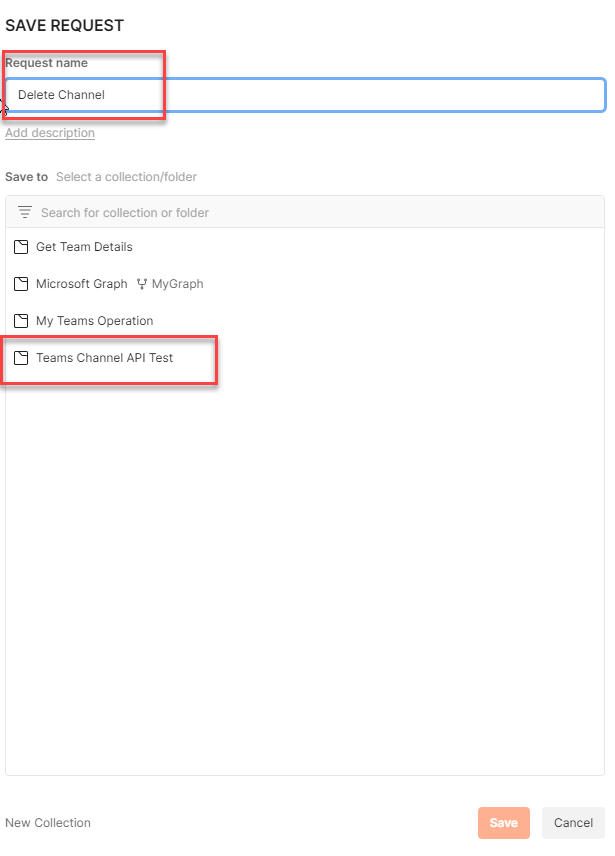
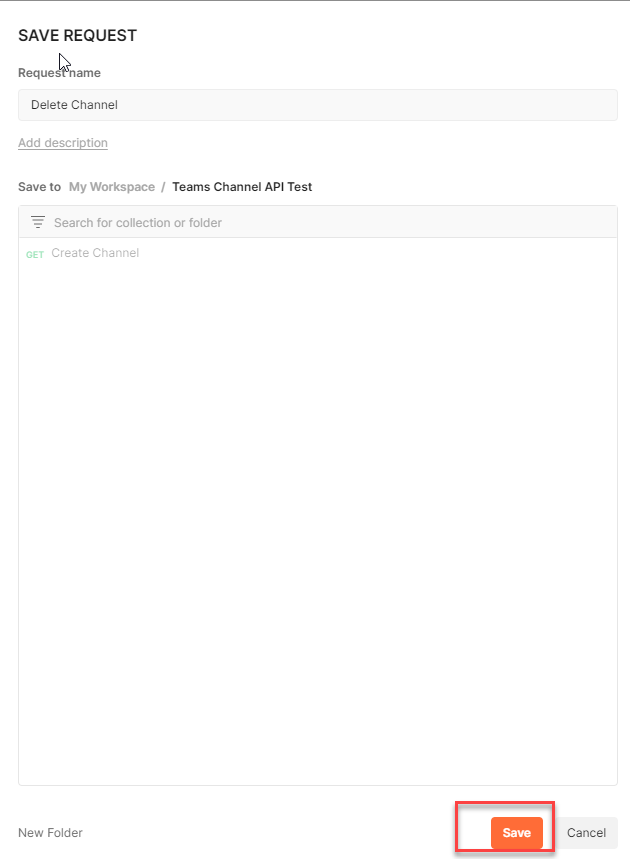
Now attempt to save because the ‘Create Channel’ request in POSTMAN as ‘Delete Channel’.
Step 20
Now change the tactic as ‘DELETE’ after which append the channel ID. The channel ID must be seen within the request physique.
Step 21
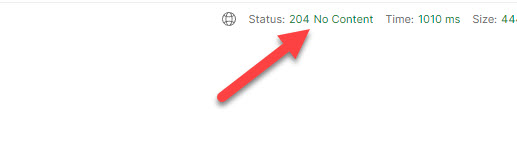
For deleting channel, there isn’t any additional configuration required, now you can click on on ‘Ship’.
On success, the response must be 204 ‘No Content material’.
Step 22
Return to your groups and observe the beforehand created channel exists no extra.
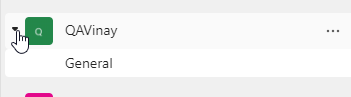
Solely the ‘Normal’ channel is proven.
Conclusion
Thus, on this article, now we have finished the next
- Verified the Azure AD App and received the App Particulars
- Used POSTMAN device to check App features by interacting with Graph API finish factors.
References


