Introduction
On this article, we are going to learn to create Azure SQL Database utilizing portal. There are database companies accessible in azure portal.
Azure database companies
- Azure cosmos database is a globally distributed database service that elastically and independently scales all through and storage.
- Azure SQL Database is a relational database as a service (DaaS) primarily based on the newest secure model of the Microsoft SQL Server database engine.
- Azure Database for MySQL is absolutely managed MySQL database service for app builders.
- Azure Database for PostgreSQL is relational database service primarily based on the open-source Postgres database engine.
Step 1
If you do not have an Azure subscription, create an Azure free account earlier than you start.
Step 2
Check in to the Azure portal along with your Azure account.
Step 3
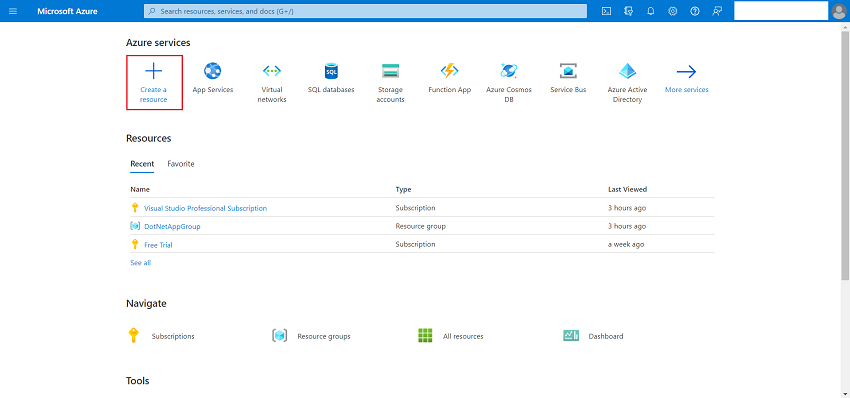
From the Azure portal menu, or from the House web page, choose Create a useful resource.
Step 4
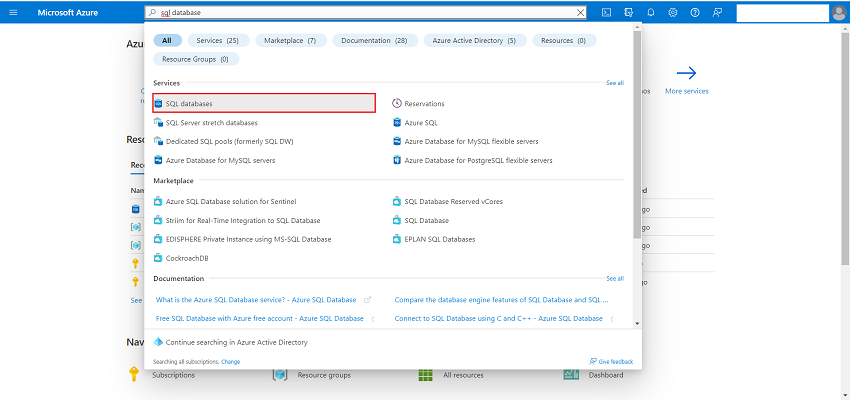
On Azure portal within the Search field, enter SQL Database. From the outcomes checklist, select SQL Databases.
Step 5
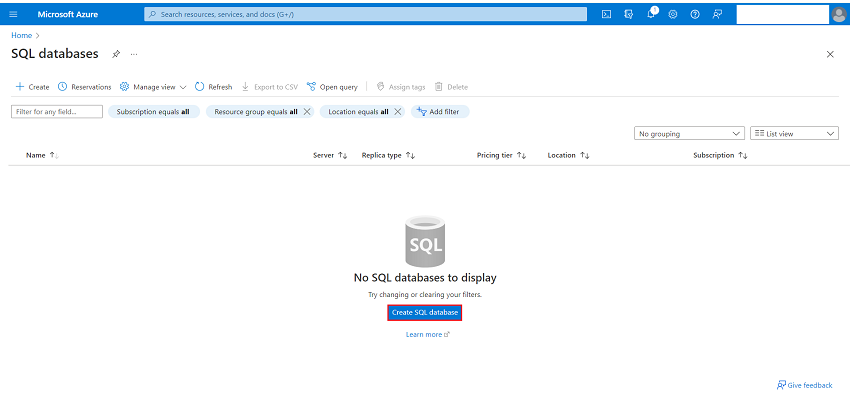
On the SQL Database part, select Create SQL Database.
Step 6
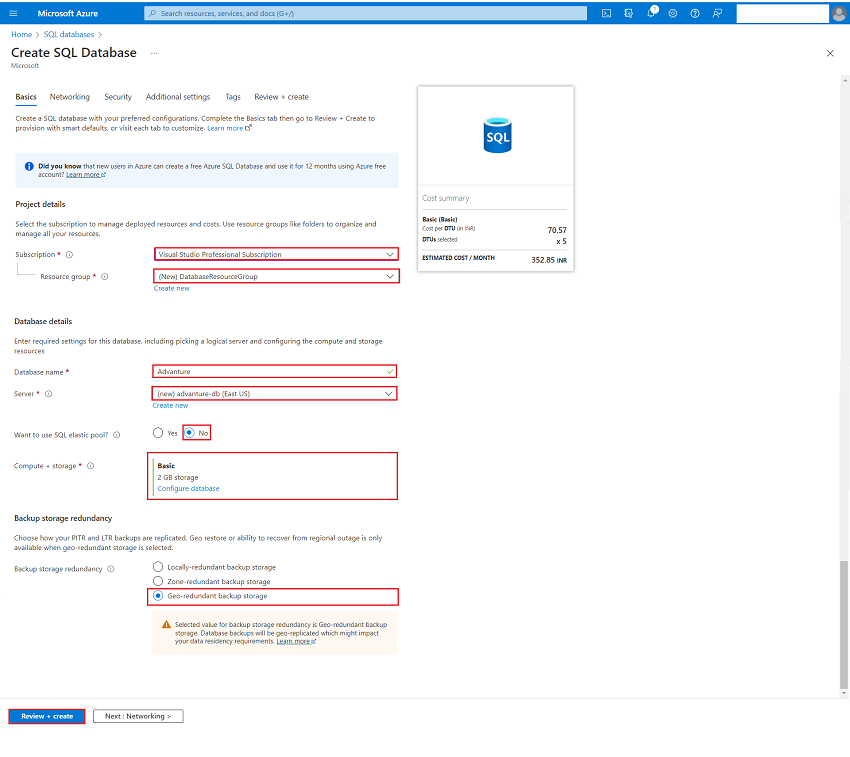
On the Create SQL Database part present the next info:
1. Subscription: Choose the specified Azure Subscription.
2. Useful resource Group, For Useful resource group, choose Create new, enter DatabaseResourceGroup. You may select current useful resource group in case you created.
3. Database Title: A novel identify is required. For Database identify, enter Journey.
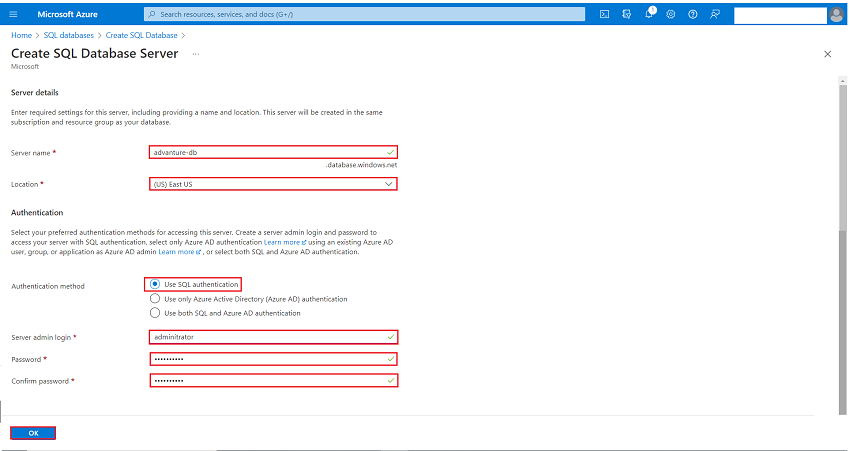
4. Server: For Server, choose Create new, and fill out the New Server kind with the next values:
- Server identify: Enter journey-db and add some characters for uniqueness. We won’t present an actual server identify to make use of as a result of server names should be globally distinctive for all servers in Azure, not simply distinctive inside a subscription. So, enter one thing like adventure-db, and the portal lets if it is accessible or not.
- Location: Choose a location from the dropdown checklist.
- Authentication technique: Choose Use SQL authentication.
- Server admin login: Enter administrator.
- Password: Enter a password that meets necessities and enter it once more within the Verify password subject.
- Choose OK.
5. Depart Need to use elastic pool set as No
6.Compute + Storage: Choose configuration database Fundamental 2GB Storage
7. Backup storage redundancy set as: Go redundancy backup storage
8. After offering the data above, choose Evaluation + Create. Subsequent validation web page seems with Create button. You might be completed. You’ve created your first SQL Database.
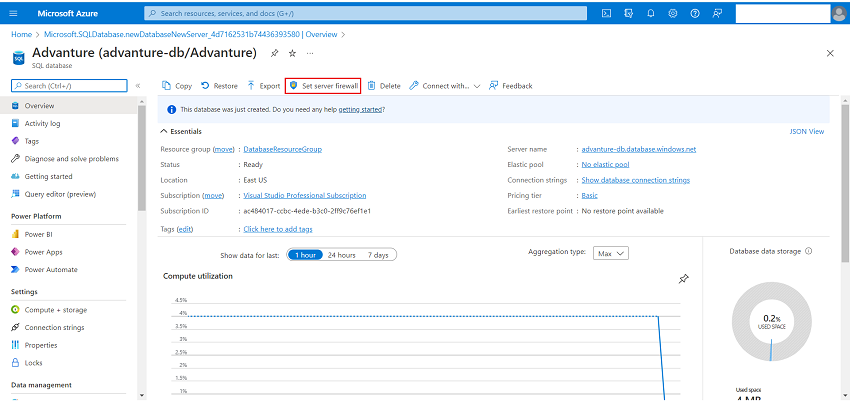
set server firewall
1. After the database deployment completes, choose SQL databases from the left-hand menu after which choose Journey on the SQL databases web page. The overview web page to your database opens. It shows the absolutely certified server identify (comparable to advanture-db.database.home windows.web) and offers choices for additional configuration. It’s also possible to discover the firewall settings by navigating on to your server and choosing Networking beneath Safety.
2. Copy the absolutely certified server identify. You’ll use it whenever you connect with your server and its databases in different fast begins. Choose Set server firewall on the toolbar.
3. Set Public community entry to Chosen networks to disclose the digital networks and firewall guidelines.
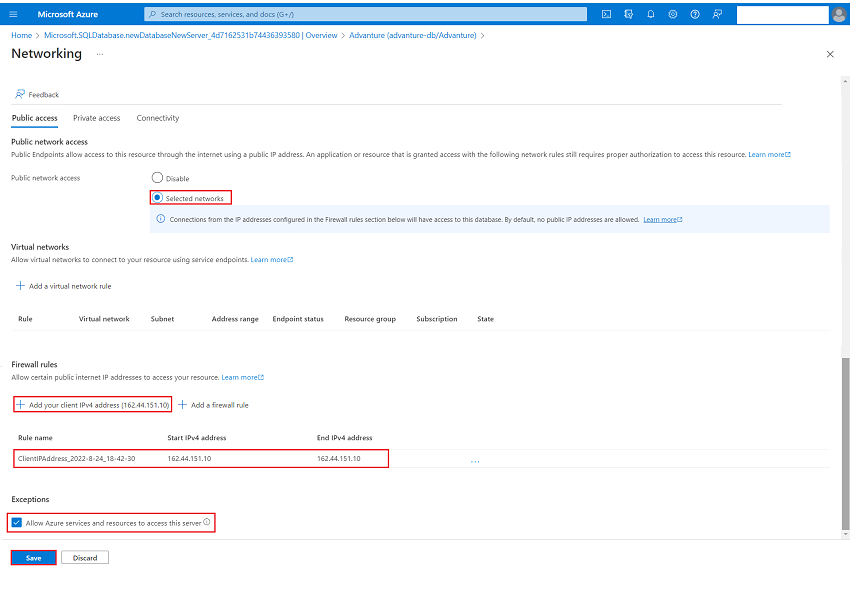
4. Select Add your consumer IP so as to add your present IP handle to a brand new, server-level, firewall rule. This rule can open Port 1433 for a single IP handle or for a spread of IP addresses. It’s also possible to configure firewall settings by selecting Add a firewall rule.
5. Choose Save
question the database
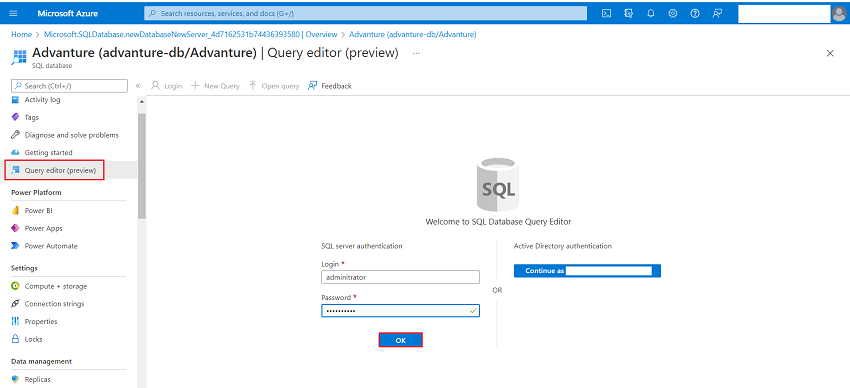
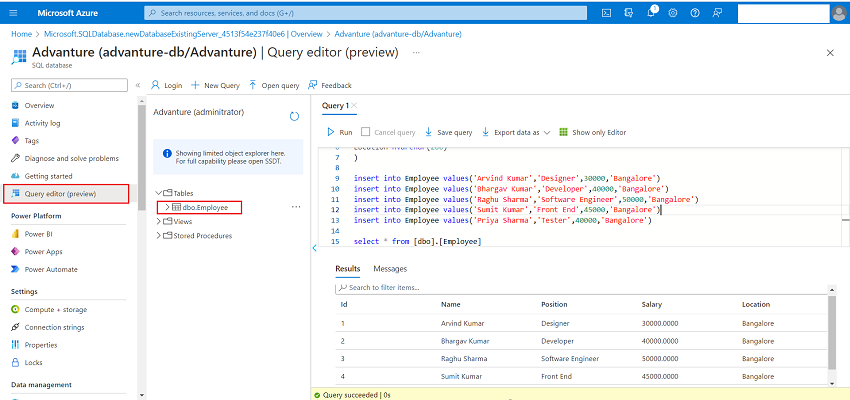
As soon as your database is created, you should utilize the Question editor (preview) within the Azure portal to connect with the database and question knowledge.
- Within the portal, seek for and choose SQL databases, after which choose your database from the checklist.
- On the web page to your database, choose Question editor (preview) within the left menu.
- Enter your server admin login info and choose OK.
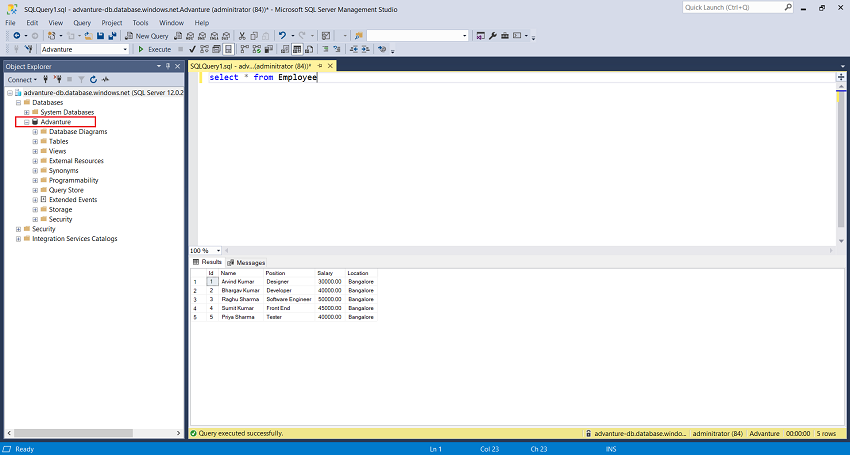
Enter the next question within the Question editor pane.
Create desk Worker(
    Id int major key id(1,1),
    Title nvarchar(200),
    Place nvarchar(200),
    Wage cash,
    Location nvarchar(200)
)
insert into Worker values('Arvind Kumar','Designer',30000,'Bangalore')
insert into Worker values('Bhargav Kumar','Developer',40000,'Bangalore')
insert into Worker values('Raghu Sharma','Software program Engineer',50000,'Bangalore')
insert into Worker values('Sumit Kumar','Entrance Finish',45000,'Bangalore')
insert into Worker values('Priya Sharma','Tester',40000,'Bangalore')
choose * from [dbo].[Employee]
join database with native SQL Administration occasion
Step 1
Open SSMS.
Step 2
The Connect with Server dialog field seems. Enter the next info:
| Setting | Advised worth | Description |
| Server kind | Database engine | Required worth. |
| Server identify | The absolutely certified server identify | One thing like: advanture-db.database.home windows.web. |
| Authentication | SQL Server Authentication | This tutorial makes use of SQL Authentication. |
| Login | Server admin account consumer ID | The consumer ID from the server admin account used to create the server. |
| Password | Server admin account password | The password from the server admin account used to create the server. |
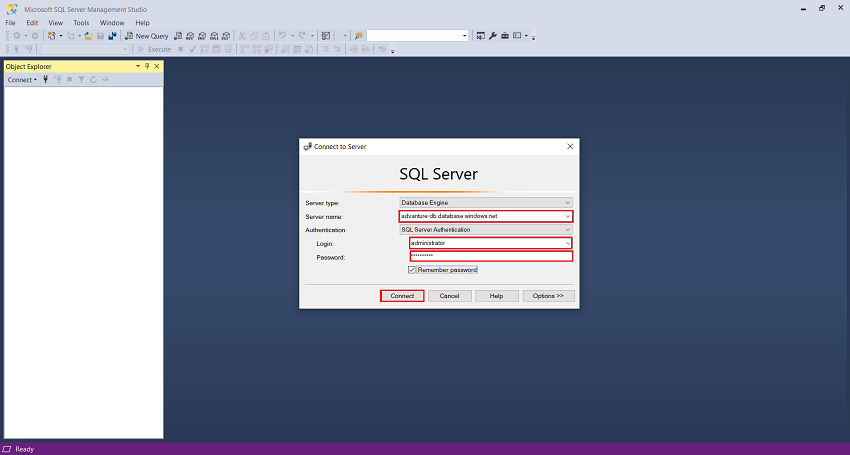
Step 3
Choose Join. The Object Explorer window opens.
Step 4
To view the database’s objects, broaden Databases after which broaden your database node
Conclusion
Congratulations you could have created your SQL Database utilizing azure portal. This text supplied a complete information on the Azure SQL Database. It additionally supplied a quick overview of it and its options. It additionally highlighted some steps for creating and managing assets on the Azure Portal.


