Within the earlier article, we’ve got been checked with the function flag used within the software configuration. Right here, we test with the azure facet.
Introduction
With a view to dynamically management the provision of a brand new internet web page in an ASP.NET Core challenge with out having to restart or reinstall it, you will have to create a function flag in Azure challenge Configuration.
Conditions
Required the App Configuration useful resource in Azure.
Right here is the step for creating the app configuration in Azure.
- Seek for the App Configuration useful resource within the Azure search bar.
- Click on on the app configuration useful resource.
- Click on on the Create button to create the app configuration useful resource in Azure. Please fill within the required particulars for those who haven’t already created the subscription and useful resource teams, so first it’s worthwhile to create them and use them right here. Right here I’ve related the pricing tier as free for the demo objective. For those who require the usual pricing tier, then it’s worthwhile to choose the usual tier.
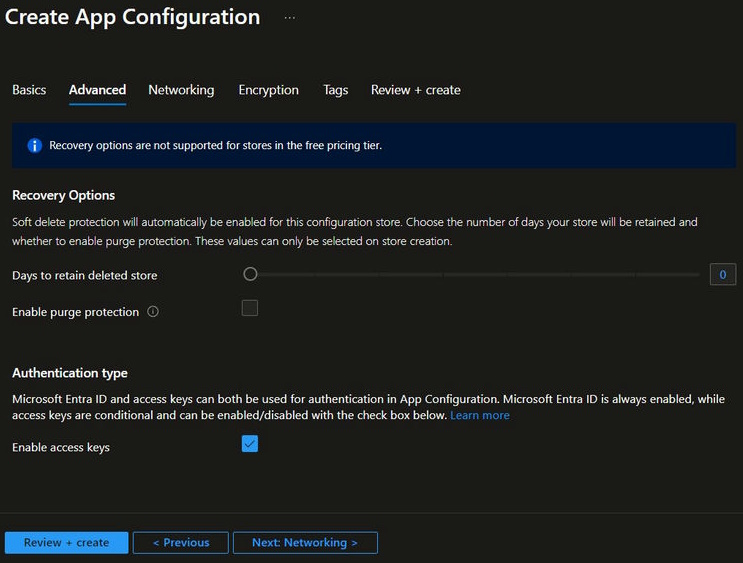
- Click on on the Subsequent, Superior > button for the subsequent step and fill within the obligatory particulars, or in case you have modified any configuration.
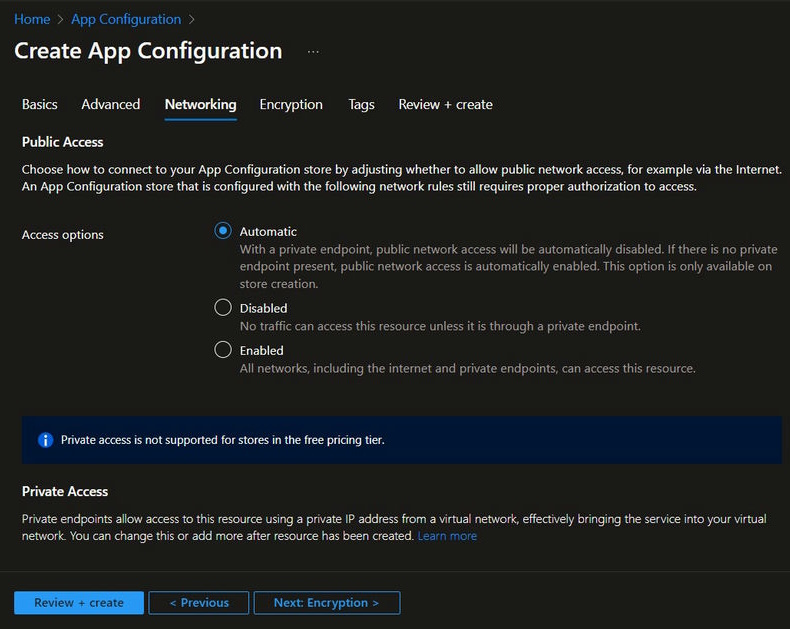
- Click on on the Subsequent: Networking > button for the subsequent step and fill within the obligatory particulars or in case you have modified any configuration. If you wish to change something on the Fundamental tab, then it’s worthwhile to click on on the < Earlier button for the again step and alter any configuration. Within the Networking tab, it’s worthwhile to select whether or not your app configuration requires entry by way of public or non-public. For the free tier, non-public entry just isn’t obtainable.
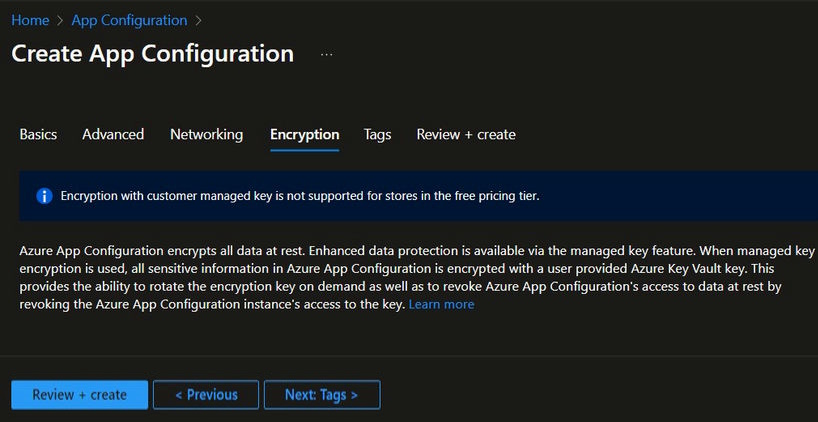
- Click on on the Subsequent: Encryption > button for the subsequent step and fill within the obligatory particulars, or in case you have modified any configuration. If you wish to change something on the Networking tab, then it’s worthwhile to click on on the < Earlier button for the again step and alter any configuration. Within the free tier, buyer managed keys usually are not obtainable; if you wish to use the usual tier, they’re obtainable.
Right here is the encryption configuration for the usual tier.
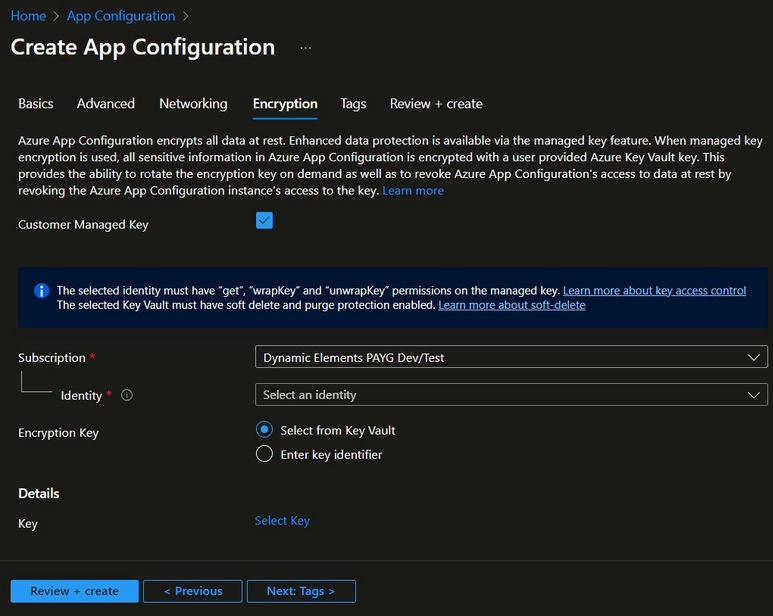
Fill within the obligatory particulars, after which click on on the Subsequent: Tags > button.
- Click on on the Subsequent: Tags > button for the subsequent step and fill within the obligatory particulars or in case you have modified any configuration. If you wish to change something on the encryption tab, then it’s worthwhile to click on on the < Earlier button for the again step and alter any configuration.
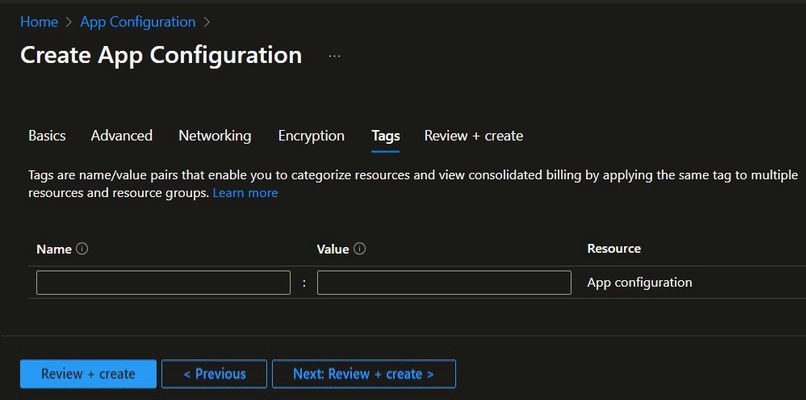
- Click on on the Subsequent: Evaluate + Create > button for the subsequent step and fill within the obligatory particulars or in case you have modified any configuration. If you wish to change something on the Tabs tab, then it’s worthwhile to click on on the < Earlier button for the again step and alter any configuration.
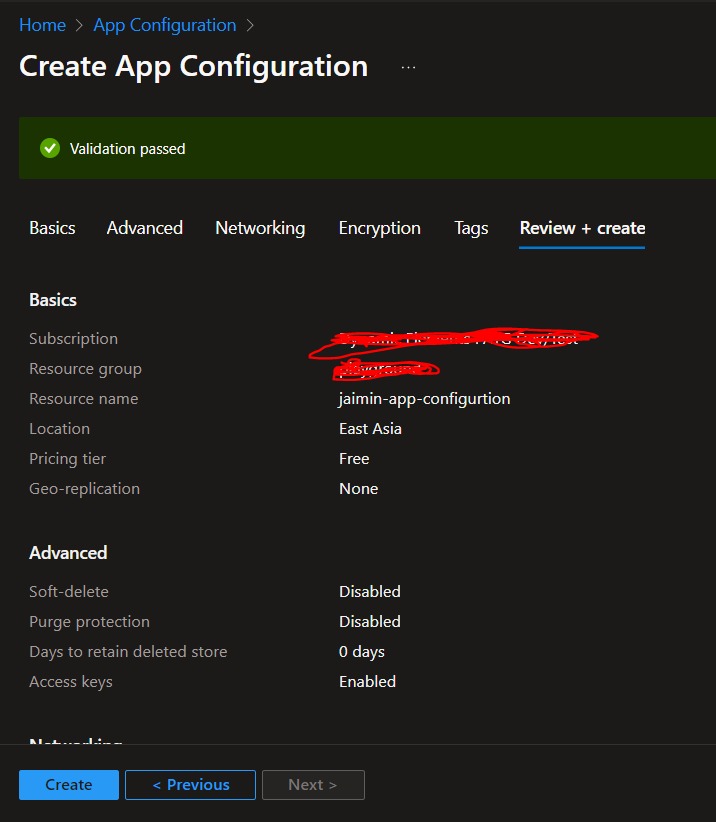
- Click on on the Create button to create the App Configuration useful resource in Azure. If you wish to change any configuration, then click on on the < Earlier button.
- After clicking on the Create button, Azure will begin creating the sources, as we’ve got seen within the notification part of the Azure Portal.
- As soon as the useful resource has been efficiently created, you will note the display beneath.

- Click on on the Go to useful resource button, and it’ll redirect to the App Configuration useful resource.
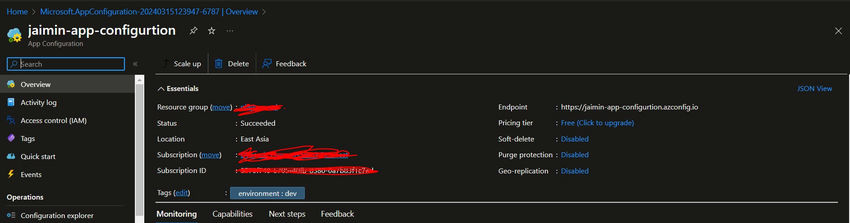
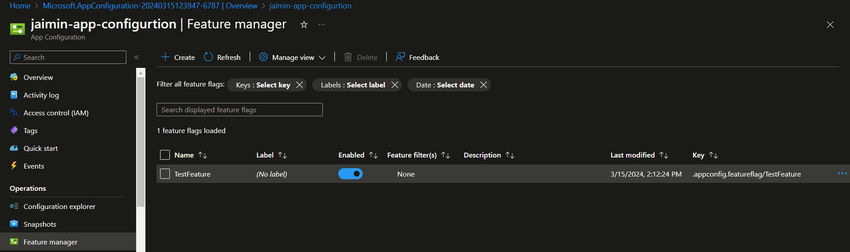
Right here is the overview web page for the app configuration useful resource.
To create the function flag configuration, comply with the beneath steps.
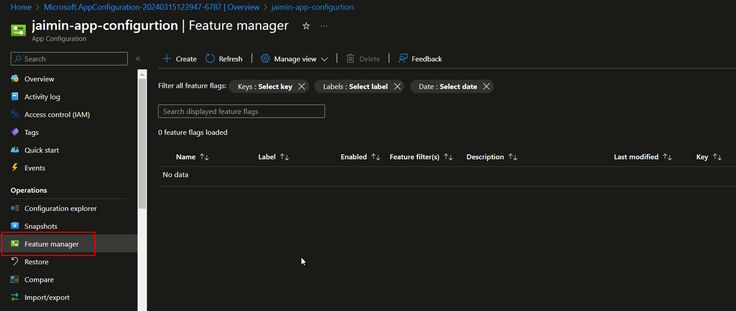
- You want to discover the function supervisor and click on on that menu.
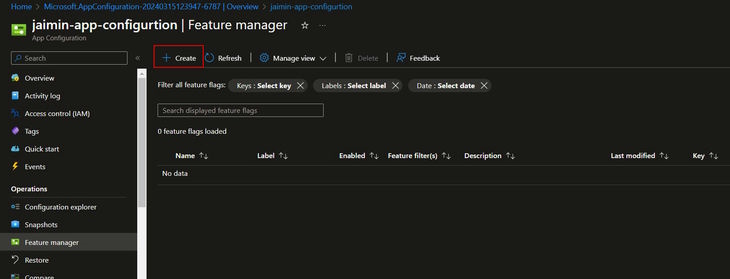
- Click on on the Create button to create the function flag.
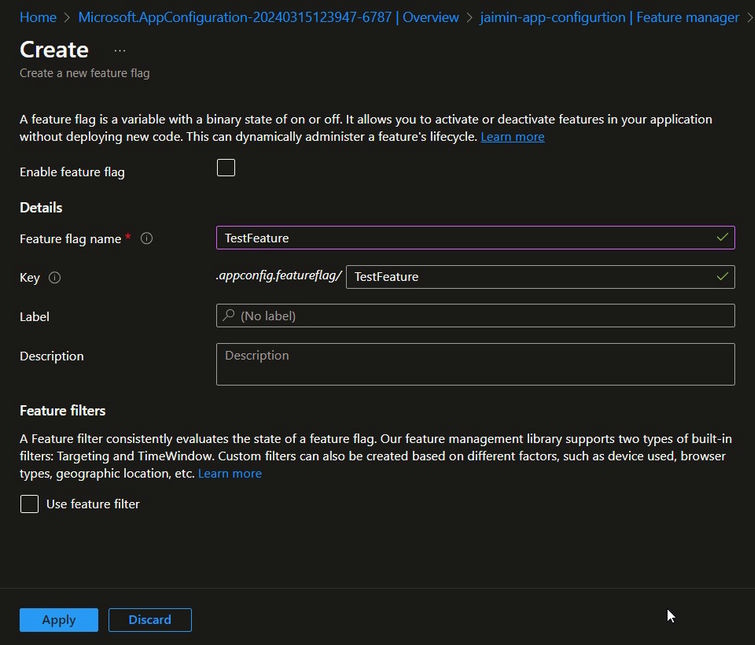
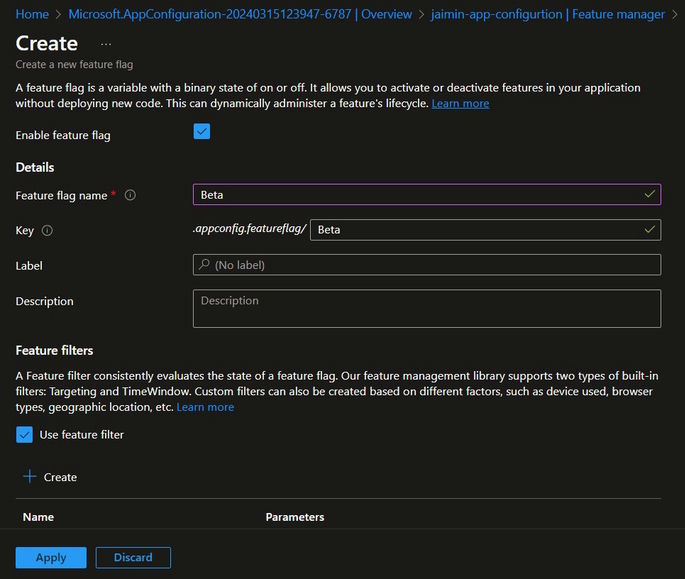
- Upon getting clicked on the Create button, beneath the display you will note. Fill within the obligatory fields and click on on the Apply button.
- As soon as the function flag is created, beneath is the display you will note.
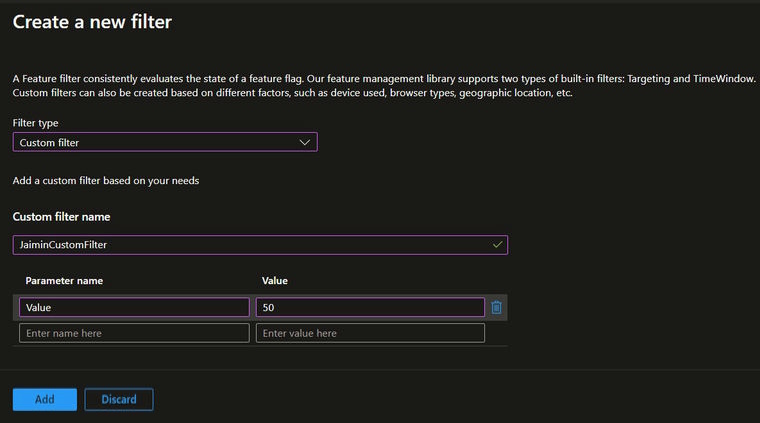
- Right here is the create function flag for the filter. Whereas creating the function flag, it’s worthwhile to test the Use function filters, then click on on the Create button. After that, it would open one other window for creating the filter, and it’s worthwhile to present the required particulars. As soon as every little thing is configured, click on on Apply to create the function flag.
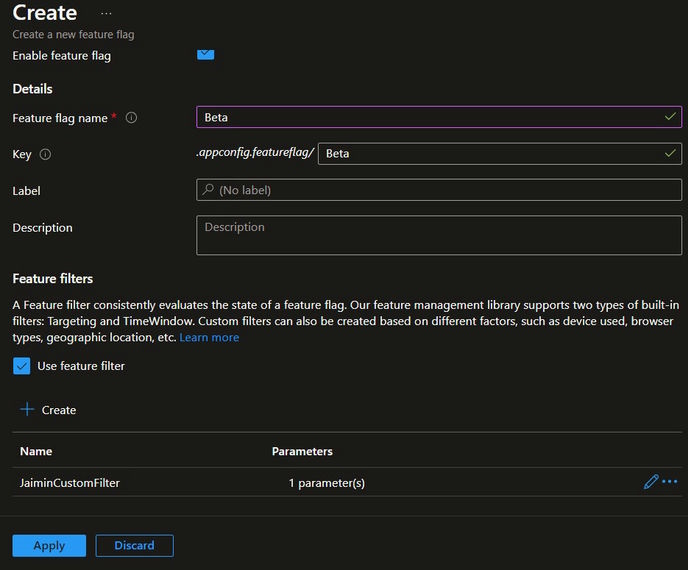
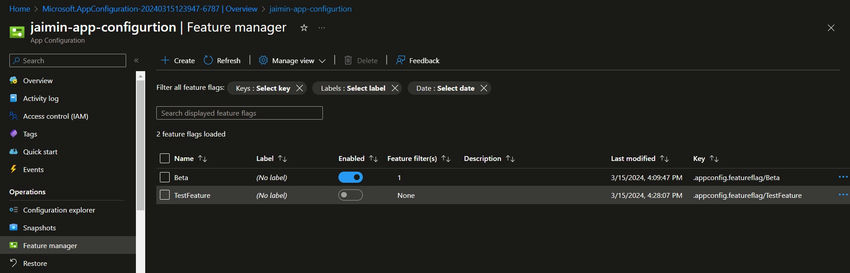
- As soon as the function flag with filter is created, you will note the beneath display.
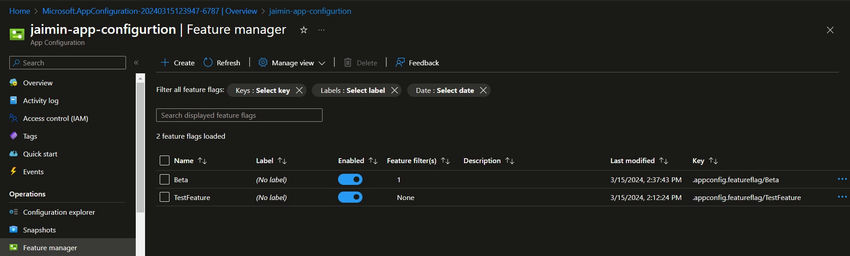
- If you wish to edit any of the function flag values, then it is also attainable right here. Click on on the horizontal 3 dots on the fitting facet of the function checklist web page. When you click on on the three dots, it would open the popup menu, and for those who click on on edit, it would open a window so that you can replace or change the configuration worth.
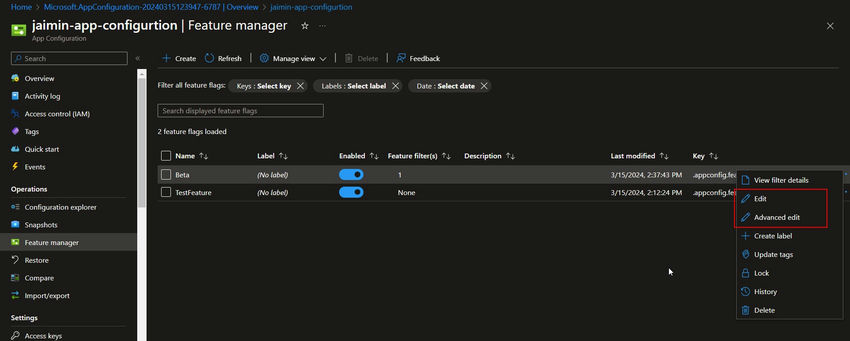
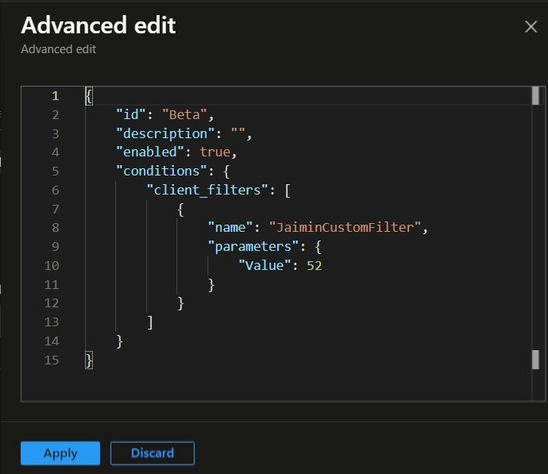
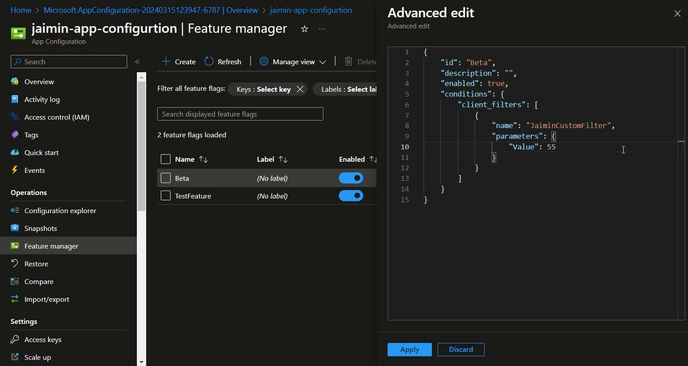
- If you wish to click on on Advance Edit, then it would open a JSON format window to vary the configuration worth. Upon getting modified the configuration worth, click on on the Apply button. If you wish to discard your adjustments, then it’s worthwhile to click on on the Discard button.
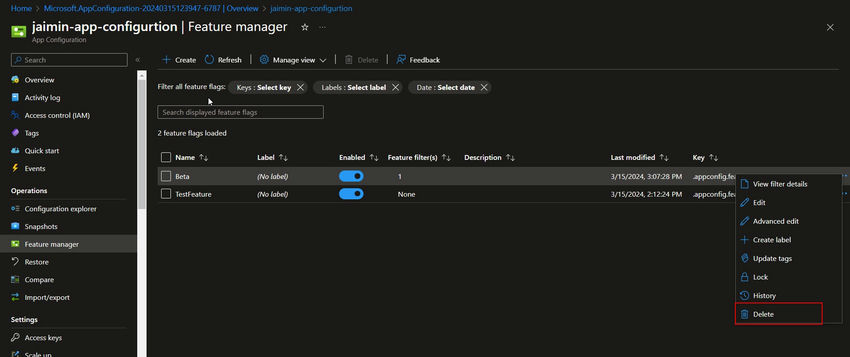
- If you wish to delete any of the function flags, then it is usually attainable right here. Click on on the three dots on the fitting facet and click on on the Delete button.
- If you wish to allow or disable any of the function flags, it’s worthwhile to click on on the swap.

Let’s test on the .Internet Core facet.
You want to set up the beneath packages within the .internet core software.
- Microsoft.Azure.AppConfiguration.AspNetCore
- Microsoft.FeatureManagement.AspNetCore
Upon getting been put in, you will have to register within the Program.cs file.
builder.Configuration.AddAzureAppConfiguration(choices =>
{
    choices.Join(connectionString)

    // Configure to reload configuration if the registered sentinel secret's modified
    .ConfigureRefresh(refreshOptions =>
         refreshOptions.Register("TestFeature", refreshAll: true));

    // Load all function flags with no label
    choices.UseFeatureFlags();
}).Construct();

builder.Companies.AddAzureAppConfiguration();

builder.Companies.AddFeatureManagement()
    .AddFeatureFilter<JaiminCustomFilter>();
The beneath point out is added to the middleware to make use of the Azure app configuration on the applying facet.
app.UseAzureAppConfiguration();
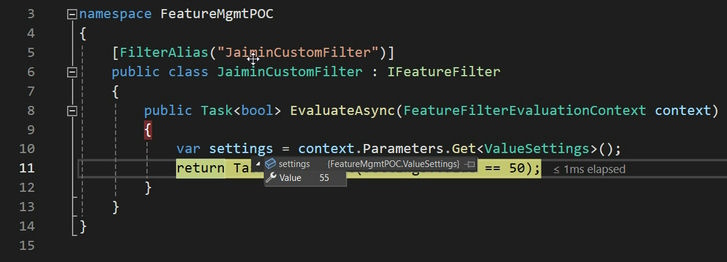
Right here is the customized filter class (JaiminCustomFilter.cs).
[FilterAlias("JaiminCustomFilter")]
public class JaiminCustomFilter : IFeatureFilter
{
    public Activity<bool> EvaluateAsync(FeatureFilterEvaluationContext context)
    {
        var settings = context.Parameters.Get<ValueSettings>();
        return Activity.FromResult(settings.Worth == 50);
    }
}
Right here is the worth settings class (ValueSettings.cs).
public class ValueSettings
{
    public int Worth { get; set; }
}
Right here is the code for whether or not the function is enabled or disabled.
var testFeature = await _featureManager.IsEnabledAsync("TestFeature");
var beta = await _featureManager.IsEnabledAsync("Beta");
Right here is the total code for getting worth from Azure and giving the consequence as within the API response.
[Route("api/[controller]")]
[ApiController]
public class ValuesController : ControllerBase
{
    non-public readonly IFeatureManager _featureManager;

    public ValuesController(IFeatureManager featureManager)
    {
        _featureManager = featureManager;
    }

    [HttpGet]
    public async Activity<IActionResult> GetAsync()
    {
        var testFeature = await _featureManager.IsEnabledAsync("TestFeature");

        var response = new StringBuilder();
        response.AppendLine($"{nameof(testFeature)} {testFeature} ");

        if (testFeature)
        {
            response.AppendLine($"{nameof(testFeature)} {DateTime.UtcNow:dd:MM:yyyy HH:mm:ss.fff} ");
        }

        var beta = await _featureManager.IsEnabledAsync("Beta");
        response.AppendLine($"{nameof(beta)} {beta} ");

        if (beta)
        {
            response.AppendLine($"{nameof(beta)} {DateTime.UtcNow:dd:MM:yyyy HH:mm:ss.fff} ");
        }

        return Okay(response.ToString());
    }
}
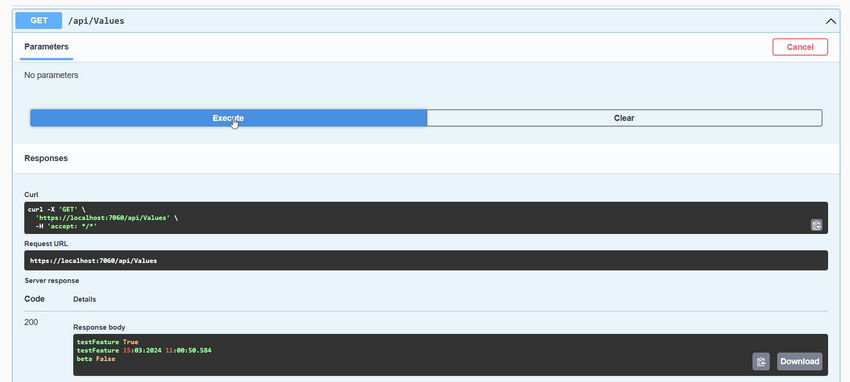
Let’s attempt to run the applying and test the response from the API.
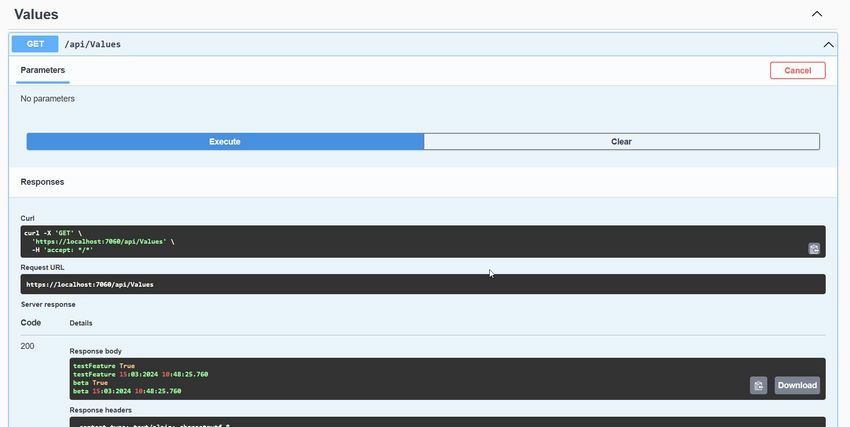
Let’s make adjustments within the Azure app configuration facet and after executing the API confirm the response of the API.

Let’s attempt to change the filter worth within the Azure app configuration.
We realized the brand new method and advanced collectively.
Completely happy coding!
Know extra about our firm at Skrots. Know extra about our providers at Skrots Companies, Additionally checkout all different blogs at Weblog at Skrots