Introduction
Digital machines (VMs), or different community associated units can talk with each other over numerous workplace and information heart places due to digital networking. Digital networking expands these capabilities through the use of software program administration to attach computer systems and servers over the Web, versus bodily networking, which connects computer systems utilizing cabling and different {hardware}. It makes use of virtualized variations of typical community instruments like switches and community adapters to offer simpler community configuration modifications and more practical routing.
Units in quite a few locations can function with the identical capabilities as a daily bodily community due to digital networking. Community directors now have new, more practical choices, corresponding to the flexibility to shortly change the community as wants change with out having to switch or buy extra {hardware}, elevated flexibility in provisioning the community to particular wants and purposes, and the flexibility to maneuver workloads throughout the community infrastructure with out sacrificing service, safety, or availability.
On this article, we’re going to discover ways to create a digital community in Microsoft Azure.
Create a Digital Community in Microsoft Azure
Step 1
Log into Azure Portal utilizing portal.azure.com.
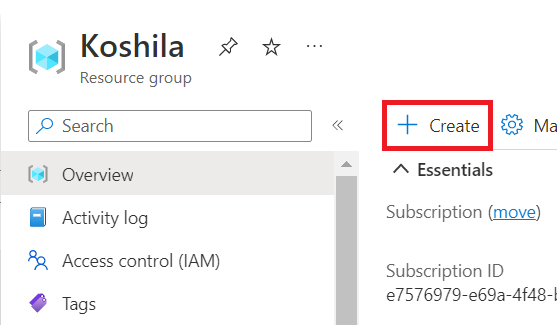
Step 2
Go to your useful resource group and click on on + Create.
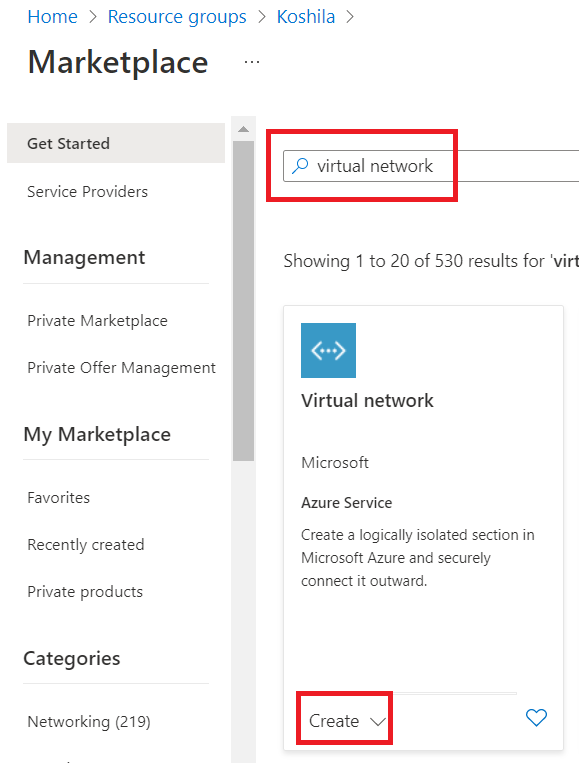
Step 3
Seek for Digital Community within the Market and click on on Create button.
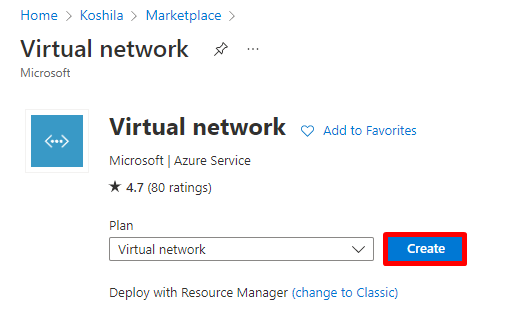
Step 4
On the digital community web page, click on Create.
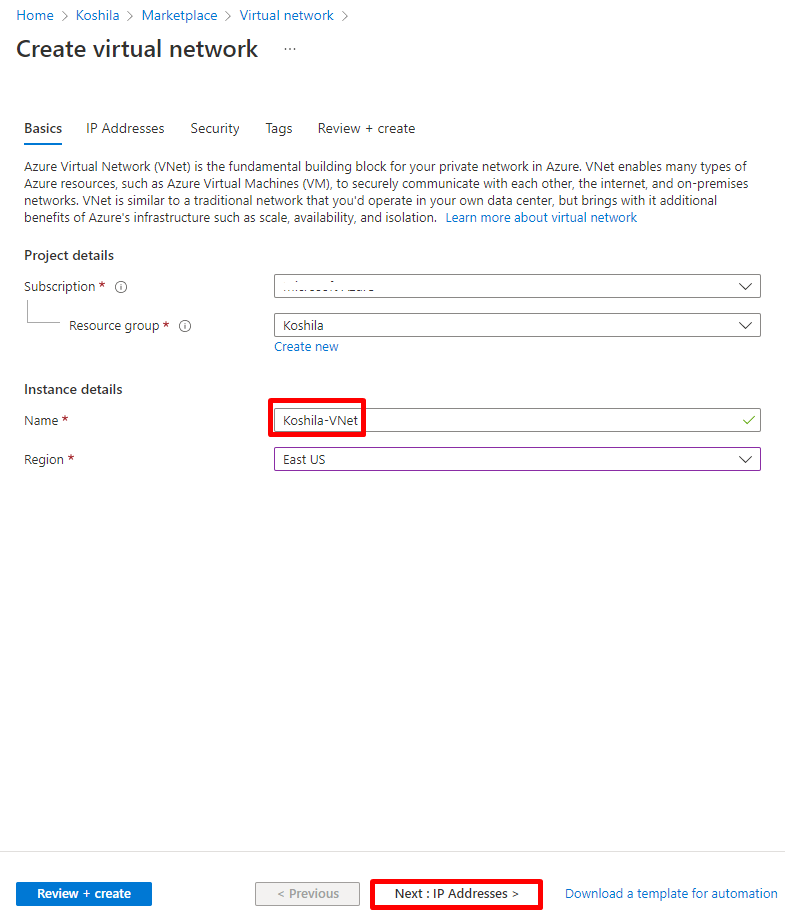
Step 5
Choose the related useful resource group, enter a reputation for the digital community, and choose the area. Then click on on Subsequent: IP Addresses button.
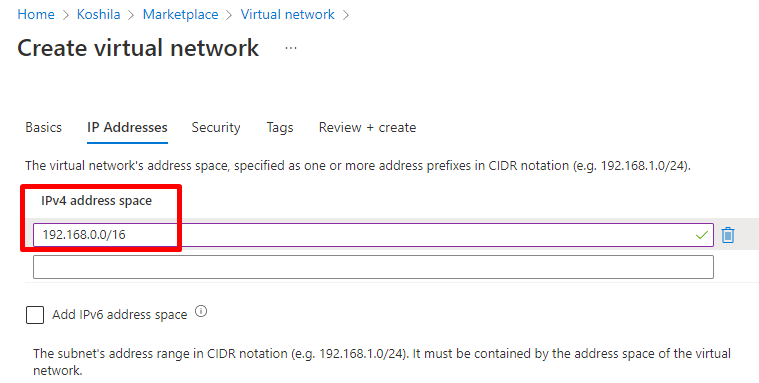
Step 6
Take away the present tackle house and add a brand new tackle house as you required. On this article, I’ve added 192.168.0.0/16.
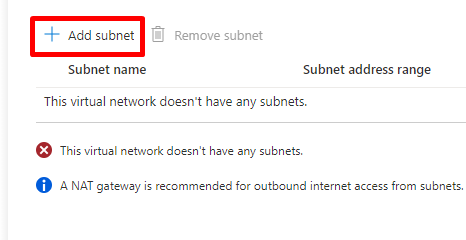
Step 7
Once we take away the present tackle house, we’ll get an error “This digital community doesn’t have any subnets.” click on +Add subnet.
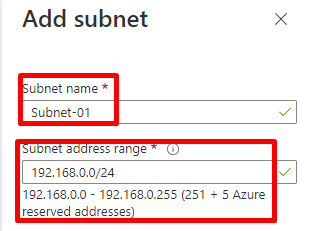
Step 8
Within the Add subnet tab, enter the title in your subnet, enter the subnet tackle vary, and click on Add.
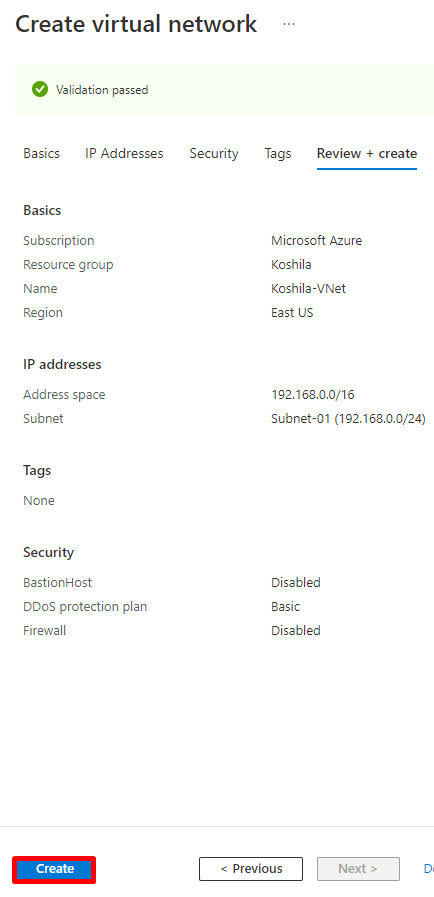
Step 9
Click on the Create button to deploy the digital community.
Abstract
This text taught us the best way to create a digital community in Azure. Kindly use the feedback part if in case you have any clarification. In our subsequent article, we’ll discover ways to handle digital networks.


