
On this article, I’ll present you set up and configure Azure AD Join. This resolution means that you can synchronize your On-Premises Lively Listing (AD) to the Azure platform and use the identical person accounts.
Microsoft supplies two forms of set up varieties to make use of for Azure AD Join, you may resolve which possibility to make use of in the course of the set up.
- CategoricalSetting: You’ve gotten a single Lively Listing Forest on-premises and fewer than 100,000 objects in your on-premises Lively Listing.
- Customise Setting: You’ve gotten multiple forest otherwise you plan to synchronize multiple forest sooner or later and greater than 100,000 objects and want to make use of a full SQL Server.
Use customized settings in Azure Lively Listing (Azure AD) Join whenever you need extra choices for the set up. Use these settings, for instance, you probably have a number of forests or if you wish to configure elective options.
Set up stipulations
- Azure AD Join have to be put in on a domain-joined Home windows Server 2016 or later
- The minimal .NET Framework model required is 4.6.2
- Home windows Server Core is not supported.
Putting in and Configuring Azure AD Join
Step 1. Must obtain the Azure AD Join installer.
- Utilizing the next hyperlink to Log into your Azure Portal https://portal.azure.com
- From the azure portal navigate to “Azure Lively Listing”
3. Within the Handle part, choose Azure AD Join
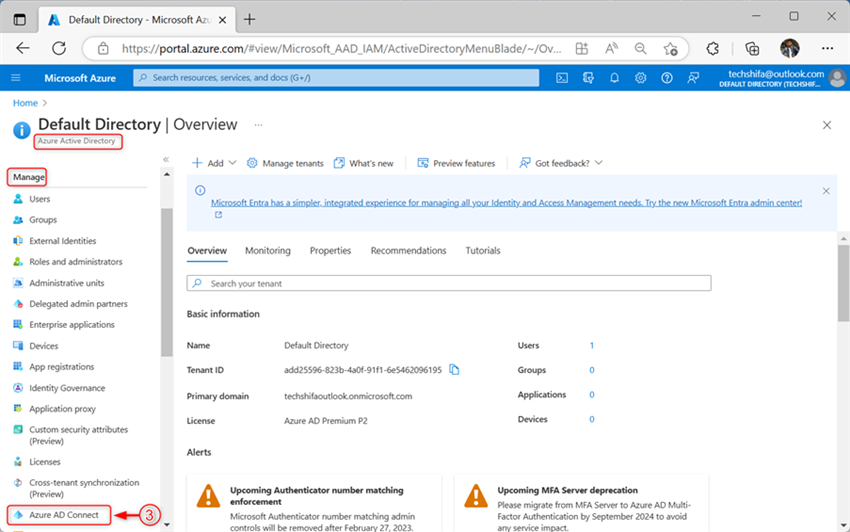
4. Choose “Join Sync“
5. Then Click on to “Obtain Azure AD Join” then it should redirect to Azure AD join (msi) Installer downloading web page

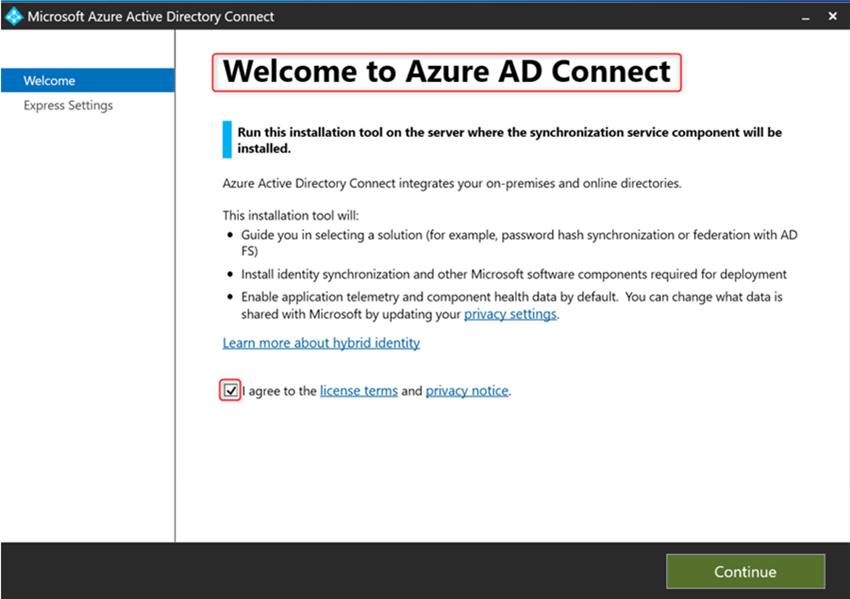
Step 2. Begin the Azure AD Join set up
- Run the Azure AD Join (msi) Installer after which Settle for the “Licence phrases and privateness discover“
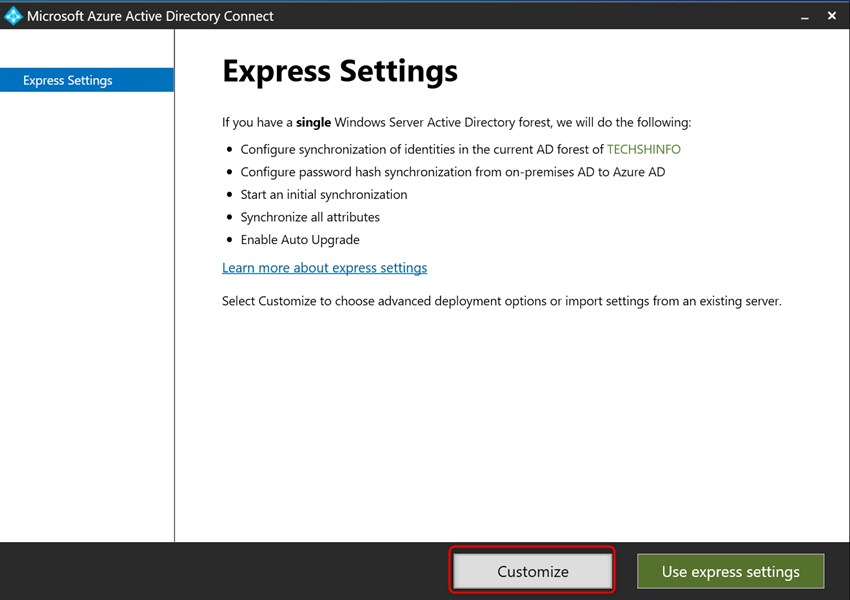
2. On the Categorical Settings web page, choose Customise to start out a customized-settings set up.
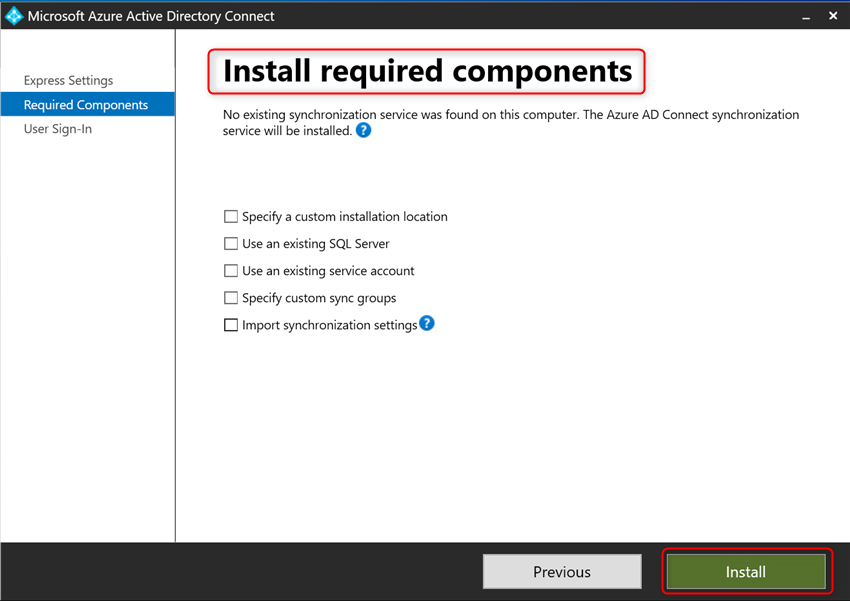
3. Required Parts – you may go away the elective configuration part unselected. Azure AD Join units up all the things routinely. Then Choose “Set up“
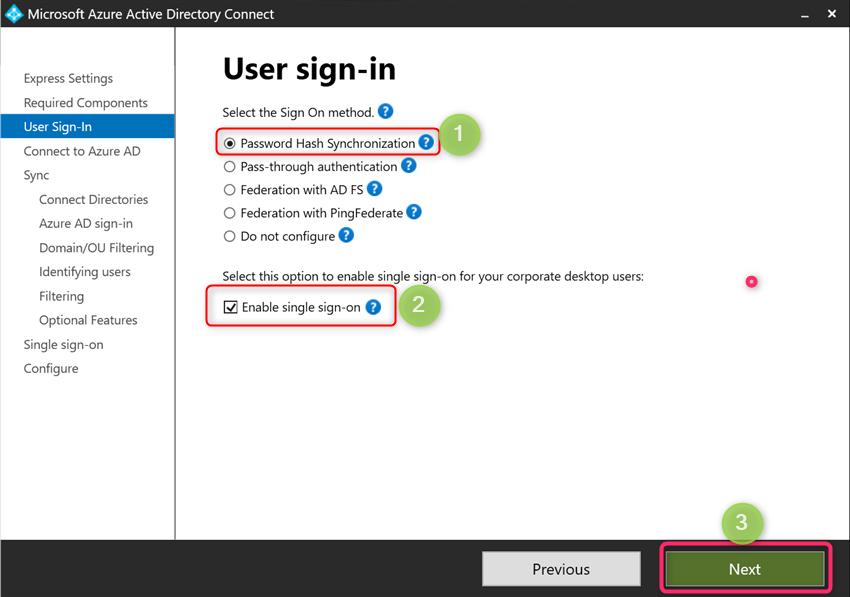
4. Observe these steps to configure single sign-on in your Customers,
- Choose Password Hash Synchronization
- Allow Sigle sign-on
- Then Choose “Subsequent“.
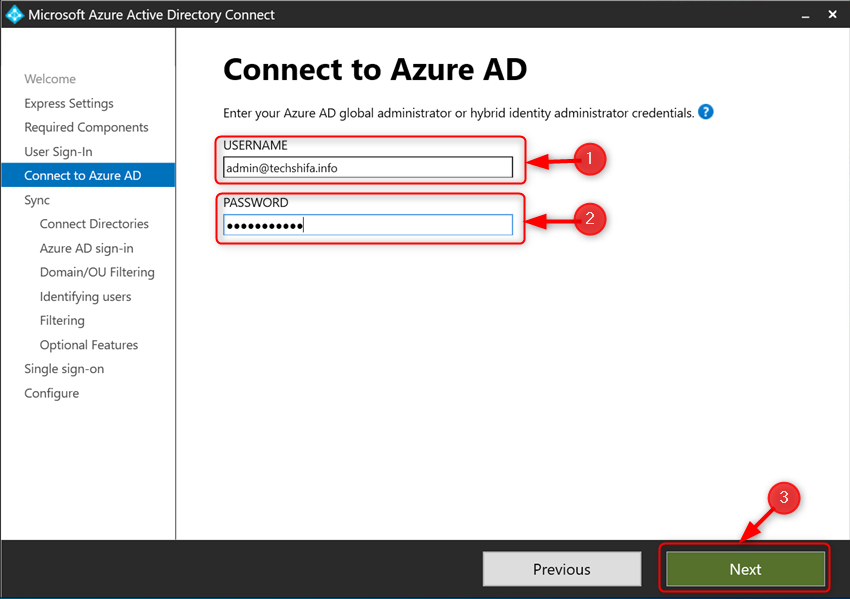
5 . To “Hook up with Azure AD” enter your Azure AD international administrator or Hybrid id administrator credentials. (Microsoft default area: person@useroutlook.onmicrosoft.com)
“techshifa.information” That is my verified customized area in Azure AD
If you wish to add or confirm a customized area in Azure Lively Listing, observe this text: Add And Confirm Your Customized Area In Azure Lively Listing
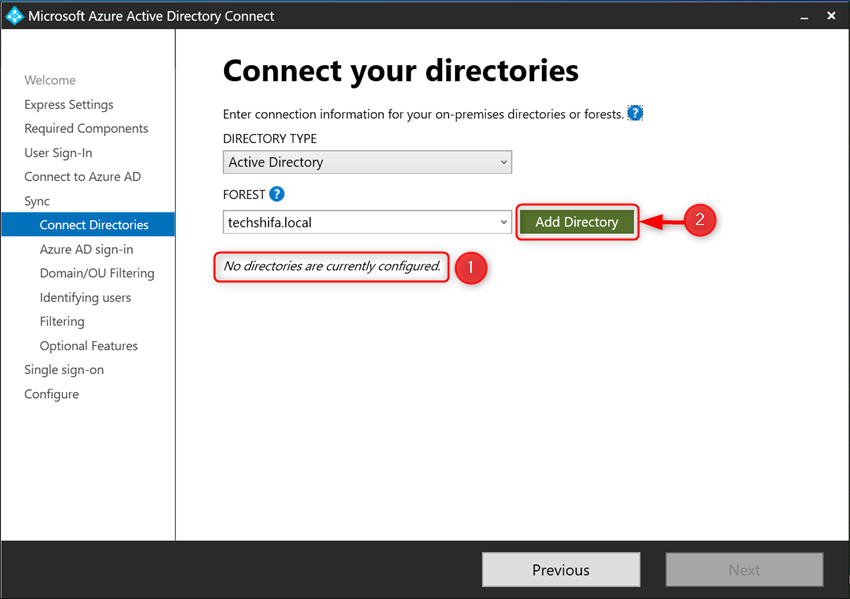
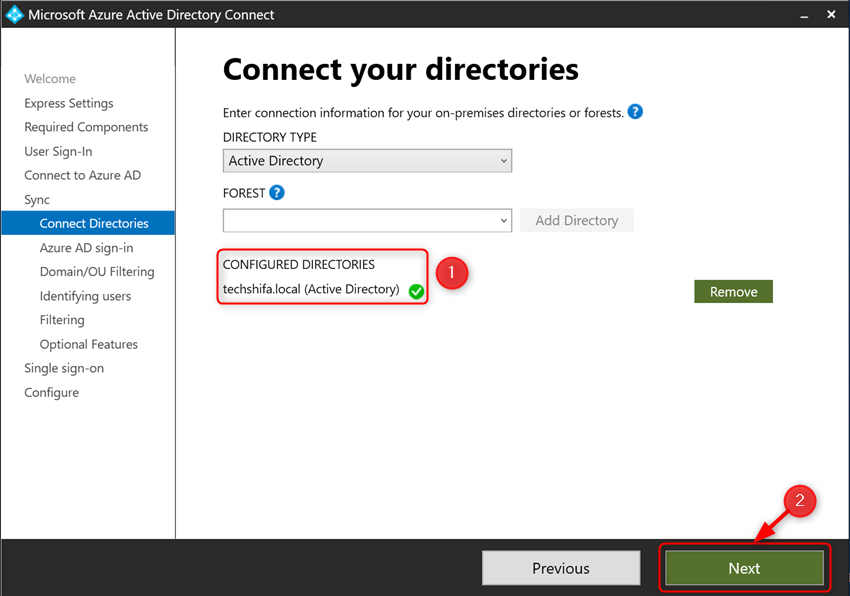
6. Join your directories
To hook up with Lively Listing Area Providers (AD DS), Azure AD Join wants the forest identify and credentials of an account that has adequate permissions.
Choose “Add Listing” (No directories are presently configured)
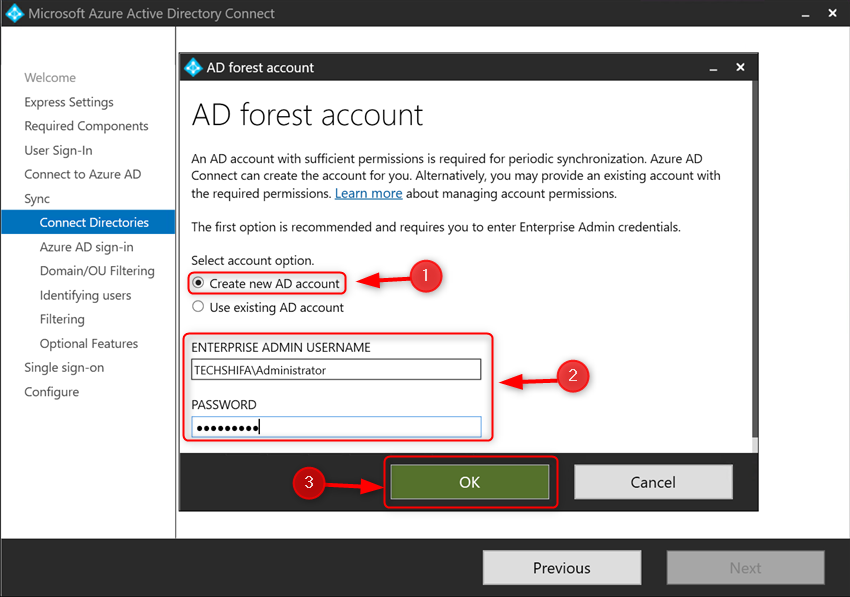
7. Create an AD Account
On-premises Lively Listing credentials for every forest that’s related to Azure AD. The account you specify on the Join your directories web page have to be current in Lively Listing,
Azure AD Join wizard creates the AD DS Connector account used to hook up with Lively Listing.
- Choose “Create New AD Account“
- Enter your “Enterprise Admin Credential“
- Then Choose “OK“
8. After you Configured Directories Choose “Subsequent”
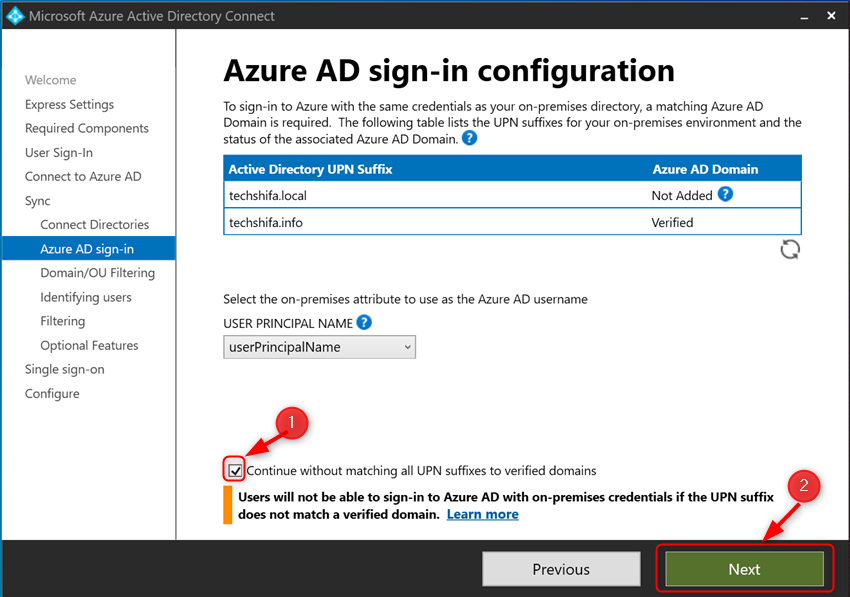
9. Azure AD sign-in configuration is determined by whether or not Azure AD can match the person principal identify suffix of a person that is being synced to one of many customized domains which are verified within the Azure AD listing.
Whenever you synchronize your on-premises listing with Cloud, it’s important to have a verified area in Azure Lively Listing (Azure AD). Solely the Person Principal Names (UPNs) which are related to the on-premises Lively Listing Area Providers (AD DS) area are synchronized.
You probably have a number of domains listed, and the first area is verified then you may choose “Proceed with out matching all UPN suffixes to verified domains.
Then Choose “Subsequent“
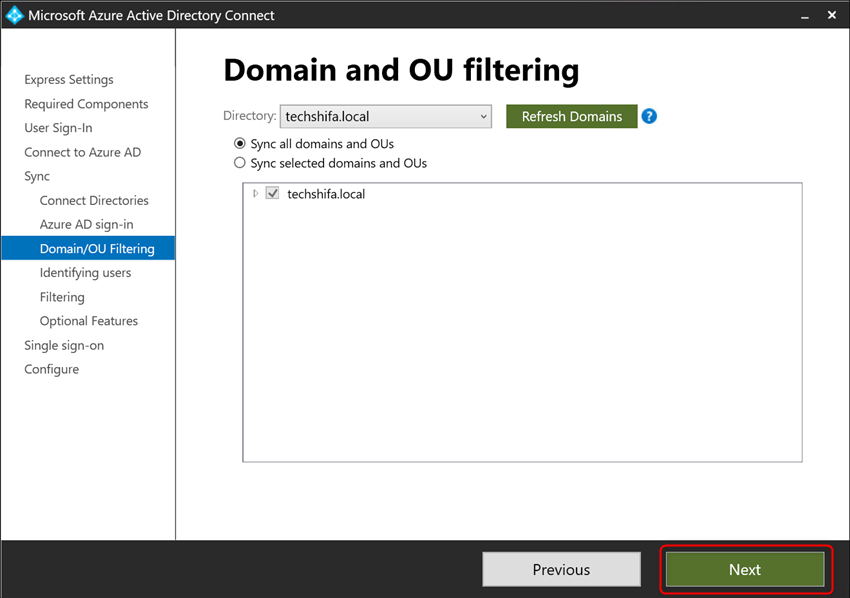
10. “Area and OU filtering” – By default, all domains and organizational models (OUs) are synchronized. In the event you do not wish to synchronize some domains or OUs to Azure AD, you may clear the suitable choices
Then Choose “Subsequent“
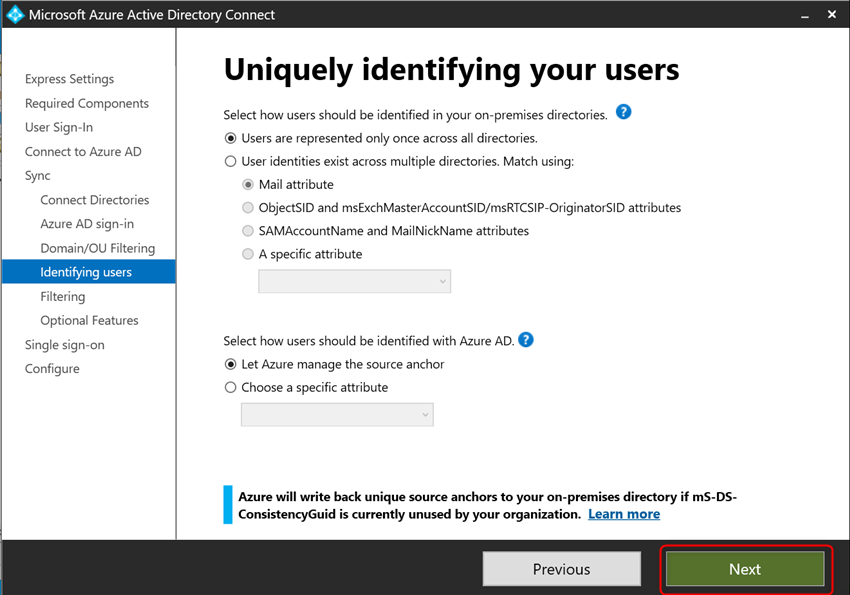
11. It’s a must to select establish customers in your on-premises directories.
On this case, I preserve all chosen by default then Choose “Subsequent“
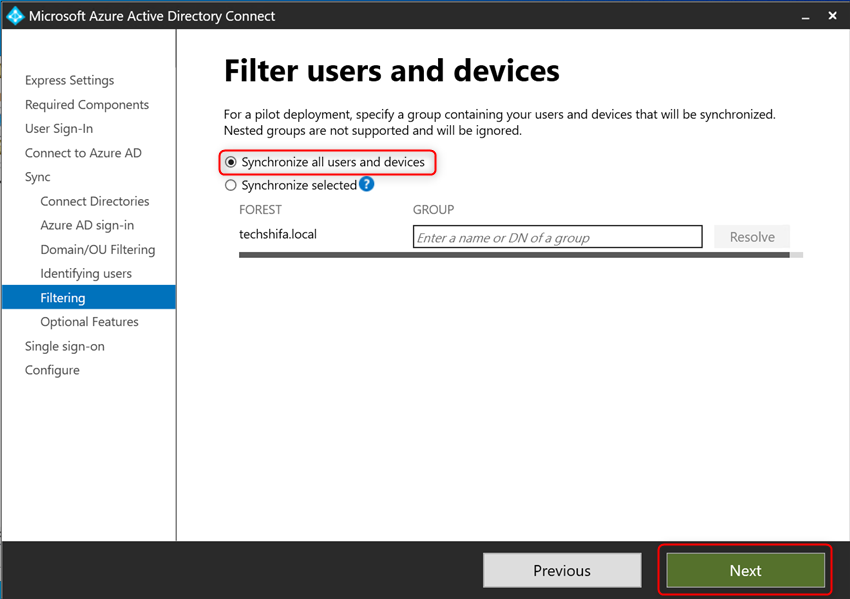
12. Choose “Synchronize all customers and gadgets“ then choose “Subsequent“
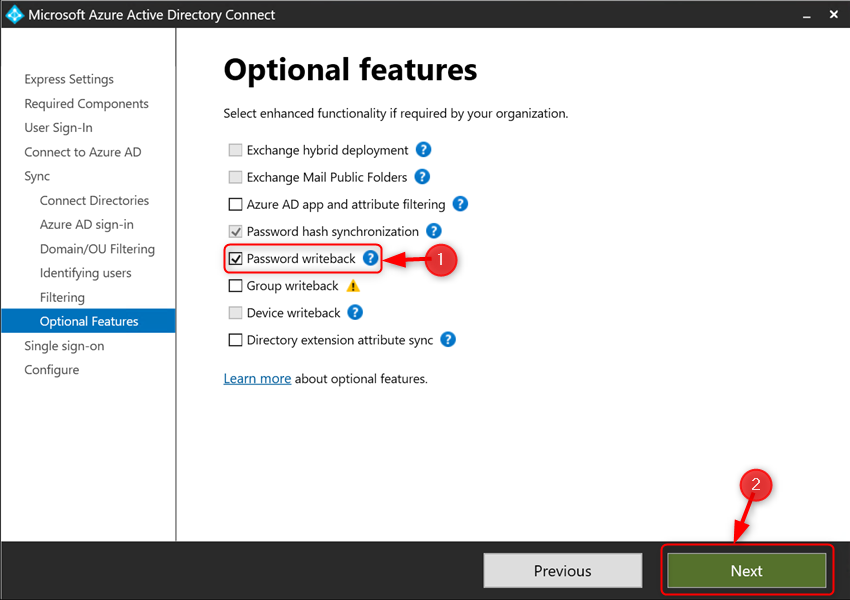
13. Choose elective options in your state of affairs.
In my state of affairs, I Choose “Password writeback“
Password writeback can be utilized to synchronize password modifications in Azure AD again to your on-premises AD DS surroundings. Azure AD Join supplies a safe mechanism to ship these password modifications again to an current on-premises listing from Azure AD.
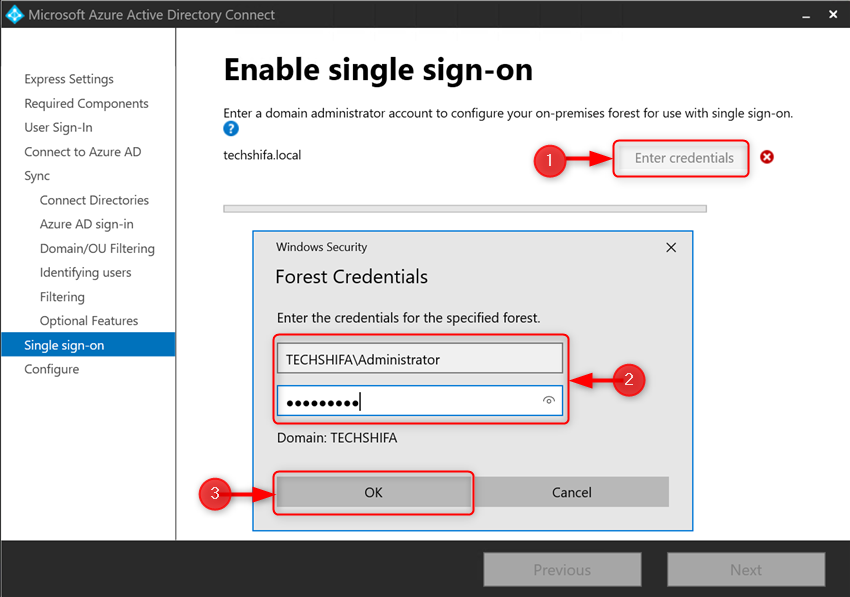
14. Allow single sign-on:
- Choose “Enter credential“
- After which Enter a site administrator account to configure your on-premises forest to be used with single sign-on
- Then Click on “OK”
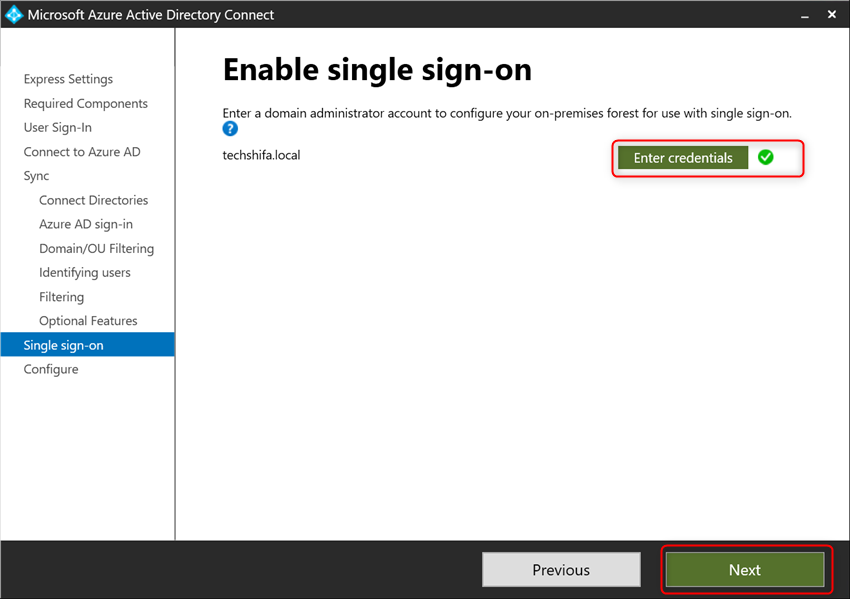
15. After coming into your area administrator credential choose “NEXT“
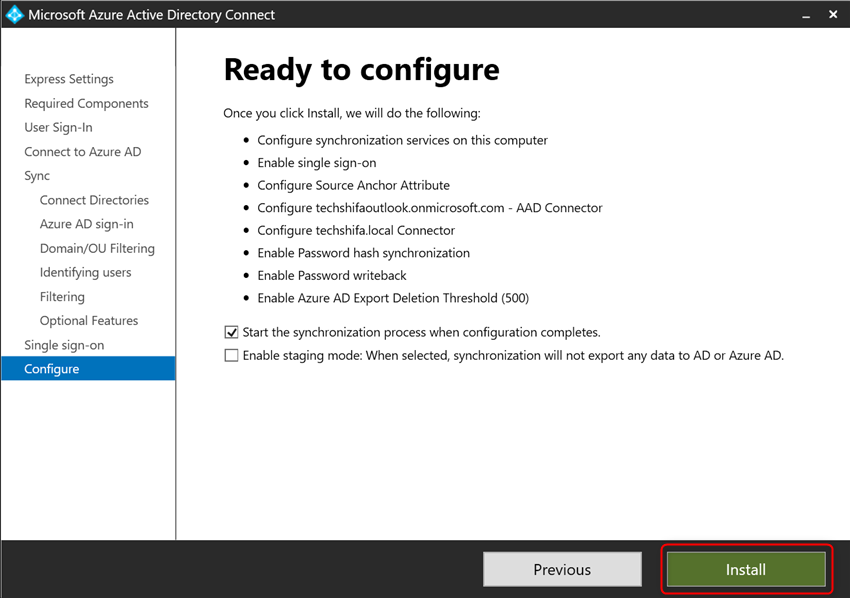
17. Azure AD Join server prepared for configuring the settings,
Click on “Set up” when you’ve confirmed that every one settings are right.
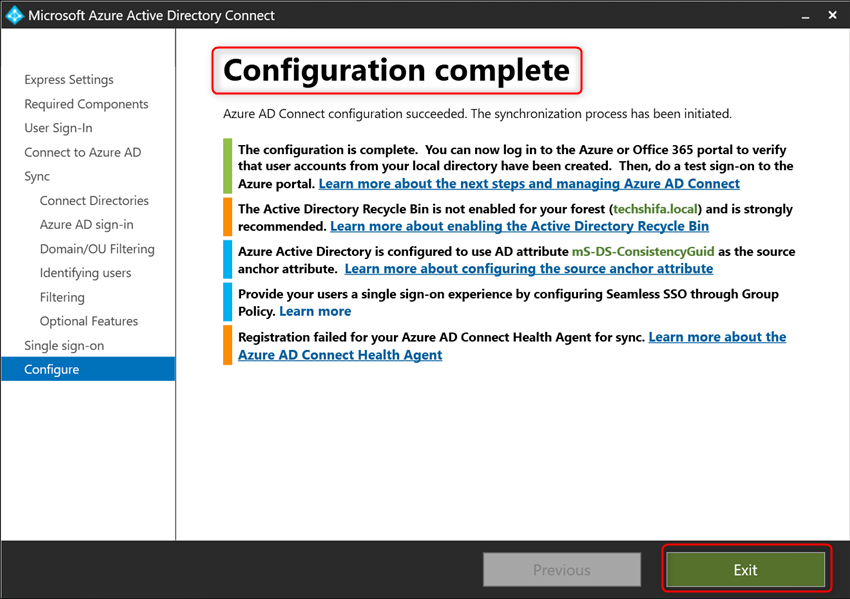
17 Azure AD Join configuration efficiently accomplished, Now Click on Exit to shut the wizard
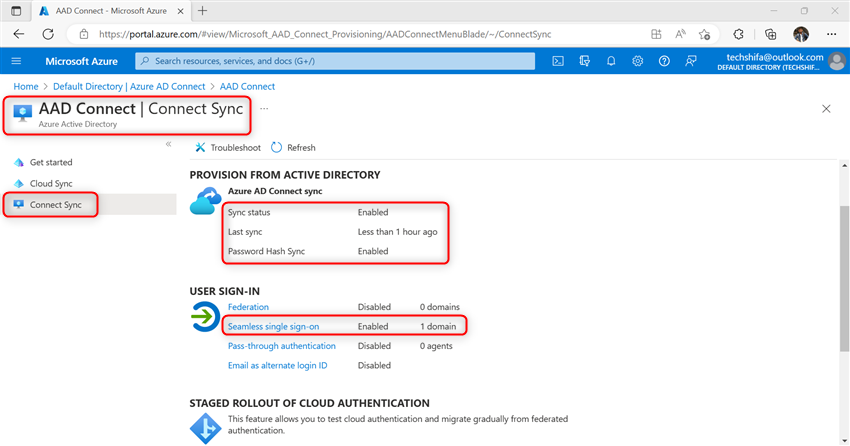
You may confirm Azure AD join sync enabled from the lively listing.
On-Premises lively listing customers displaying within the following image.
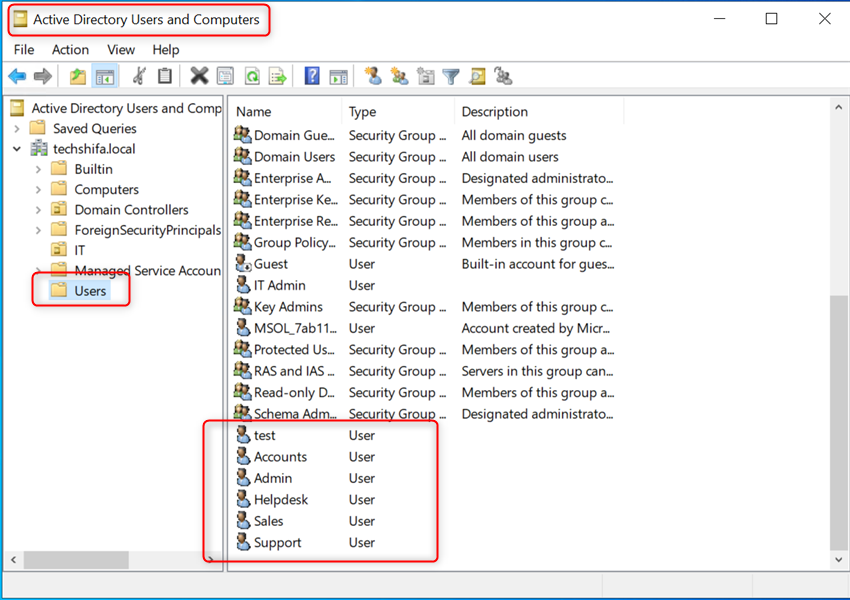
Efficiently On-Premises customers are synchronizing with Azure AD


