Introduction
MSFT Graph API is the unified programmability mannequin developed by MSFT that can be utilized to construct apps that work together with the info of thousands and thousands of customers. It implements most of the OData question parameters. This graph API is program impartial, which implies this service might be consumed in functions programmed in any language (C#, Java, PHP, JavaScript, and so forth..). You can even join a developer tenant from MSFT if you happen to don’t have entry to a tenant to configure the Azure AD app. Please go to the references part for signing up for developer tenant.
To begin working with graph API, I’m dividing the article into 2 sequence.
- Creating Azure AD utility and configuring with proper API permissions (this text)
- Consuming the Graph API from a console utility utilizing .internet core
The Graph API can be utilized to get the info from the tenant, corresponding to customers knowledge, consumer’s contacts, customers’ teams, Tenant knowledge corresponding to O365 teams, O365 websites, and so forth. to eat that knowledge in your functions.
Creating Azure AD utility and configuring with proper permission position
For this text, I’ve taken developer tenant and carried out the beneath steps. The identical steps might be achieved in PROD tenant. This requires International Admin rights to create an utility and configure it with the proper permissions.
Step 1
Log in to the Azure AD portal at https://portal.azure.com with international admin rights.
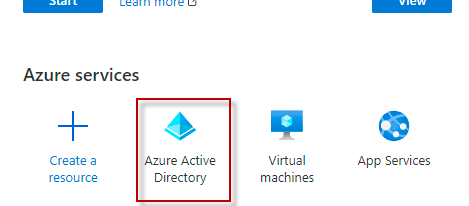
Step 2
Click on on ‘Azure AD’
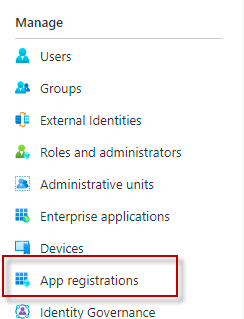
Step 3
Below handle search for ‘App Registration’.
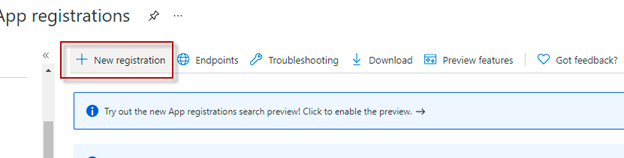
Step 4
Click on on ‘New Registration’
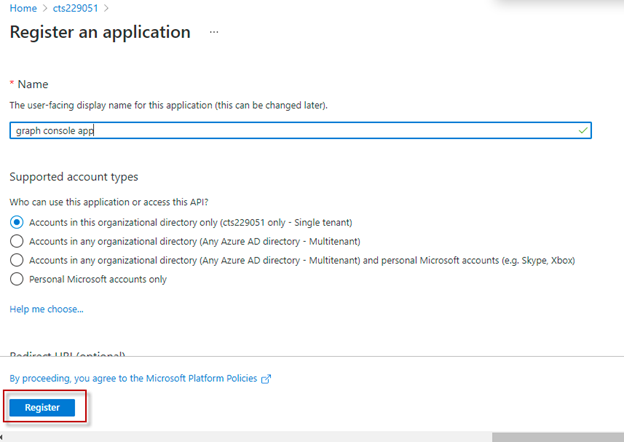
Step 5
Title your utility as ‘graph console app’ and choose the account sorts as ‘Accounts on this group listing solely. Go away relaxation all default and click on on ‘Register’
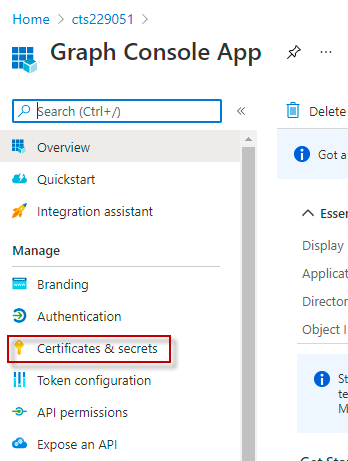
Step 6
After the applying is created, go to ‘Graph Console App’ and click on on ‘Certificates & secrets and techniques’ below ‘Handle’. Click on on ‘New shopper secret’ below the ‘Consumer secrets and techniques’ part.
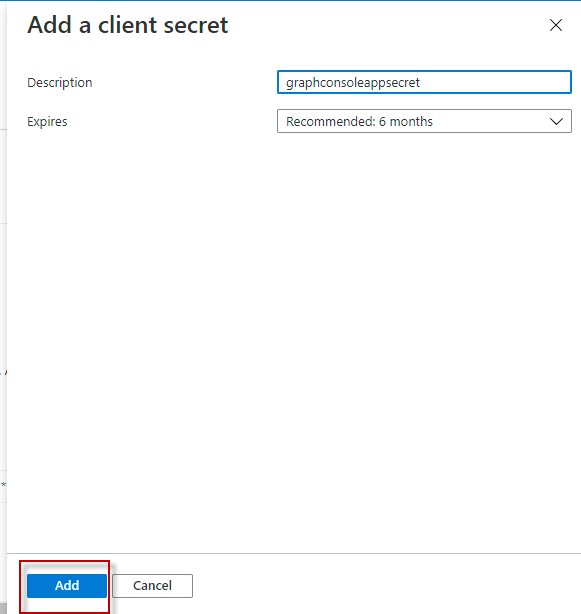
Step 7
Enter the outline as ‘graphconsoleappsecret’ and you may go away the default choice as ‘Beneficial: 6 months’. Click on on ‘Add’. Please word that the key expires and the graph utility will get 401 unauthorized error. Observe your group’s suggestion.
Step 8
You should have the worth populated and ensure to repeat it by clicking on the little copy image. Please word that after you go outdoors and are available again to this utility, the key worth will get hidden. so ensure to repeat a secure place.

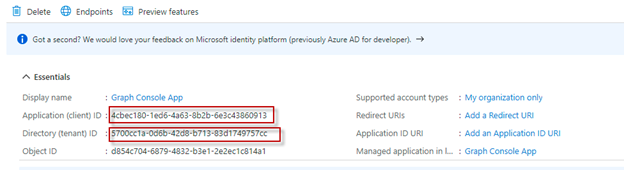
On the finish of this part, you must have the next values. These values are wanted within the .internet console app to eat the Graph API providers.
- Tenant ID: This may be discovered from the house web page of the azure portal or from the applying overview
- Software ID: might be discovered from the applying
- App Secret: obtained from the shopper secrets and techniques part after the key is created.
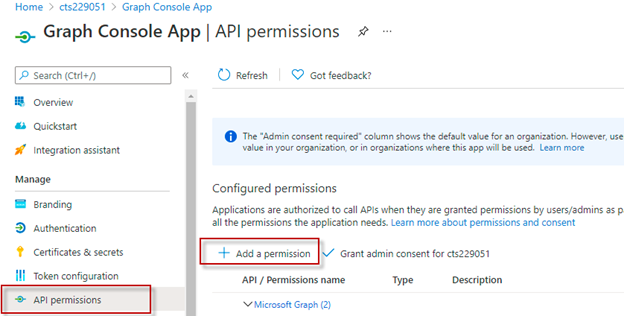
Step 9
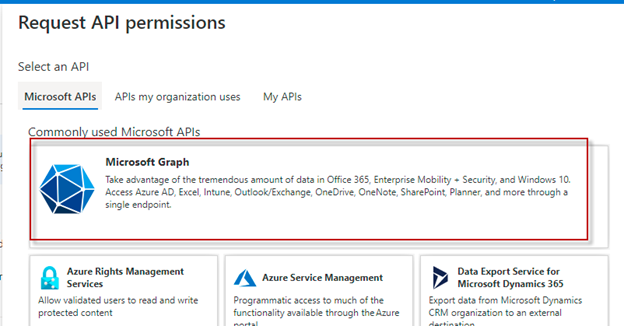
Configure API Permissions and click on on ‘Add a permission’ and choose ‘Microsoft Graph’
Step 10
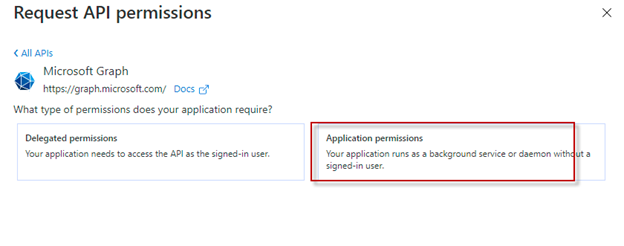
Within the ‘Request API Permissions’ choose ‘Software permissions’.
Step 11
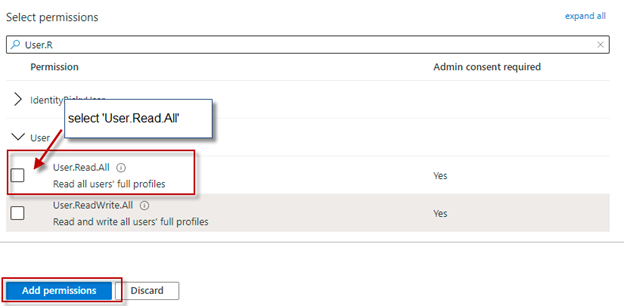
Within the choose permissions search for ‘Consumer.R’ and click on enter. Choose below consumer ‘Consumer.Learn.All’
Step 12
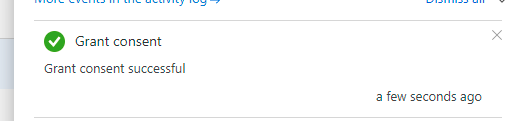
Grant Admin Consent. After configuring permission, it requires admin consent. you need to be seeing a warning yellow image, ‘Not granted for Contoso’ (that is your organization title. on this case I used to be referring to Contoso).
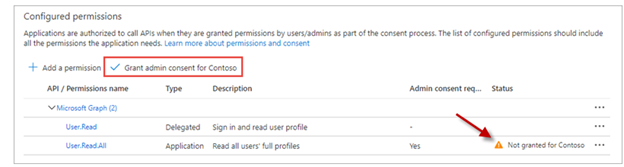
As soon as clicked on Grant admin consent, you need to be getting a pop-up, do you need to grant consent for the requested permissions for all of the accounts in your tenant? choose ‘Sure. you need to be getting a ‘Grant Consent’ profitable message.

Step 13
Validate that now for the Azure AD utility ‘Graph console app’ that’s created you must see the API configured permissions Customers.Learn.All and the admin consent standing is ready as ‘Inexperienced verify mark’.
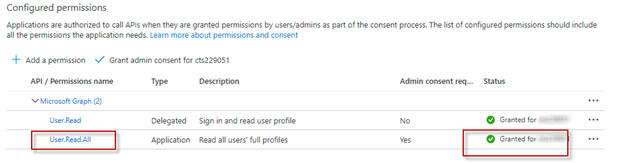
These steps verify the Azure AD utility is efficiently created and the proper API permissions or configured.
Conclusion
Thus on this article, we have now seen methods to create an Azure AD app and configure the API permissions for the App. Within the subsequent article, we’ll see how can we get the info in your console functions utilizing the Graph API.
References
- https://developer.microsoft.com/en-us/microsoft-365/dev-program
- https://docs.microsoft.com/en-us/graph/use-the-api


