Introduction
Azure log analytics provides you the ability to go looking and examine logged knowledge from numerous Azure assets. Earlier than this was a separate service in Azure however now it is being integrated as a part of Azure monitor. On this demo we’re going to learn to handle Azure Log Analytics.
Step 1 – Log Analytics
Log into the Azure portal utilizing your account credentials on the following URL. https://portal.azure.com/
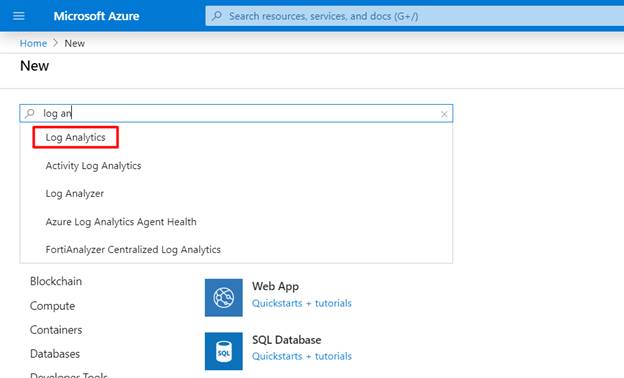
On the dashboard, select to create a useful resource and kind “Log Analytics”.
Step 2 – Creating Log Analytics
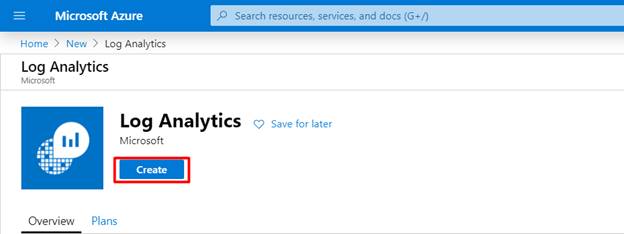
Click on “Create” button to deploy the Log Analytics Service.
Step 3 – Log Analytics Workspace
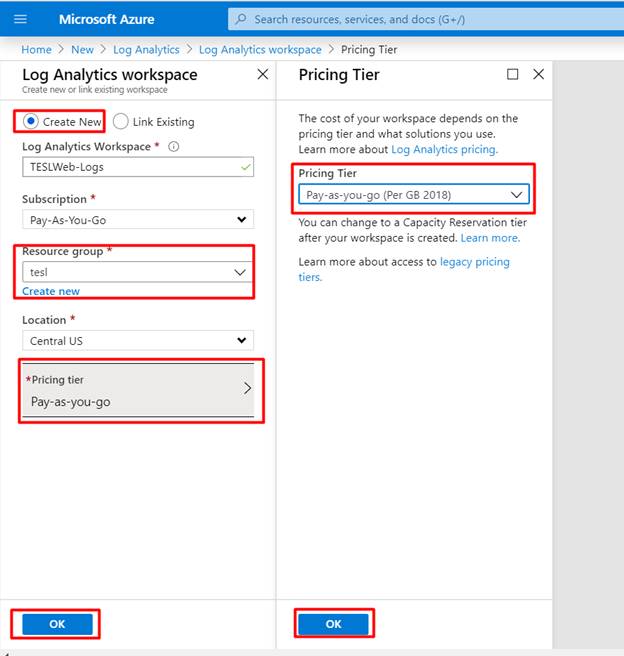
Choose “Create New” within the Log Analytics. Enter the “Log Analytics Workspace” title, select the proper “Subscription”. Choose the present useful resource group, after which choose the “Pricing Tier”, after coming into the knowledge, click on “Okay” button to start out the deployment.
Step 4 – Verifying the Log Analytics Workspace
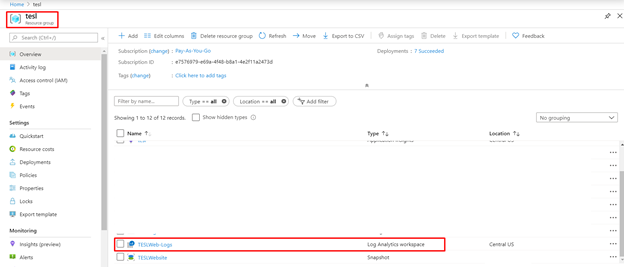
After efficiently deploying the Log Analytics Workspace, we have to confirm our Log Analytics Workspace. Go to your Useful resource Group and confirm that our Log Analytics Workspaces are put in appropriately. So right here our Log Analytics Workspace named “TESLWeb-Logs” is efficiently deployed, so click on the “TESLWeb-Logs”.
Step 5 – Including Digital Machine
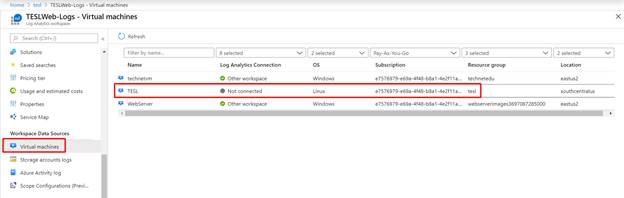
Within the Log Analytics Workspace “TESLWeb-Logs” choose “Digital Machines” underneath the Workspace Information Sources, now we are able to confirm that our Digital Machine “TESL” will not be related so click on the Digital Machine.
Step 6 – Connecting our Digital Machine
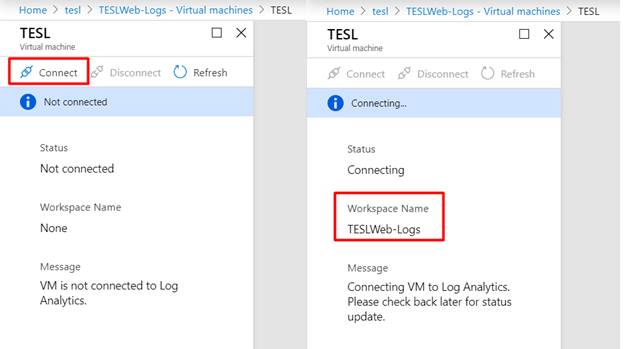
Now we are able to confirm that our Digital Machine Standing will not be related and the Workspace Title is None, so Click on “Join”. After clicking “Join” now we are able to confirm that our Workspace title is “TESLWeb-Logs”.
Step 7 – Verifying the Connection
Now our Digital Machine “TESL” is related to the Log Analytics Connection.

Step 8 – Connecting the Sources
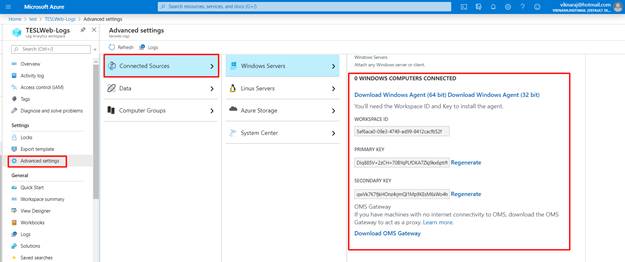
Choose the Log Analytics workspace after which click on “Superior Settings”. Right here we are able to discover the Related Sources. This selection is for On-Premises Servers, you possibly can obtain the OMS Gateway and analyze the logs.
Step 9 – Choosing the Efficiency counters
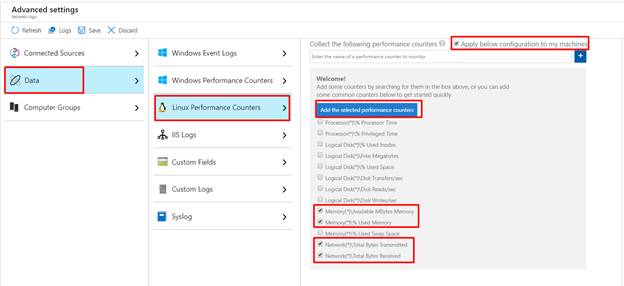
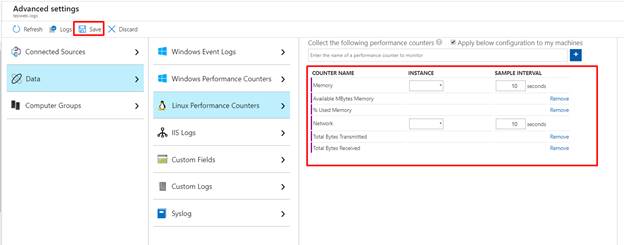
On this demo our workloads are operating to the cloud, so click on “Information”. Our Digital Machine Working System is Linux, so click on “Linux Efficiency Counters”, then choose “Apply beneath configuration to my machine”. After that choose the efficiency counters, after which click on “Add the chosen efficiency counters”.
Step 10 – Efficiency Interval
Choose the efficiency Interval, after which click on “Save”.
Step 11 – Monitoring the Logs
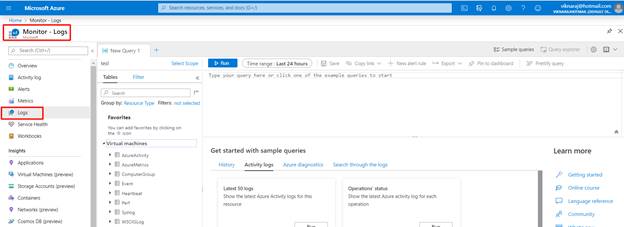
Search monitor within the search field, within the Monitor instrument, click on “Logs”
Step 12 – Working the Question
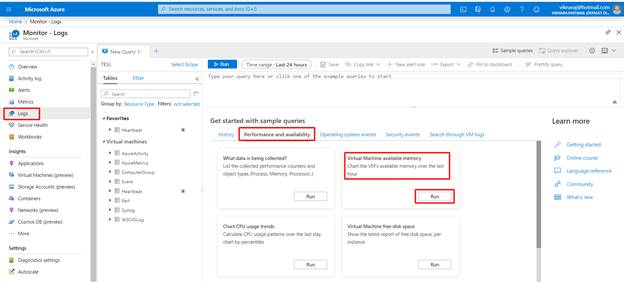
Within the Logs, Choose the “Efficiency and Availability” then choose “Digital Machine accessible reminiscence” after which choose “Run”.
Step 13 – Question Output
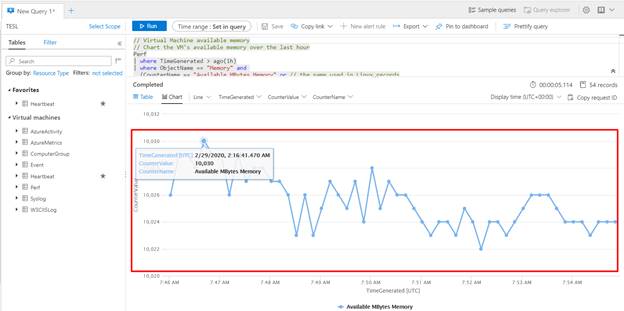
After operating the question, we are able to get the chart of our Digital Machines Reminiscence utilization output.
Abstract
I hope you understood about Azure Log Analytics. On this demo we used a quite simple question for analyzing, in our subsequent article will be taught extra analyzing ideas utilizing Azure Log Analytics.


