Introduction
Microsoft Entra Web Entry is a classy addition to the World Safe Entry suite, integrating seamlessly with Microsoft’s ecosystem to supply sturdy Safe Internet Gateway (SWG) capabilities. The characteristic focuses on monitoring and controlling internet site visitors from units outfitted with the GSA shopper, guaranteeing safe entry to SaaS purposes by way of complete internet content material filtering insurance policies. This initiative goals to reinforce web safety and accessibility for organizations, paving the best way for a safer digital atmosphere.
Particular conditions have to be fulfilled to successfully deploy Microsoft Entra Web Entry, together with assigning the World Safe Entry Administrator function and configuring an Entra-joined Home windows system. Following these preliminary steps, the method entails enabling the GSA for the tenant, activating the Web Entry Profile, and crafting safety profiles alongside internet content material filter guidelines. The set up of the World Safe Entry Shopper on designated units is a essential step, guaranteeing seamless integration and performance.
Step 1. Earlier than continuing with the configuration, guarantee that you’ve.
- Assigned the World Safe Entry Administrator function to the suitable personnel.
- An Entra-joined Home windows system for testing functions.
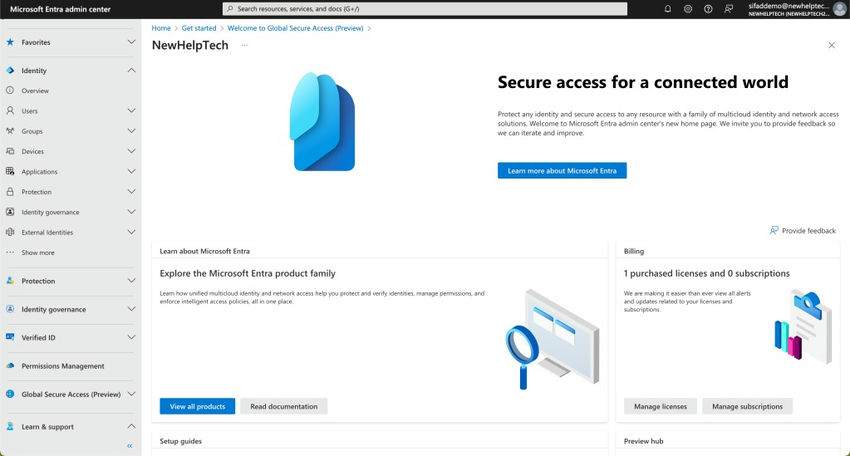
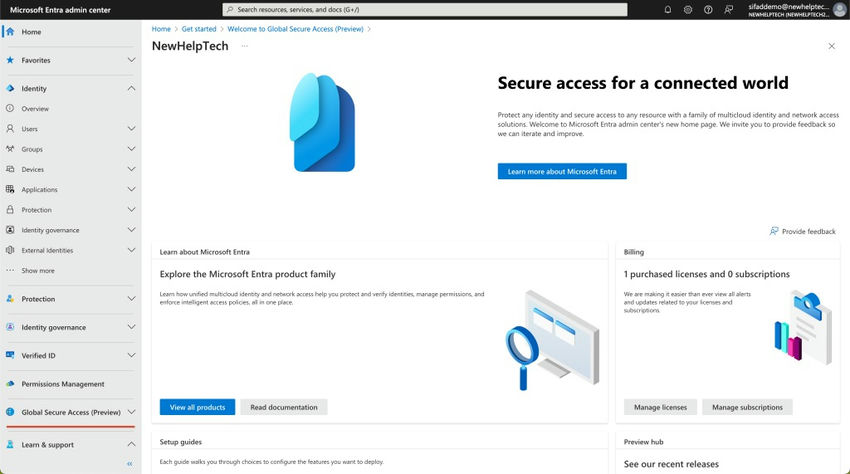
Step 2. Log in to the Microsoft Entra portal (https://entra.microsoft.com/)
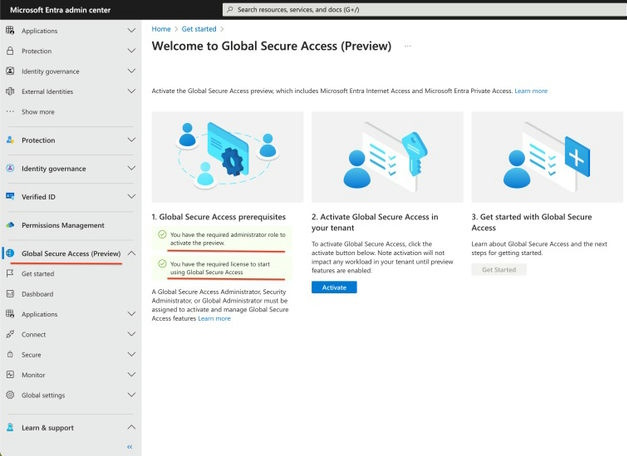
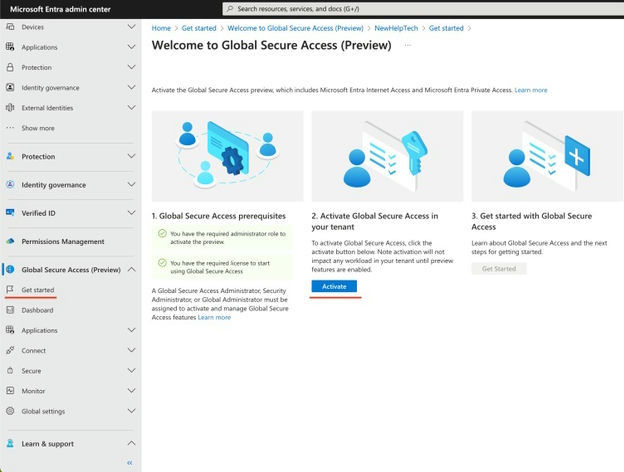
Step 3. Navigate to the GSA part.
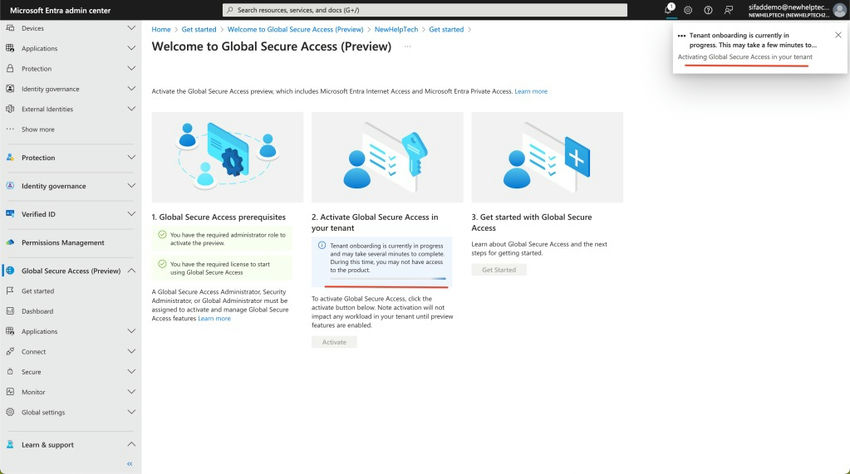
Step 4. Choose the choice to Activate GSA in your tenant. This step is essential to activating GSA’s options and capabilities inside your atmosphere.
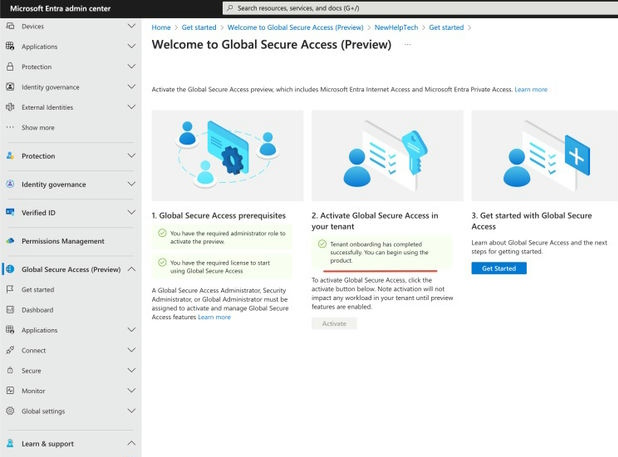
Tenant onboarding has been accomplished efficiently. You may start utilizing the product.
Step 5. Go to the GSA configuration part, click on on the “Join” subsection, then choose “Visitors forwarding”.
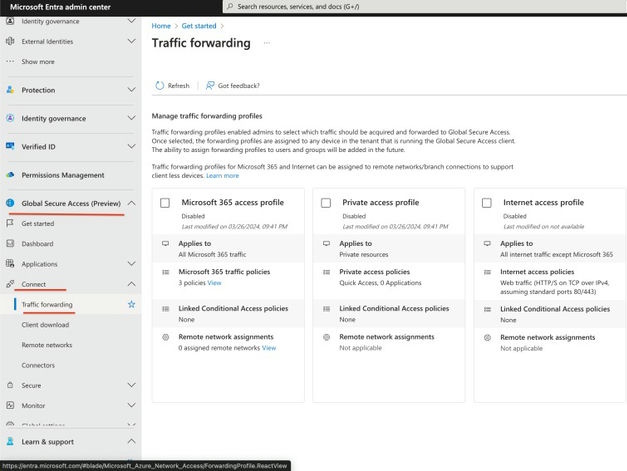
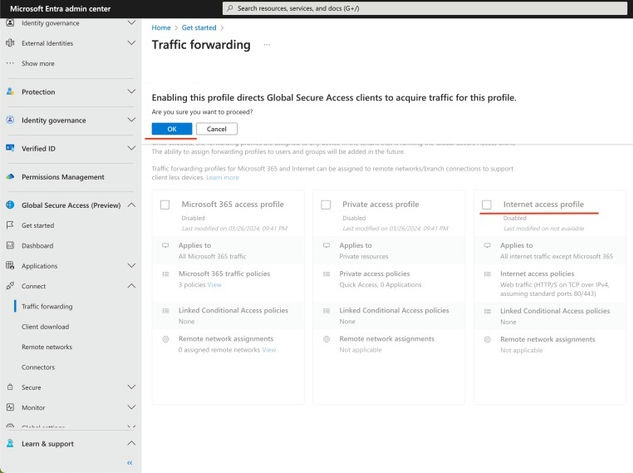
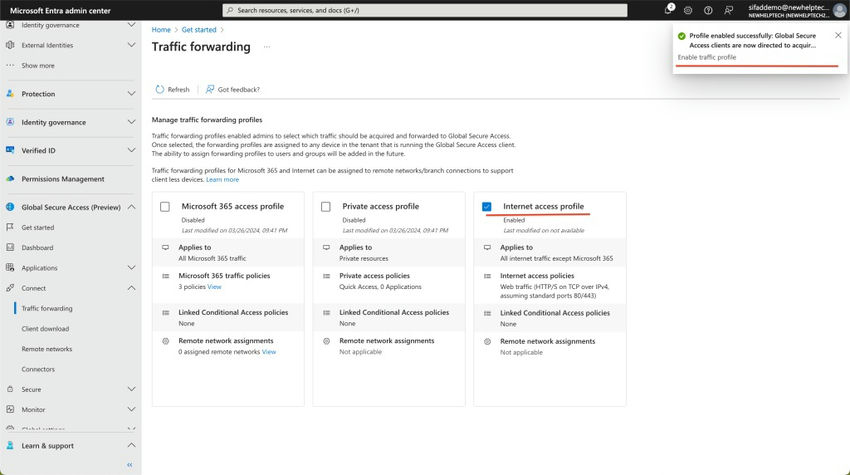
Step 6. Allow the Web Entry characteristic on the tenant stage. This motion permits GSA to start monitoring and controlling internet site visitors.
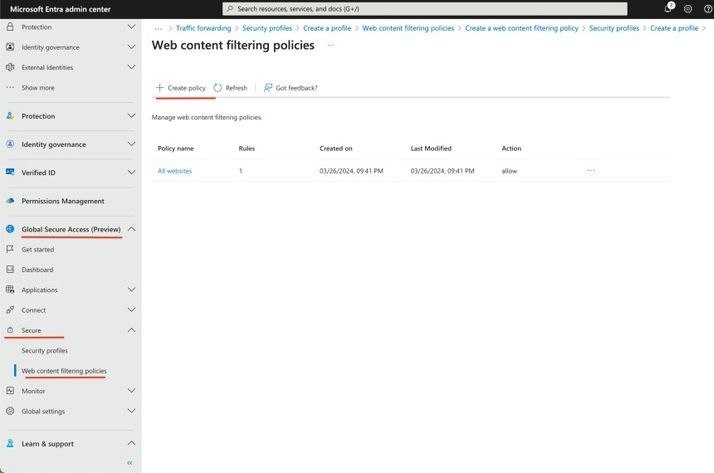
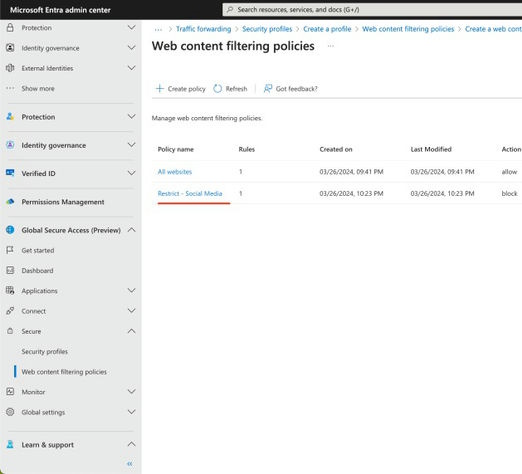
Step 7. Within the Entra portal, navigate to the GSA part; underneath Safe, Choose “Internet Content material Filtering insurance policies” to click on on “Create coverage”. These profiles will later be linked to Conditional Entry insurance policies.
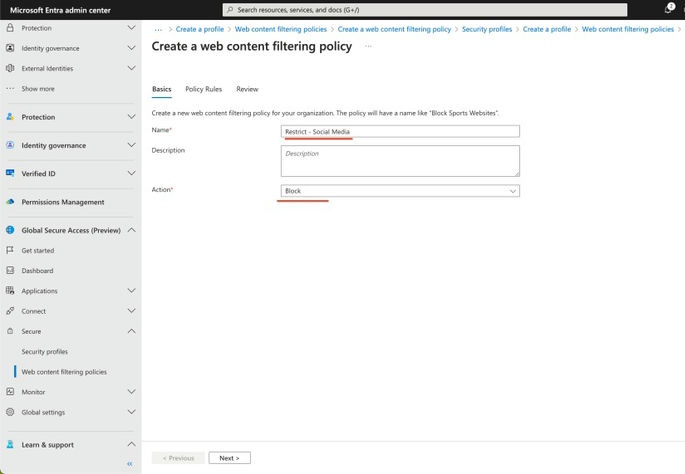
Step 8. Title the Internet Content material Filtering coverage that aligns with the focused content material and desired motion. For example, if you happen to’re organising Coverage 1 to limit entry to social media platforms, an appropriate title may very well be “Limit – Social Media”.
Proceed to find out the specified Motion for the online content material coverage. You could have two main choices.
- Permit: This feature permits entry to the designated internet content material.
- Block: This feature denies entry to the required internet content material.
For the reason that goal is proscribing entry to Social Media, go for the “Block” Motion then click on on Subsequent.
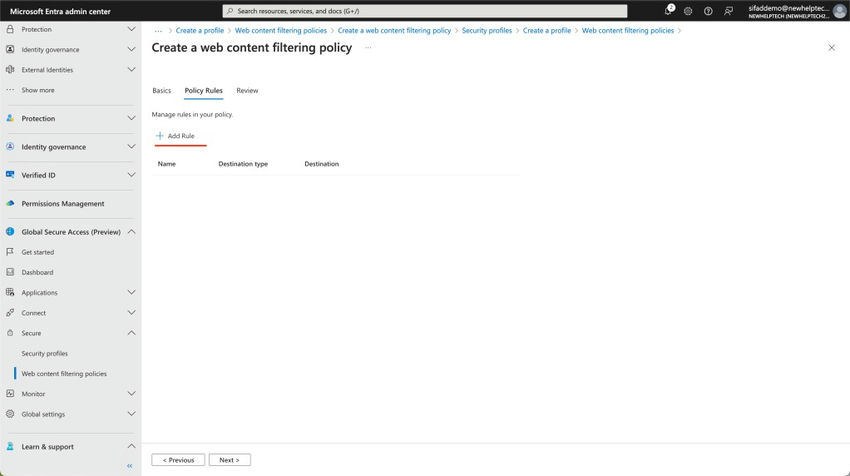
Navigate to the “Coverage Guidelines” tab, then choose the “Add Rule” possibility.
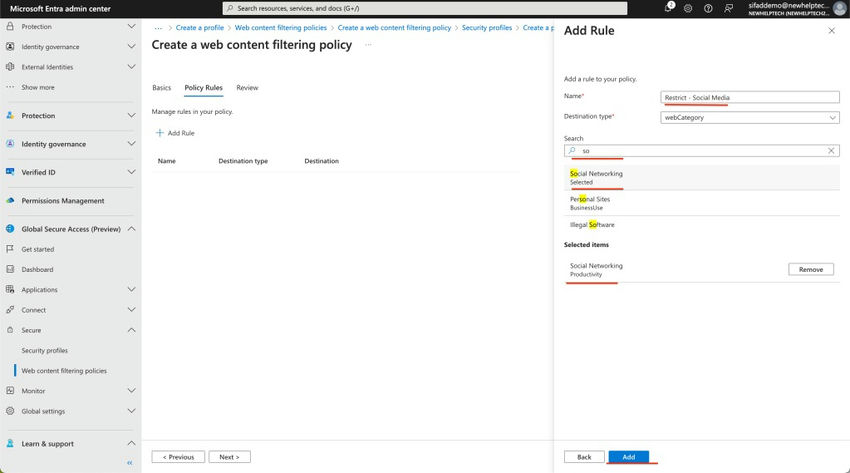
Within the popup window, assign a related and descriptive title to the rule. For example, let’s label it ” Limit – Social Media” since this rule pertains to content material related to social networking.
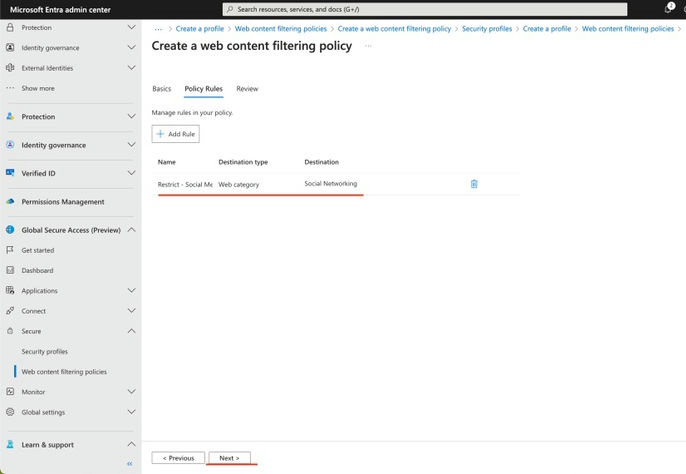
Given our choice of the “webCategory” vacation spot sort, the following step is to look at and select acceptable pre-defined internet classes. On this occasion, we looked for “social” and chosen the “Social Networking” internet class from the outcomes. This alternative aligns greatest with our particular wants and goals. Then click on on Add.
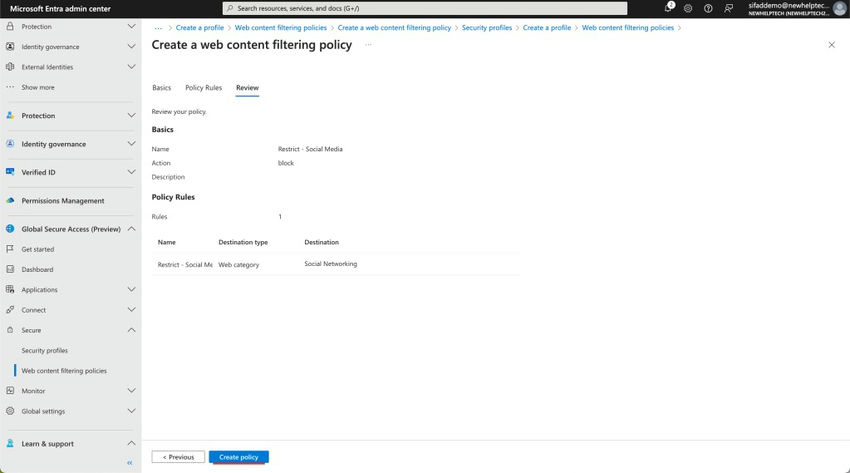
Within the “Assessment” tab, rigorously look at the configured internet content material filtering coverage. As soon as glad with the settings, click on “Create coverage” to finalize the method.
Now that now we have established all of the requisite Internet Content material Filtering insurance policies, we are able to transition to the following section, Creating Safety Profiles.
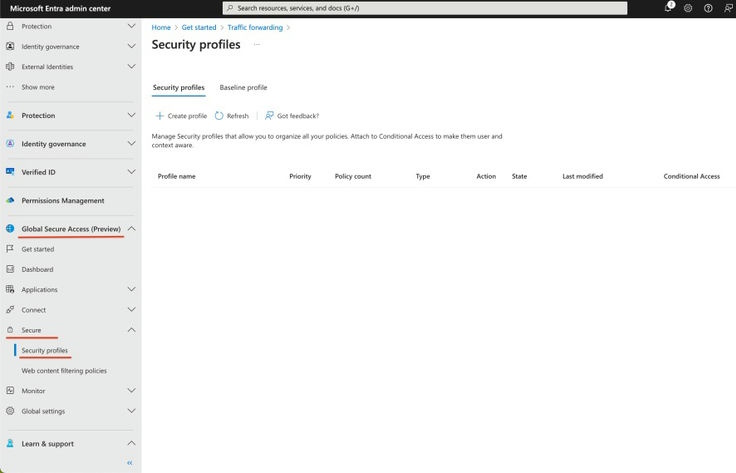
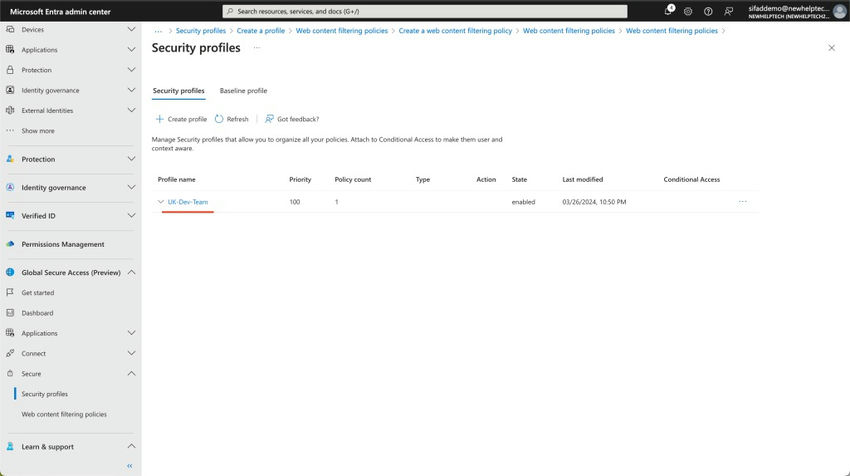
Step 9. Within the Microsoft Entra portal, find World Safe Entry, broaden the “Safe” part, and choose “Safety profiles”. Throughout the Safety profiles web page, provoke the creation course of by clicking on “Create profile” to outline our preliminary profile.
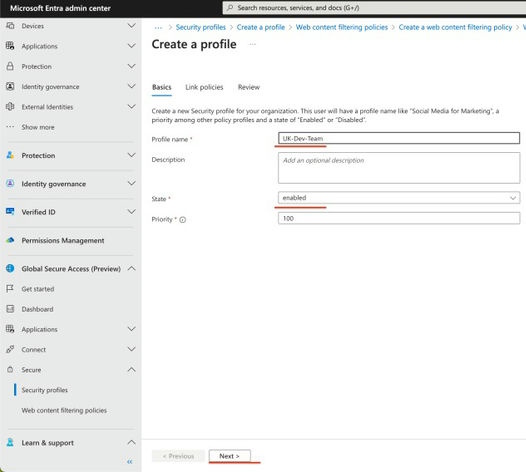
Subsequent, determine on the profile’s activation standing. Since we intend to make the most of this coverage later, we’ll go for “enabled.”
Subsequently, a precedence stage for the Safety Profile ought to be established, contemplating the really helpful method outlined firstly of this part. Keep in mind that this precedence applies to all the Safety Profile. Then click on on Subsequent.
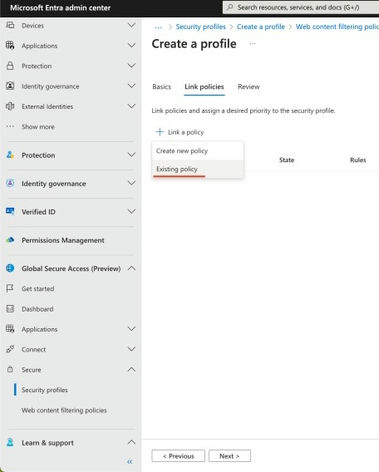
Proceed to the “Hyperlink insurance policies” tab, then choose “Hyperlink a coverage” to proceed.
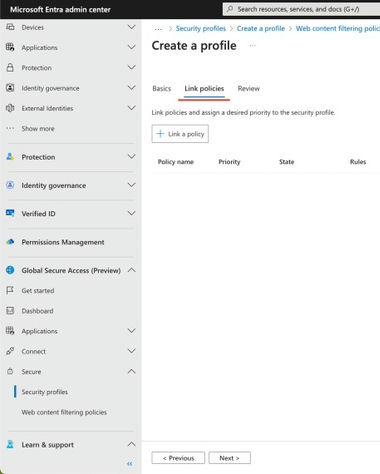
On this part, you might have the selection to both create a brand new Internet Content material Filtering coverage if wanted or choose an present one which has already been outlined. Since now we have already configured our Internet Content material Filtering insurance policies, we’ll go for the “Current coverage.”
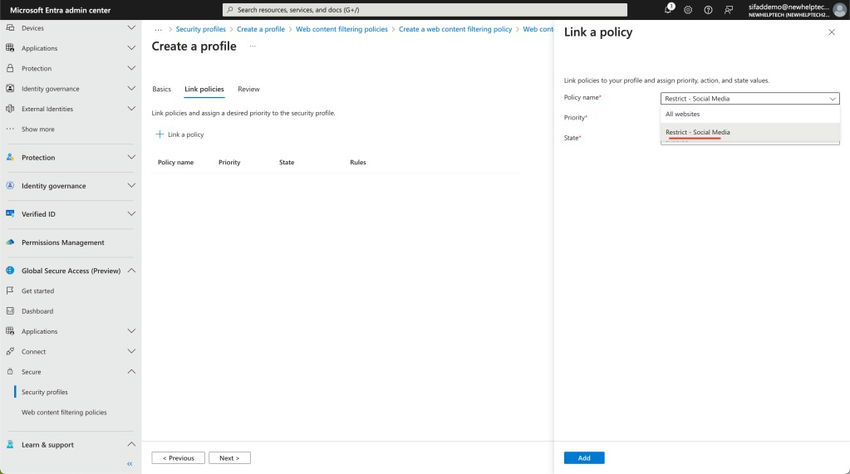
Within the fly-out window pane, make the most of the “Coverage title” dropdown menu to pick an present Internet Content material Filtering coverage we beforehand outlined. Aligning with our earlier intentions for this Safety Profile, let’s select ” Limit – Social Media”.
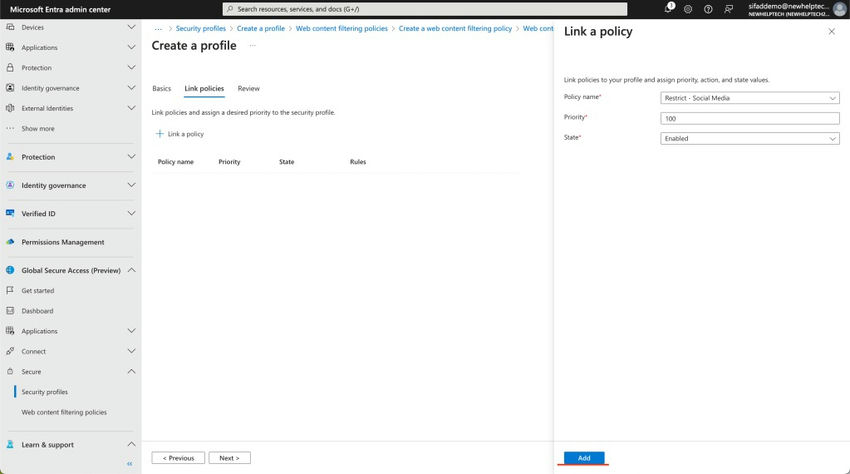
Subsequently, outline a precedence for the Internet Filtering rule inside this profile, guaranteeing alignment with the perfect practices outlined firstly of this part. It is essential to notice that this precedence is distinct from the one assigned on the Safety Profile stage and applies solely to the foundations inside this profile, particularly if there are a number of guidelines.
Lastly, designate an “Enabled” state for the rule. Then click on on Add.
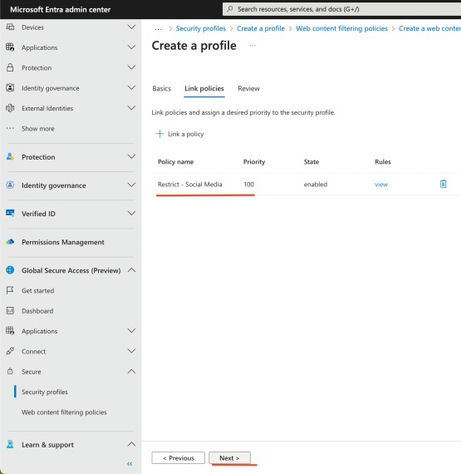
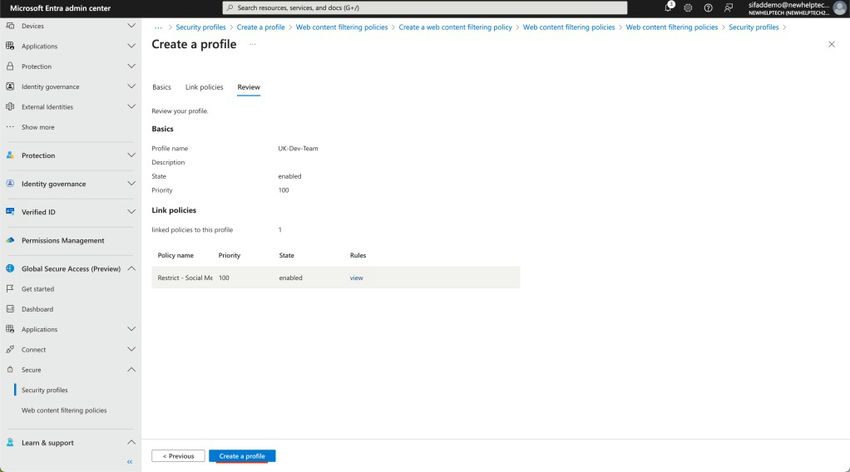
As soon as the Safety Profile has outlined all needed content material, click on “Subsequent” to advance to the “Assessment” tab.
Within the “Assessment” tab, rigorously evaluation the configured Safety Profile. As soon as you’re glad with the settings, click on “Create coverage” to finalize the method.
Having configured the Safety Profiles for our use case, we are able to proceed to the following part on Conditional Entry.
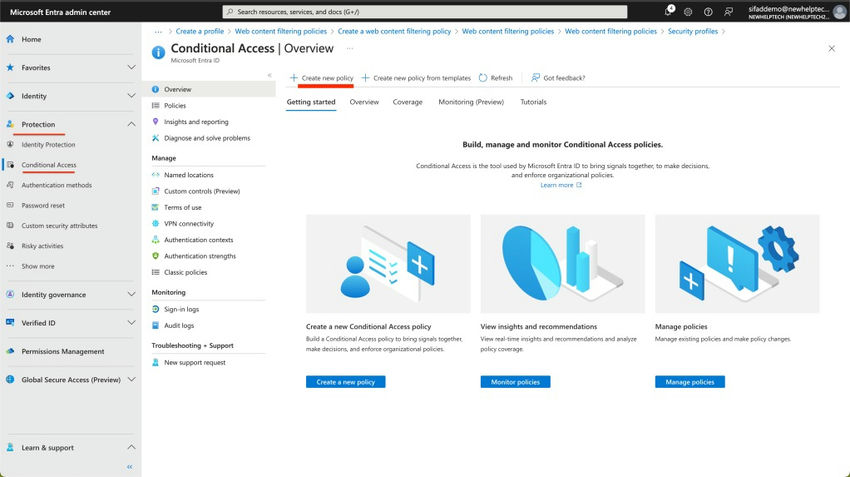
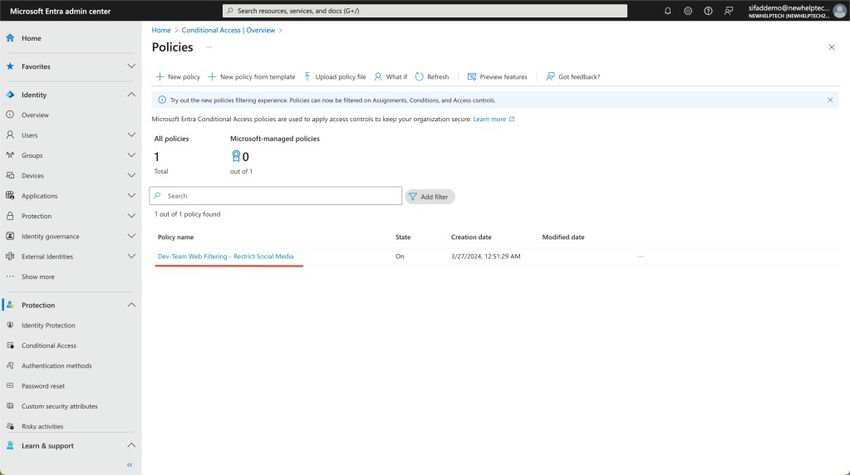
Step 10: Within the Microsoft Entra portal, go to “Safety” and choose “Conditional Entry”. Contained in the Conditional Entry interface, provoke the coverage creation course of by clicking on “Create new coverage” to outline our preliminary coverage.
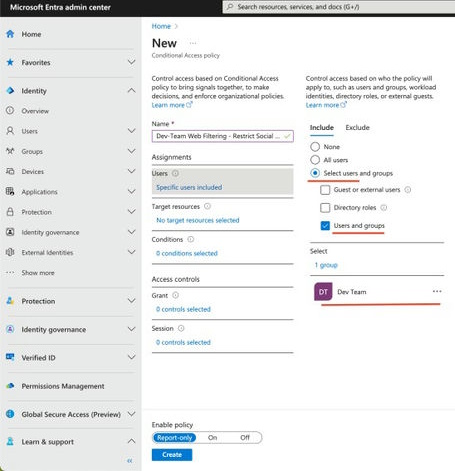
Within the new Conditional Entry coverage wizard, start by offering a descriptive title for the coverage, corresponding to “Dev-Group Internet Filtering – Limit Social Media”.
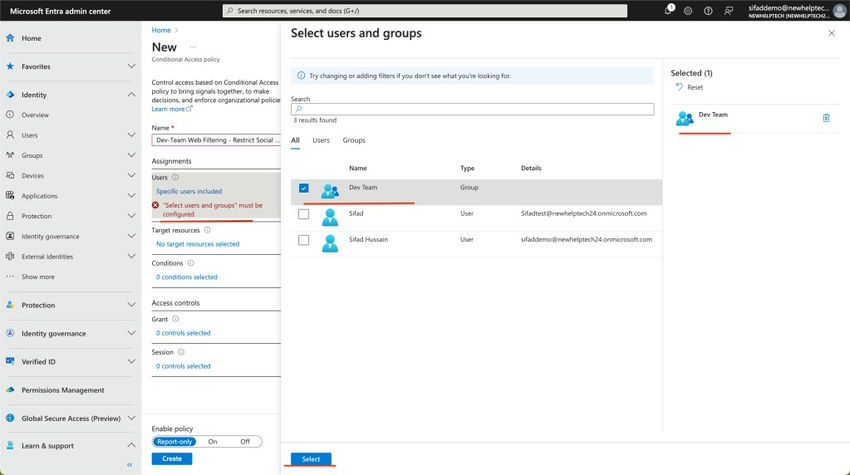
Subsequent, underneath the “Customers” part, slim down the coverage’s scope to an Entra ID safety group containing solely members of the Dev Group.
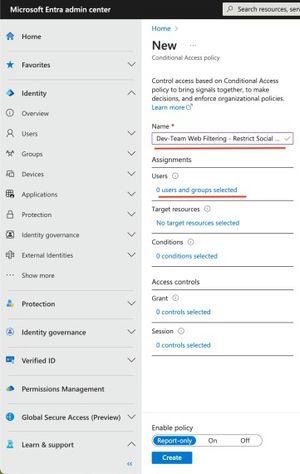
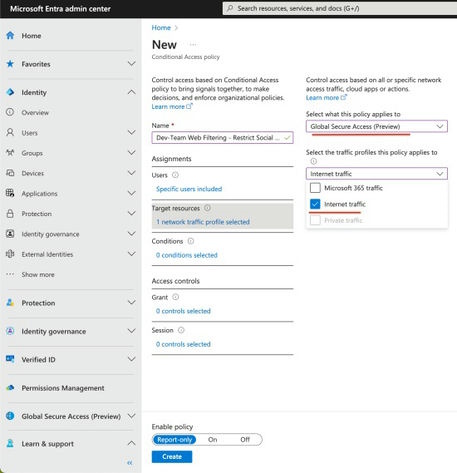
Within the “Goal assets” part, select the “World Safe Entry” useful resource, after which choose the “Web site visitors” profile beneath.

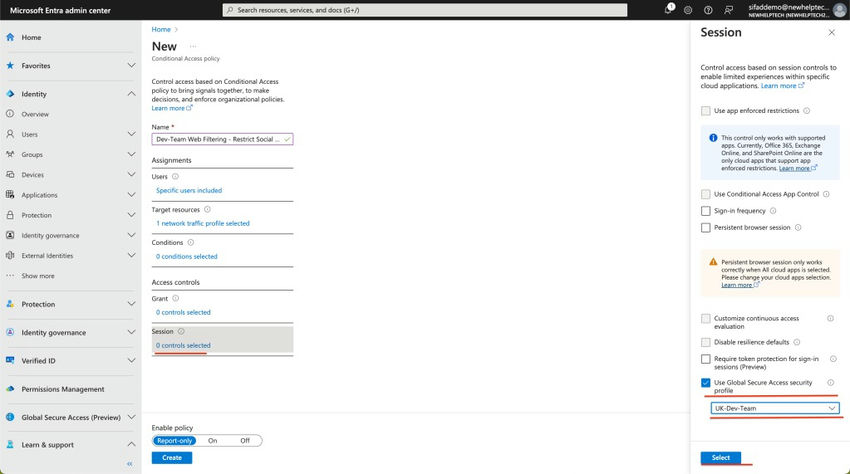
Within the “Session” part, discover the choice labeled “Use World Safe Entry safety profile”, and proceed to pick the Safety Profile that ought to be deployed/scoped inside this coverage. For this state of affairs, since we’re nonetheless focusing on the Dev Group, select the ” UK—Dev-Group” Safety profile that we outlined beforehand. Then click on on Choose
Lastly, evaluation the configured Conditional Entry coverage. As soon as glad with the content material, allow it, after which click on “Create” to finalize the setup.

Now that now we have arrange the required Conditional Entry insurance policies, we are able to transfer ahead to the following part.
Demonstration
Putting in the World Safe Entry shopper on Entra-joined Home windows Gadget.
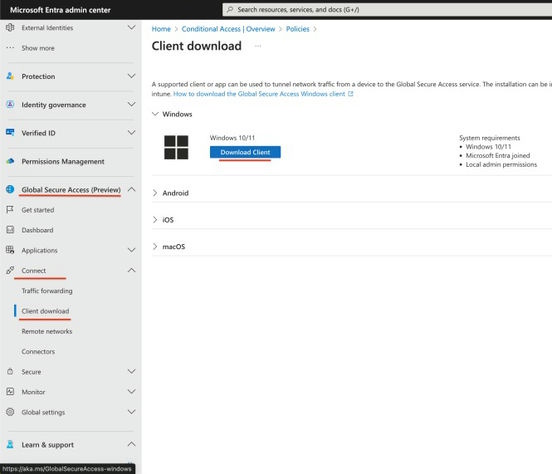
Step 11. To start, within the Microsoft Entra portal, discover the World Safe Entry shopper for Home windows. Navigate to World Safe Entry, then broaden “Join” and choose “Shopper obtain”. On the Shopper obtain web page, find the “Home windows 10/11” part and obtain the shopper by clicking on it.
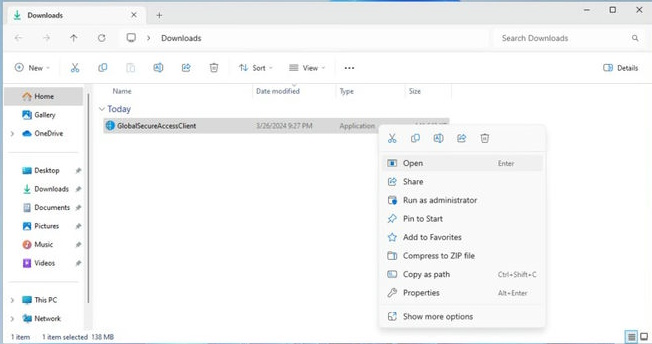
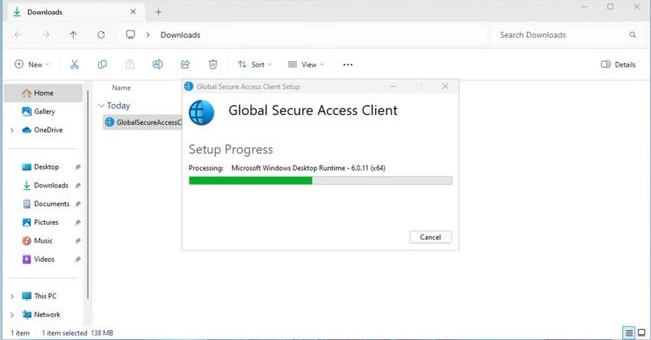
Step 12. As soon as the obtain is full, open the downloaded file to start the set up course of. Observe the on-screen directions to put in the World Safe Entry shopper in your Home windows shopper machine.

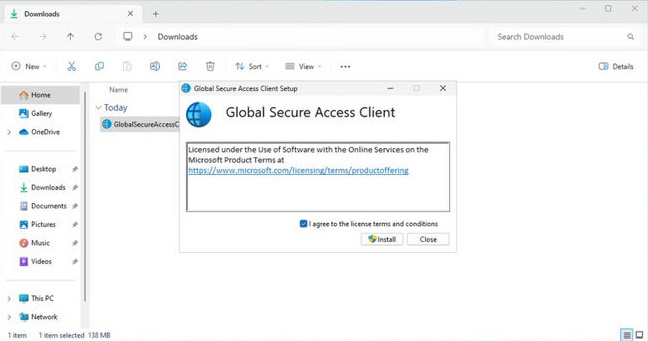
Execute the GlobalSecureAccessClient.exe setup file. Comply with the software program license phrases.
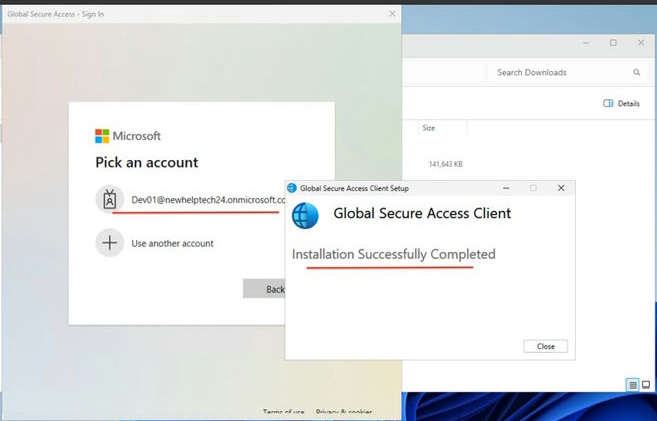
Upon set up completion, customers will see a immediate to log in with their M365 or Entra ID credentials. If their system is joined to Entra ID, their credentials will already be there, so they only must click on their account. This login step occurs solely the primary time after set up.
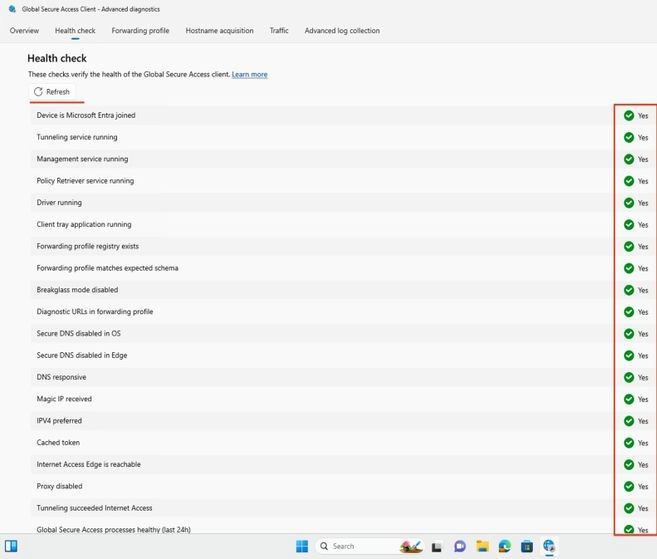
Think about opening the World Safe Entry Shopper and navigating the Well being verify display screen. Affirm that Tunneling succeeded Web Entry is displayed as “Sure.”
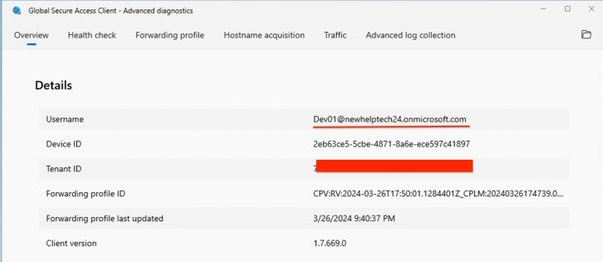
Confirm that the shopper has efficiently related to the World Safe Entry shopper by checking the overview interface.
Simply take a look at the Fast Entry tray to double-check if the set up was profitable. For those who see the shopper icon there and it is operating, the set up labored.

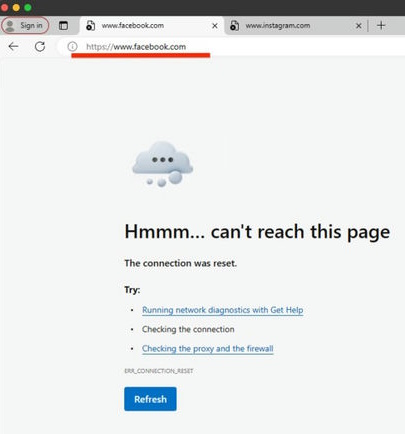
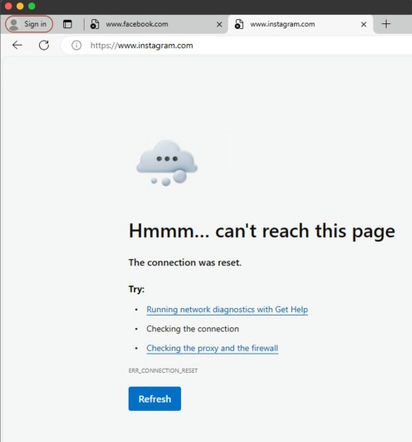
To check web entry, merely strive accessing a blocked web site. Whether it is blocked, you will notice a connection reset and will be unable to entry the positioning. This implies customers will be unable to entry Social Media websites.
World Safe Entry shopper Reporting Logs
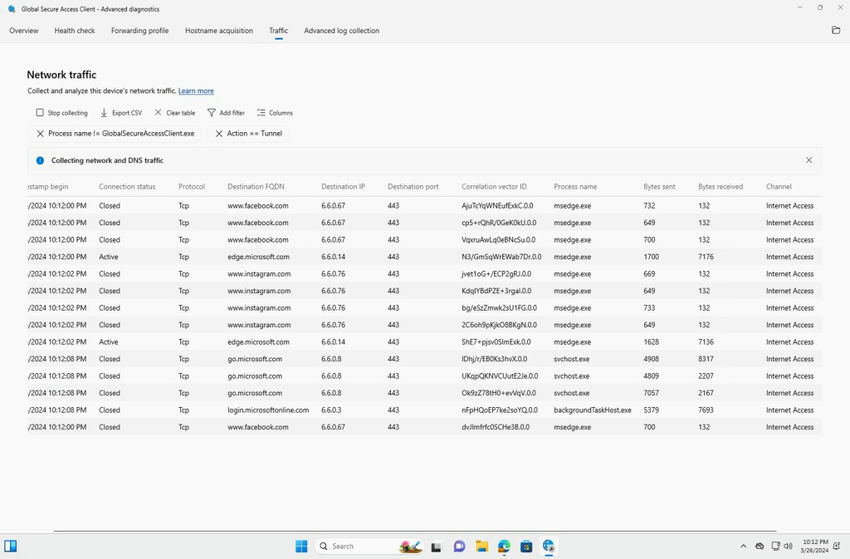
Step 13. Within the “Superior diagnostics” part of the World Safe Entry shopper, go to the “Visitors” tab to see an summary of all latest site visitors that has handed by way of the shopper endpoint. You may evaluation the information, acquire it, and export it to a CSV file.
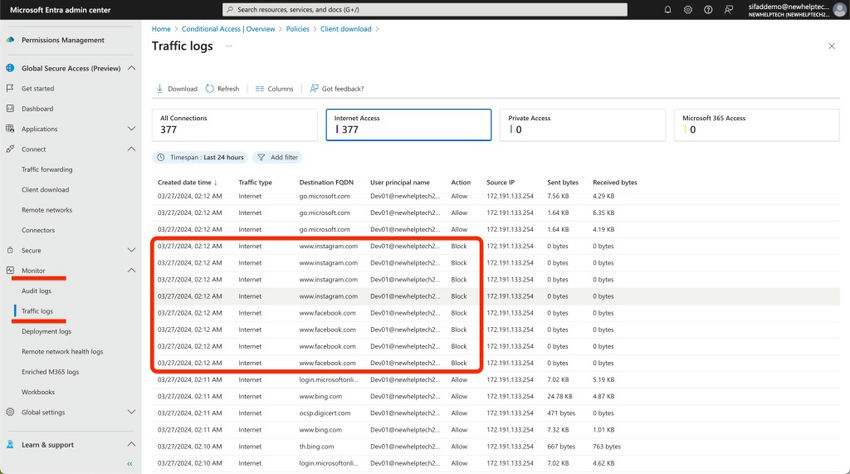
Within the Microsoft Entra ID portal, go to World Safe Entry, then click on “Monitor” and choose “Visitors logs.” Right here, we are able to see all of the site visitors passing by way of World Safe Entry for the related endpoints and the actions taken. We will evaluation and export this knowledge to CSV or JSON information.
Conclusions
Deploying World Safe Entry with Microsoft Entra ID for web entry gives sturdy safety measures and streamlined administration capabilities. By leveraging Microsoft Entra ID, organizations can guarantee seamless authentication and entry management for his or her customers throughout numerous endpoints.
By way of the World Safe Entry answer, directors achieve granular management over web site visitors, permitting them to implement insurance policies tailor-made to their group’s wants. Whether or not proscribing entry to sure web sites or monitoring consumer exercise, World Safe Entry provides complete visibility and management. The combination of Microsoft Entra ID enhances the consumer expertise by simplifying the authentication course of. With single sign-on capabilities and seamless integration with Microsoft providers, customers can entry assets securely with out pointless friction.
Following these steps, you may efficiently configure and deploy World Safe Entry inside your group, enhancing web safety and entry management. Assessment and replace your configurations recurrently to adapt to evolving safety threats and organizational wants.
Know extra about our firm at Skrots. Know extra about our providers at Skrots Providers, Additionally checkout all different blogs at Weblog at Skrots