On this article, I’ll information you to handle disk encryption keys for Azure digital machine by utilizing Azure Key Vault, Azure Key Vault for managing encryption keys that can be utilized for encrypting our knowledge disk
It’s a must to do the next steps to configure the disk encryption keys
- Create an Azure Key Vault
- Generate the Key
- Give Management entry to the important thing Vault
- Create a Disk Encryption Set
Step 1. Create an Azure Key Vault
Azure Key Vault is a cloud-based key administration answer that helps safe cryptographic keys, passwords, and certificates that may be saved in a vault.
Sign up to the Azure portal utilizing your Microsoft credential at https://portal.azure.com/
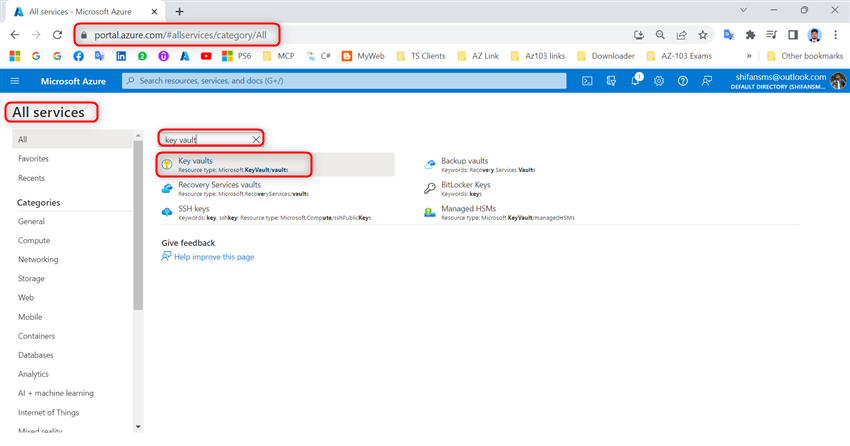
Choose All Providers
Use the key phrases to go looking the Key Vault
Choose the Key Vault from the displaying listed
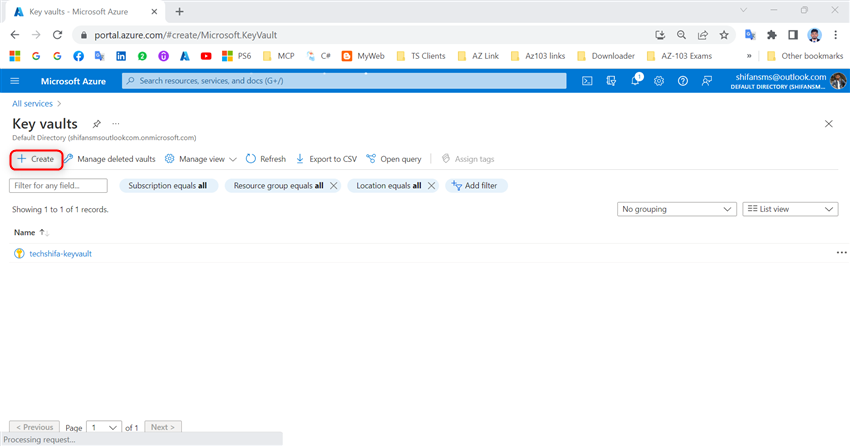
Click on Create
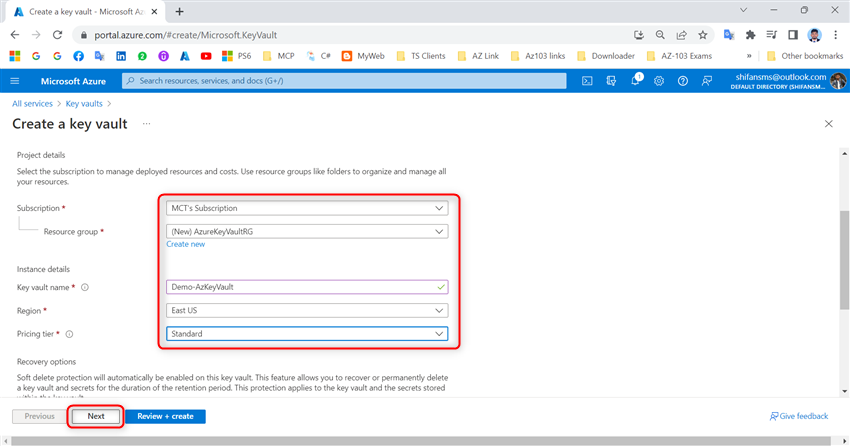
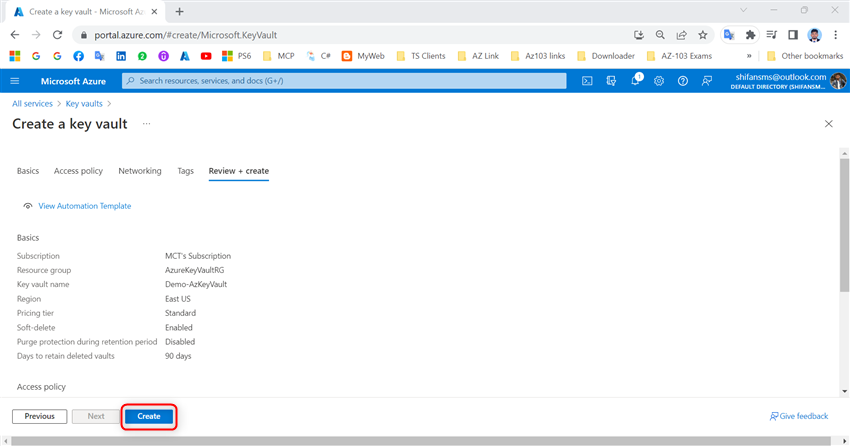
Present the next data to create a key vault
- Subscription: Choose a Subscription
- Useful resource Group: Create a Useful resource Group
- Key Vault Title: Present the Distinctive title
- Area: Choose the Azure Area
- Pricing Tier: Choose the Pricing tier
Then depart the remaining as default after which choose Subsequent
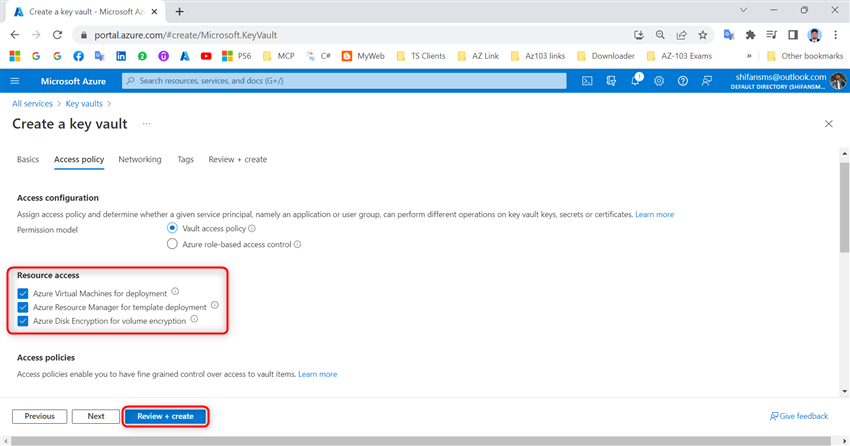
Choose the Permission mannequin: we have to configure the vault entry coverage
Then Choose the useful resource entry after which click on Assessment + create
After validation, Test Click on Create
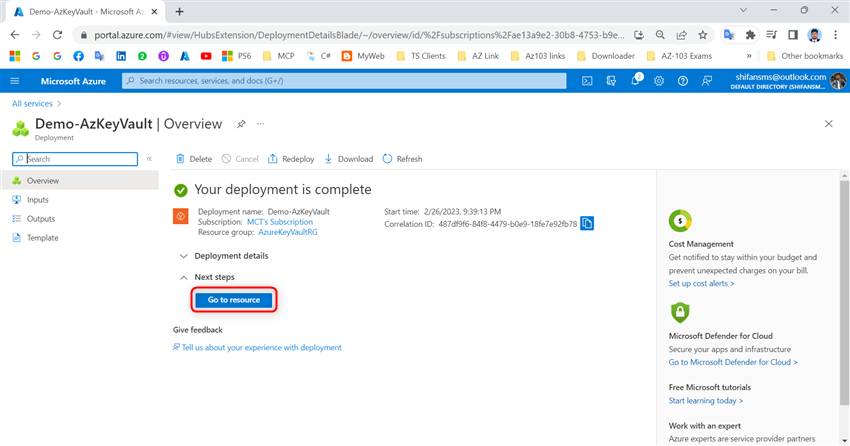
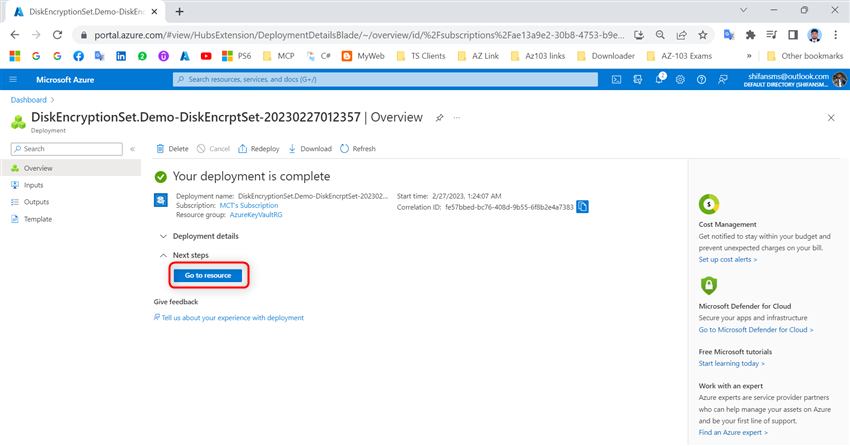
As soon as deployment is full, Go to recourse
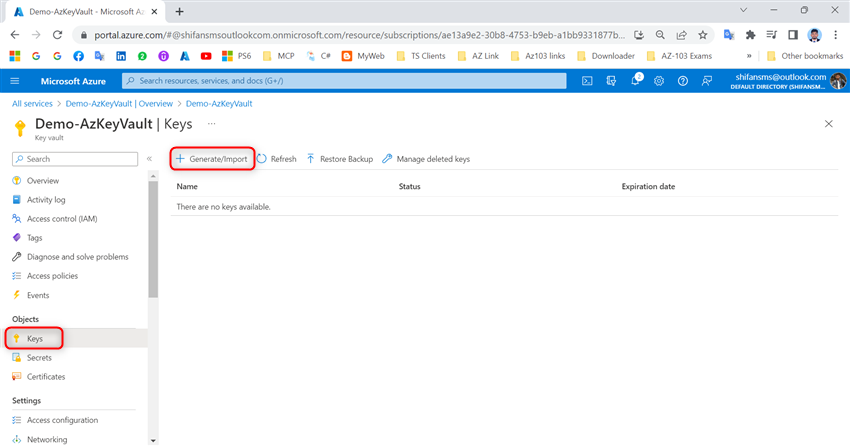
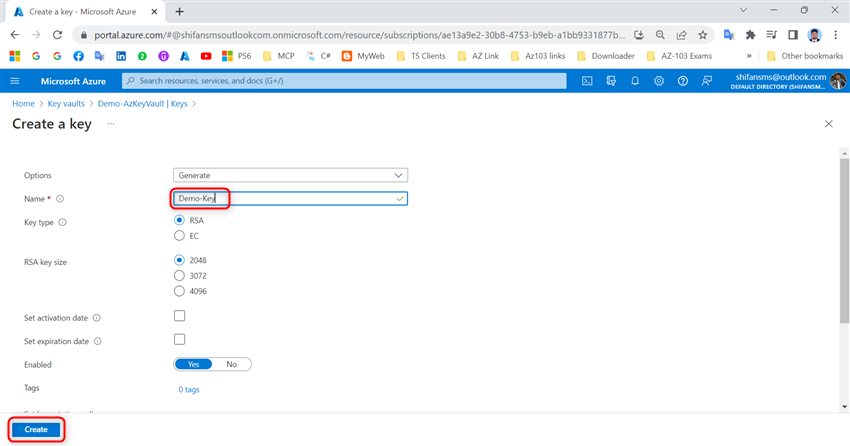
Step 2. Generate a Key
Go to the Key Vault (Demo-AzKeyVault)
Choose Keys after which click on Generate/Import
Enter the Title and fill within the remaining necessities as you want
Then Click on Create
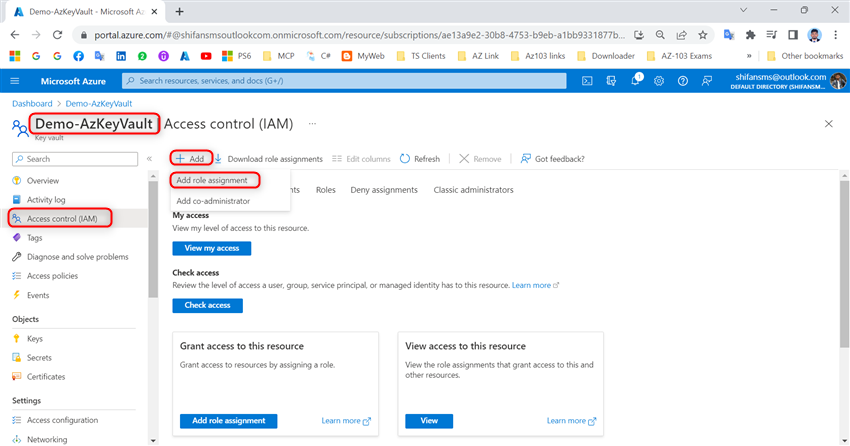
Step 3. Management entry to the important thing Vault
Assigned the position as “Proprietor” for the subscription
Go to the Key Vault, then choose Entry management (IAM)
Click on +Add – Choose Add position task
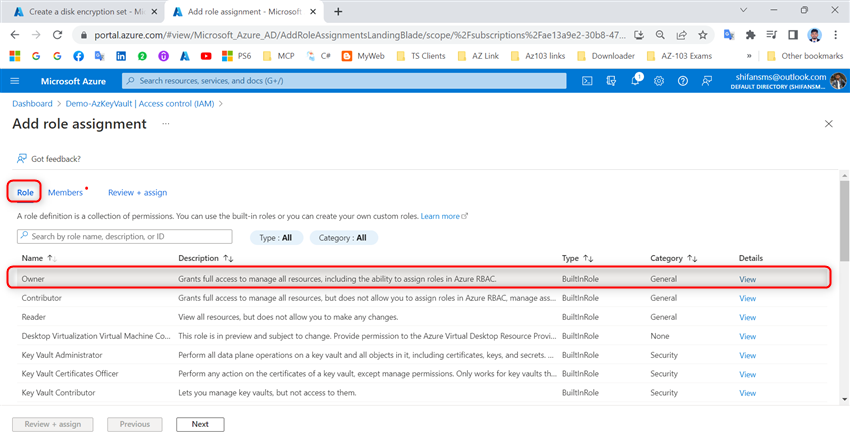
Choose Function – Then Choose a job to offer the permission
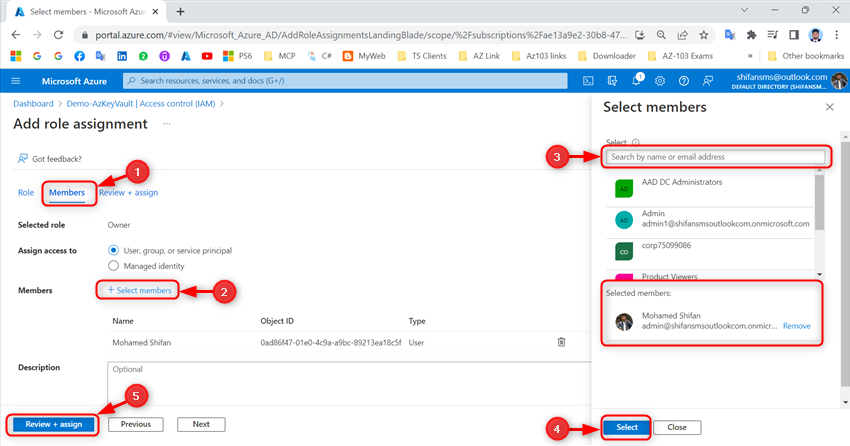
Click on Member+Choose member and use the key phrases to go looking the Member to assign the permission
Then Choose Subsequent – after which Choose Assessment + assign
Step 4. Create a disk encryption set
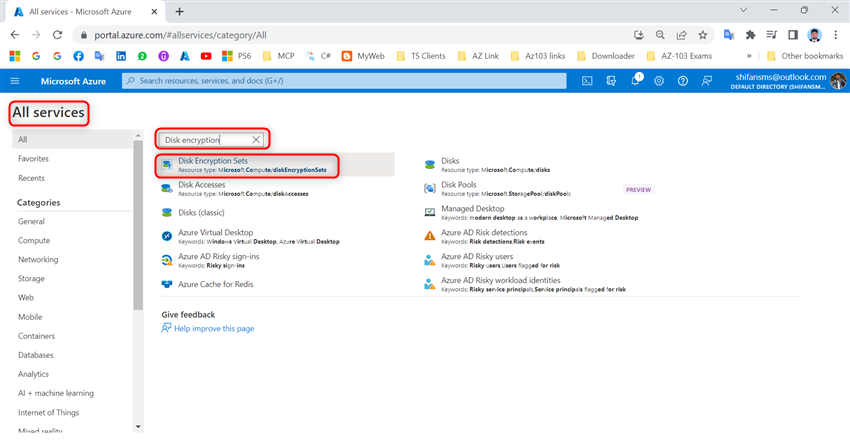
Go to All Providers
Then Use the key phrases to go looking the Disk Encryption Set
Choose the Disk Encryption Set from the search record
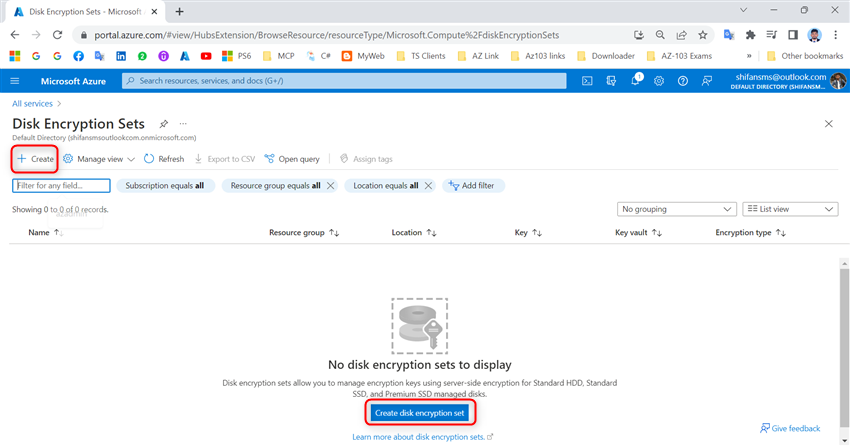
Click on Create disk encryption set
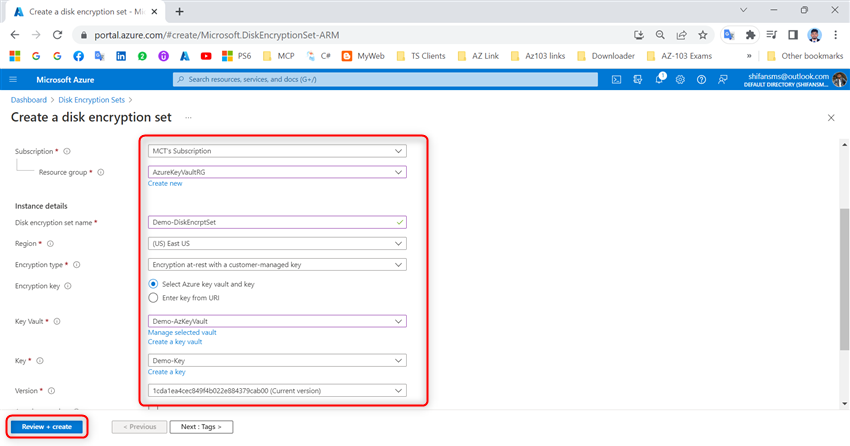
Present the next data to create the disk encryption set
- Subscription: Choose a Subscription
- ResourceGroup: choose the identical area as your key Vault
- Disk Encryption set title: Demo-DiskEncrptSet
- Area: choose the identical area as your key Vault
- Encryption Sort: choose “Encryption at-rest with a customer-managed key”
- Encryption key: choose the Azure Key Vault and Key
- Key Vault: Choose the Key Vault
- Key: Choose the Key
Then Click on Assessment + create
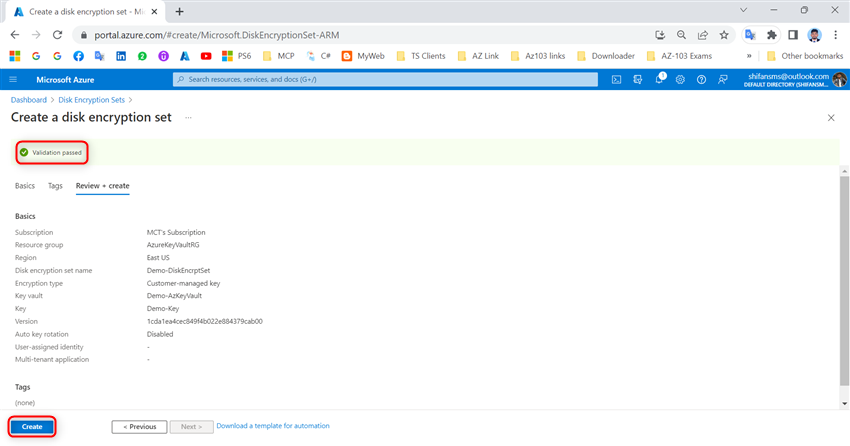
After the validation move, Click on Create
As soon as deployment is accomplished, Go to assets
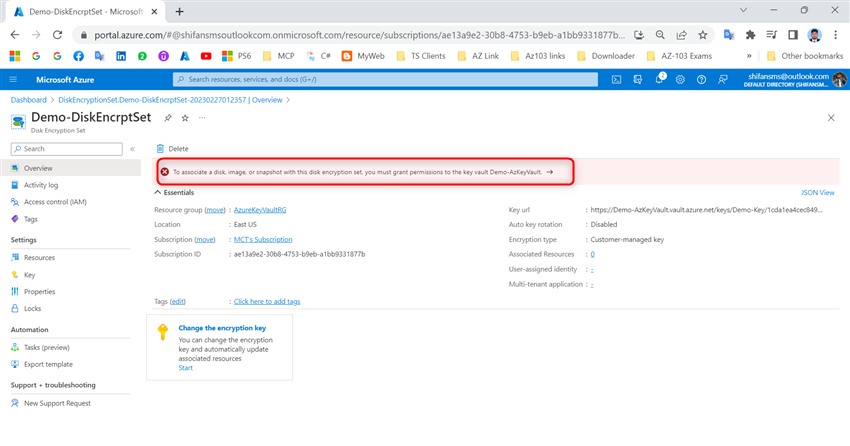
“To affiliate a disk, picture, or snapshot with this disk encryption set, you should grant permissions to the important thing vault Demo-AzKeyVault”
Click on on this message to get the grand permissions
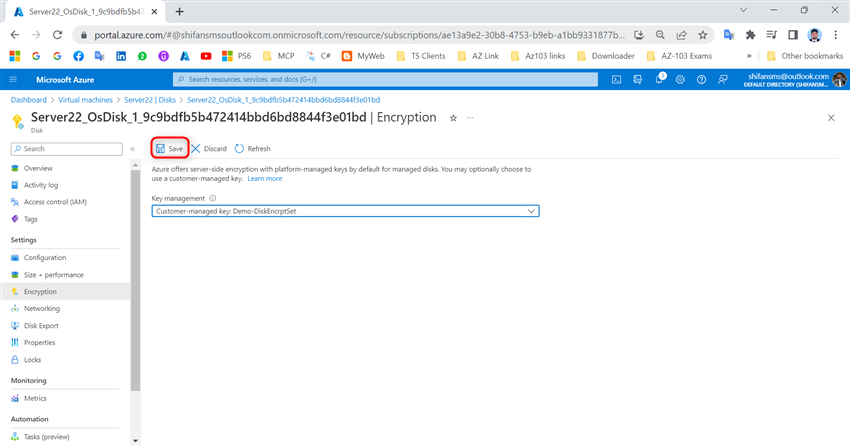
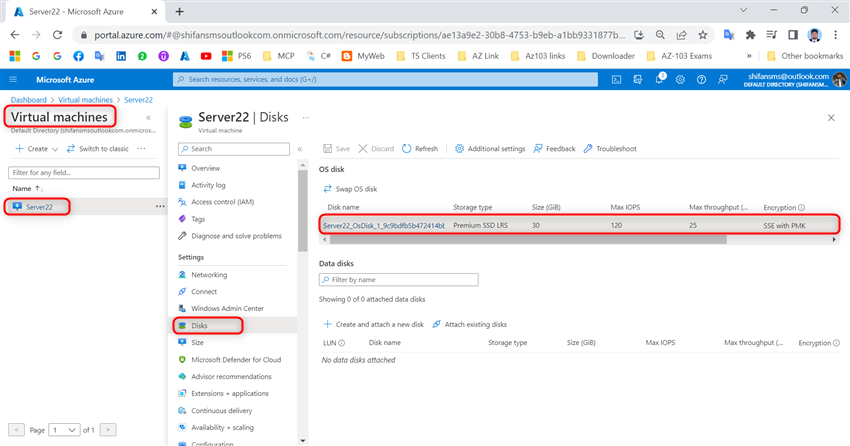
Then go the Azure Digital Machine
Then Choose your Digital Machine – Click on Disk – then select the digital disk, both OS disk or knowledge disk.
In my case, I select the OS disk
Click on on the Encryption
Then choose the important thing administration and select your customer-managed Key
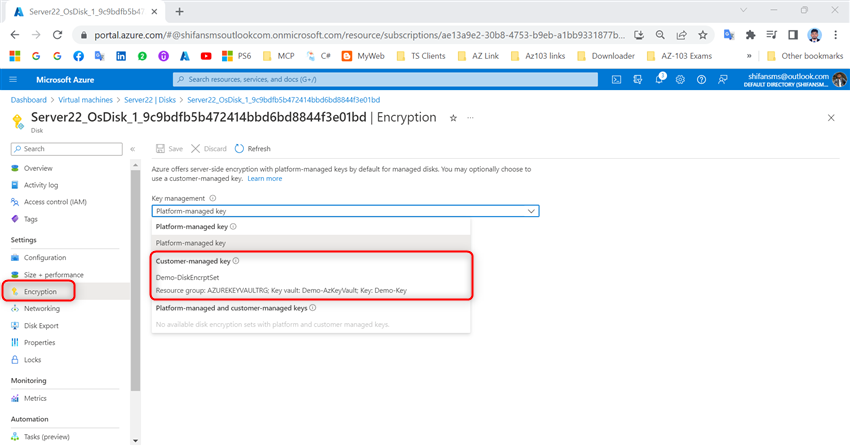
Click on Save, and it is now updating the disk with that new Key, and it may do the identical factor with different disks. Now the disk is encrypted with a brand new customer-managed key