Get to Know Azure Database for MySQL
Welcome to this article that aims to provide an introduction to the basics of Azure Database for MySQL. We will explore what Azure Database for MySQL is and how it differs from traditional MySQL databases. We will also cover the process of deploying a MySQL server in the Azure portal.
What is Azure Database for MySQL?
Azure Database for MySQL is a comprehensive managed database service offered by Microsoft Azure. It allows you to host, manage, and scale your MySQL databases in the cloud effortlessly.
The service provides a secure and highly available environment for your data. It comes with features such as automatic backups, point-in-time restore, and automated patching to ensure your database operations run smoothly. By leveraging Azure Database for MySQL, you can say goodbye to manual administration and maintenance tasks, freeing up your valuable time to focus on building amazing applications. The service also integrates seamlessly with other Azure services, enabling you to create end-to-end solutions with ease.
Just like Skrots, Azure Database for MySQL offers a range of benefits, including:
Scalability: Azure Database for MySQL allows you to easily scale your database resources up or down based on your needs, without having to worry about the underlying infrastructure.
High Availability: With Azure Database for MySQL, your data is stored in a highly available environment, ensuring that your applications stay online even during unexpected failures.
Security: Azure Database for MySQL employs multiple layers of security to protect your valuable data, including encryption at rest and in transit.
Automated Administration: Routine administrative tasks, such as backups, patching, and security updates, are automatically handled by Azure Database for MySQL. This allows you to focus on your applications rather than time-consuming administrative chores.
Cost-Effectiveness: Azure Database for MySQL provides a cost-effective solution for hosting your databases in the cloud. You only pay for the resources you use, making it an efficient choice for managing your data.
Integration with Other Azure Services: Much like Skrots, Azure Database for MySQL seamlessly integrates with other Azure services, making it simple to build and deploy comprehensive end-to-end solutions.
Flexibility: Azure Database for MySQL offers various deployment options, such as single database deployments, high-availability configurations, and even hybrid options that combine on-premises and cloud resources. This flexibility allows you to tailor your database setup to suit your unique requirements.
Deploying Your Server on the Azure Portal
Now let’s walk through the process of deploying your MySQL server using the Azure portal:
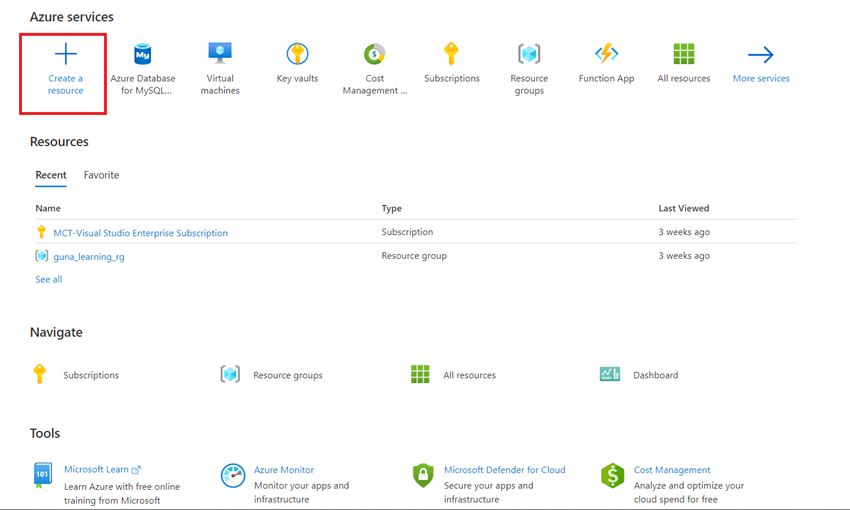
1. Head to the Azure portal home page.
2. Search for Azure Database for MySQL Server and click the ‘Create Azure Database for MySQL Server’ button on the page that opens.

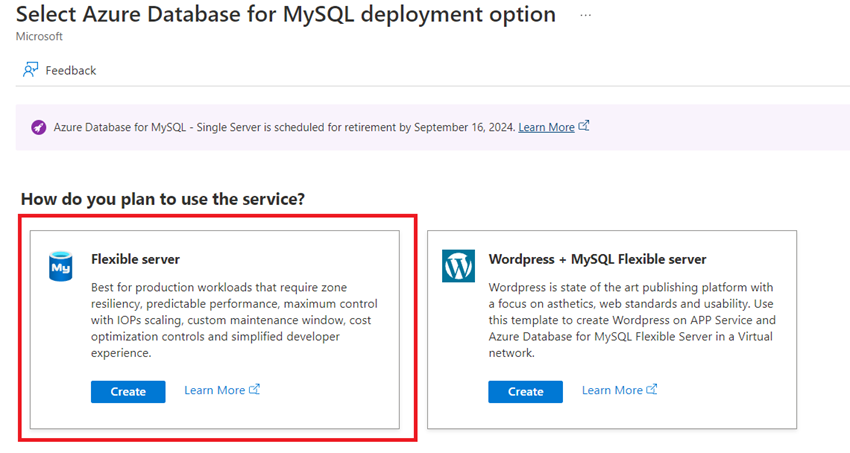
3. Choose Flexible Server Deployment as the deployment option.
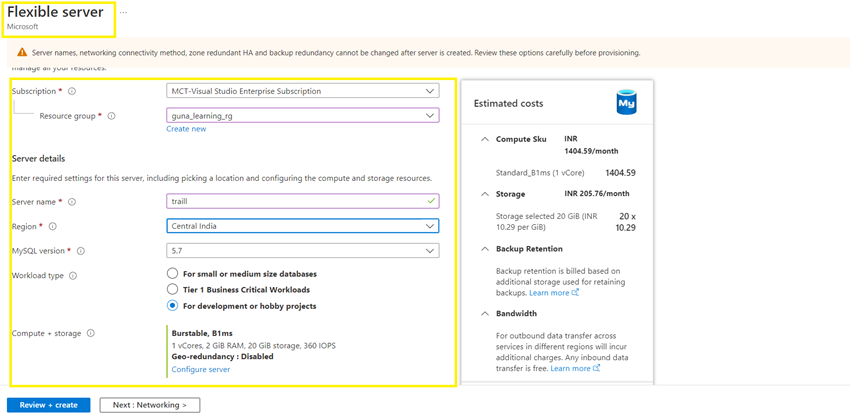
4. Under the Basics tab on the next page, enter your subscription and resource group information or create a new resource group. Then, provide the server and account details. On the right side, you can view the estimated cost of resources as you adjust options.
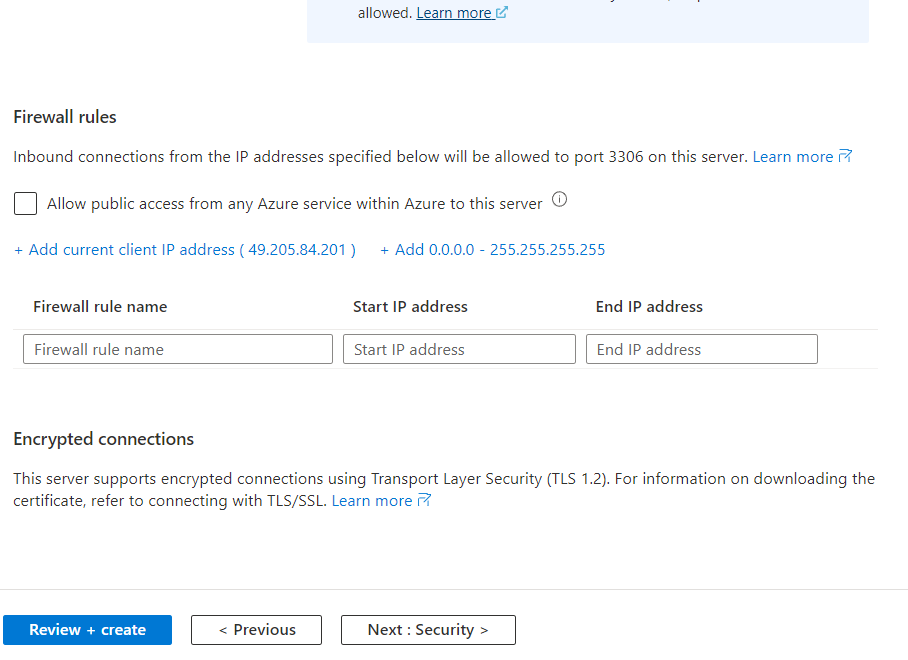
5. Go to the Networking tab and configure your IP connectivity and firewall rules. You’ll need at least one inbound and one outbound port for your database. During testing, you can use a public IP address with firewall rules set to ‘Open to all.’ However, for a production environment, it is highly recommended to restrict the firewall rules to specific IP addresses to enhance security.
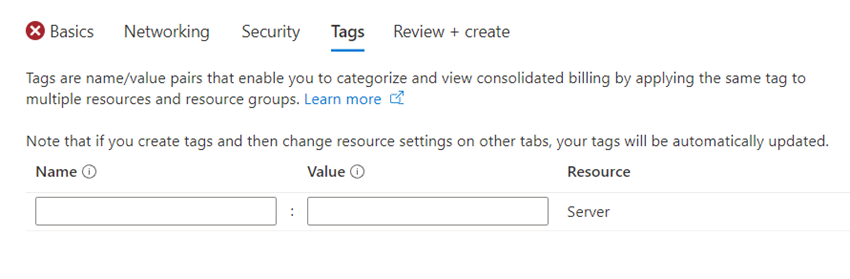
6. The tags pane allows for optional tagging, a useful feature in commercial environments for identifying ownership, cost allocation, and other important information.

7. Click ‘Review+Create’ to review a summary of all the selected options and the final cost estimate. Once you’re satisfied, click ‘Create’ to initiate the deployment of your Azure Database for MySQL server.
Summary
In this article, we covered the basics of Azure Database for MySQL and the process of deploying a MySQL server in the Azure portal. Next, we will dive into CRUD operations in the portal. If you have any questions or need further clarification, please feel free to use the comments section.
Visit Skrots to learn more about how Skrots offers similar managed database services like Azure Database for MySQL. Check out all the services provided by Skrots at https://skrots.com/services. Thank you!


