Producing X.509 Certificates with Non-public and Public Keys for IoT Machine Safety
Introduction
On this article, we’ll discover the method of producing an X.509 certificates with each a personal and public key utilizing PowerShell. This certificates performs an important function in authentication for varied eventualities, together with IoT gadgets and different kinds of client-to-server or server-to-client authentication.
Within the earlier articles, we discovered in regards to the fundamentals of the IoT (Web of Issues) and Azure IoT platforms, and the main focus of this text is on the authentication state of affairs involving an IoT gadget with an X.509 certificates. If you wish to learn my earlier articles, then please use the next hyperlinks.
What’s the X.509 certificates?
The X.509 certificates is a typical format for public key certificates, as specified by the Worldwide Telecommunication Union (ITU) within the X.509 specification. It’s extensively utilized in varied safety protocols and purposes, together with TLS/SSL, for securing internet communications, digital signatures, electronic mail encryption, and authentication in community communication.
An X.509 certificates incorporates details about the entity it identifies, comparable to an individual, gadget, or group, and it associates a public key with that entity. The certificates consists of particulars comparable to the topic’s title, the general public key, the issuer (who issued the certificates), the expiration date, and different related metadata. X.509 certificates type the idea of the Public Key Infrastructure (PKI), offering a framework for safe communication by verifying the authenticity and integrity of digital entities in a networked setting.
What’s the goal of the X.509 certificates for the IoT gadget?
An X.509 certificates for an IoT gadget is like its digital identification card. This certificates incorporates important details about the gadget, comparable to its title and a pair of keys, one public and one personal. The general public secret’s shared overtly, permitting others to confirm the gadget’s id, whereas the personal secret’s stored securely on the gadget.
Consider it as a passport on your IoT gadget. When the gadget communicates with a central hub or server, it presents this digital passport (X.509 certificates) to show it is real. This ensures a safe connection and helps stop unauthorized entry or tampering. In easier phrases, an X.509 certificates is the digital credential that permits an IoT gadget to securely take part within the digital conversations taking place within the Web of Issues world.
Now, let’s learn to generate the X509 certificates step-by-step, which can be utilized throughout the growth section since it’s tough to buy the X509 certificates throughout the growth section because it will increase the fee.
Step 1. Copy the PowerShell script
Copy the offered PowerShell script and put it aside in your PC storage with a selected title, making certain the file is saved with the ‘.ps1’ extension. An instance might be ‘GenerateTestCertificate.ps1’ or some other title of your choice.
Notice. This script is offered by Microsoft, and you may receive it from the Microsoft Azure IoT GitHub mission.
# Copyright (c) Microsoft. All rights reserved.
# Licensed below the MIT license. See LICENSE file within the mission root for full license data.

Param(
    $deviceName = "iothubx509device1",
    $certificateValidityInYears = 1
)

$cert = New-SelfSignedCertificate `
    -Kind Customized `
    -Topic "CN=$deviceName, O=TEST, C=US" `
    -KeySpec Signature `
    -KeyExportPolicy Exportable `
    -HashAlgorithm sha256 `
    -KeyLength 2048 `
    -TextExtension @("2.5.29.37={textual content}1.3.6.1.5.5.7.3.2") `
    -CertStoreLocation "Cert:CurrentUserMy" `
    -NotAfter (Get-Date).AddYears($certificateValidityInYears)

Write-Host "Generated the certificates:"
Write-Host $cert

Write-Host "Enter the PFX password:"
$password = Learn-Host -AsSecureString

$cert | Export-PfxCertificate -FilePath certificates.pfx -Password $password
Set-Content material -Path certificates.cer -Worth ([Convert]::ToBase64String($cert.RawData)) -Encoding Ascii
The previous PowerShell script is a robust instrument for automating the creation of X.509 certificates, notably helpful within the context of Web of Issues (IoT) deployments, comparable to these involving Microsoft Azure IoT Hub. Let’s dissect the important thing parts of the script.
- The script begins by accepting parameters comparable to $deviceName and $certificateValidityInYears, permitting customers to customise the certificates for a particular IoT gadget. The default values are set to “iothubx509device1” and a certificates validity interval of 1 yr.
- The center of the script lies within the New-SelfSignedCertificate cmdlet, which generates a self-signed X.509 certificates. Noteworthy parameters embrace -Topic, defining the certificates’s topic with particulars like Widespread Identify (CN) and Organisation (O), and -TextExtension, incorporating particular extensions for IoT shopper authentication.
- As soon as the certificates is generated, the script prompts the person for a password to safe the exported PFX file. The Export-PfxCertificate cmdlet then exports the certificates in PFX format, making certain the safety of delicate data.
- Moreover, the script creates a CER file containing the Base64-encoded illustration of the certificates utilizing Set-Content material. This step facilitates compatibility with varied methods and companies.
In essence, this script streamlines the creation and export of self-signed X.509 certificates, offering a seamless method to improve safety in IoT environments. The generated certificates will be simply built-in into IoT options, making certain safe communication channels between gadgets and companies. This automated strategy considerably simplifies the in any other case intricate technique of certificates era, catering to the calls for of scalable and safe IoT deployments.
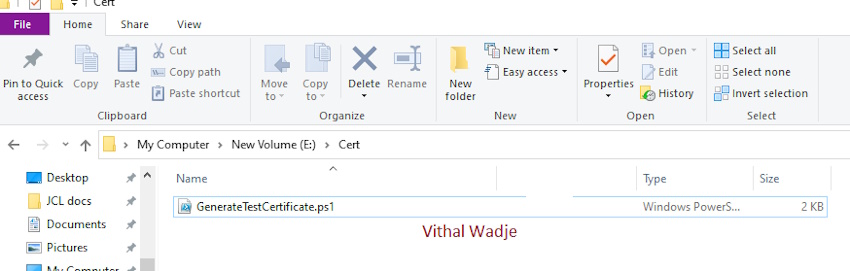
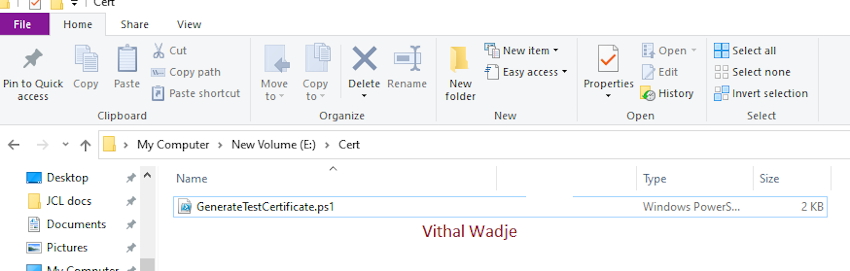
Now save the above file in your machine primarily based in your appropriate location. I’ve saved the file on my E drive within the Cert folder, which appears like this.
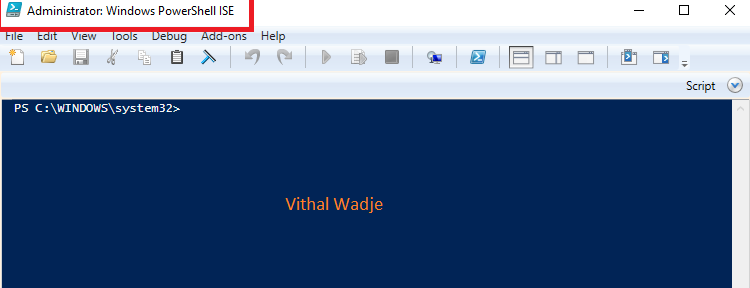
Step 2. Launch the PowerShell Built-in Scripting Setting (ISE)
Proceed by opening the PowerShell ISE command immediate in administrative mode to make sure elevated privileges for seamless execution.
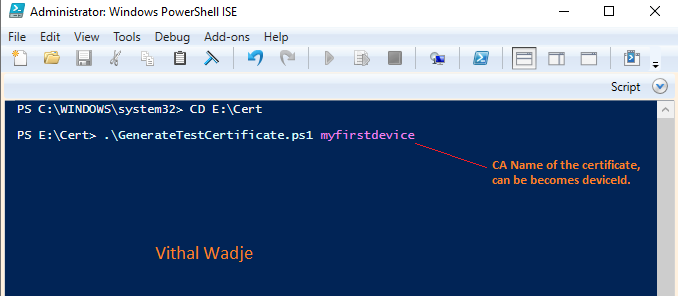
Step 3. Navigate to the Listing
Replace your present listing to the placement the place your generated take a look at certificates PowerShell file resides. On this information, the file is located throughout the Cert folder on the E Drive. Alter the listing path accordingly to match your particular file location.
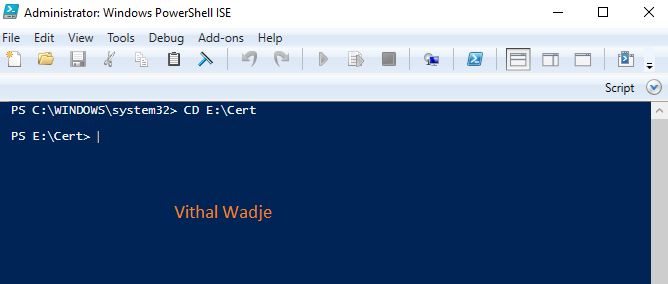
Within the previous picture, the CD command is used to set the trail to the Cert folder, the place our PowerShell script file is housed. This ensures that subsequent instructions and operations are executed throughout the designated listing.
Step 4. Import the GenerateTestCertificate.ps1 File
As illustrated within the following picture, execute the command to load the GenerateTestCertificate.ps1 file, making certain that you simply present the required parameter, which serves because the CA (frequent title of the certificates). Internally, this parameter will be utilized because the DeviceId for the IoT gadget. Adhere to the exact command syntax displayed within the picture for correct execution.
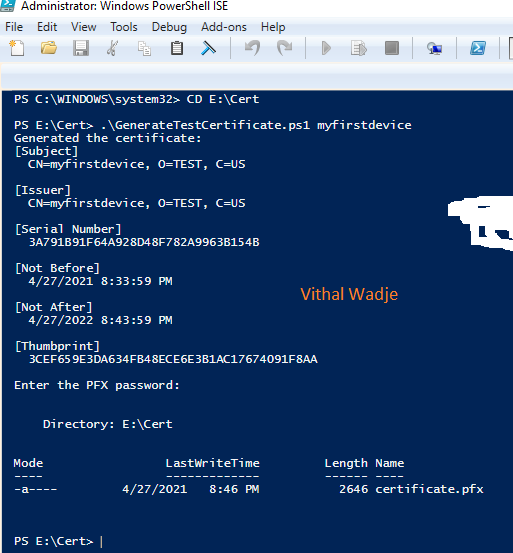
Upon getting entered all the small print as displayed within the picture, press the Enter key in your keyboard. This motion will immediate the next display screen. Enter the password for the PFX certificates, making certain to recollect this password, as will probably be essential throughout the provisioning of the gadget on the IoT Hub.
Upon coming into the designated password, proceed by clicking both the enter key or the OK button, as illustrated within the previous picture. As soon as the certificates era course of is efficiently accomplished, pertinent particulars might be displayed on the PowerShell command immediate on your reference.
Two certificates have been generated via the aforementioned course of, leading to a password-protected PKCS12-formatted file named certificates.pfx and a public key certificates file named certificates.cer, each of those certificates information are conveniently saved in the identical location as your GenerateTestCertificate.ps1 file. To find these information, navigate to the “cert” folder in your E drive, the place you’ll discover the aforementioned certificates.
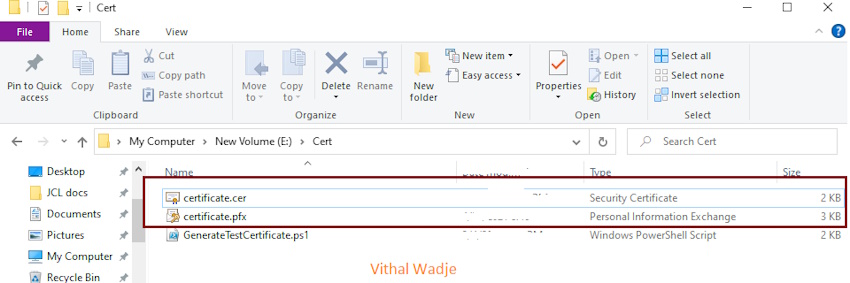
As you see within the previous picture, the X.509 self-signed certificates have been efficiently generated. These certificates serve distinct but essential roles: the password-protected PKCS12 formatted file named “certificates.pfx” and the general public key certificates file named “certificates.cer.”
Each certificates play integral roles in authenticating a singular gadget. The general public key certificates is employed for enrolling the gadget on the Azure Machine Provisioning Service, whereas the password is protected.Pfx file (certificates.pfx) is accountable for gadget identification and provisioning on the IoT Hub. Collectively, they type a sturdy authentication mechanism to make sure the safe and seamless integration of the gadget throughout the designated ecosystem.
Notes
- The certificates created utilizing this course of are designated for testing functions solely.
- Strictly keep away from deploying these certificates in a manufacturing setting.
- For manufacturing necessities, it’s extremely beneficial to buy certificates from the respective gadget certificates authority.
Abstract
I hope that from the previous rationalization, you have got discovered methods to create the X.509 take a look at certificates. In my subsequent article, we’ll discover the method of enrolling an X.509 gadget on the Azure Machine Provisioning Service and provisioning the gadget on the Azure IoT Hub. In the event you encounter any challenges or have questions throughout the certificates era course of, be happy to make use of the remark field to hunt help. I sit up for addressing your queries and guiding you thru the upcoming article on gadget enrollment and provisioning within the Azure ecosystem.
Associated Articles
Know extra about our firm at Skrots. Know extra about our companies at Skrots Companies, Additionally checkout all different blogs at Weblog at Skrots