Introduction
Azure is a cloud service supplier developed by Microsoft. It offers many providers for software program builders, and one among these providers is “Digital Machines”. Digital machines are created just about in Azure clouds, they usually appear like a standard pc.
Azure can present many digital machine photos in our cloud platform. So, it simply deploys our digital machine inside a couple of minutes.
By studying this text, you’ll learn to create and join a digital machine utilizing the Azure cloud.
Conditions for creating digital machines
Software program Necessities
- Azure cloud account
- Edge or different browsers
- RDP software program
- Steady web connection
Create a Digital machine
Step 1
Step2
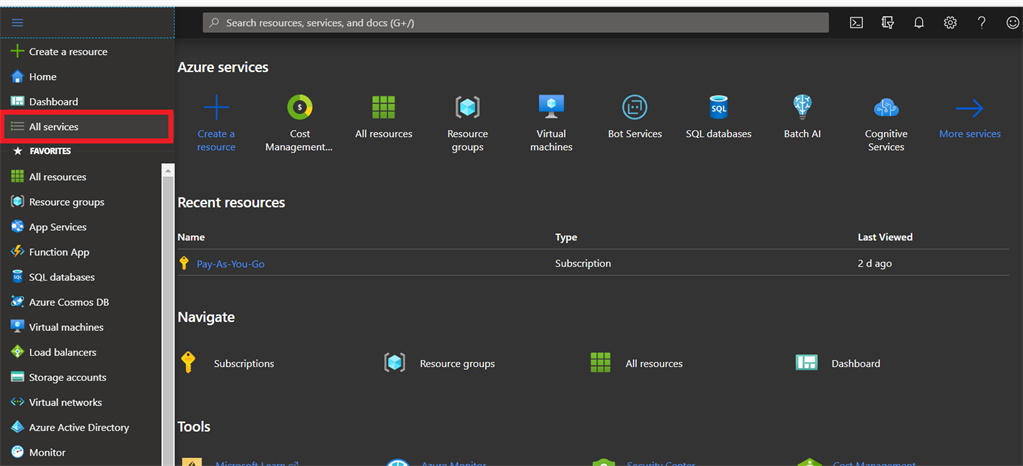
Within the left aspect navigation pane, click on “All Companies”.
Step 3
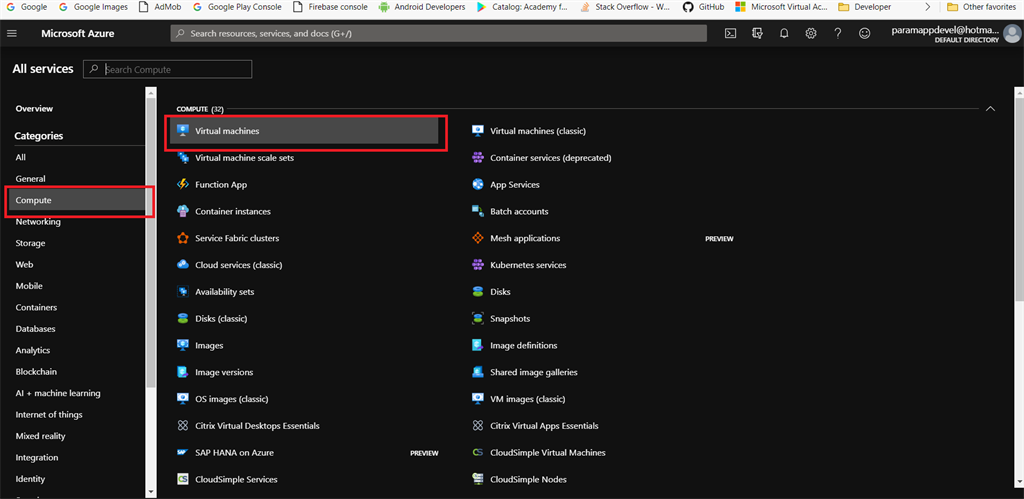
In all providers web page, you possibly can choose “Compute” after which click on the “Digital Machines”.
Step 4
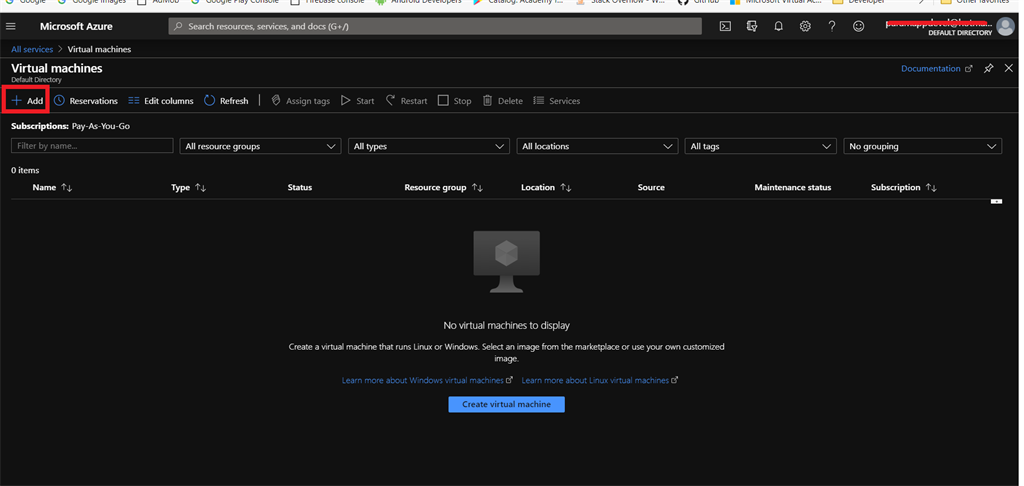
Now you’ve gotten entered the Digital machine web page. Then after clicking the “Add” button we are able to enter in “Create a digital machine web page”.
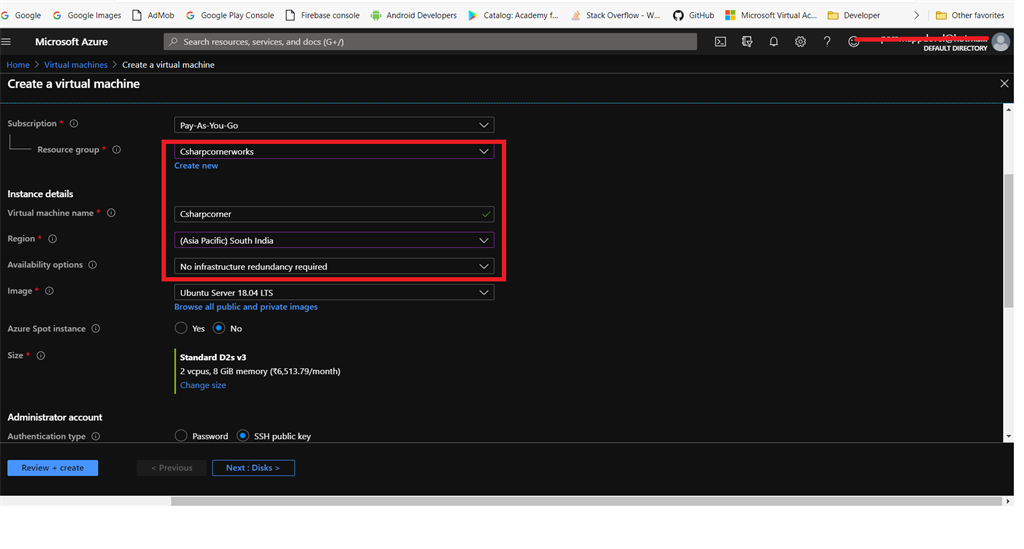
Step 5
- Choose your Subscription plan.
- Select your “Useful resource Group”. In case you are not creating any sources in your Azure account, learn my earlier article to “Creating Useful resource group in Azure cloud”.
- Underneath the occasion particulars give our digital machine identify and area.
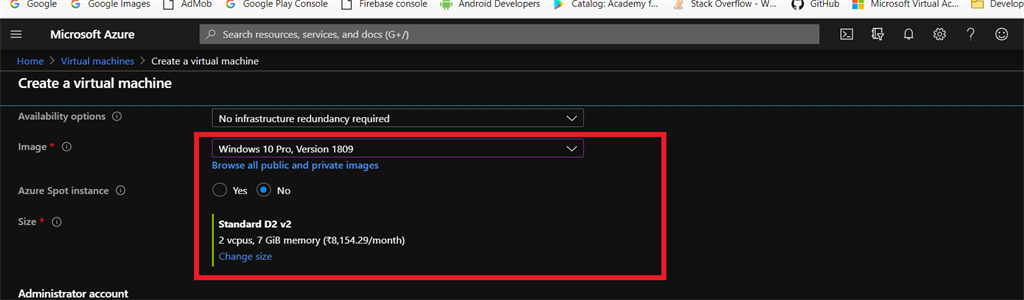
Step 6
Subsequent, select a picture for our digital machine, we are able to choose “Home windows 10 Professional 1809” after which choose “measurement” of our machine. We will choose (2 Vcpu`s and 7GB RAM).
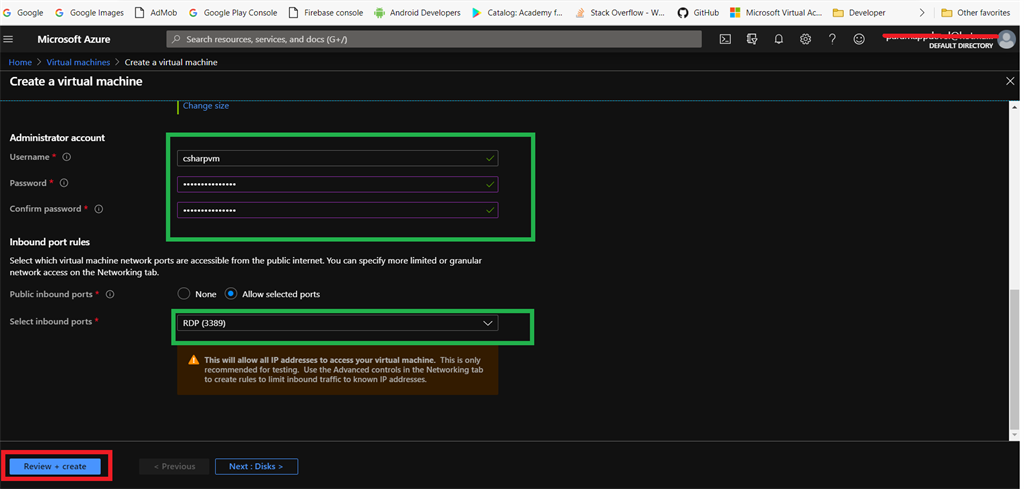
Step 7
Subsequent, give your username and password to your digital machine. Lastly choose inbound ports as “RDP 3389” after which click on the “Evaluate + Create” Button.
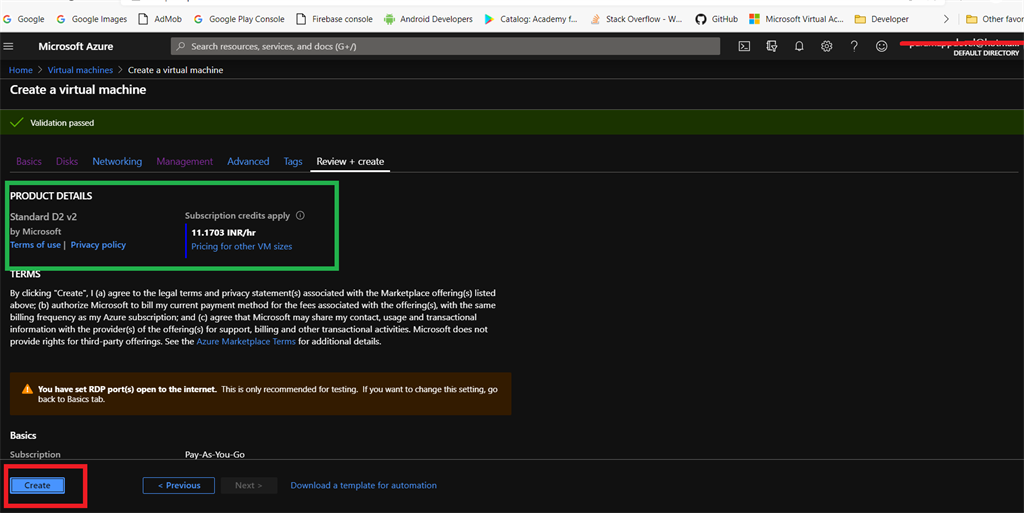
Step 8
Within the subsequent web page, a “Validation handed” message seems and your product particulars are displayed as value/hour. Click on the “Create”button and your digital machine is created inside 5 minutes.
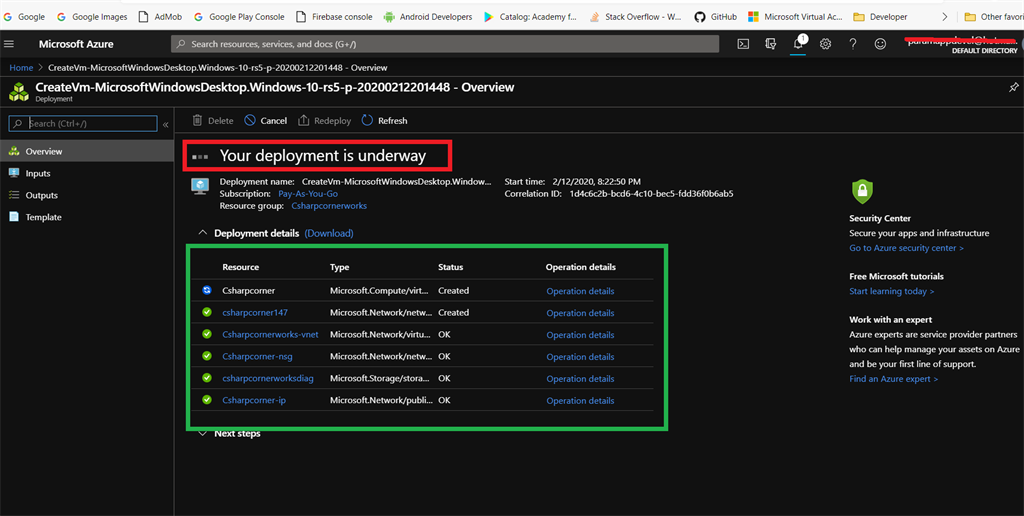
Step 9
Your digital machine is below deployment, watch for a couple of minutes and your deployment shall be full.
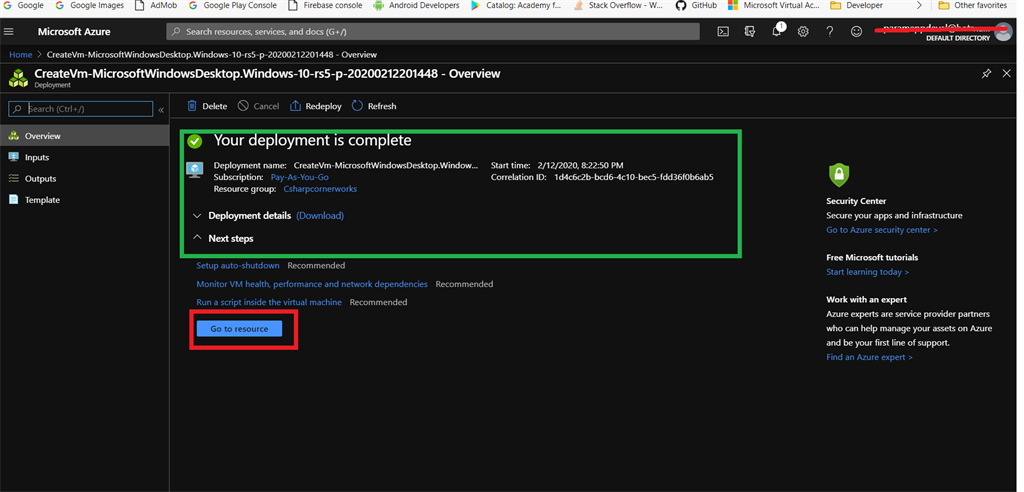
Step 10
After your deployment is full, click on the “Go to Useful resource” button and go to the digital machine dashboard web page.
Home windows digital machine is prepared :). Let’s join our digital machine to the native pc.
Join Digital Machine utilizing RDP Software program
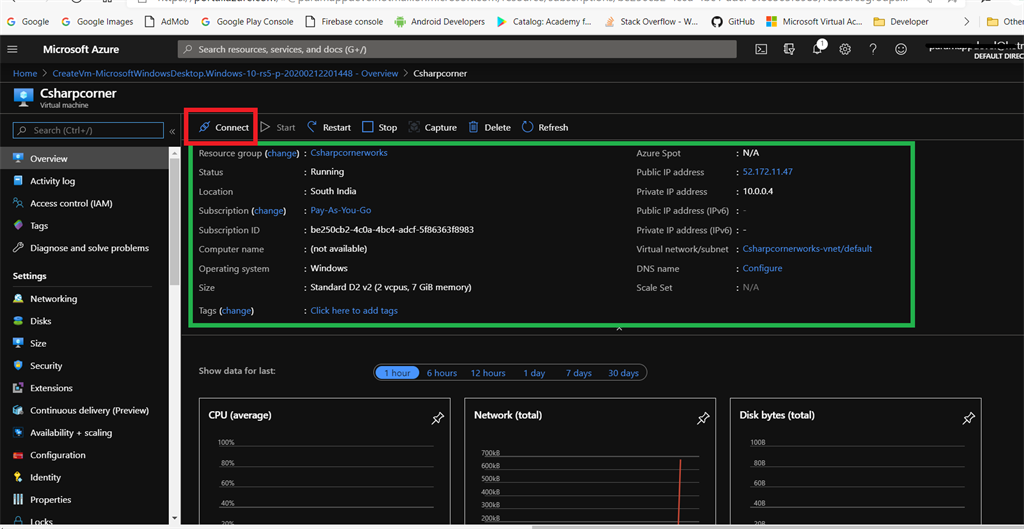
Step 1
Now you possibly can click on the “Join” button on the high of the digital machine dashboard web page.
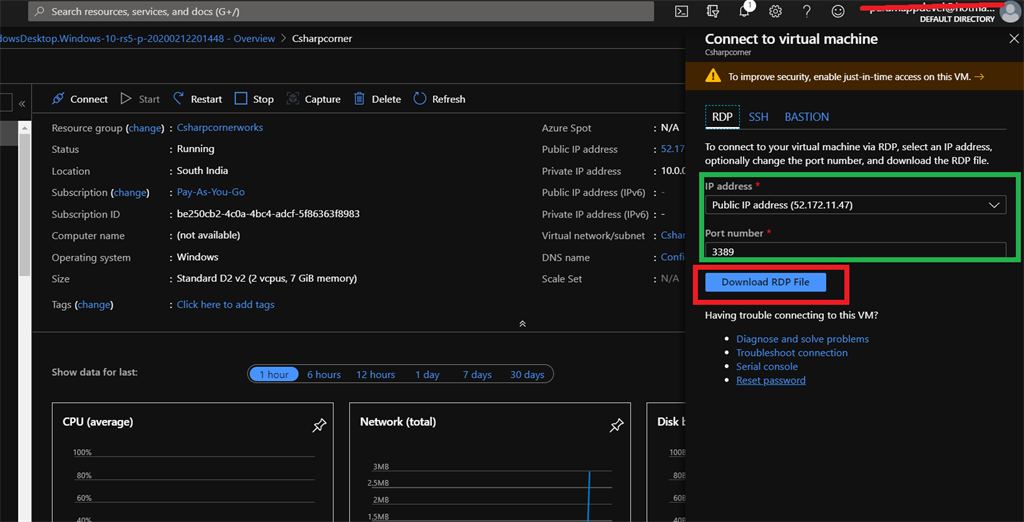
Step 2
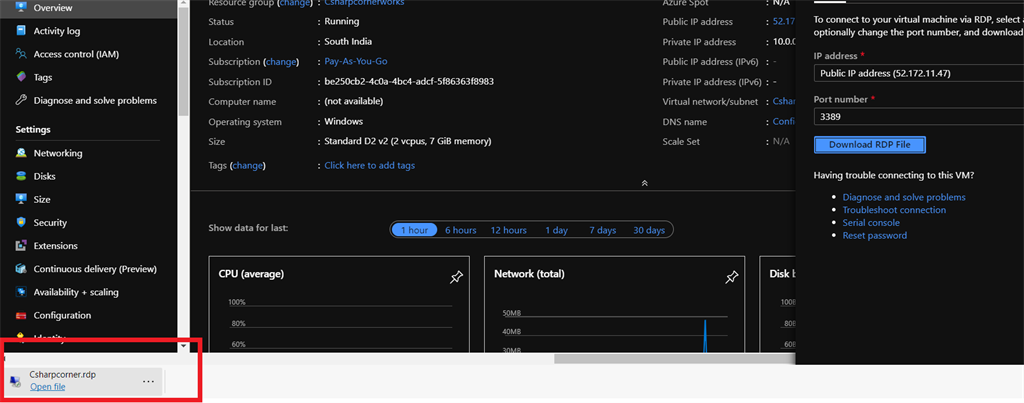
Afterwards, “Hook up with digital machine” pane has opened on the appropriate aspect of the digital machine web page. Your digital machine IP handle and port quantity shall be displayed.
Click on the “Obtain RDP File” button. Your RDP file shall be downloaded by the browser.
Step 3
Click on to Run the downloaded RDP file.
Step 4
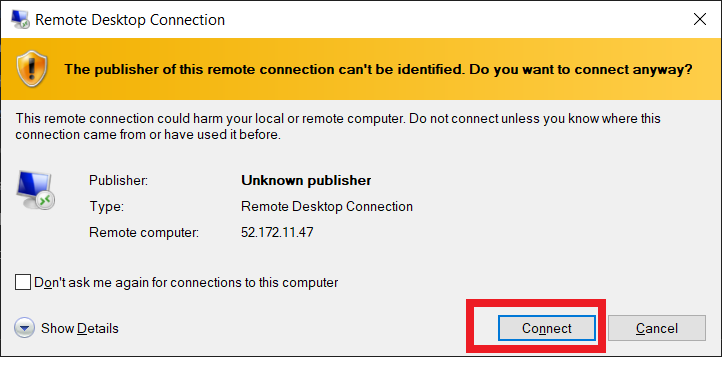
After you run the file, RDP prompts you to attach with the digital machine. Click on the “Join” button.
Step 5
Subsequent, enter your digital machine username and password (these credentials are given throughout Digital machine creation). Click on “Okay”.

Step 6
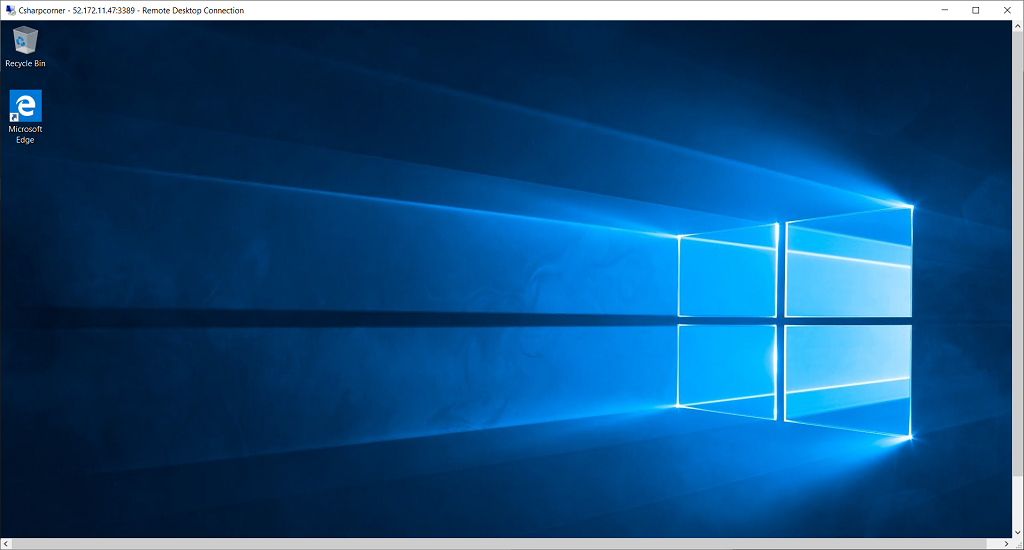
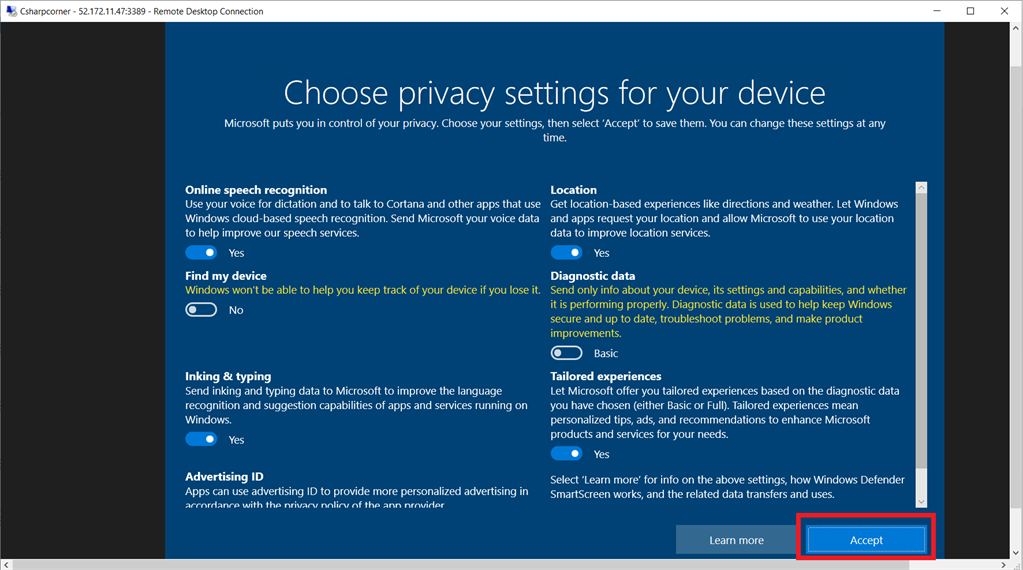
Our digital machine is linked by RDP. Click on the “Settle for” button. Your home windows digital machine is able to work.
Abstract
Lastly, we efficiently created and linked a “Home windows Digital machine” utilizing Azure cloud.