Hello everybody. I hope everyone seems to be protected.
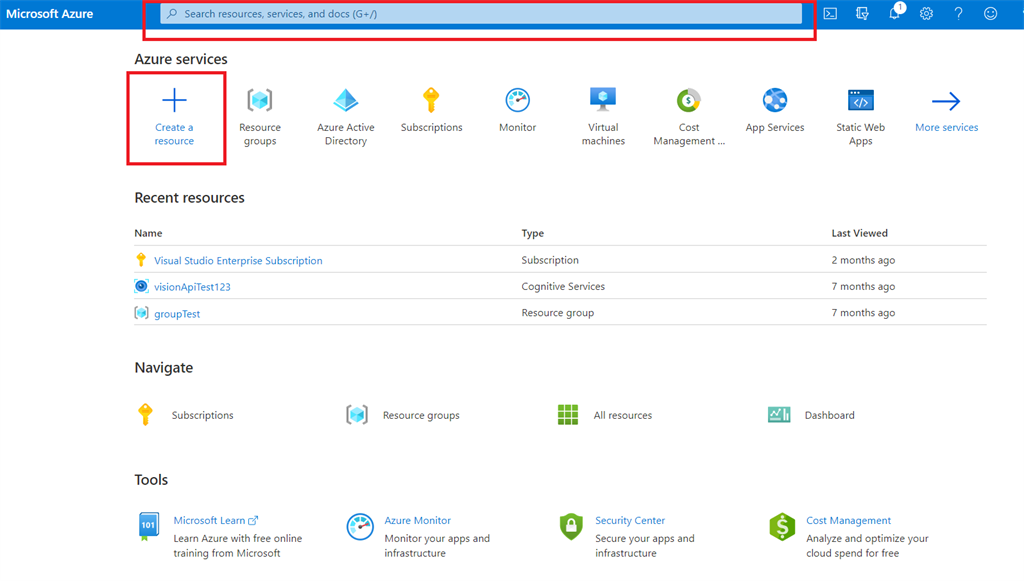
To create home windows digital machine you can both click on on create a useful resource with the plus button,
and click on on Compute and Click on on Digital Machine.
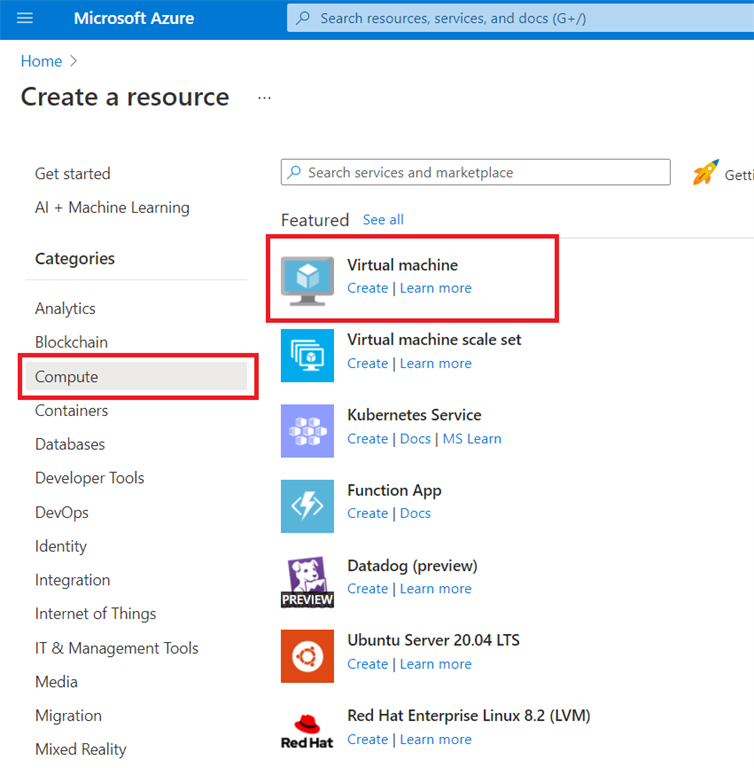
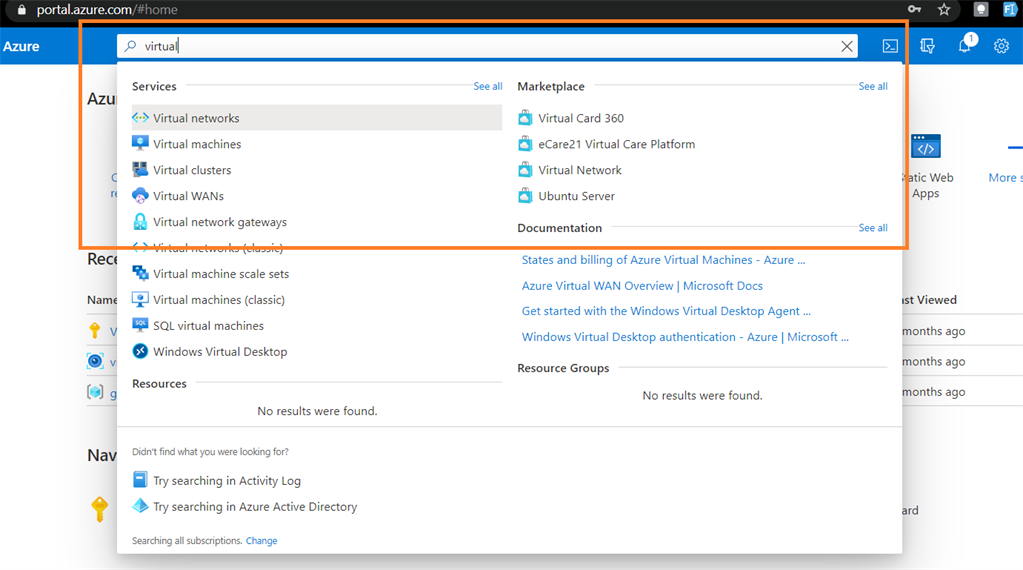
Otherwise you may seek for the digital machine within the search bar. And from there you may create home windows digital machines or some other digital machines you want, however on this article, we’re specializing in Home windows digital machines.
So there are alternative ways that you may go in regards to the creation of an Azure digital machine, so let’s go and create a brand new window digital machine. So I’m going to click on on the plus button and select the digital machine after which So over right here, you are actually, introduced with a wizard that may assist with the method of making a digital machine. That is the form of questionnaire I really feel. So allow us to go and do it step-by-step. So right here we have now completely different classes that we have now to fill as much as create the machine.
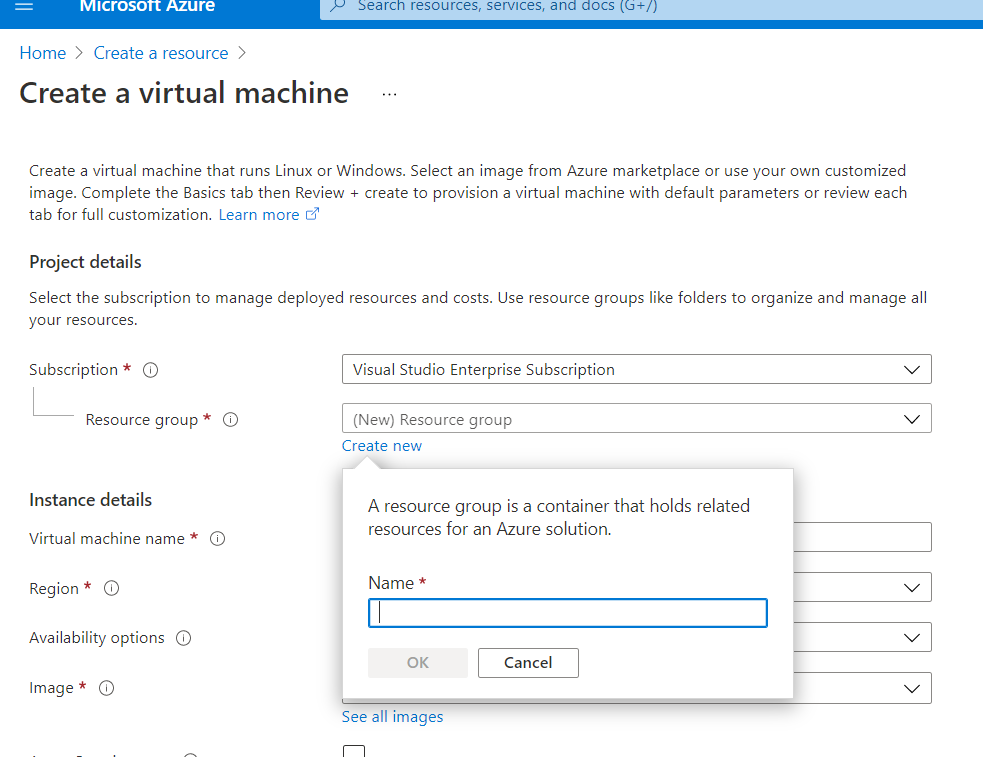
So allow us to full the Fundamental class.
Select your subscription.
So I have already got a subscription and that is used for billing functions. Now select a useful resource group and if you do not have one you then’ll all the time have the choice for creating a brand new one by clicking the brand new button over right here.
So why the useful resource group?
The useful resource group is used for the logical grouping of assets.
Give a reputation for the machine.
You need to give a reputation for the machine, so I’m giving it as a demo VM.
Now determine the situation.
You need to determine what’s the area or location for the digital machine as a result of.
Azure has a number of areas internationally that you may select on your assets. And that is to get the least latency for information switch and different components. There are restrictions in Azure for areas for instance in case you’re utilizing an Azure free account you won’t be capable of select a digital machine.
Select availability.
I’m going to decide on no infrastructure redundancy required which is the default.
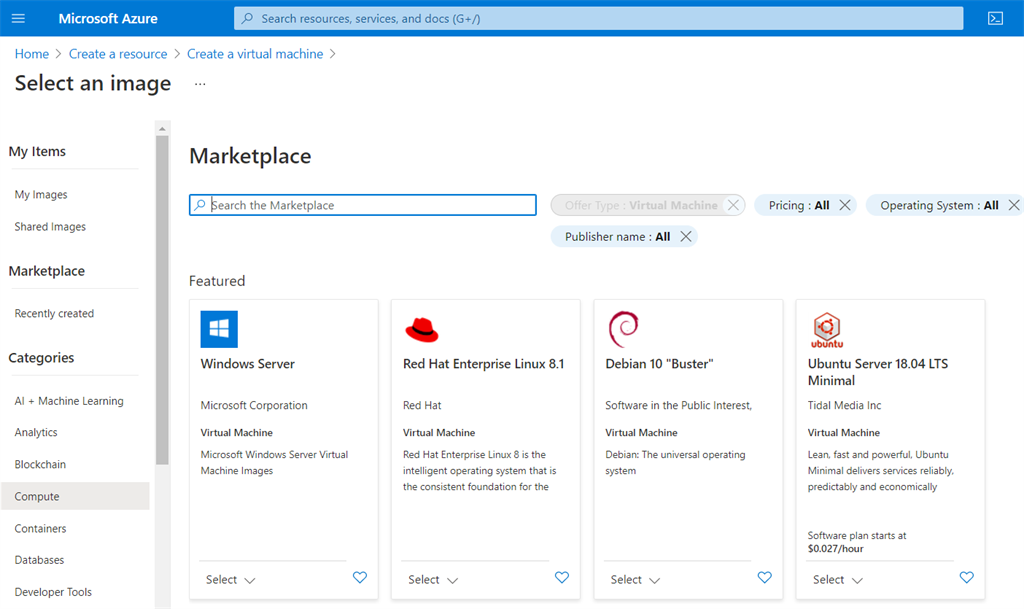
Select Picture.
This would be the OS on your digital machine so I’m selecting Home windows server 2019 information middle however if you wish to select one thing else you may browse for private and non-private photos.
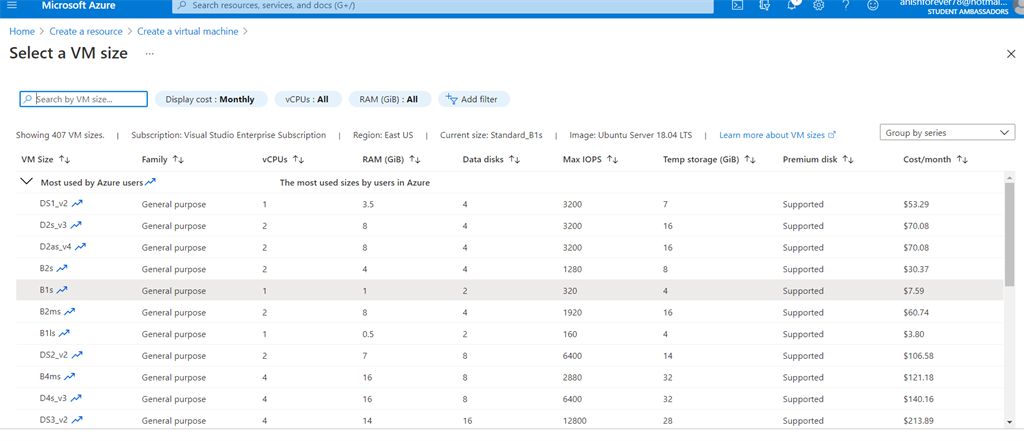
Now, it can assign me the dimensions which is customary underscore D2 below scope V2. Meaning it can allocate me two digital CPUs, 7GB of RAM however if you wish to change the dimensions you may.
So based mostly on this measurement configuration, it’ll allocate two digital CPUs and 7 gigs of reminiscence. So you may see an estimated value monthly. Now, if you wish to exit and alter the dimensions of the machine, you may exit and click on on see all sizes and it’ll present you the no of CPU, Dimension of the RAM, and estimated value monthly so select whichever is appropriate for you and I’ll depart it default.
Give person identify and password.
Subsequent, we have to exit and provides what’s the username and password. That is for the administrator login. now enter the password and there are some restrictions for the password. So it’s a must to be sure that it has at the least one lowercase character, one uppercase character, , one quantity, or one particular character.
Inbound port guidelines.
I’ll depart it to default. What this port rule will do is that it’ll truly go forward and permit us to attach or RDP into the occasion.
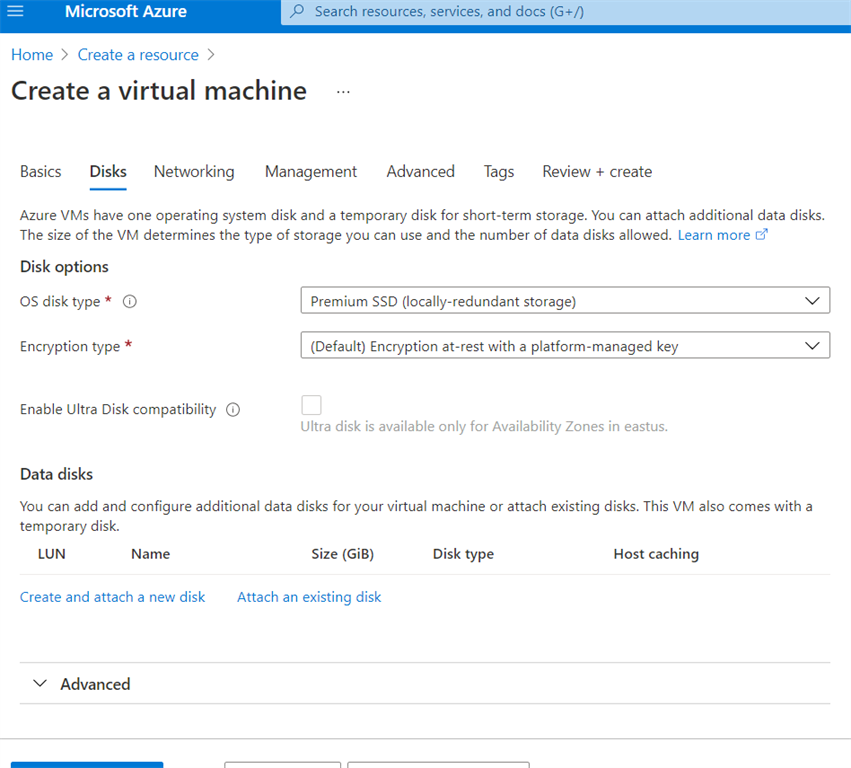
Disk
Now, I am going to go on the subsequent for the disk. That is the underlying disk or the volumes that can be connected to the machine. Now, by default, it’s assigning me a disk of normal SSD and this would be the OS disk. So that is going to be the OS quantity.
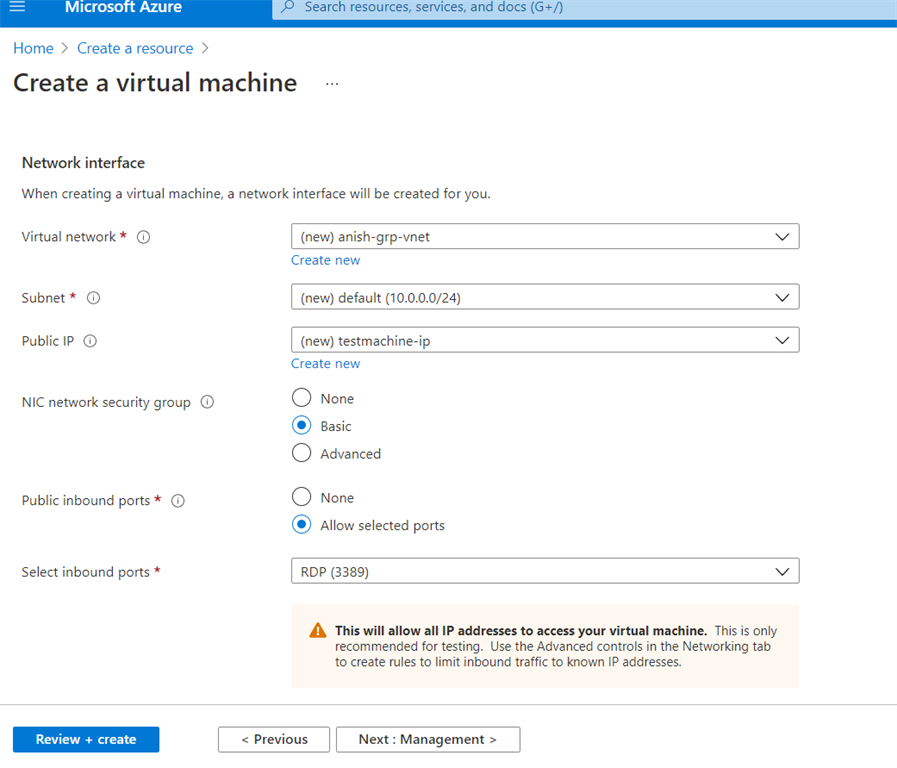
Community
By default, this wizard will even create a New Azure digital community. So if you do not have a digital community it will create a brand new digital community, as a result of VM must be a part of a community.it can create a brand new subnet inside the digital community a public IP deal with.
Why public IP?
This permits connectivity to this machine from the Web. Once more, let me go forward and depart every thing as it’s.
Click on on the Subsequent for Administration and depart every thing as it’s and for now depart every thing as it’s.
Click on on the Subsequent for Advance and depart every thing as it’s and for now, depart every thing as it’s.
Click on on the Subsequent for Tages and assign tags.

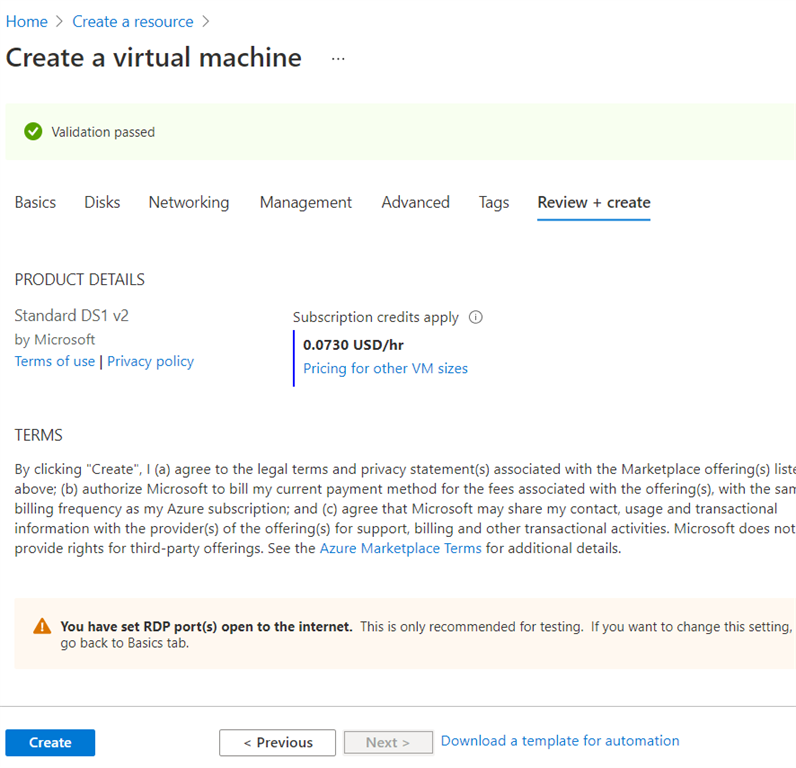
Click on Subsequent for Evaluate and Create.
So over right here you may evaluation the entire settings you are specifying for the creation of the digital machine. over right here the essential factor to notice is that what you’re going to be charged per hour And if every thing is OK, we create.
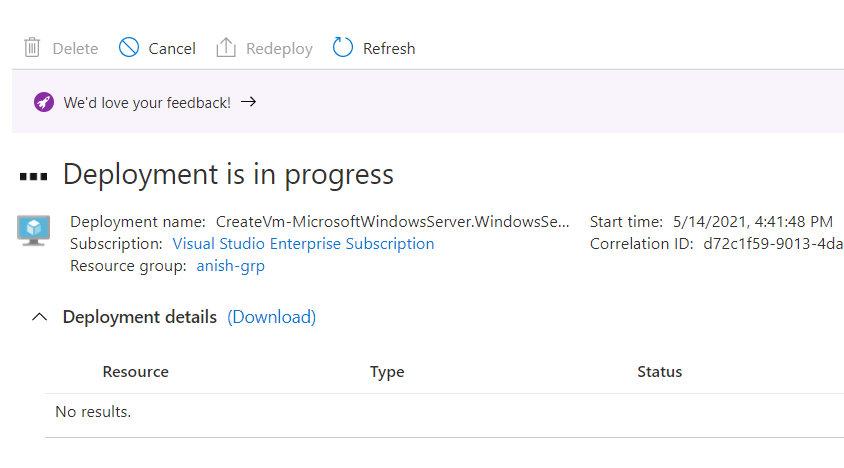
Now, this would possibly take round 4 to 5 minutes. You will note deployment is in progress.
After a while you will notice the beneath display and that confirms that deployment is profitable and the digital machine is prepared and together with this additionally, you will get a notification.
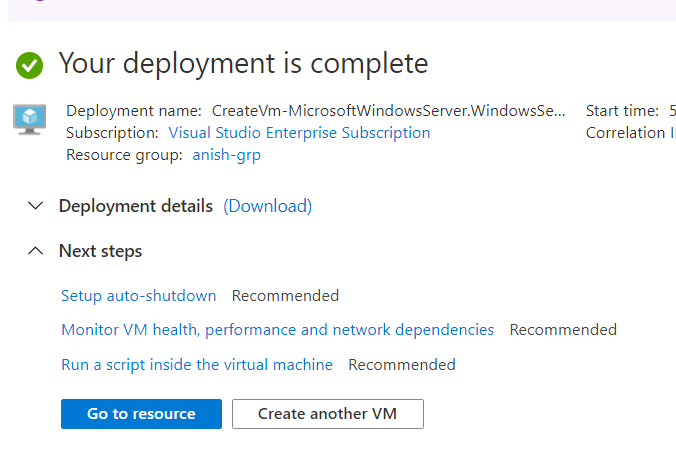
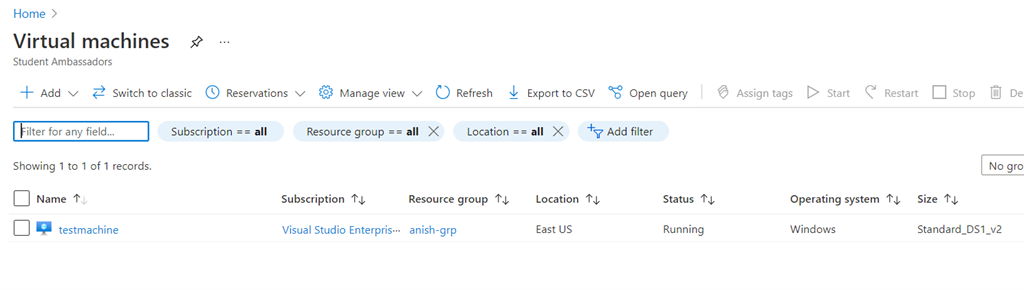
Now if you’ll click on Go to useful resource button then you will notice the checklist of the digital machines.
That is it for this text. So on this article, we discovered learn how to create the digital machine on Azure. Subsequent, we are going to see learn how to join and use the digital machine.


