Let’s Dive into Continuous Deployment🚀 with Azure DevOps Pipelines🌈 and .NET Project
Hey there! Before we get into the nitty-gritty of this article, it’s essential to brush up on Azure DevOps. If you missed the previous articles, no worries, you can find them below.
If you want to understand Continuous Integration and how to set up Azure DevOps Pipelines for CI in a .NET project, check out my previous article.
This post is an extension of my earlier write-up on Continuous Integration with Azure DevOps Pipelines and the .NET Project. If you’re new to this topic, I encourage you to read my previous article on CI.
Now, let’s dive into setting up a pipeline for continuous deployment.
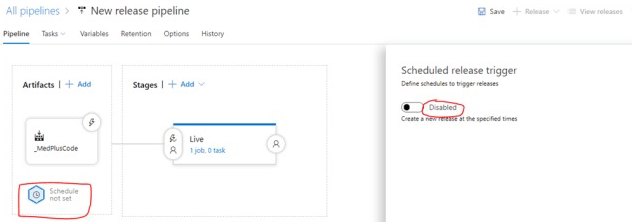
Step 1. Pipeline
There are three ways to trigger the release:
- Set a specific date, time, or day
- Start when changes are checked in
- Trigger manually.
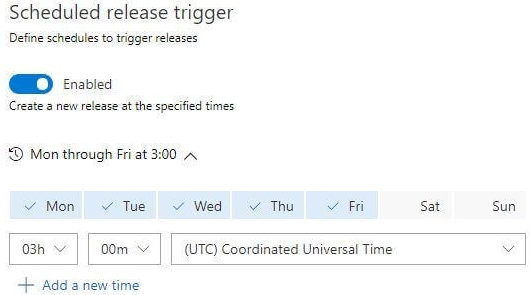
- Choose the scheduler, enable the trigger, and if you want to set a specific day and time, simply provide the necessary timings.
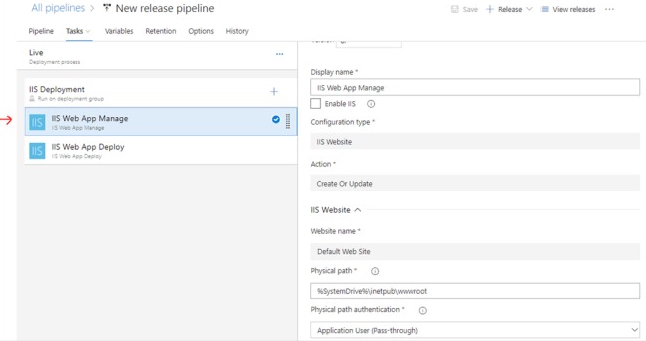
Step 2. Tasks
With the IIS Deployment template selected, there are specific tasks and configurations to complete, as outlined below.
- IIS Deployment
- IIS Web App Manage
- IIS Web App Deploy
Let’s go through and set up each task one by one.
IIS Deployment
IIS Web App Manage
- Configure the web app details here, such as the website name or the physical path for the web application folder.
- For instance, my default website physical path was C:inetpubwwwroot. This path needs to be specified in the physical path text box.
IIS Web App Deploy
- In this tab, specify the package or folder details. Essentially, you need to provide the latest package or zip files from Continuous Integration, so the agent can copy and deploy those files to the designated location.

- After this setup, you can manually create the release for testing and verify the deployment.

Step 3. Variables Setup
Variables provide an easy way to inject crucial data into different parts of the pipeline. You have predefined system variables and the option to create your custom variables based on your requirements. For more insights, check here.

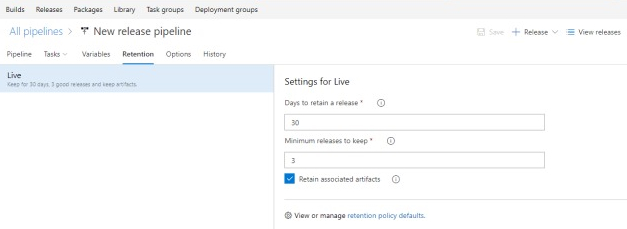
Step 4. Retention Policy
The Retention Policy assists in maintaining a history of your recent releases. You can set the number of days to retain the history.
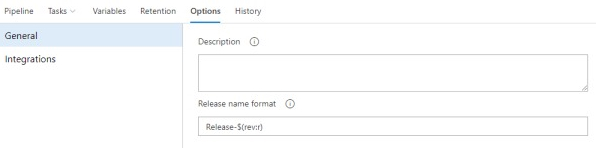
Step 5. Release Naming
You have multiple options to manage the format of the release name.
Step 6. Release and Deployment
History
Following the deployment, you can easily check the history encompassing changeset details like change type, comments, date & time of the change, user behind the change, and other relevant info whenever needed.

I hope you found this article insightful! Feel free to drop your feedback or comments in the section below.
If you’re keen on exploring more about Azure DevOps, check out the upcoming articles in this series listed below.
Explore more about our company at Skrots. Find detailed insights into our services at Skrots Services. Also, don’t forget to browse through our other engaging blogs at Blog at Skrots. Thank you for being with us on this learning journey!


