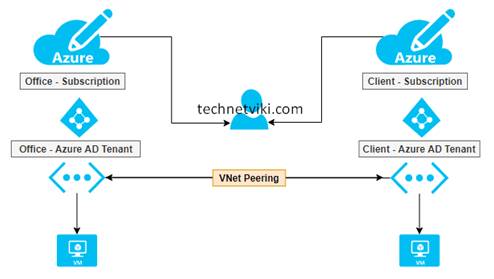
On this article, we’re going to find out how can we implement VNet Peering throughout completely different Azure Lively Listing Tenants. VNet Peering means that you can join two digital networks created by utilizing completely different deployment fashions.
Usually we’re utilizing a VPN gateway for connecting completely different subscriptions from Digital Community to Digital Community. On the similar time, we will use VNet Peering to attach digital networks in the identical Azure subscription or completely different subscriptions, so long as they share the identical Azure AD tenant.
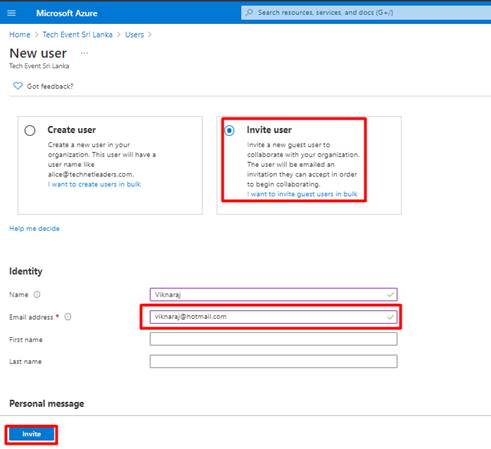
Earlier than configuring the VNet peering we have to add the Consumer AD Tenant consumer to our Azure AD, so invite them utilizing the Azure AD.
Step 1
Within the Azure Lively Listing, choose the Customers beneath the administration, within the Customers web page Click on + New consumer, then choose Invite consumer lastly enter the consumer e mail tackle and click on the Invite button.
Step 2
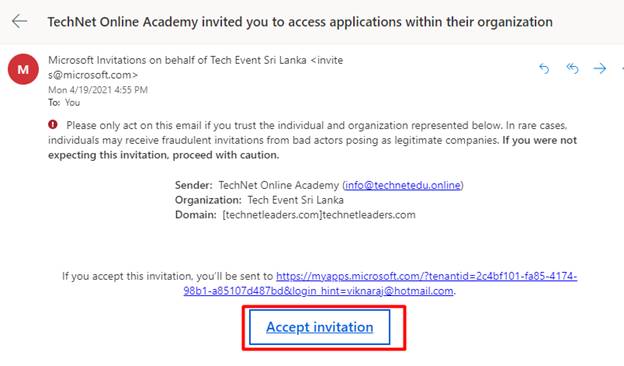
Within the consumer e mail, we will discover that the Azure AD initiation, so click on Settle for Invitation.
Step 3
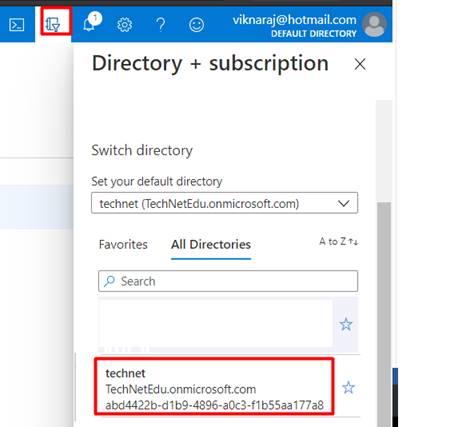
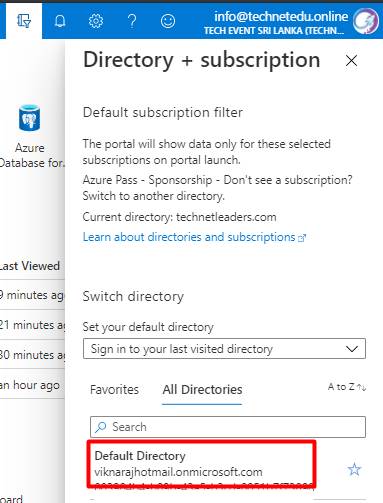
After accepting the Invitation, Signal out of the Azure portal and Register Once more, we will now discover the brand new listing added to our Azure portal.
Step 4
Repeat the identical course of (Step 1 to Step 3) for an additional Azure AD Tenant.
Step 5
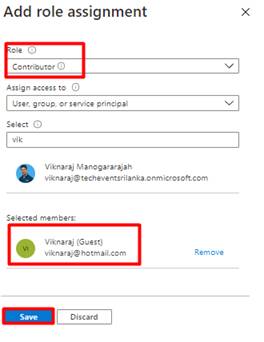
Now we have now to assign permission to the Invited customers. Within the Azure Useful resource Group create the Function task utilizing the Entry Management (IAM), choose the position like Contributor or Community Contributor, after which choose the consumer and click on Save.
Step 6
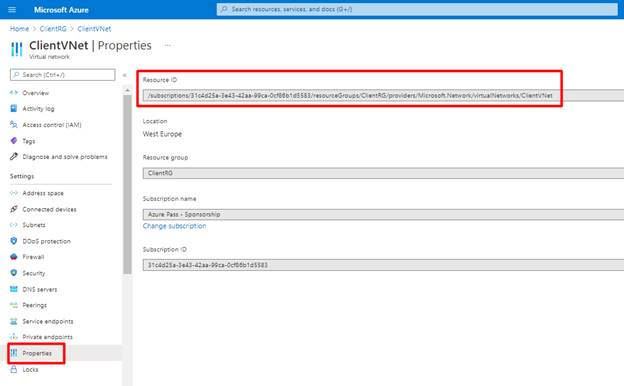
To gather the useful resource ID for including the VNet peering, to discovering the Digital Community Useful resource ID, go to the Digital Community and click on Properties, within the properties web page yow will discover the Useful resource ID.
Step 7
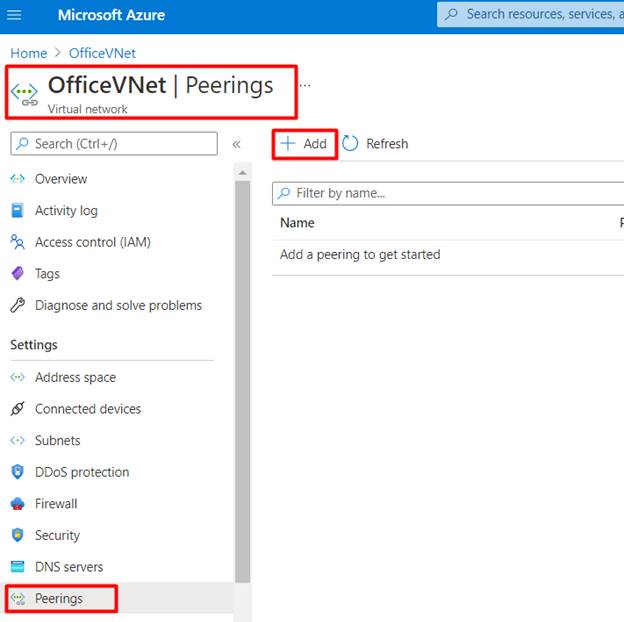
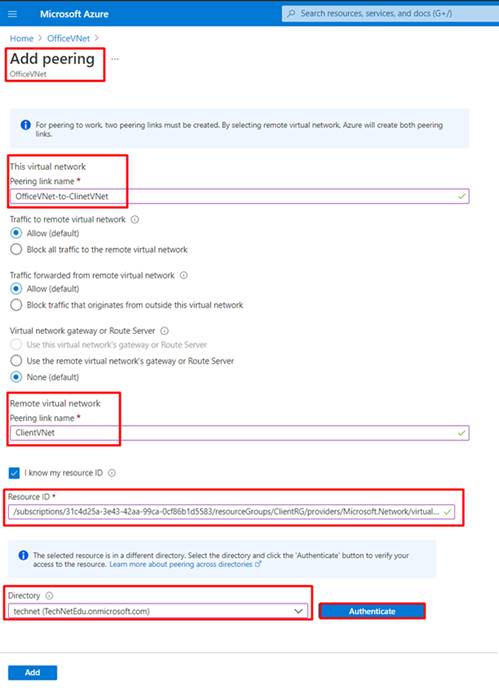
Open the Digital Community “OfficeVNet” and Choose the peering beneath the Settings, after which click on + Add.
Step 8
Within the Add, peering web page, enter the peering hyperlink identify, and enter the Distant digital community identify.
After that Choose, I do know my useful resource ID, after which enter the Useful resource ID, after coming into the Useful resource ID (Step 6, we have now copied the useful resource id) you may capable of finding the Listing, choose the Distant Azure Listing, and click on Add.
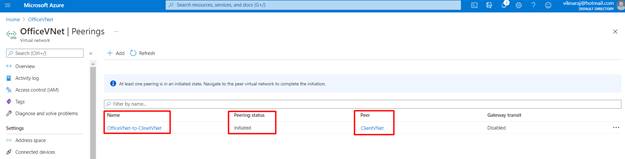
Step 9
Within the peering part, we will be verified that the peering standing is “Initiated” as a result of we should repeat the identical settings on the Consumer-side.
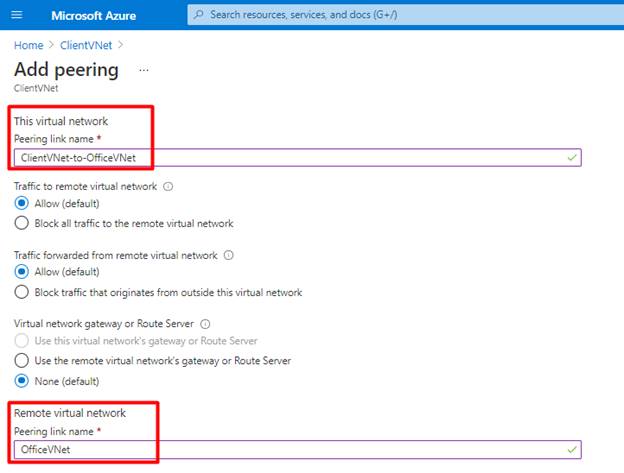
Step 10
Repeat the identical steps (Steps 6 to Steps 8),
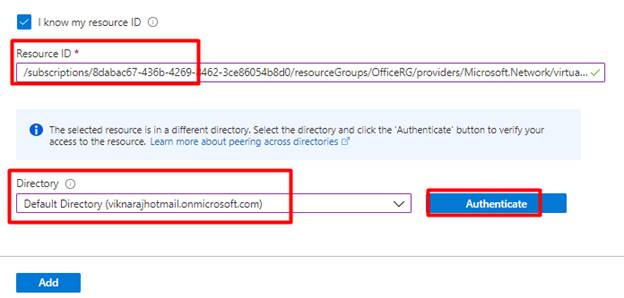
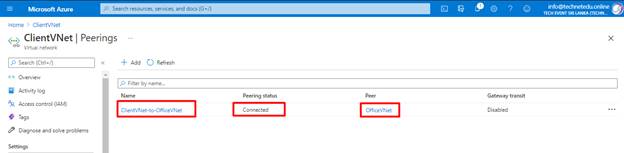
Step 11
Lastly, our VNet peering has been related to each side.

Abstract
On this demo, we have now discovered the right way to configure VNet peering within the Totally different Azure Tenant, when you have any questions be happy to remark beneath this text.


