Angular 10 Undertaking In Azure DevOps CI/CD With Azure Repos or GitHub And Internet hosting In Azure App Service – Half Three
Introduction
On this article, we’ll perceive methods to use Azure Repos, CI/CD utilizing Pipeline in Azure DevOps, Internet hosting the identical in Azure App Service. We are going to create an Angular 10 challenge from scratch and carry out all of the steps. That is an end-to-end demo explaining the steps intimately, from creating an Angular challenge in VS Code to managing the supply code in Azure DevOps and performing CI/CD to deploy the identical in Azure App Service. We are going to use the present Azure portal settings which have modified over time.
Conditions
- Full Half 1 and Half 2 of the article earlier than beginning this.
- 1 Hr. of your targeted time is required to finish all three components.
Your complete demo is split into three articles, please discover the main points under:
Let’s proceed with Part 5,
Configure CI/ CD for the Undertaking by integrating Azure DevOps with Azure App Service
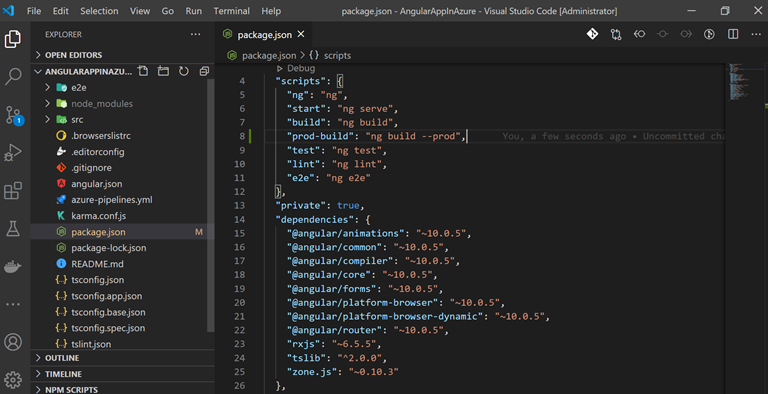
- Earlier than making a Pipeline in Azure, lets shortly add the manufacturing construct command within the angular challenge we created early on.
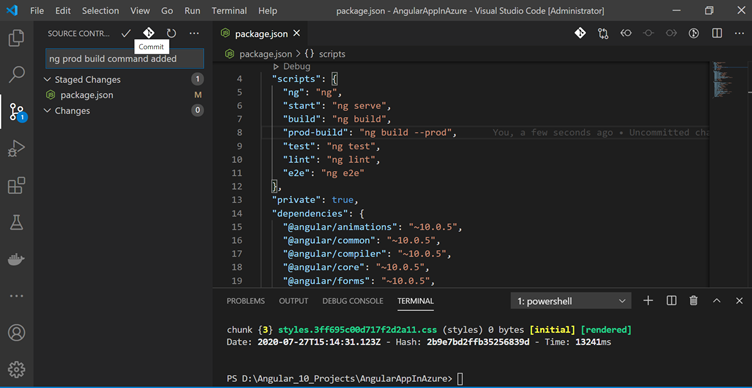
- Open the Undertaking in VS Code and open package deal.json file and add the command “prod-build”: “ng construct –prod”, as proven under:
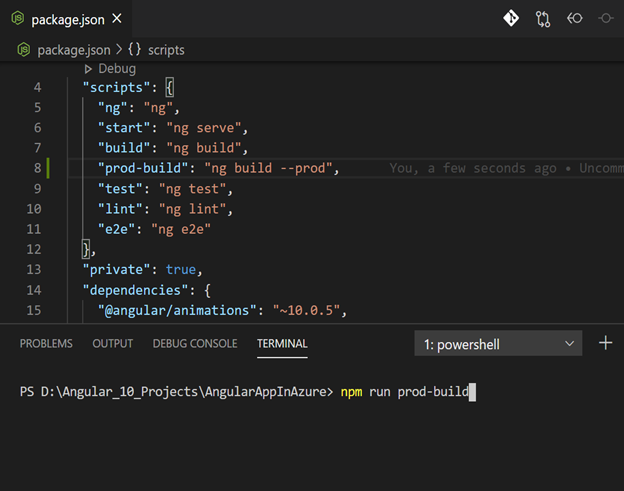
- Run the prod construct command within the terminal, as proven under, to know the place the deployment recordsdata are created.
- Open the Azure DevOps account the place we added our supply code earlier within the demo.
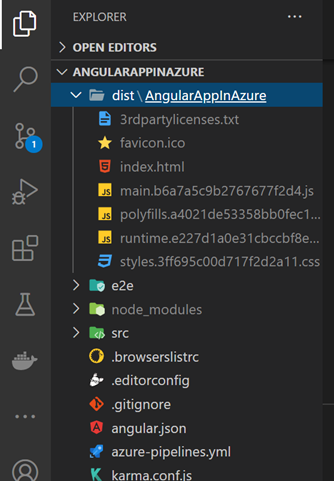
- After the construct was profitable, you will discover the deployed recordsdata within the distAngularAppInAzure folder as proven under. In your case, it will likely be your challenge identify.
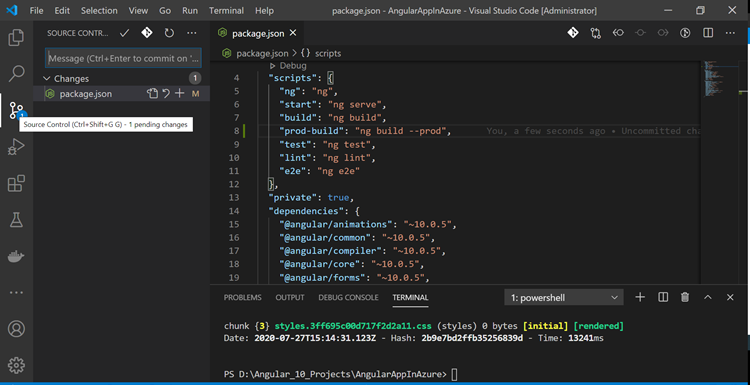
- Stage, commit and push the adjustments to our distant repository to which our code is linked.
- Click on the Supply Management choice as proven under
- Click on + icon to stage and after that present remark and click on the tick icon to commit the adjustments as proven under
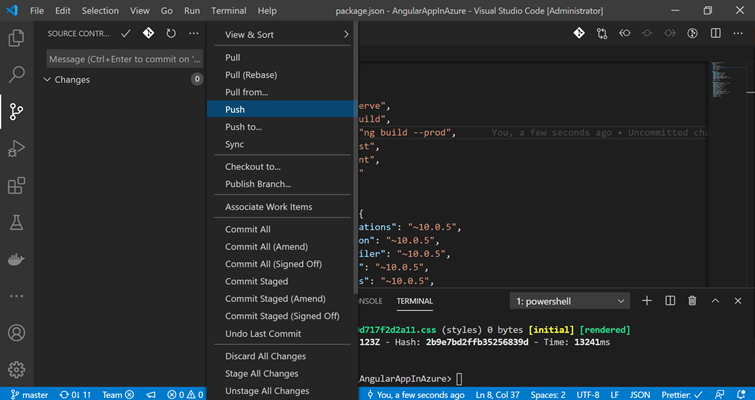
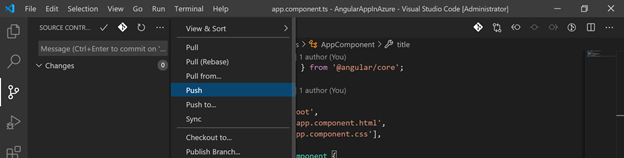
- Subsequent, is to push the code to your distant repository as proven under, click on … icon and push the code.
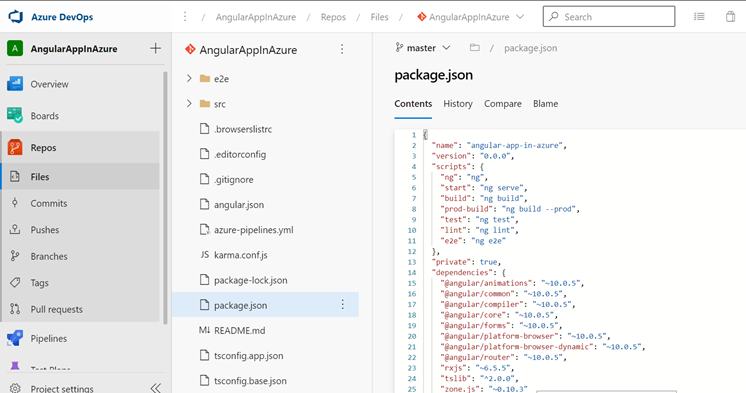
- We will confirm the pushed code by opening the package deal.json file in distant repository and see the adjustments reflecting as proven under,
- Now, it is time to configure CI/CD in Azure DevOps. Open Azure DevOps and Click on Pipelines choice as proven under
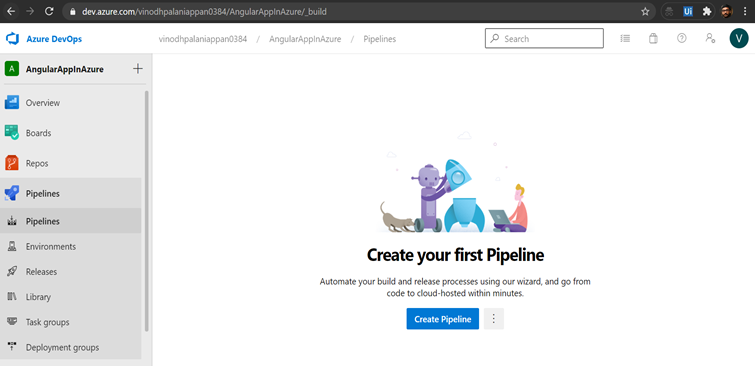
- Click on Create Pipeline choice and click on the basic editor hyperlink on the backside of the display as proven under,
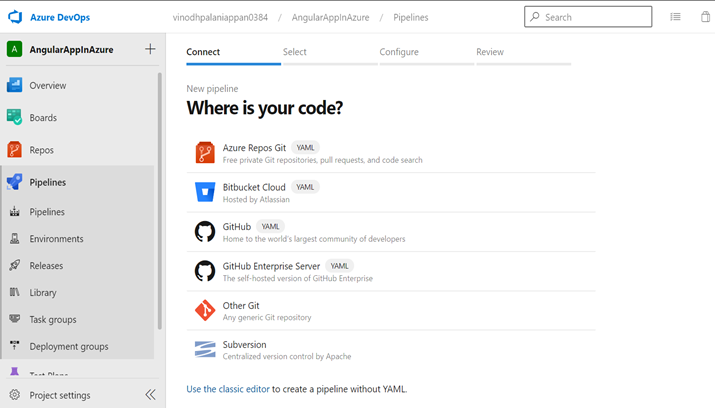
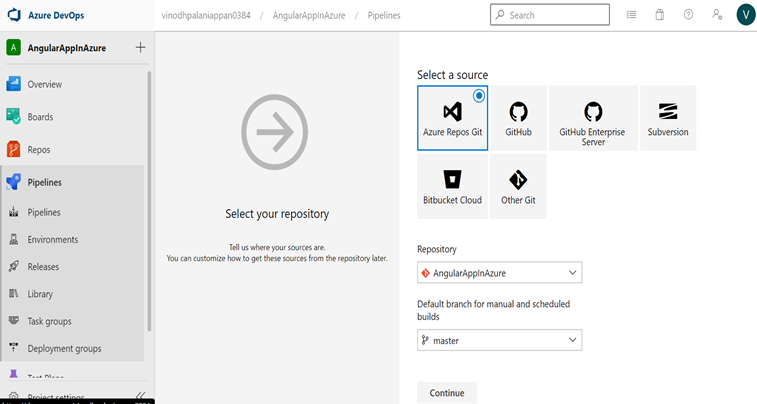
- Select Azure Repos Git and choose the Repository as proven under after which click on proceed.
- Notice
We will additionally select GitHub/ Bitbucket if our challenge is in GitHub/ Bitbucket. your complete course of stays the identical, besides this step.
- Begin with an Empty job, click on Empty job choice as proven under
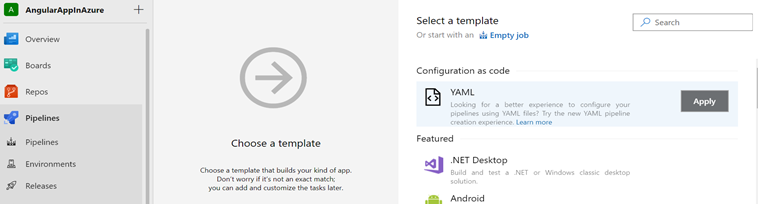
- As soon as Empty job is chosen, we’ll discover the under display

- Click on the + icon subsequent to Agent job 1 as proven above and Sort Node within the search field as proven under and click on Add Node.js software installer.
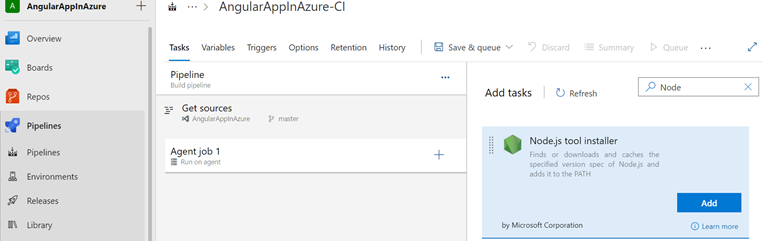
- After Add, choose the Node from the Agent job 1 and alter the Model and different choices of it as proven under

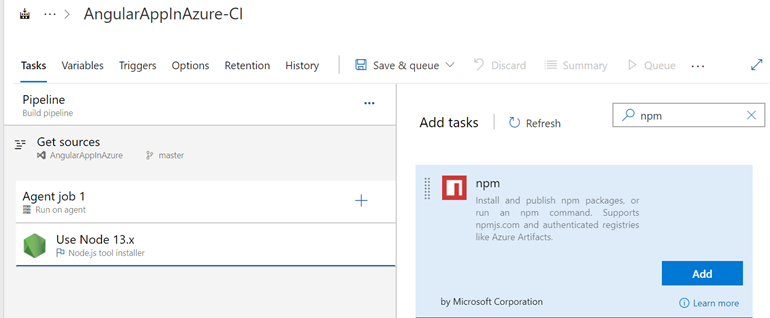
- Add the second activity by once more clicking the + icon in Agent job 1, this time seek for npm and add the identical as proven under
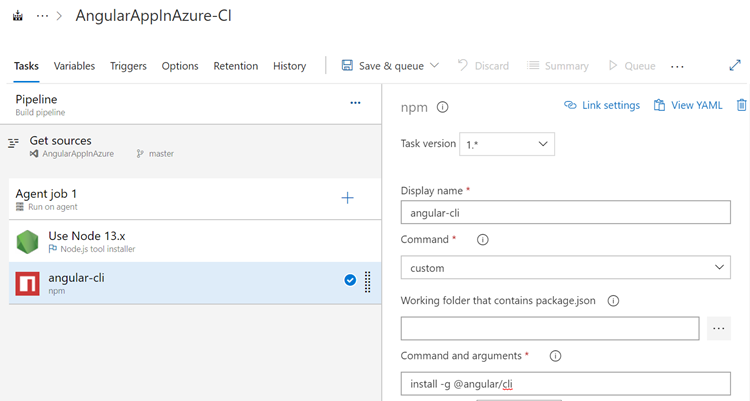
- Choose the added npm beneath Agent job 1 and alter the main points as proven under,
- Notice: Count on the values we’re modifying, remaining values can be set to its default values (We do not have to the touch it for this demo).
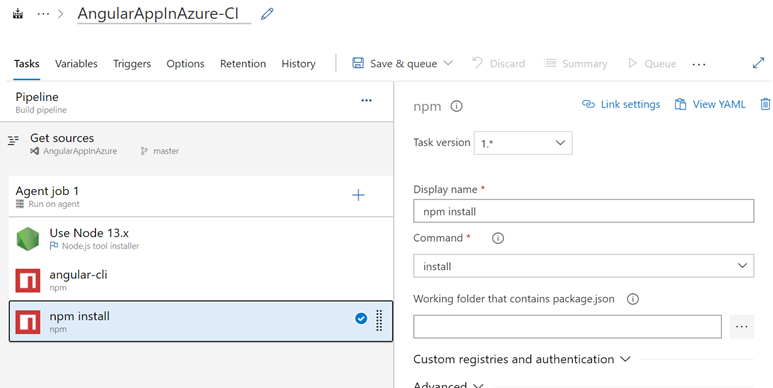
- Add the following activity, once more seek for npm and add the identical beneath the Agent job 1 and set the values as proven under,
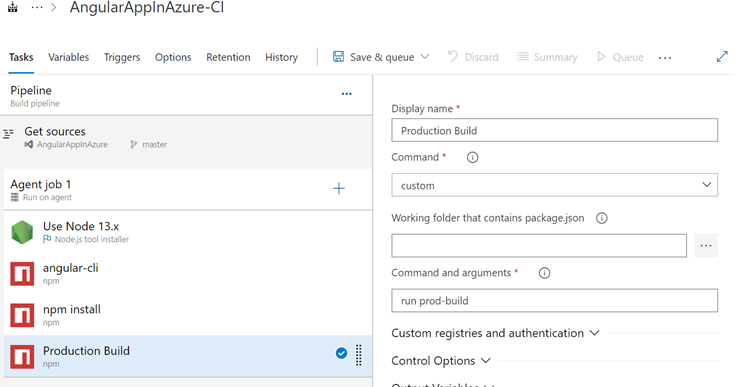
- Add yet another npm activity beneath Agent job 1 for configuring manufacturing construct as proven under, simply repeat the earlier steps
- Essential Notice: The working folder identify needs to be the placement of our package deal.json file. On this demo, the working folder is the basis path, so we’re leaving that vacant.
- Essential Notice: Bear in mind early on, we configured the command prod-build in our challenge and pushed the package deal.json file to distant repository. Cross that command within the manufacturing construct activity as proven under,
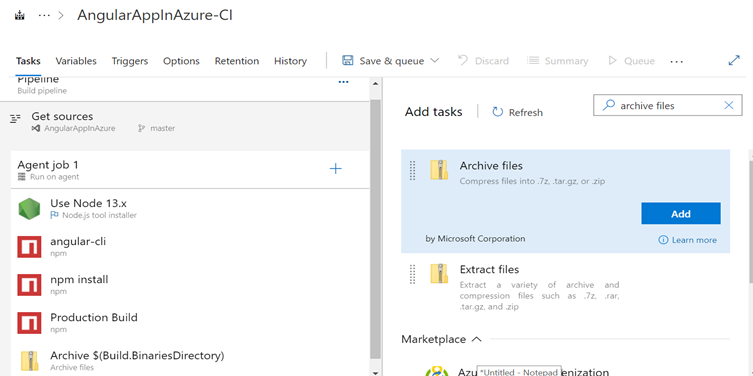
- Subsequent activity is to archive the challenge, click on + icon and Sort Archive recordsdata within the search and add the identical as proven under,
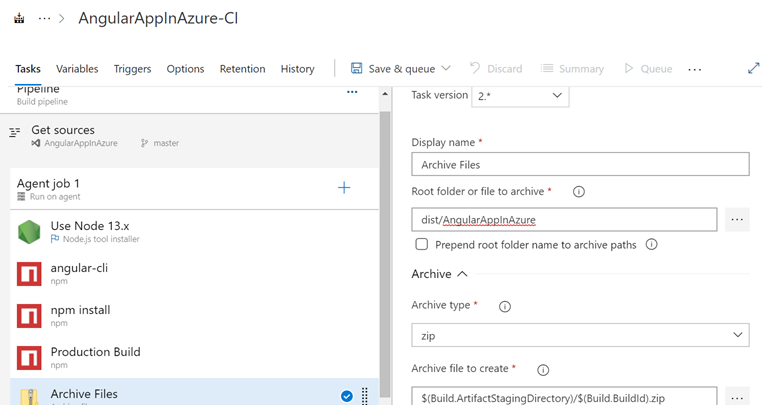
- Choose the Archive choice from the Agent job 1 and configure the values as proven under,
- Notice: Within the under configuration, Root folder ought to comprise the trail of the construct output (dist folder), which you’ll confirm whenever you carry out a neighborhood construct, which we have now performed earlier on this demo. You’ll be able to refer again to know the construct output folder identify in your challenge. Usually, by default it will likely be the identical identify as your challenge identify.
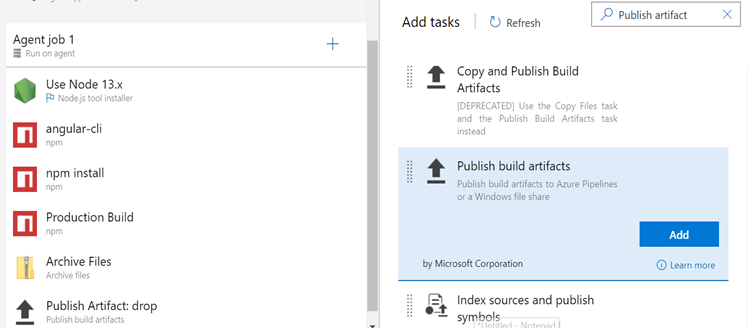
- Add the final activity to publish the construct, seek for publish artifact and Add the identical as proven under,
- For publishing an artifact, the default values are relevant for this demo, so no adjustments.
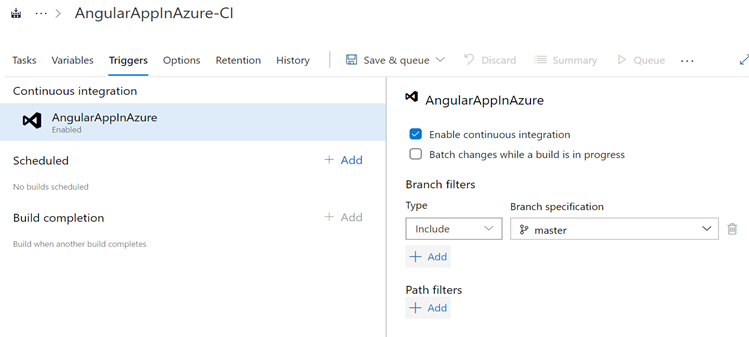
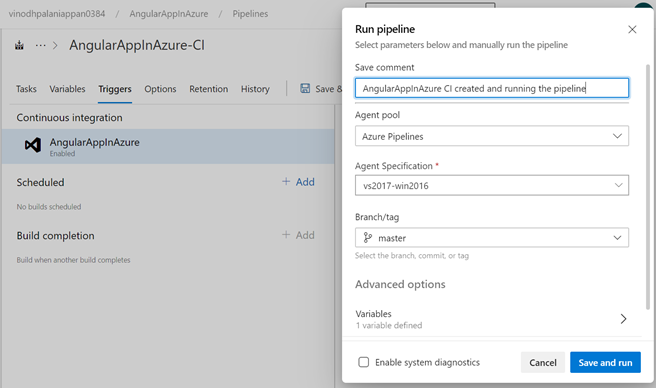
- Click on the Triggers tab and choose the Allow Steady integration choice, as proven under.
- Click on Save & Queue to finish the method.
- Present remark and click on Save and run choice as proven under.
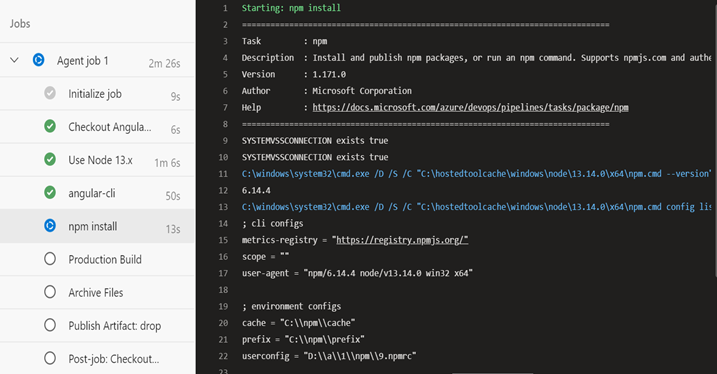
- Await few seconds after which refresh your browser to see the Jobs working, as proven under

- We will click on on the Agent job 1 to see the main points of the execution, which may give you some perception on the execution course of
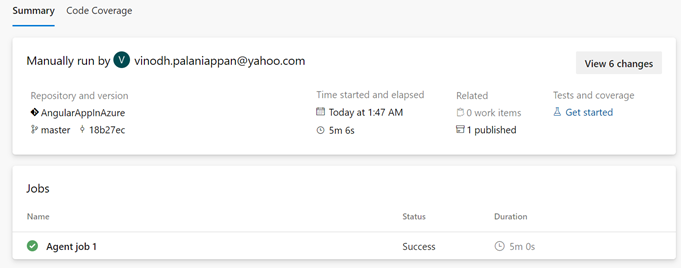
- Notice: It would take jiffy to finish your complete course of, as soon as it’s full you possibly can see the standing as success as proven under, and additionally, you will obtain a mail on the Construct Success.
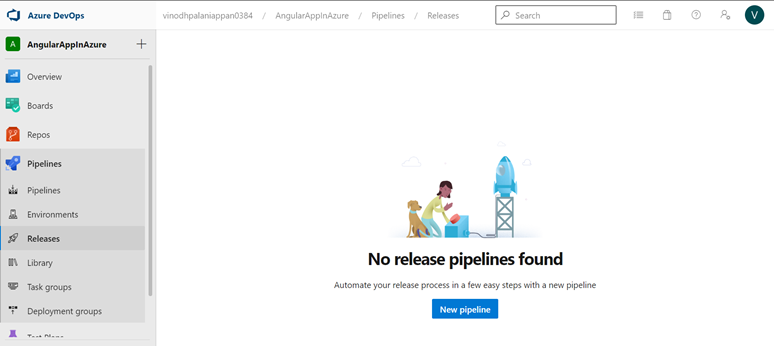
- Now, we’re shifting on to our remaining stage which is Steady Deployment (CD). Let’s configure CD. These includes quite simple steps.
- Click on Releases choice beneath pipelines and click on New pipeline button as proven under,
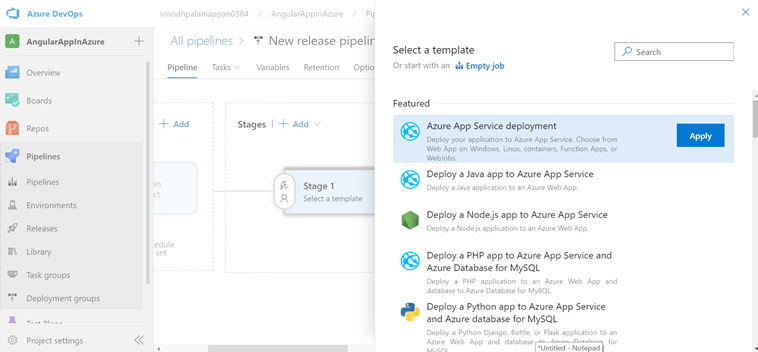
- After you click on New Pipeline, the under template will seem, choose Azure App Service deployment and click on Apply.
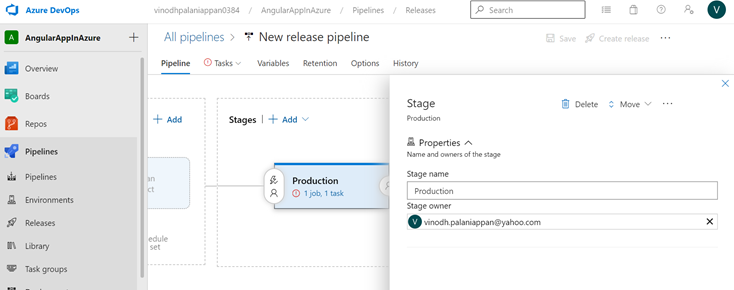
- Present the Stage identify as Manufacturing as proven under and shut the Stage window- We may give a significant Stage identify.
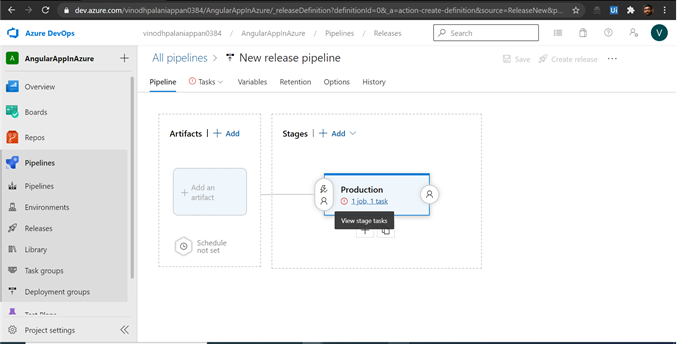
- Subsequent, click on contained in the Manufacturing Field which says “1 job, 1 activity” as proven under
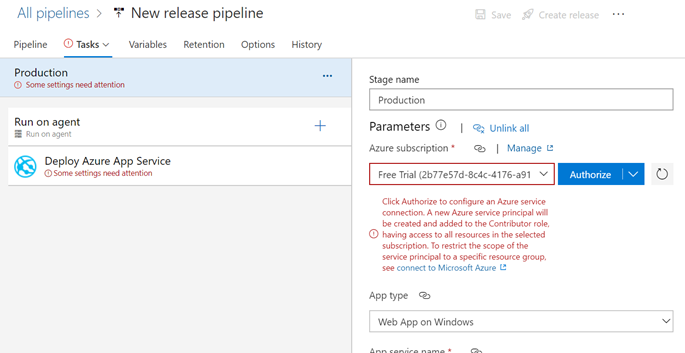
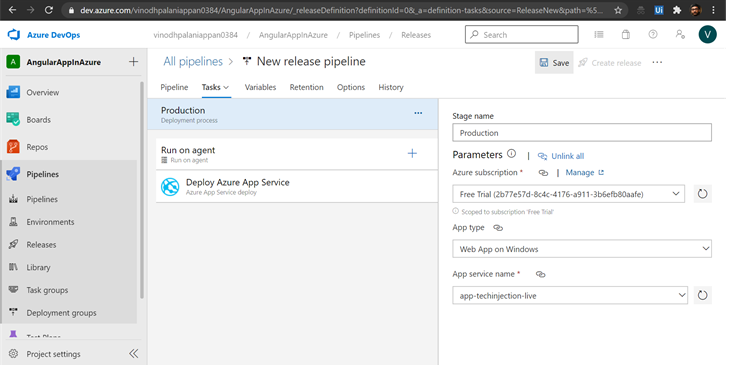
- After opening that, we have now to map all of the Azure App service particulars right here which we created earlier within the Azure Portal. These values can be routinely out there because the person account is mapped to that Azure portal account.
- After we choose the Free Trial choice beneath Azure subscription, it could ask to Authorize as proven under, please click on the Authorize button and login along with your Azure portal account. If the authorization is completed already, you’ll not be prompted to Authorize
- On profitable authorization, we will map the opposite values as proven under, make sure you map the App Service which we created within the Azure portal and click on Save as proven under:
- If you click on Save, you’ll be prompted with the under dialog field, click on Okay on the identical. We’re mapping our folder path in Azure App Service the place the code can be deployed.
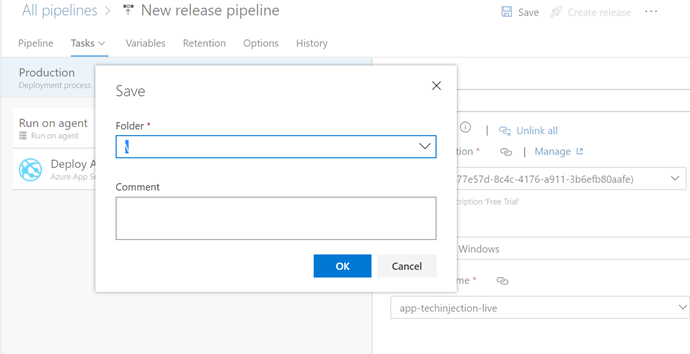
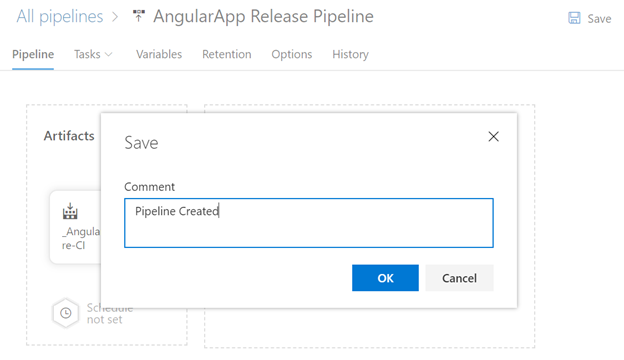
- Change the identify of the pipeline and save the identical as proven under:

- Subsequent step is to click on the tan which says Pipeline and click on Add an Artifact choice as proven under
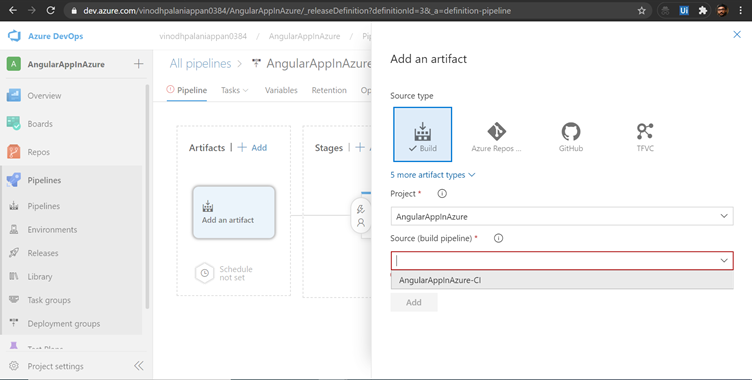
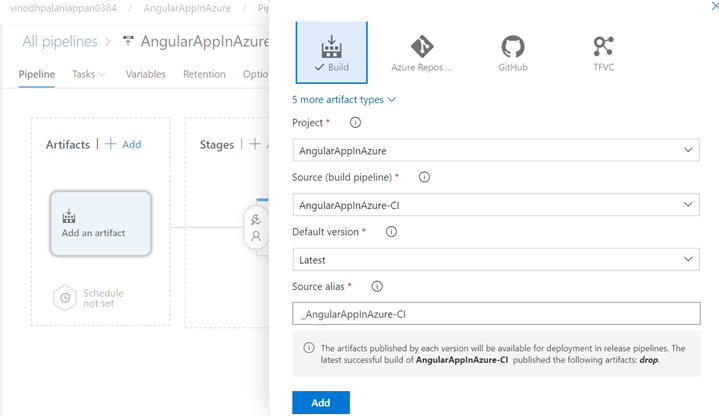
- Select the Supply (construct pipeline) which we already created and click on Add, as proven under
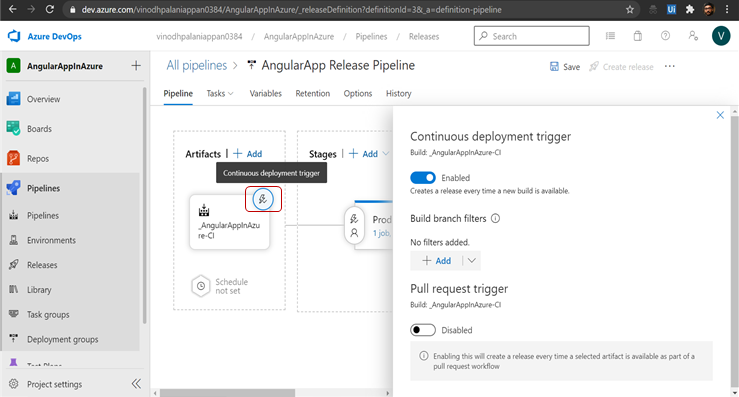
- Subsequent Step is to allow the Steady deployment set off as proven under, this may guarantee every time a construct is profitable, routinely it is going to begin the discharge to the manufacturing atmosphere.
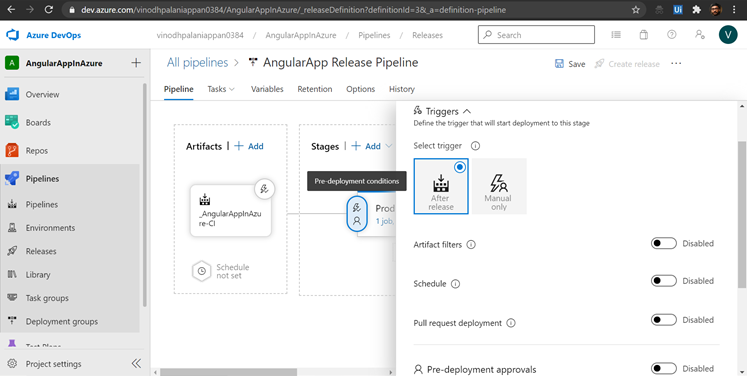
- The under step is just not required, simply in your data function. We will additionally schedule the discharge by clicking the Pre-deployment circumstances as proven under. you possibly can discover Azure DevOps to be taught extra it. There’s an approval course of earlier than the construct and way more. However for our demo, we’re not utilizing it.
- Finally, click on Save and full the method as proven under:
- Lastly, we have to push some code from VS Code to distant repository, which is able to set off the (Construct Pipeline) CI course of routinely after which completes the (Launch Pipeline) CD course of routinely and the adjustments can be out there within the LIVE URL.
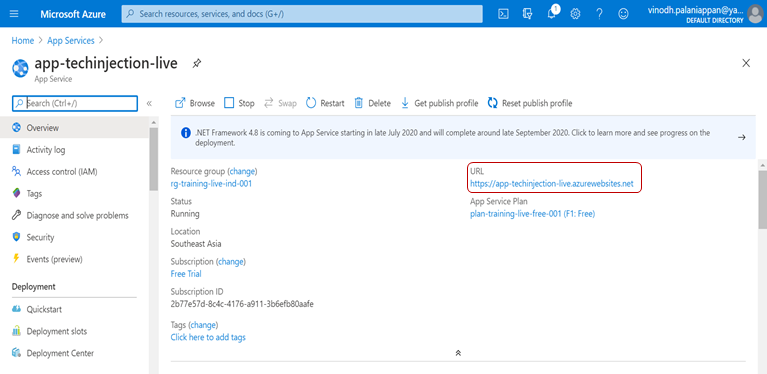
- We will discover the Reside URL from the Azure Portal beneath App Service as proven under,
- https://app-techinjection-live.azurewebsites.internet
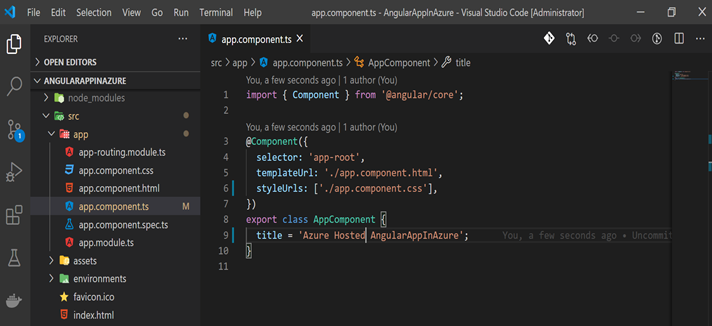
- Including a line of code within the challenge after which stage, commit and push the code to azure distant repository to set off the CI/CD Course of routinely, please see under,
- The reason of commit and push to distant repository is given earlier within the demo, consult with that.
- Notice: modified the title property in app.element.ts

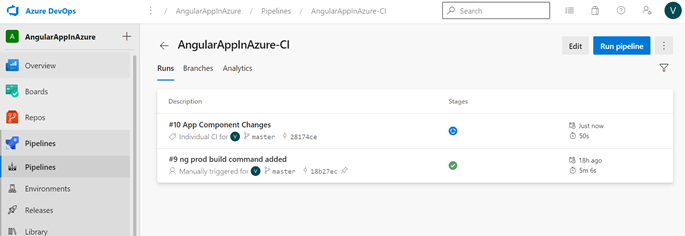
- Await few seconds and refresh the Azure pipelines display, you’ll discover the under standing. We will see the construct is routinely began.
- The construct can be accomplished in jiffy. As soon as the construct completes, the discharge pipeline will begin the deployment routinely.
- As soon as the CI is accomplished, you possibly can navigate to Releases choice to see the CD occurring as proven under.
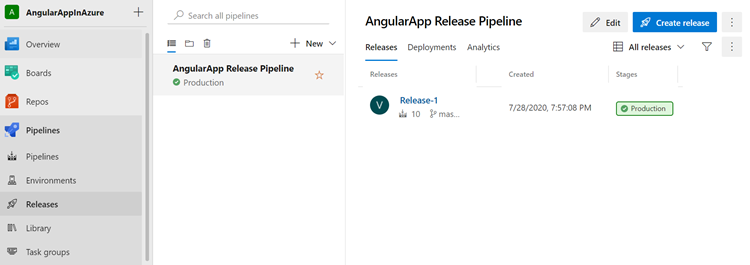
- Click on on the Launch-1 choice to see the whole particulars of the Launch pipeline, as proven under.
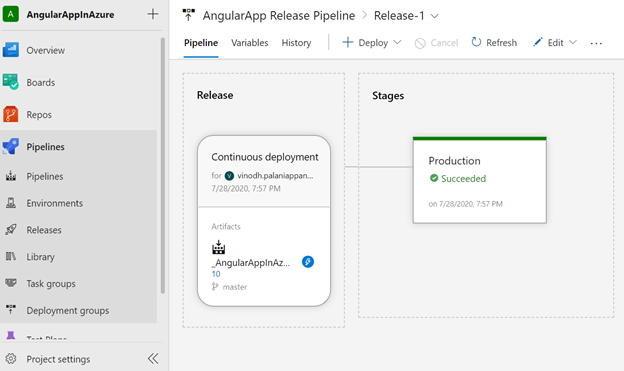
- Now, we will open the browser and kind the LIVE URL to see the hosted app. Please notice the adjustments that we did on the app.

Properly, we’re performed. So any further, any adjustments performed on the code and pushed to distant repository, it is going to set off the pipelines and the adjustments might be seen in LIVE URL. Please notice that you would be able to be taught extra on Azure Pipelines to handle pipelines extra successfully.
Please consult with Half 1 and Half 2 of this weblog to finish your complete demo:
Thanks. I actually respect everybody for studying by this text.


