Introduction
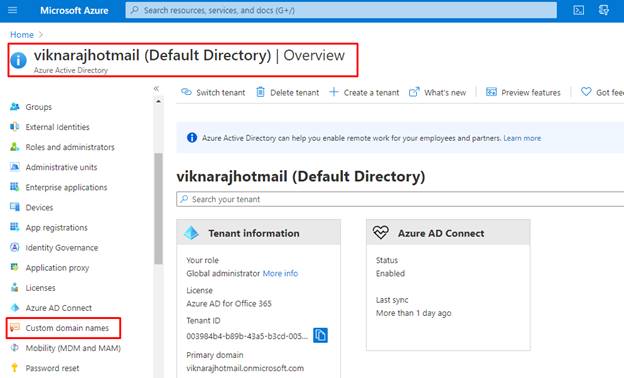
On this article, we’re going to learn to add a customized area identify to Azure Lively Listing. Each new Azure AD tenant comes with an preliminary area identify, like “<yourdomainname>.onmicrosoft.com”, and we are able to’t change or delete our preliminary area identify, however we are able to add our group domains. Including the customized domains helps us to create person names which can be beneath our area.
Step 1
Within the Azure Portal, Seek for Azure Lively Listing from the search field and choose Azure Lively Listing, after which choose “Customized domains”.
Step 2
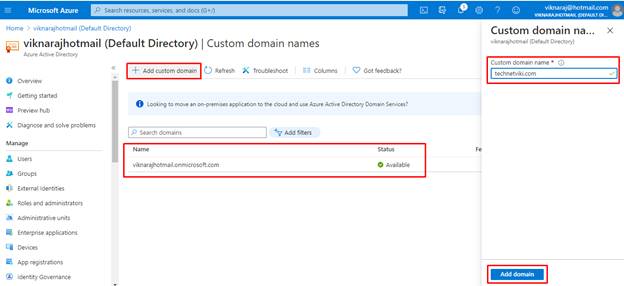
In Customized area identify, we are able to discover that we have now one default area out there, click on “+ Add customized area” and enter your group’s area identify, on this demo our area identify is, technetviki.com. Choose Add area.
Step 3
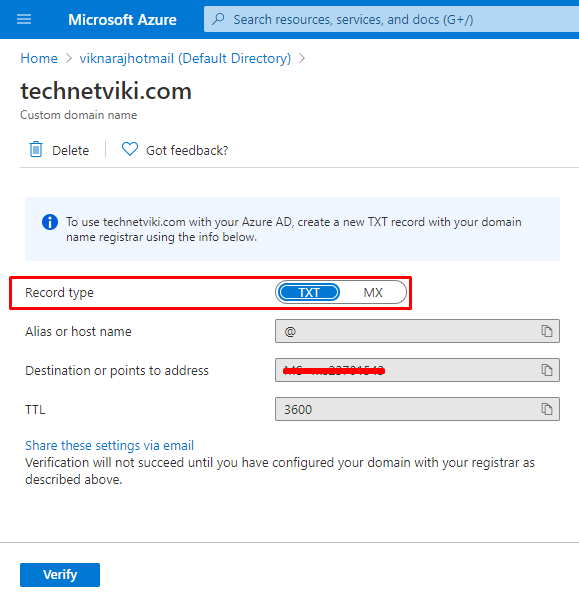
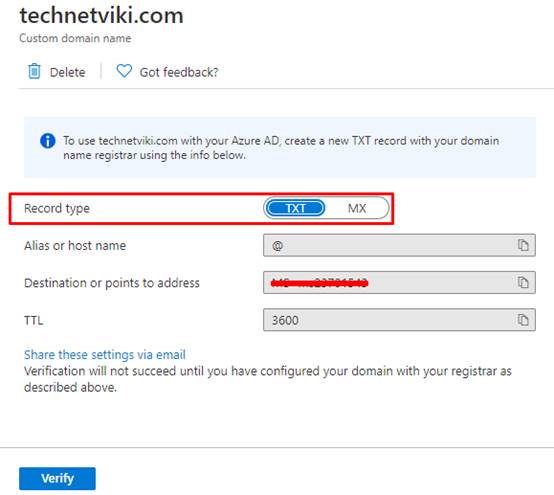
Now our unverified area is added. The technetviki.com web page seems displaying your DNS data. Save this data.
Step 4
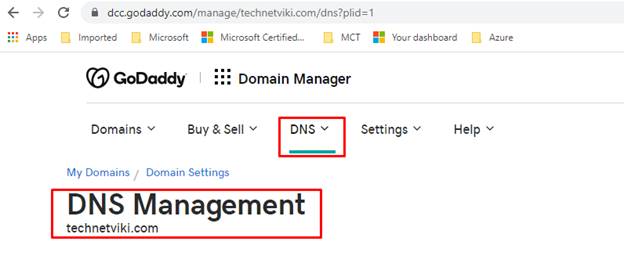
Our group area identify has been registered in GoDaddy, so log in to the GoDaddy web site and choose DNS Administration
Step 5
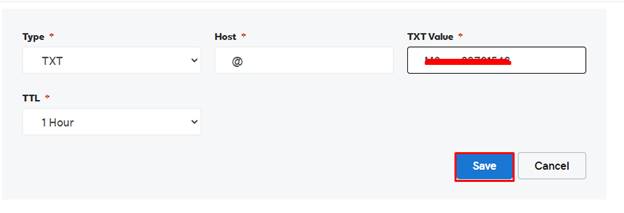
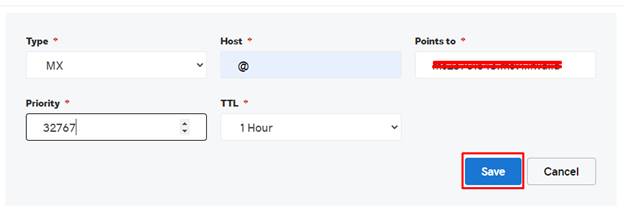
Add the Azure AD DNS data out of your portal. Creating this TXT document and MX document on your area verifies possession of your area identify. Set the time to dwell (TTL) to 3600 seconds (60 minutes), after which save the document.
Step 6
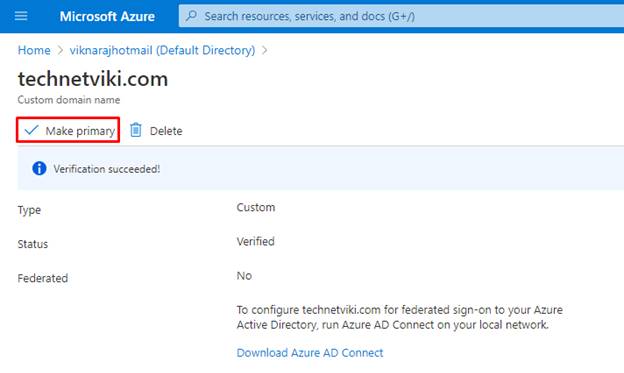
After including the DNS document click on Confirm button.
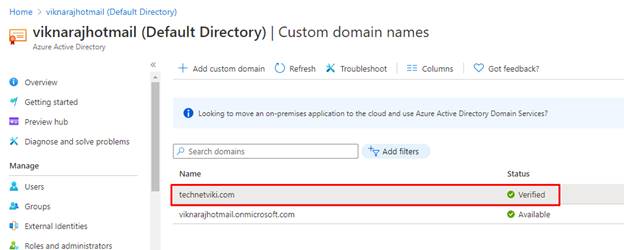
Now we are able to see that our area has been verified.

Step 7
After verifying the area, click on “Mark main”
Step 8
Now we are able to see our personal area has been verified in our Azure Lively Listing.
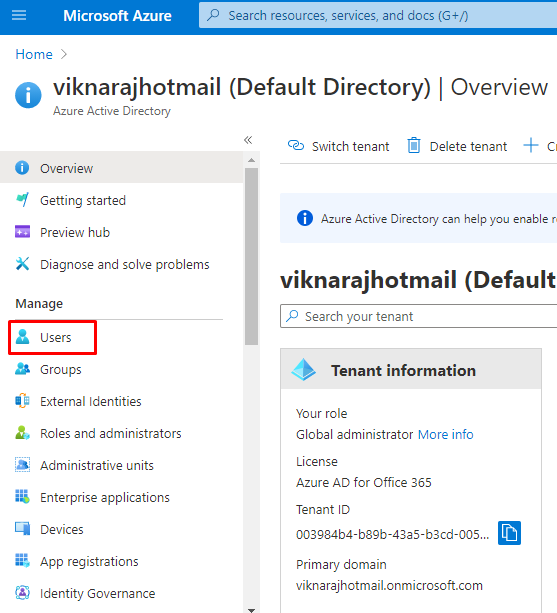
Step 9
Now we’re going to take a look at whether or not we are able to create a person identify utilizing our personal area. So click on “Customers” beneath the Handle.
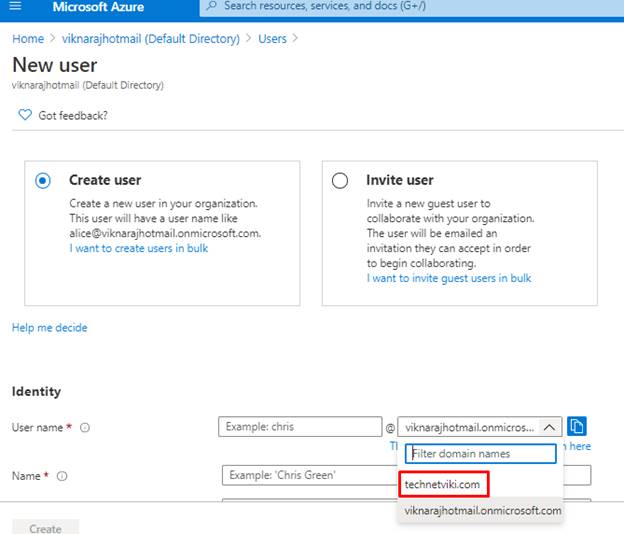
Step 10
Within the Create person we are able to choose our personal area identify.
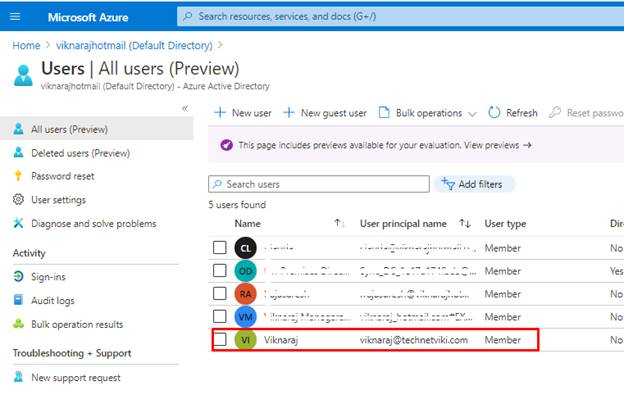
Step 11
Lastly we have now created a person identify utilizing our personal customized area.
Abstract
On this article we have now realized learn how to add our personal customized area identify to our Azure Lively Listing. You probably have any questions be happy to contact me.


