Introduction
On this article, I’ll talk about learn how to create, copy, rename, and delete the SQL database in Azure.
Stipulations
- Microsoft Azure account.
- SQL server administration studio.
Agenda
- Create SQL database.
- Copy SQL database.
- Rename SQL database.
- Delete SQL database.
Create SQL Database
Under, I’ll clarify learn how to create an SQL database within the Azure portal.
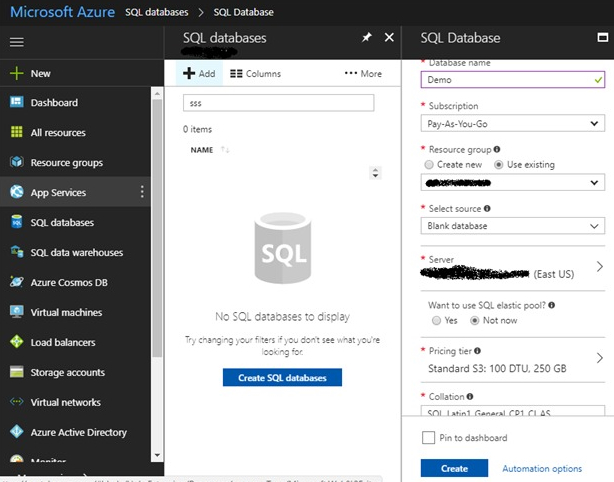
- Open the Azure portal and log in with the right credentials.
- Go to SQL databases.
- Click on on add and a brand new popup will come.
- Within the popup, add database title, and subscription, choose useful resource group, choose supply, choose a server, choose the choice of SQL elastic pool, choose pricing tier, choose collation (case delicate or case insensitive), and click on on create which is proven within the under determine.
- It can take a while to create an SQL database and after that, the database will present beneath the SQL databases part.
Copy SQL Database
Under, I’ll clarify learn how to copy a SQL database within the Azure portal.
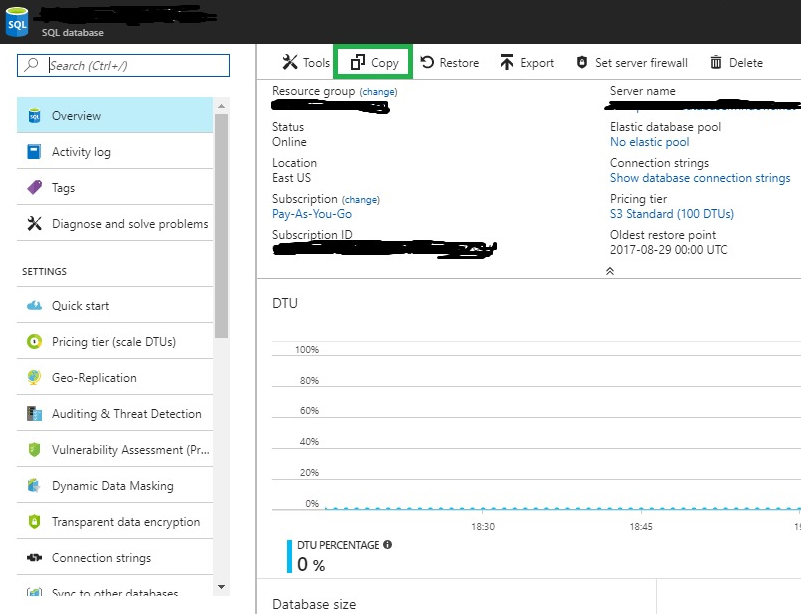
- Open the Azure portal and log in with the right credentials.
- Go to SQL databases.
- Choose the present database, go to the Overview choice, and click on on the copy which is proven within the under determine.
- A brand new popup will come, by which adthe d database title, choose goal server, choose elastic database pool, choose pricing tier, and click on on okay which is proven within the under determine.
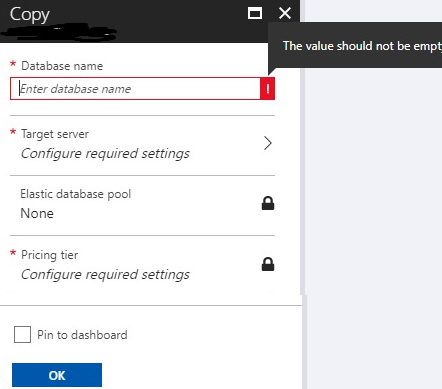
It can take a while to repeat the SQL database and after that, the database will present beneath the SQL databases part.
Rename SQL Database
Under, I’ll clarify learn how to rename an SQL database within the Azure portal.
In Azure, there isn’t any choice out there to rename an current SQL database within the portal.
However we will nonetheless try this, which is defined under.
- Open SQL server administration studio.
- Present server title (azure server title), login, password, and click on join.
- Choose the database that you just need to rename from the databases part.
- Press F2, give a brand new title and press enter.
- Or right-click on the database, click on rename, give a brand new title and press enter.
After that, go to the Azure portal, and there you possibly can see the database title has been modified.
Delete SQL Database
Under, I’ll clarify learn how to delete an SQL database within the Azure portal.
- Open the Azure portal and log in with the right credentials.
- Go to SQL databases.
- Choose the database which you need to delete and click on on the overview.
- After that, a delete button will show which is proven under determine.
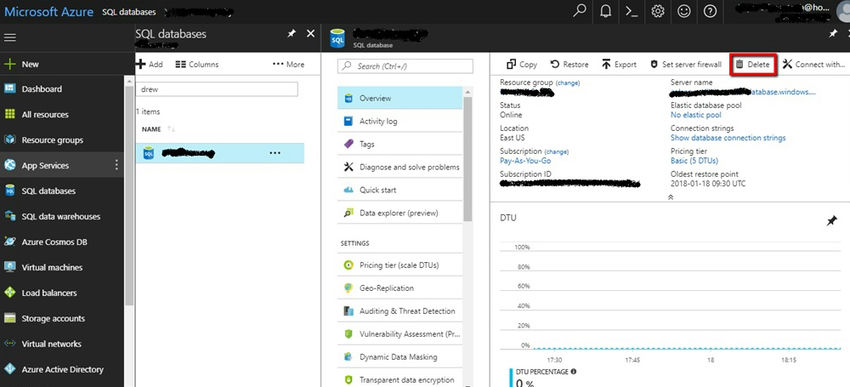
- Click on on the delete button and after that, a brand new pop-up will come from the right-hand facet.
- Within the textbox, sort the database title and click on on the delete button which is proven under determine.
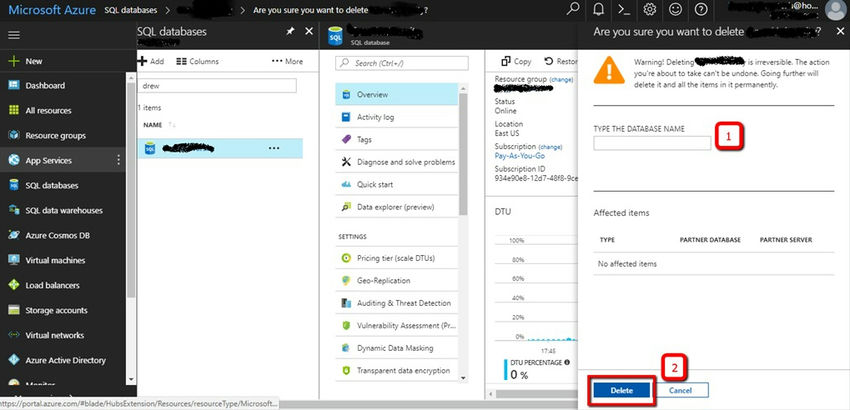
After that, it should take a while and the database can be completely deleted from the server.
Know extra about our firm at Skrots. Know extra about our companies at Skrots Providers, Additionally checkout all different blogs at Weblog at Skrots