Introduction
Azure Utility Gateway, performing at layer 7, is important for effectively managing net site visitors to your purposes. This text delves into the idea and configuration of an Utility Gateway, protecting important options like load balancing, SSL termination, and net utility firewall (WAF) capabilities. By optimizing efficiency, enhancing safety, and making certain seamless entry to your purposes, we’ll discover the sturdy capabilities of the Utility Gateway.
Conditions
- Azure Subscription for those who don’t have you’ll be able to create by way of the hyperlink. Azure Free Account
- Azure VM or Net App Service (IIS or Net web page)
- Further Subnet for Utility Gateway
Step 1. Check in to the Azure portal.
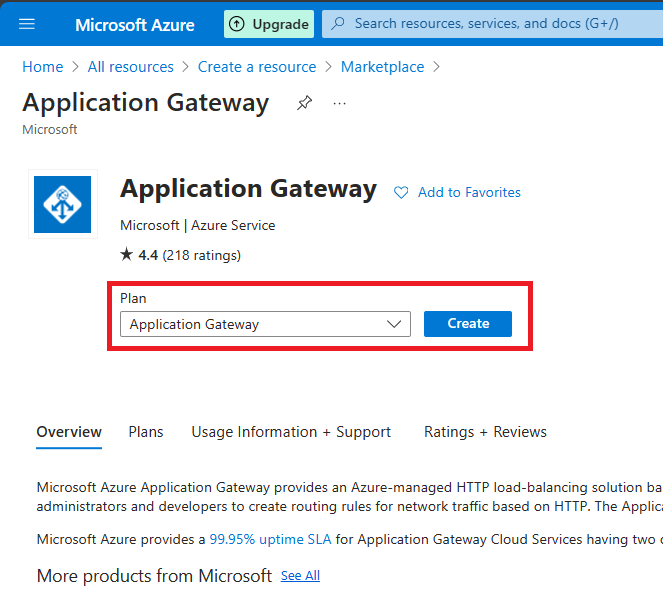
Step 2. Go to market search Utility gateway and hit on create.
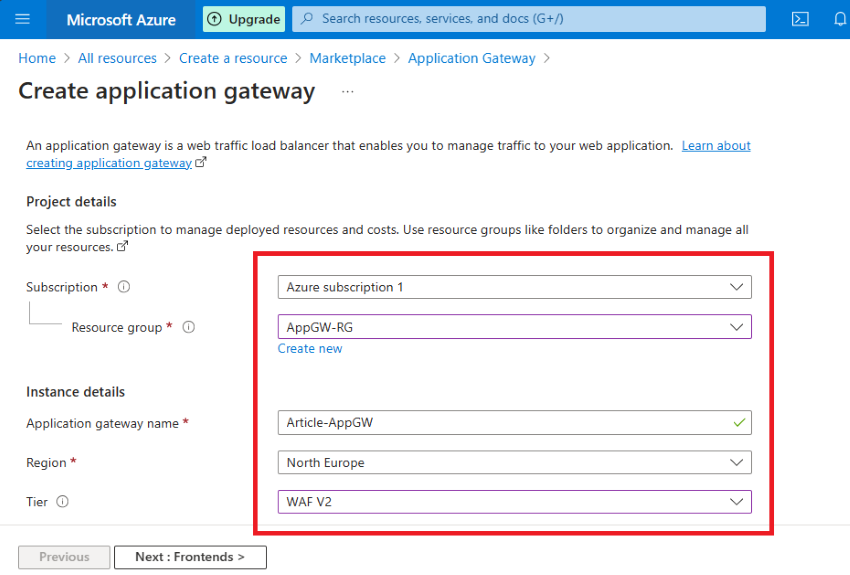
Step 3. Within the fundamental tab, choose your useful resource group and supply a reputation for the appliance gateway in my case I’ll use article-AppGW
- Useful resource Group Article-AppGW
- I’ll choose the North Europe area you’ll be able to select your nearest areas as you resolve.
- When it comes to tires, I’ll select WAF v2.
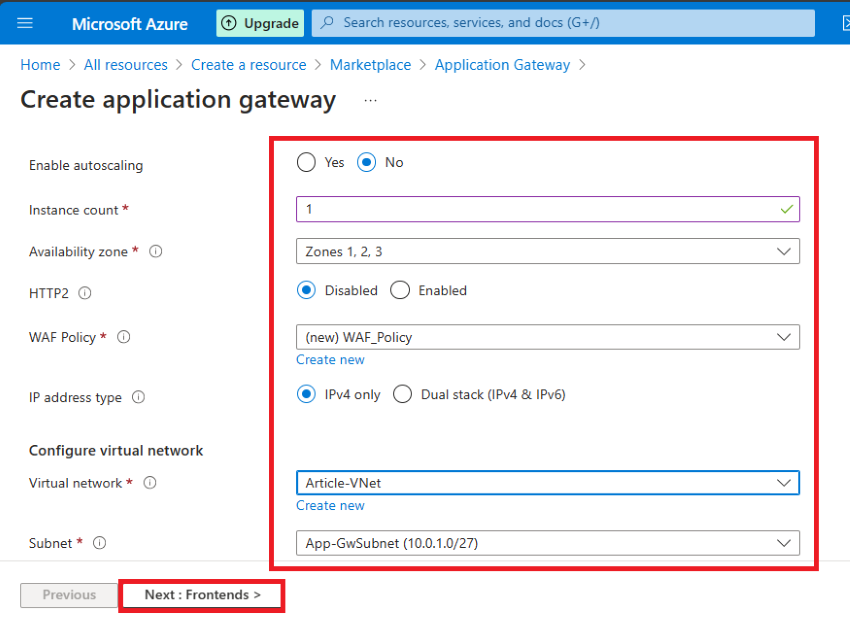
Step 4. Kindly observe my steps for this demo, as I’ve configured it to keep away from any conflicts.
- Allow autoscaling: No
- Occasion rely: 1
- Availability Zone: 1,2,3 (If you need, you’ll be able to select 1)
- HTTP2: Disabled
- IP Handle kind: IPV4
Configure Digital Community
When it comes to community, I’ll select my digital community and my app gateway subnet (App-GwSubnet) as a substitute of my VM subnet.
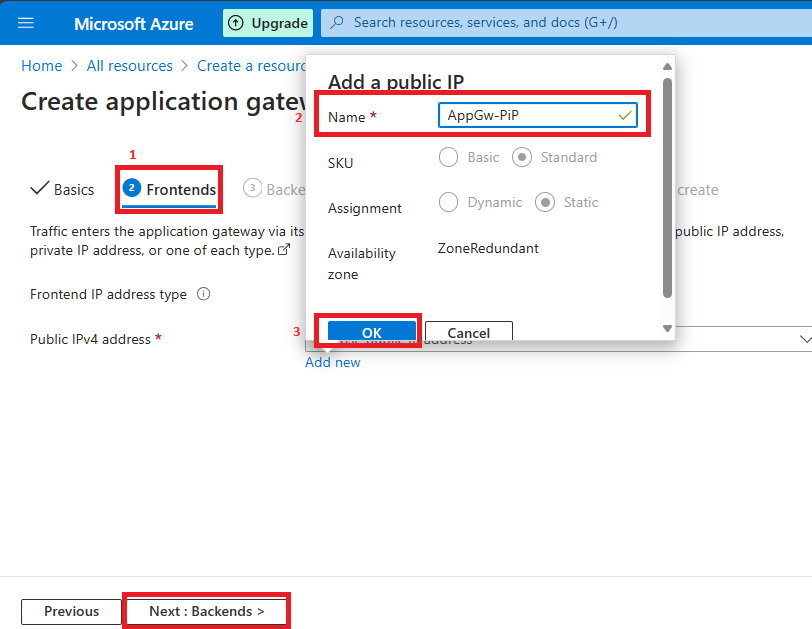
Then click on on Frontend IP>
Step 5. Within the Frontend tab click on Add New after which kind IP title in my case AppGw-PiP, Click on Subsequent: Backend
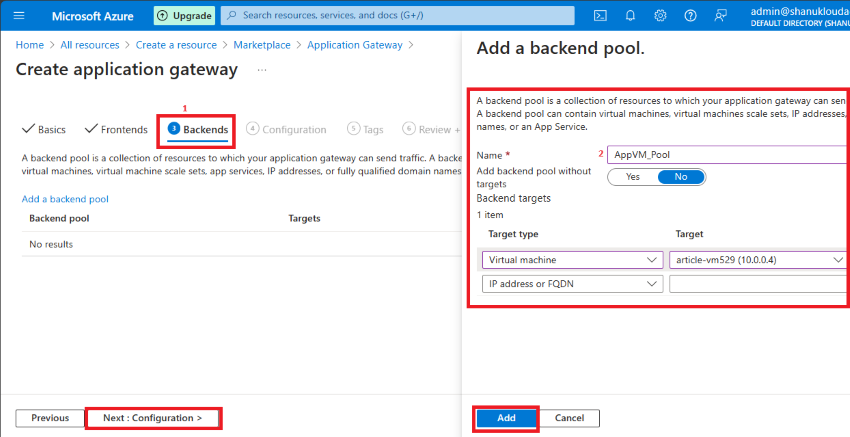
Step 6. Within the Backend, tab Click on Add Backend Pool then Present some Pool title (AppVM_Pool).
- Goal kind: Digital machine
- Goal: VM nic (article-vm52910.0.0.4)
Click on on the Add button.
Step 7. Now Frontend and Backend are efficiently configured.
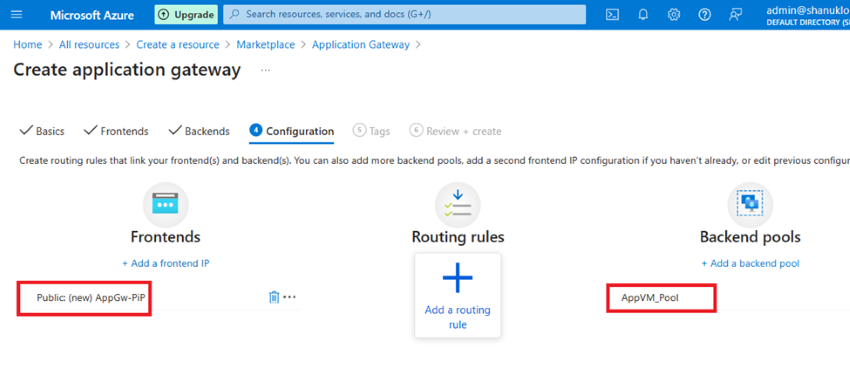
Step 8. Now I’ll configure a vital space, which is routing guidelines.
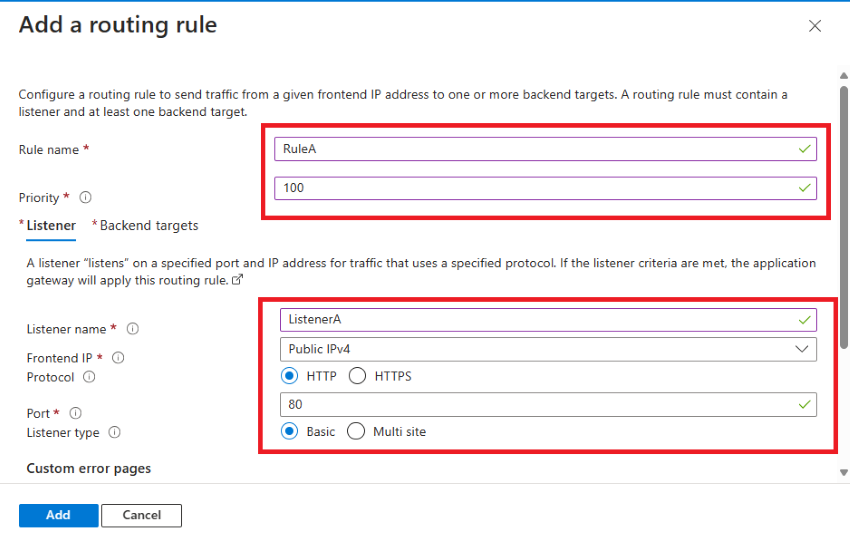
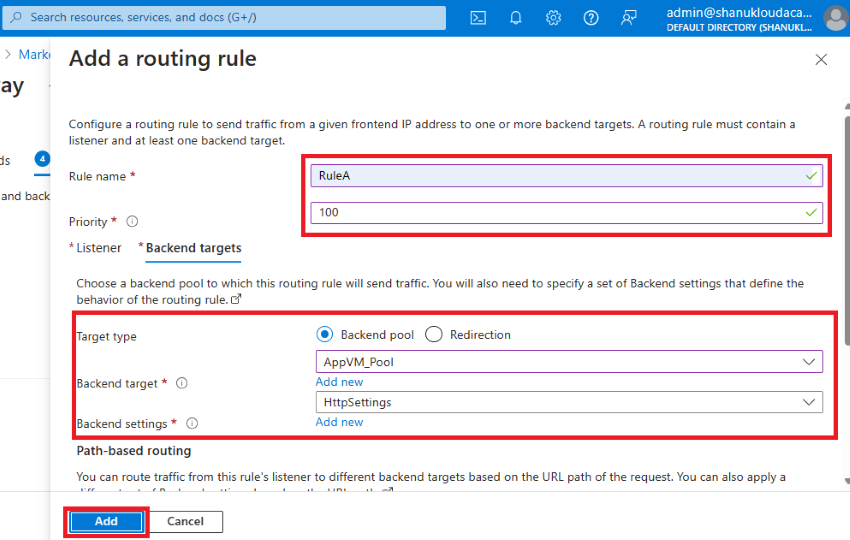
Add a routing rule with the next specs:
- Rule title: RuleA
- Precedence: 100
- Listener title: ListenerA
- Frontend IP: Public IPv4
- Protocol: HTTP
- Port: 80
Please word that if you wish to choose HTTPS, you have to have an SSL certificates put in in your utility. In my case, since it is a demo atmosphere, I don’t want to make use of an SSL certificates.
Step 9. Transfer to the Backend targets.
- Add Backend targets: AppVM_Pool
- Add Backend Settings: HttpSettings
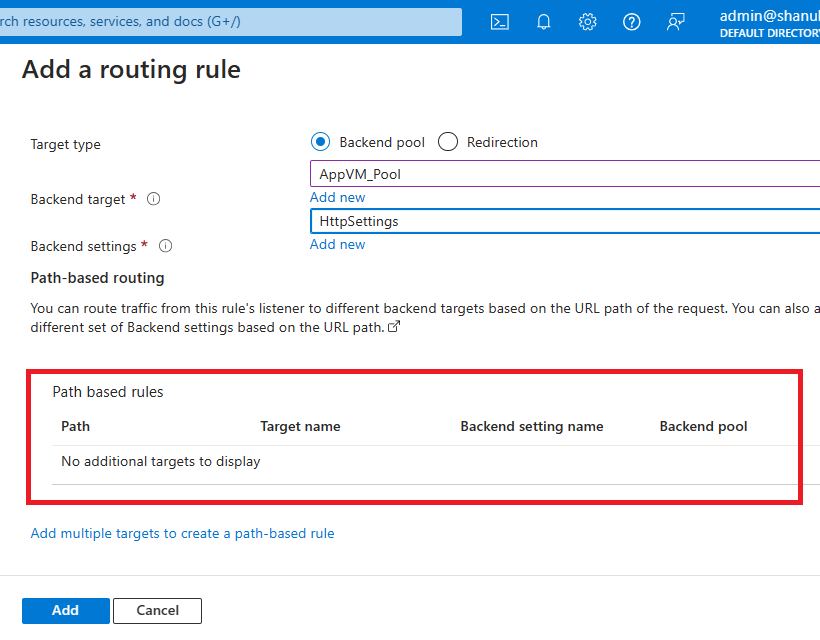
Step 10. You probably have a number of paths in your utility, you’ll be able to make the most of path-based routing. Nonetheless, in my case, I don’t have a number of paths in my utility. Click on: Subsequent Tags
Step 11. Click on Evaluate and Create.
It’d take 10-Quarter-hour for deployment.
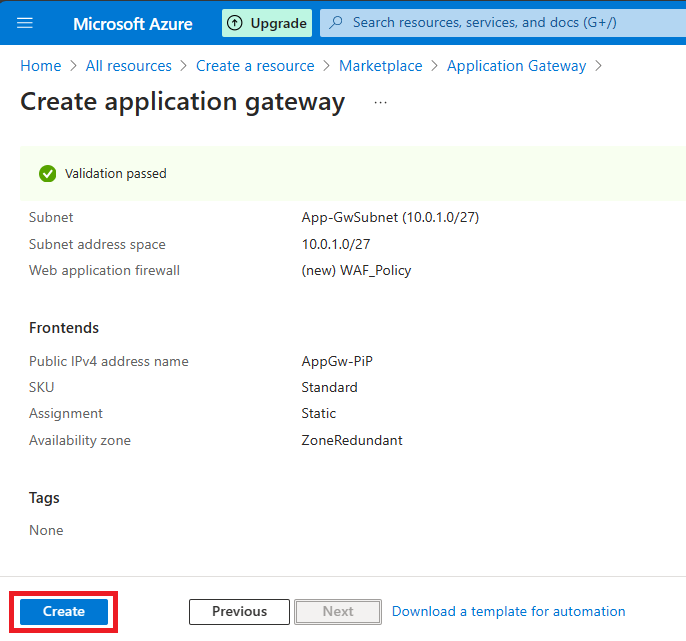
Step 12. Efficiently, my utility gateway has been deployed.
Net Utility Firewall Configuration
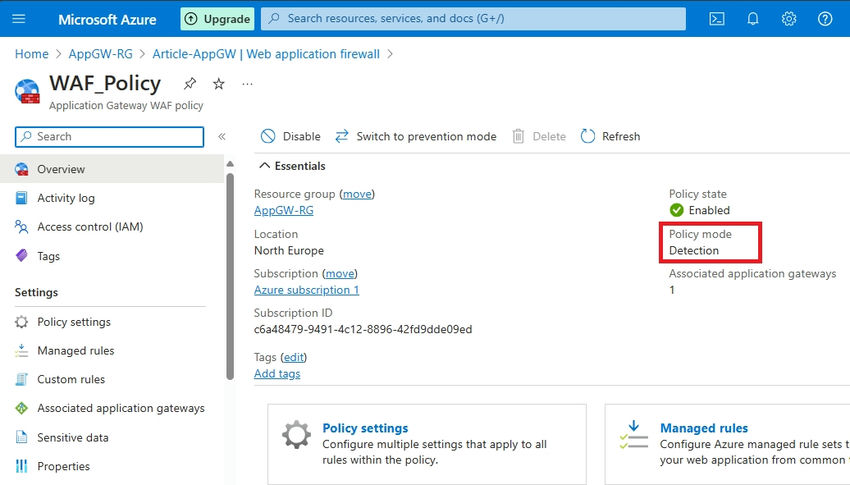
Step 1. Within the left-side pane of the Utility Gateway Overview, navigate to Net Utility Firewall.
It is essential to notice that by default, my WAF mode is about to Detection. Because of this person site visitors will probably be allowed to achieve the appliance, but when a risk is detected, it would solely be detected and never prevented. For extra particulars, confer with the Microsoft Docs right here.
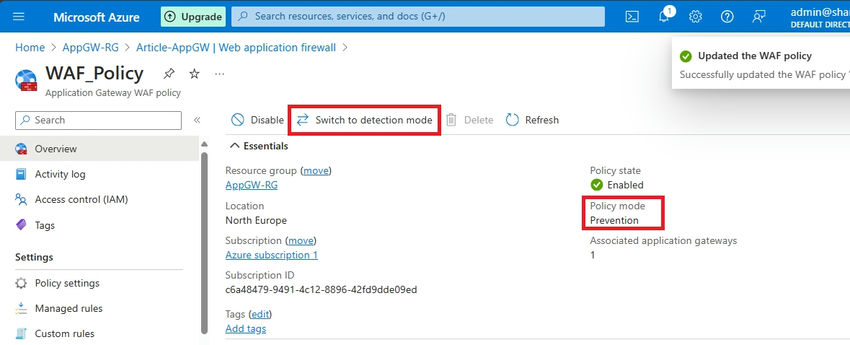
Step 2. You should utilize Change to Prevention mode to set Prevention.

Step 3. You possibly can swap to Prevention mode to allow prevention actions.
Step 4. Managed Rule Units provide OWASP-verified rulesets you could allow relying in your utility’s conduct. In my situation, I will activate all guidelines to evaluate the conduct of my default HTML web page.
In Net Utility firewall>Managed guidelines>OWASP 3.2>Increase>Choose all> Enabled
Use the Docs to tune your insurance policies: Managed Guidelines
Testing and Validation of Utility Gateway
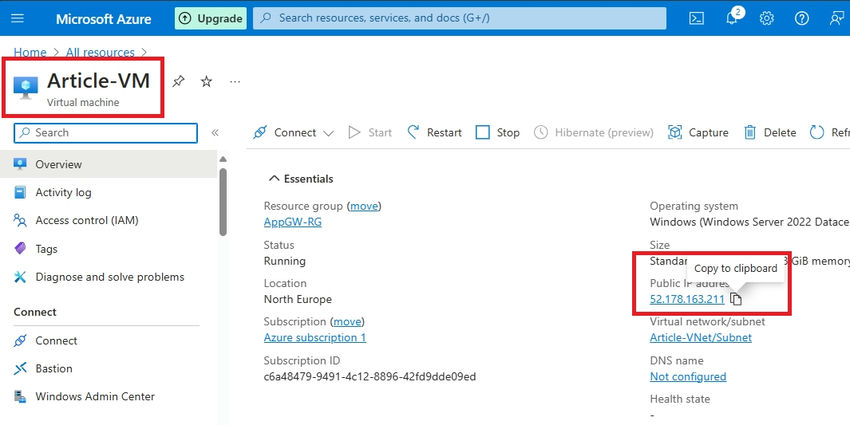
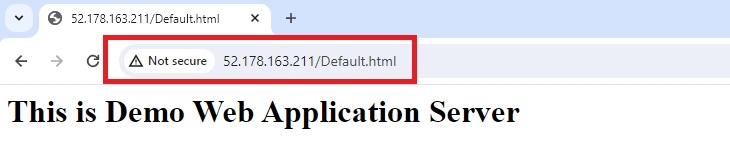
Step 1. First, I’ll browse my utility utilizing the VM’s public IP as a substitute of the appliance gateway’s IP for testing.
Step 2: It is working correctly.
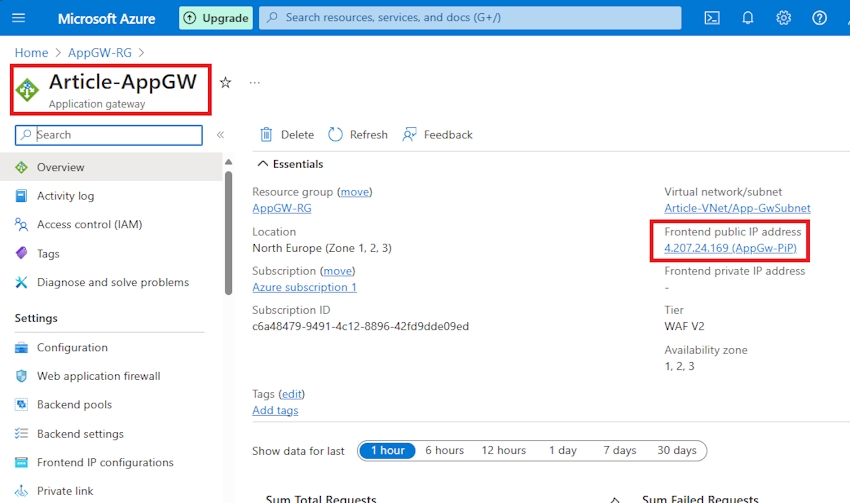
Step 3. Now I’m going to browse the appliance utilizing the Utility Gateway’s IP handle as a substitute of the VM’s public IP handle.
Navigate to your Utility Gateway overview, and replica the IP handle.
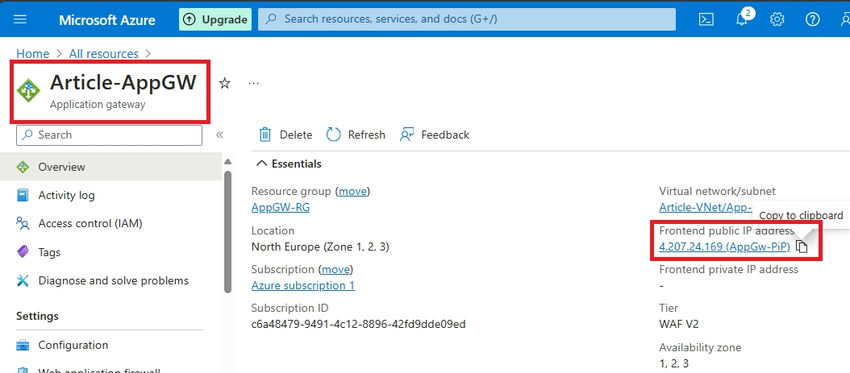
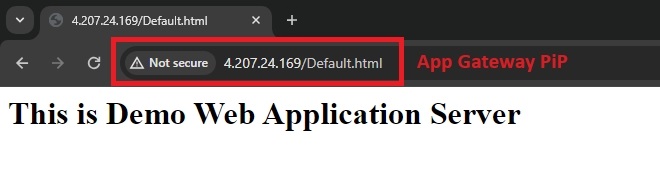
Step 4. Paste the IP handle into your browser’s handle bar and press enter. As anticipated, my default HTML web page is functioning correctly by way of the Utility Gateway’s frontend IP.
Observe. As I discussed, my HTML pages are functioning correctly with out dependencies in my demo atmosphere. Nonetheless, it’s possible you’ll encounter some 403 Forbidden errors. This relies on your utility. If you happen to encounter such errors, don’t be concerned; you may want to regulate sure exclusion guidelines.
Conclusion
I’ve configured and examined the Utility Gateway efficiently. Bear in mind to regulate exclusion guidelines for those who encounter 403 Forbidden errors and disassociate the VM’s public IP.
Know extra about our firm at Skrots. Know extra about our companies at Skrots Companies, Additionally checkout all different blogs at Weblog at Skrots


