Introduction
Welcome to this article, where we will explore and deploy various services in Azure Kubernetes Services (AKS) Clusters. Let’s dive in!
Azure Kubernetes Service
Azure Kubernetes Service (AKS) is a managed container orchestration service provided by Microsoft Azure. With AKS, you can focus on managing your applications instead of worrying about the underlying infrastructure.
AKS offers features like autoscaling and simplified application deployment.
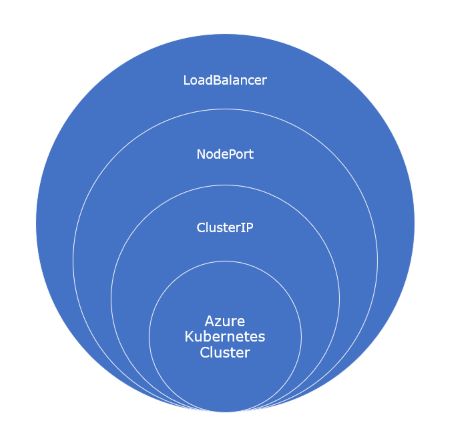
Types of AKS services
- Cluster IP: This service exposes the application on an internal IP within the cluster. Kubernetes is the default service.
- NodePort: NodePort is an extension of Cluster IP. It exposes the service on the same port of each selected node in the cluster.
- LoadBalancer: LoadBalancer is a superset of NodePort. It creates an external load balancer in the cloud and assigns an external IP to the service.
Steps to Create AKS Cluster
To begin, please log in to the Azure portal.

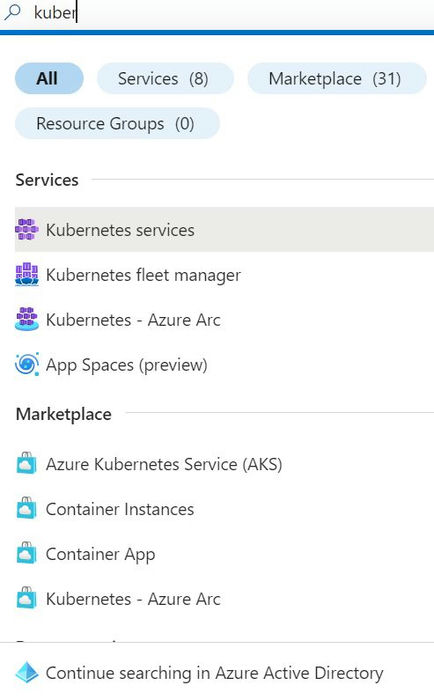
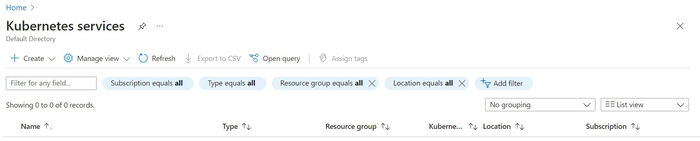
In the search bar, search for “Kubernetes services”.
Click on the “Create” option in the Kubernetes Services window.
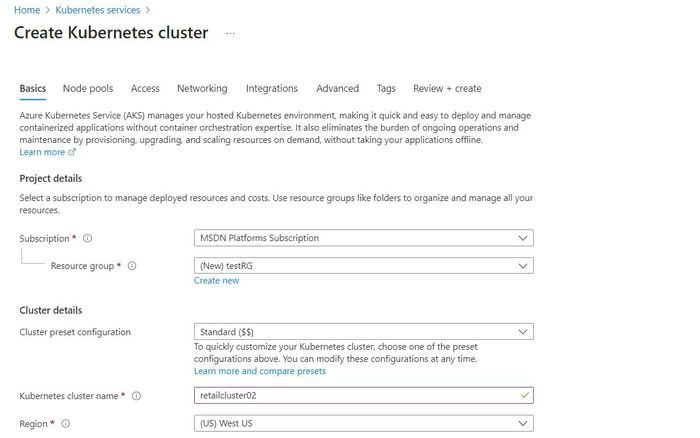
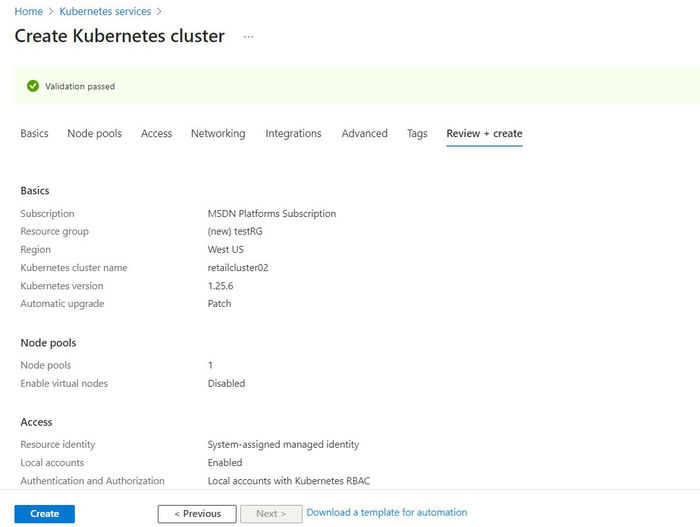
First, provide your Azure subscription.
Create a new resource group and name it “testRG”.
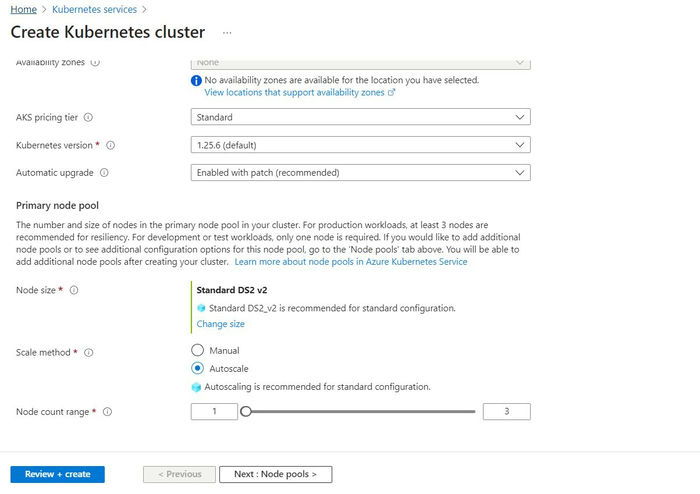
Choose a name for your Kubernetes cluster, such as “retailcluster02”.
Select the Azure region as “US West US”.
Keep the Kubernetes version as the default.
For the Node Size, choose the “Standard DS2_v2” option, which is recommended for standard configurations.
Select “Autoscale” as the Scale Method.
Specify the Node Count range as 1:3, meaning 1 master node and 3 worker nodes.
Click the “Review+Create” button.
You will see a validation passed message on the screen. Click the “Create” button.
Click the “Create” button.
The deployment will initialize and within a minute or two, it will become successful.
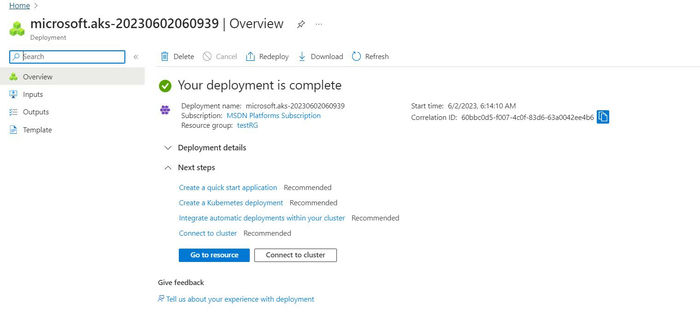
Now, click the “Go to Resource” button.
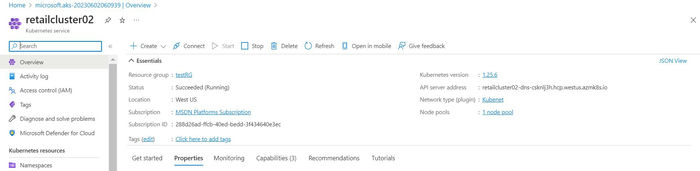
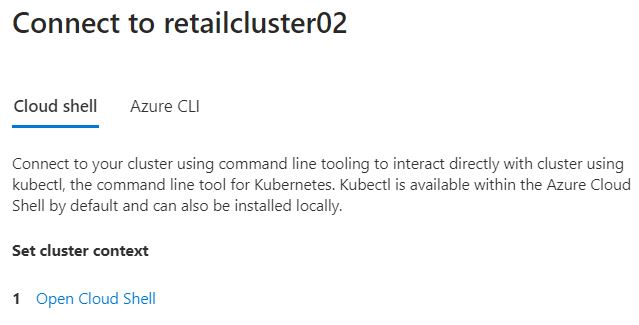
You will see “Retailcluster02” on the screen. Click the “Connect” button.
Once you click “Connect”, you will be redirected to the Cloud Shell.
Once the Cloud Shell is open, you need to create storage first.

If you run the command “kubectl get svc”, you will notice that it displays the Cluster IP service by default.

YAML File for nginx-deployment:
apiVersion: apps/v1
kind: Deployment
metadata:
  name: nginx-deployment
  labels:
    app: nginx
spec:
  replicas: 3
  selector:
    matchLabels:
      app: nginx
  template:
    metadata:
      labels:
        app: nginx
    spec:
      containers:
      - name: nginx
        image: nginx:1.14.2
        ports:
        - containerPort: 80
You can expose the deployment as a NodePort service by changing the type to NodePort in the expose command:
kubectl expose deployment nginx-deployment –name=np-service –type=NodePort

Finally, you can expose the deployment as a LoadBalancer service by changing the type:
kubectl expose deployment nginx-deployment –name=lb-service –type=LoadBalancer

Click on “Services & Ingresses” in the “Retailcluster02” window.
You will see a list of available Kubernetes resources.
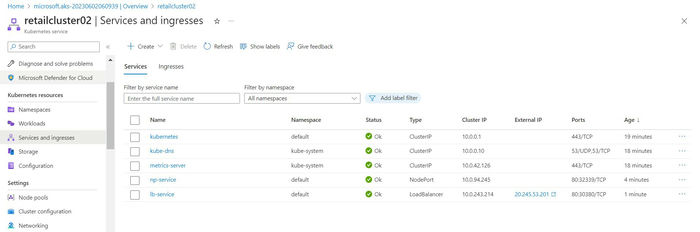
Click on the “External IP” option.
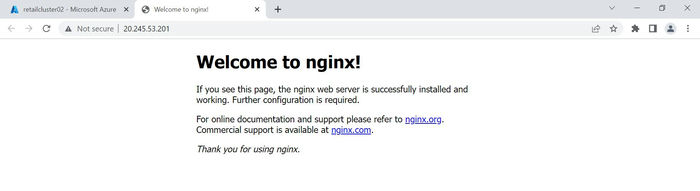
You will see the “nginx-deployment” opened in a new tab with the welcome message: Welcome to nginx!
Summary
In this article, we successfully created and deployed an Azure Kubernetes Service cluster and explored different types of services within the AKS cluster. We at Skrots also provide similar services, so make sure to visit https://skrots.com and check out all the services we offer. Thank you for reading!
Thanks for reading this article!!!


