Introduction
On this article, we’ll see how one can deploy an internet site from the Bitbucket account to Microsoft Azure. I can be strolling you all by find out how to configure Bitbucket account with Azure and deploying the webapp from Bitbucket repository to Azure.
Step 1
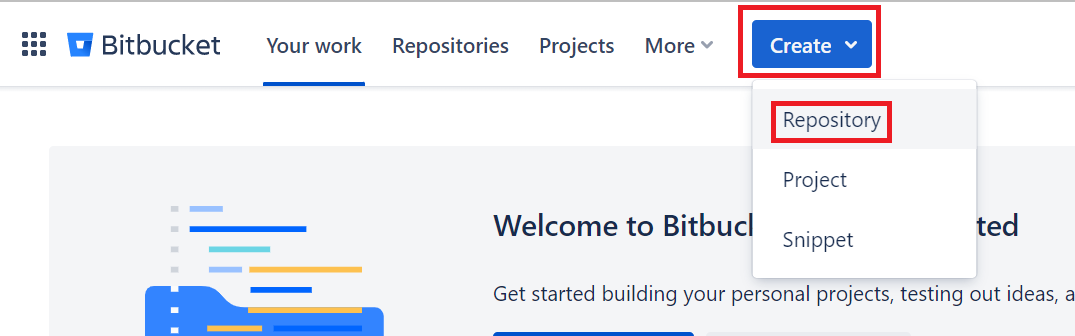
First you will need to create a repository in your bitbucket account. Login to your Bitbucket account and click on on Create button, then choose Repository.
Step 2
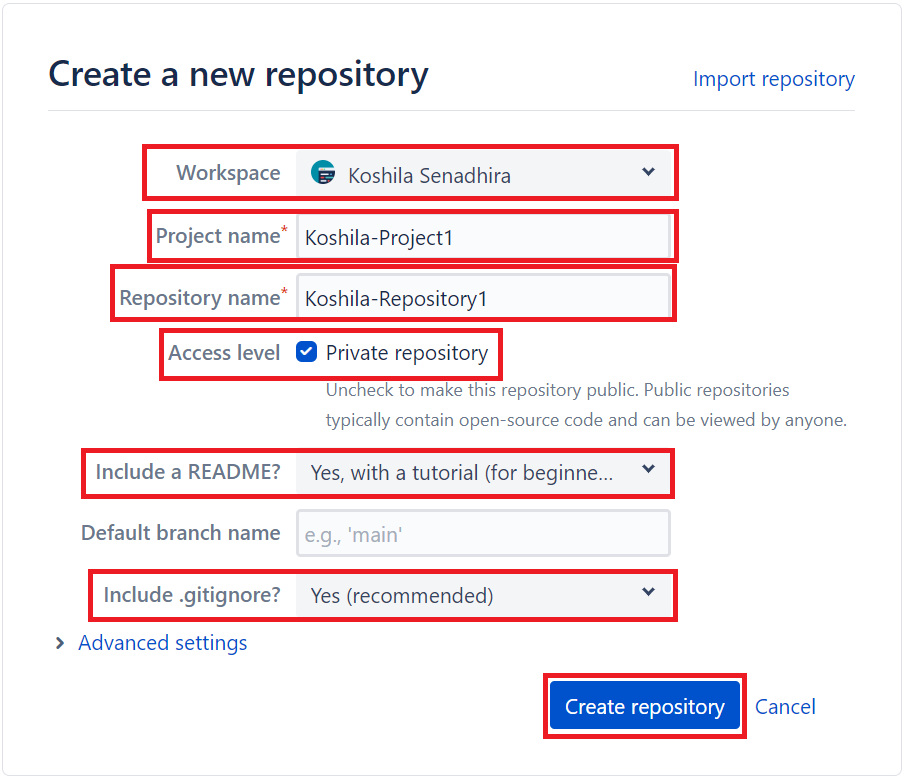
Fill within the required fields (You should utilize Superior settings possibility as nicely in case you required) and click on on Create repository button to create the repository.
Step 3
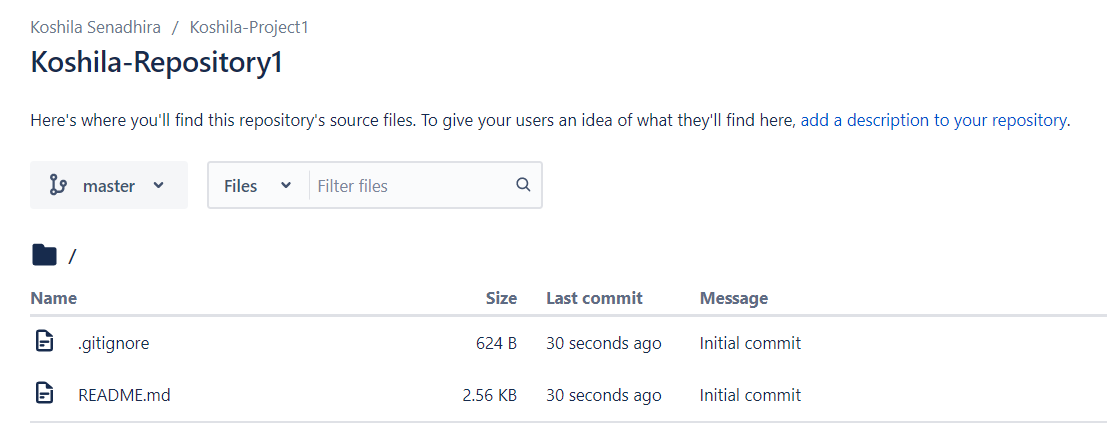
Then it is possible for you to to see the created repository.
Step 4
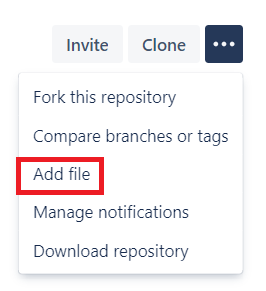
Click on on Add file button and add your Index.html file.
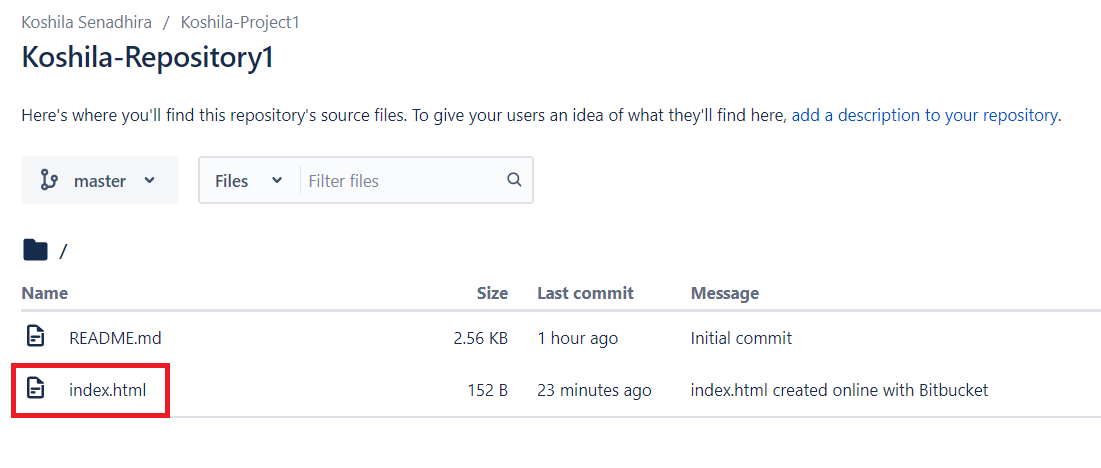
After including the Index.html file, it is possible for you to to see the file within the record.
Step 5
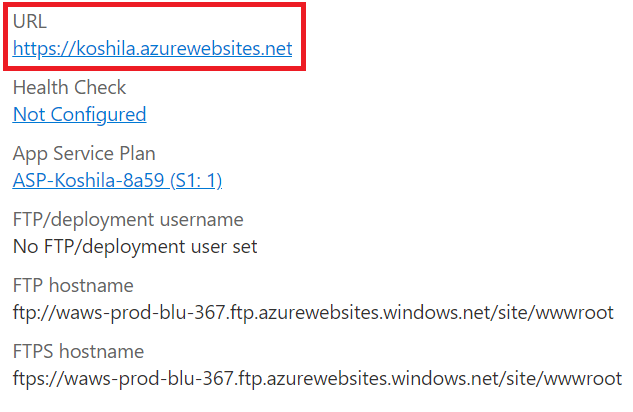
Go to your Net App in Azure portal. Click on on the URL. And be sure that your Net App is up and operating.
Step 6
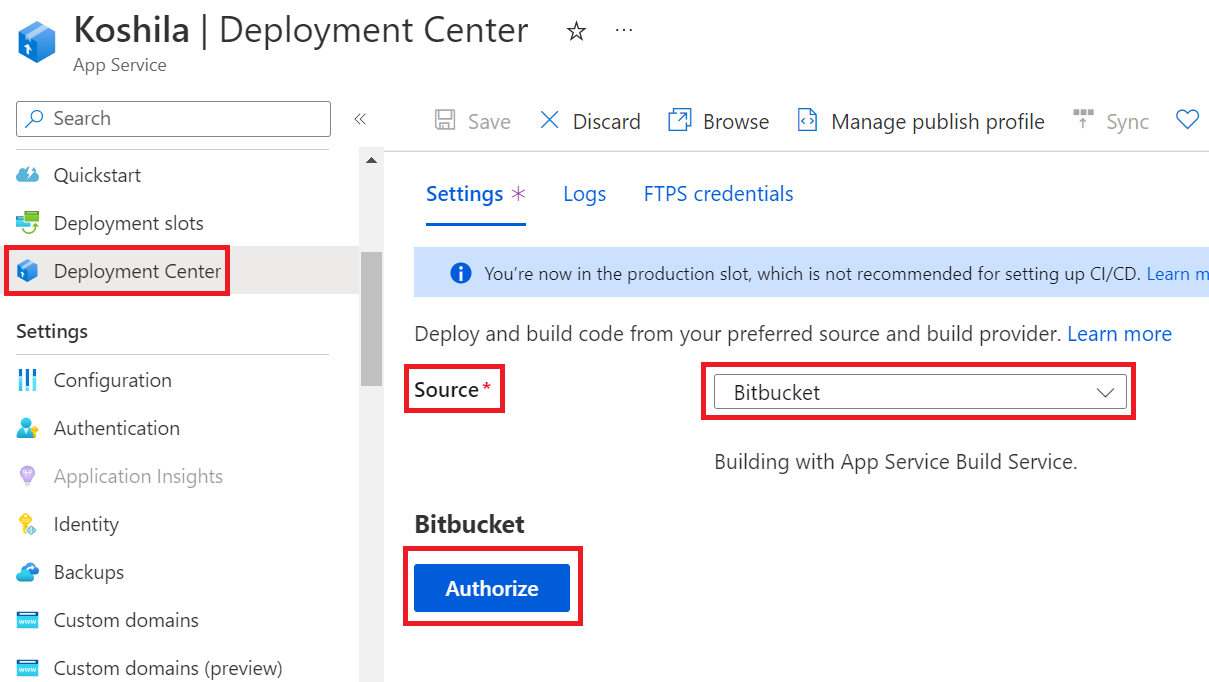
Now we’ll attempt to deploy the content material from the Bitbucket account. Go to Deployment Heart and choose the Supply as Bitbucket. For the very first time you’ll have to authorize your Bitbucket account. So, click on on Authorize button, present your Bitbucket credentials and Grant entry.
Step 7
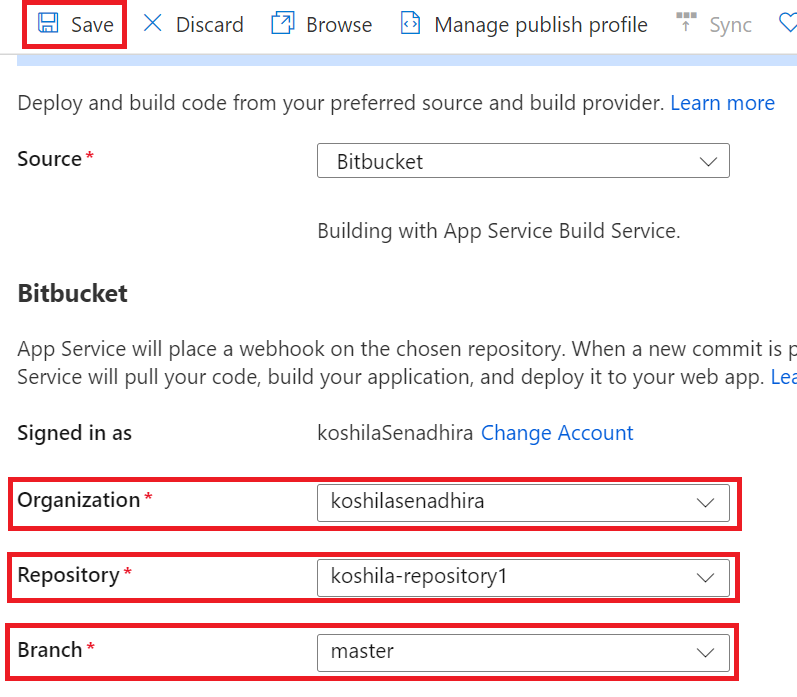
Then present the required data and click on on Save button.
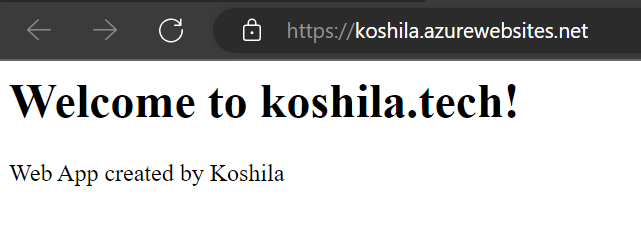
Step 8
Now click on in your URL once more and you will note the content material in your Index.html file.
Abstract
On this article we discovered find out how to deploy an internet site from Bitbucket to Azure, please use the feedback part when you have any query.
