On this article, I wish to share the steps and code to create/replace an Excel sheet from an Azure internet job. Utilizing Microsoft.Interop.Excel, we are able to create and replace the Excel sheet however in Azure internet jobs, we couldn’t use that DLL file, as an alternative of Microsoft. Interop dll, we are able to use the OpenXML spreadsheet choice to create or replace the Excel from the Azure internet job.
Let’s see the right way to create an Azure internet job together with the deployment steps and approaches to create or replace Excel.
What are the accessible choices to create or replace Excel?
- Utilizing the Microsoft.Interop.Excel
- OLEDB Connection
- OpenXML Spreadsheet
- Microsoft Excel 15.0 Object Library
- Third-party DLLs
Right here, I wish to share the code for the OpenXML spreadsheet, since Microsoft.Interop.Excel and OLEDB can’t work on Azure internet jobs.
What’s an Azure Net Job?
Net Jobs is a function of Azure App Service that allows you to run a program or script in the identical context as an internet app, API app, or cell app. There is no such thing as a extra value to make use of Net Jobs.
Steps to Create Azure Net Job
Step 1. Open Visual Studio in your machine (I’m utilizing 2015 VS).
Step 2. Then, choose the “Azure Net Job” from Visual Studio.
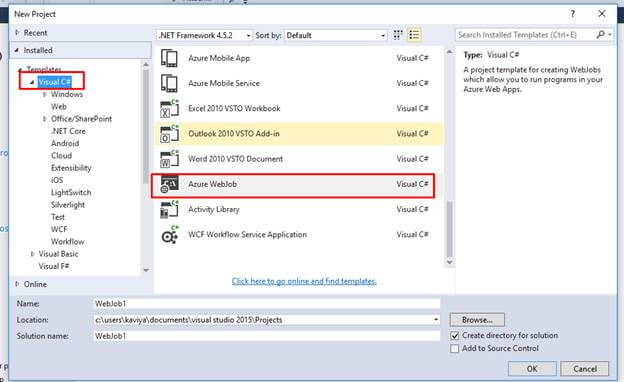
Step 3. Present the title for the online job, choose the placement, and click on “OK” to create a brand new answer.
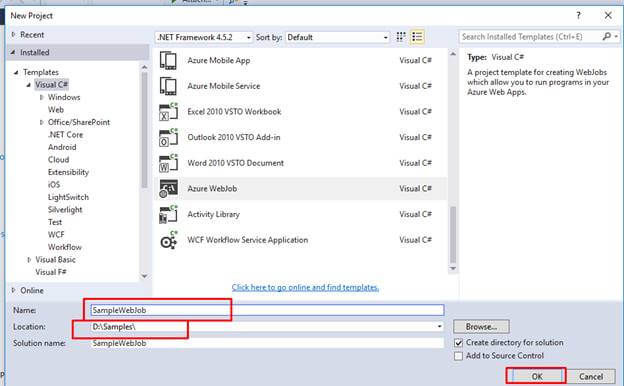
Your undertaking shall be created efficiently.
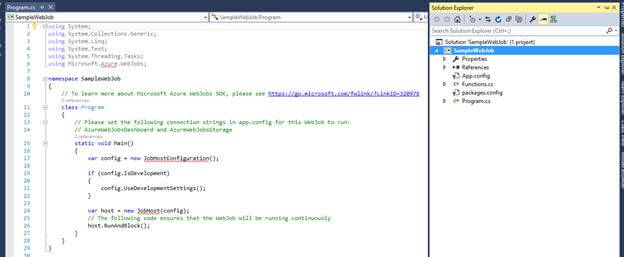
Step 4. After the undertaking is created, simply construct the answer to revive the NuGet packages.
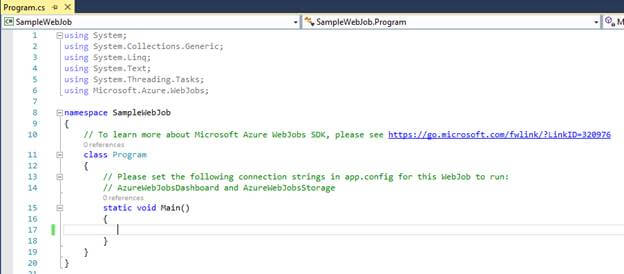
Step 5. Then, write the code inside the primary operate. Within the pattern, I’ve retrieved the information from the SQL DB desk utilizing View and now I’m updating within the Excel sheet.
Required DLL’s
utilizing System.Runtime.InteropServices;
utilizing DocumentFormat.OpenXml.Packaging;
utilizing DocumentFormat.OpenXml.Spreadsheet;
utilizing System.Collections.Generic;
utilizing DocumentFormat.OpenXml;
References
Right here is the pattern code for the ExportDataSetToExcel technique.
- Cross your dataset on the tactic
- Sheet Identify
- SPath for the Excel sheet and
// Write the view knowledge to the excel
personal static void ExportDataSetToExcel(DataSet ds, string SheetName, string reportPath)
{
    string consequence = string.Empty;
    strive
    {
        string filePath = reportPath;
        if (File.Exists(filePath))
        {
            File.Delete(filePath);
        }

        if (ds.Tables.Rely > 0 && ds.Tables[0] != null && ds.Tables[0].Columns.Rely > 0)
        {
            System.Information.DataTable desk = ds.Tables[0];

            utilizing (var spreadsheetDocument = SpreadsheetDocument.Create(filePath, SpreadsheetDocumentType.Workbook))
            {
                // Create SpreadsheetDocument
                WorkbookPart workbookPart = spreadsheetDocument.AddWorkbookPart();
                workbookPart.Workbook = new Workbook();
                var sheetPart = spreadsheetDocument.WorkbookPart.AddNewPart<WorksheetPart>();
                var sheetData = new SheetData();
                sheetPart.Worksheet = new Worksheet(sheetData);
                Sheets sheets = spreadsheetDocument.WorkbookPart.Workbook.AppendChild<Sheets>(new Sheets());
                string relationshipId = spreadsheetDocument.WorkbookPart.GetIdOfPart(sheetPart);
                Sheet sheet = new Sheet()
                {
                    Id = relationshipId,
                    SheetId = 1,
                    Identify = desk.TableName
                };
                sheets.Append(sheet);

                // Add header to sheetData
                Row headerRow = new Row();
                Checklist<string> columns = new Checklist<string>();

                foreach (DataColumn column in desk.Columns)
                {
                    columns.Add(column.ColumnName);
                    Cell cell = new Cell();
                    cell.DataType = CellValues.String;
                    cell.CellValue = new CellValue(column.ColumnName);
                    headerRow.AppendChild(cell);
                }

                sheetData.AppendChild(headerRow);

                // Add cells to sheetData
                foreach (DataRow row in desk.Rows)
                {
                    Row newRow = new Row();

                    columns.ForEach(col =>
                    {
                        Cell cell = new Cell();
                        // If worth is DBNull, don't set worth to cell
                        if (row[col] != System.DBNull.Worth)
                        {
                            cell.DataType = CellValues.String;
                            cell.CellValue = new CellValue(row[col].ToString());
                        }
                        newRow.AppendChild(cell);
                    });

                    sheetData.AppendChild(newRow);
                }

                Console.WriteLine($"Export {desk.Rows.Rely} rows of information to excel efficiently.");
                spreadsheetDocument.Shut();
            }
        }

        // string storageConnectionString = ConfigurationManager.ConnectionStrings["AzureWebJobsStorage"].ConnectionString.ToString();
        // var storageAccount = CloudStorageAccount.Parse(storageConnectionString);
        // CloudBlobClient cloudBlobClient = storageAccount.CreateCloudBlobClient();
        // var container = cloudBlobClient.GetContainerReference("emsreportcontainer");
        // Write the excel to Azure storage container
        // utilizing (FileStream fileStream = File.Open(filePath, FileMode.Open))
        // {
        //     bool exists = container.CreateIfNotExists();
        //     var blob = container.GetBlockBlobReference(SheetName + ".xslx");
        //     blob.DeleteIfExists();
        //     blob.UploadFromStream(fileStream);
        // }
    }
    catch (Exception ex)
    {
        Console.WriteLine($"Export motion failed. Error Message: {ex.Message}");
    }
    // return consequence;
}
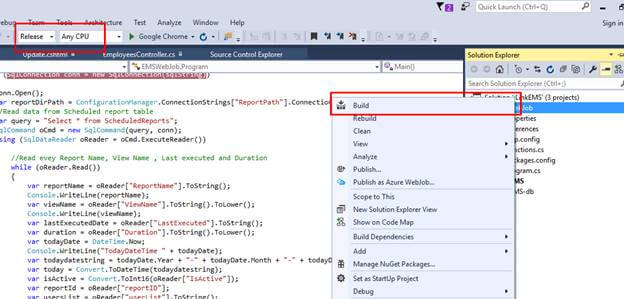
Deployment steps
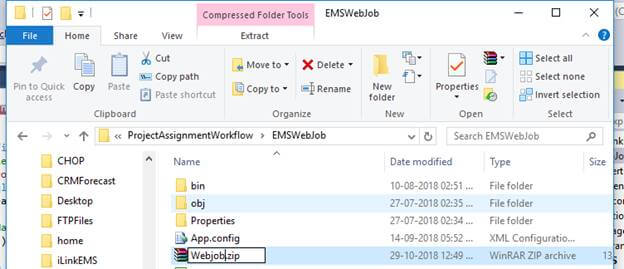
As soon as you’re achieved with the code adjustments, construct the answer within the launch mode and zip the construct folder. That zip file must be uploaded to the online job.
Observe the below-listed steps to deploy the job on the Azure portal.
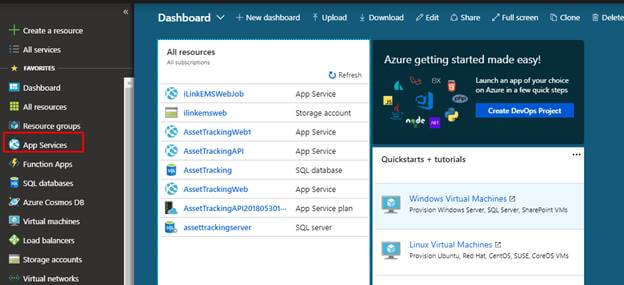
Step 1. Open the Azure portal web site.
Step 2. Click on “App Service” from the left navigation.
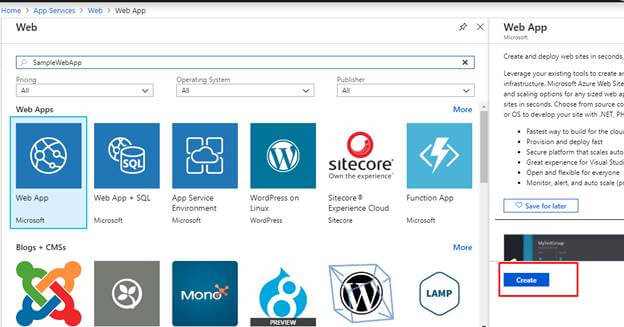
Step 3. On the app service web page, click on the “Add” button to create a brand new app service for those who don’t have one already.
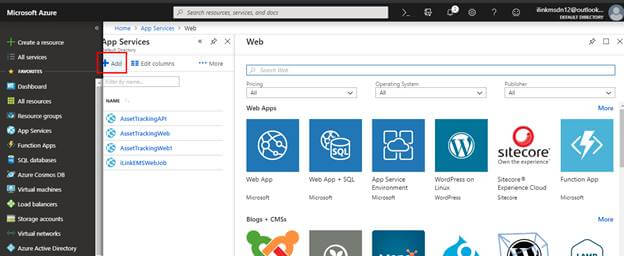
Step 4. Then, choose the “Net App” from the right-side pane and supply the app title as per your want.
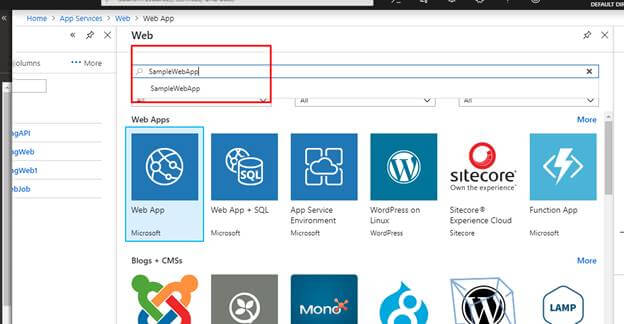
Step 5. Click on on the Create button. It’s going to navigate to the online app creation web page kind.
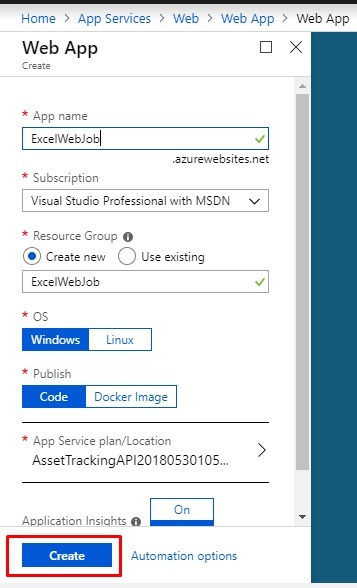
Step 6. On the internet app kind, present the related particulars equivalent to “App title, Subscription, Useful resource Group, OS, Publish, App service plan/location, Software insights”.
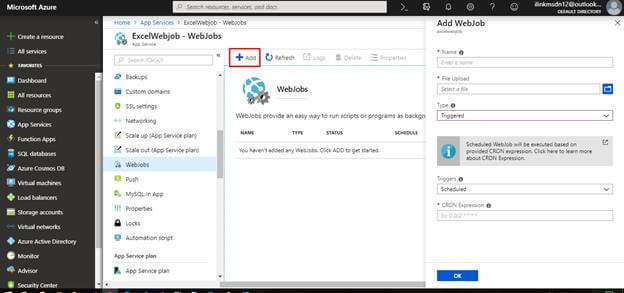
Step 7. Then, choose your app from the App Companies web page and click on “internet jobs” from the left navigation pane.

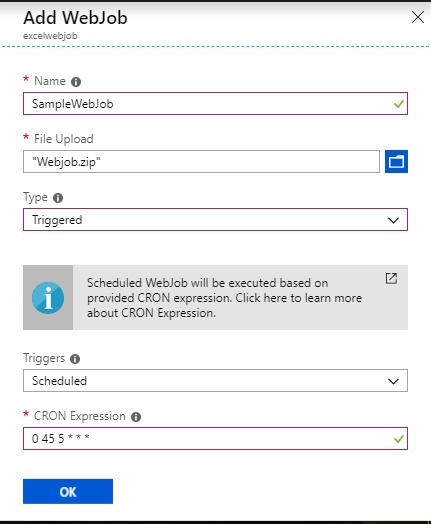
Step 8. Click on on “Add” from the proper pane present the beneath particulars and choose “OK”.
- Identify
- File Add: Add the webjob.ZIP folder – (A .zipfile that comprises your executable or script file in addition to any supporting information wanted to run this system or script. The supported executable or script file varieties are listed within the Supported file varieties).
- Kind: Scheduled (I’ve chosen scheduled as a result of my job needs to run every single day at midday)
- CRON Expression à UTC Time (0 45 5 * * *) (IST 12 PM)
CRON Expression Learn extra.
Step 9. The brand new internet job seems on the internet web page, as proven within the beneath picture.

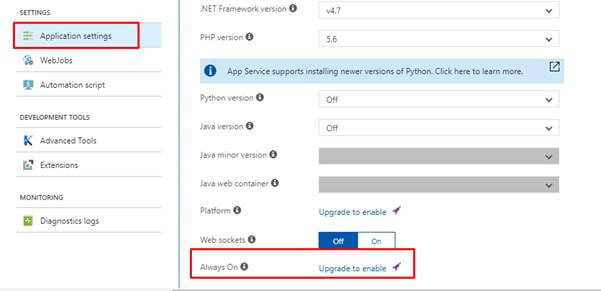
Step 10. After creating the online job, choose “At all times on” from the appliance settings. Open the app service and choose the appliance settings.
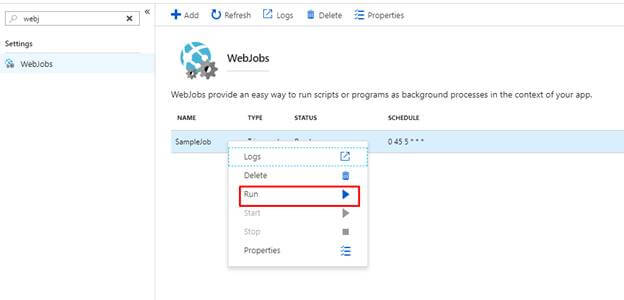
Step 11. To run the WebJob, right-click its title within the record and click on “Run”.
Lastly, we now have created the scheduled internet job.
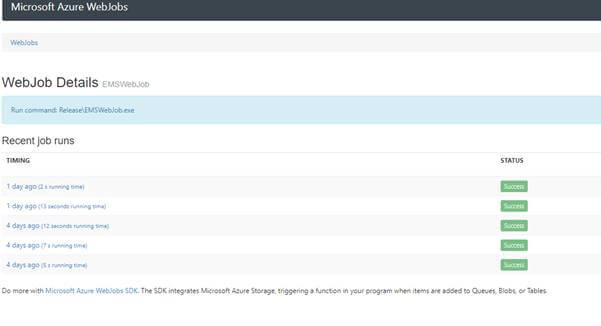
Step 12. After working the job, choose the logs the place we are able to see success and failure messages.
Abstract
On this article, we now have explored the right way to create an Azure internet job, the right way to deploy the job in Azure, and what are the alternate choices to create or replace the SQL Database desk values in Excel.
Know extra about our firm at Skrots. Know extra about our companies at Skrots Companies, Additionally checkout all different blogs at Weblog at Skrots