Introduction
Azure Cross-through Authentication (PTA) is a brand new authentication technique launched in Azure AD Join within the 2.1.15.zero or newest model.
Advantages of Cross-through Authentication (PTA)
- Synchronizes objects from On-prem AD to AAD
- Password writeback
- Seamless-Signal-On (SSO)
- Hybrid Id Options
Stipulations
Please take into account the configuration under if you’re utilizing a firewall or any proxy in your On-prem to Azure AD surroundings.
Be sure that authentication is the agent that may make an outbound request to Azure AD over the next ports.
Step 1
I’ve downloaded the most recent Azure AD Join from Microsoft’s official web site, and under I’ve included the obtain hyperlink additionally.
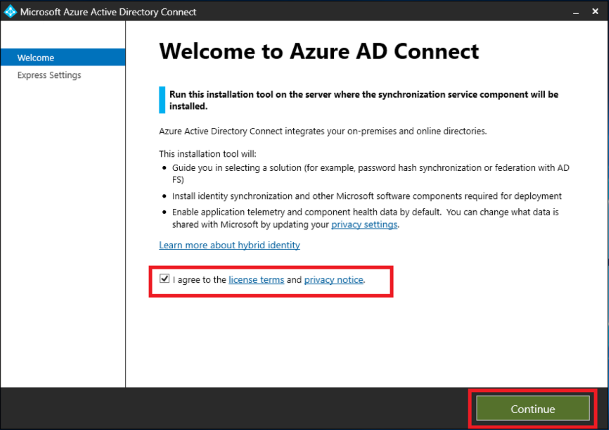
Step 2
Simply tick I agree and click on Proceed.
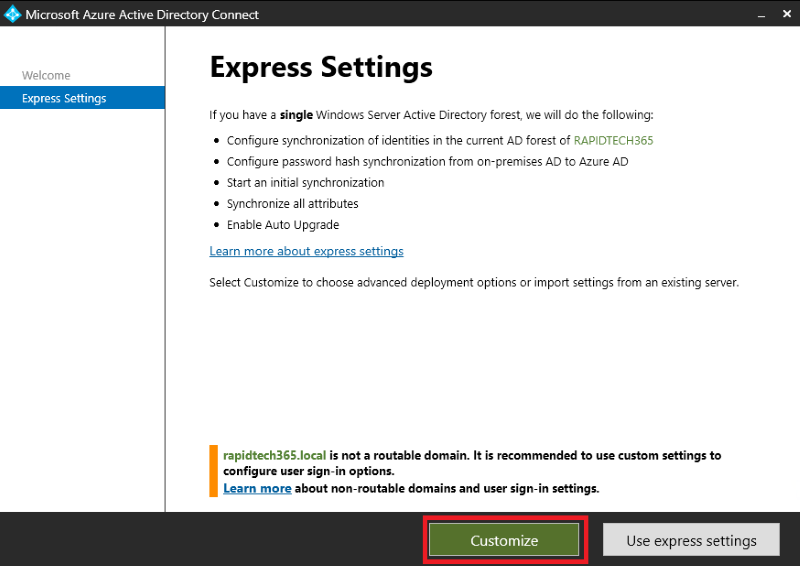
Step 3
Go to the Customise Choice right here.
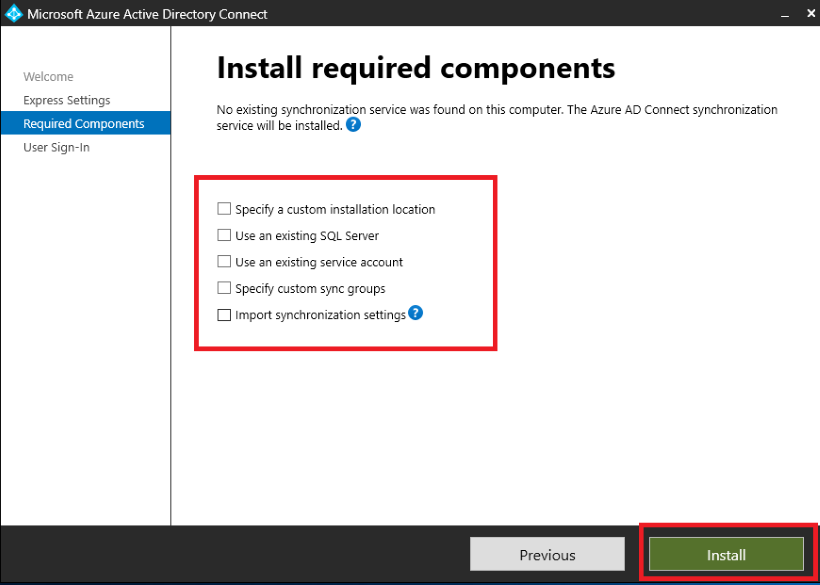
Step 4
Simply go away all of the tick choices empty and click on Set up.
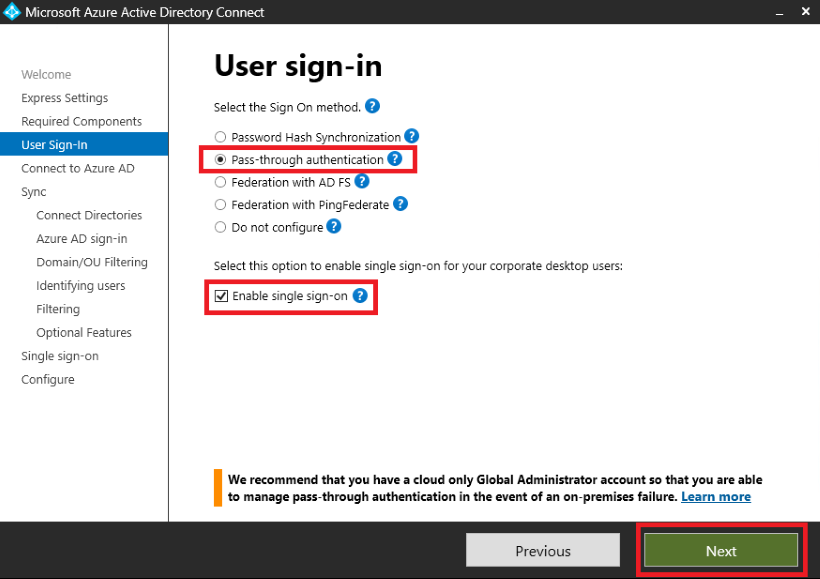
Step 5
Right here, choose Cross-through authentication and allow Single-Signal-On. Click on Subsequent.
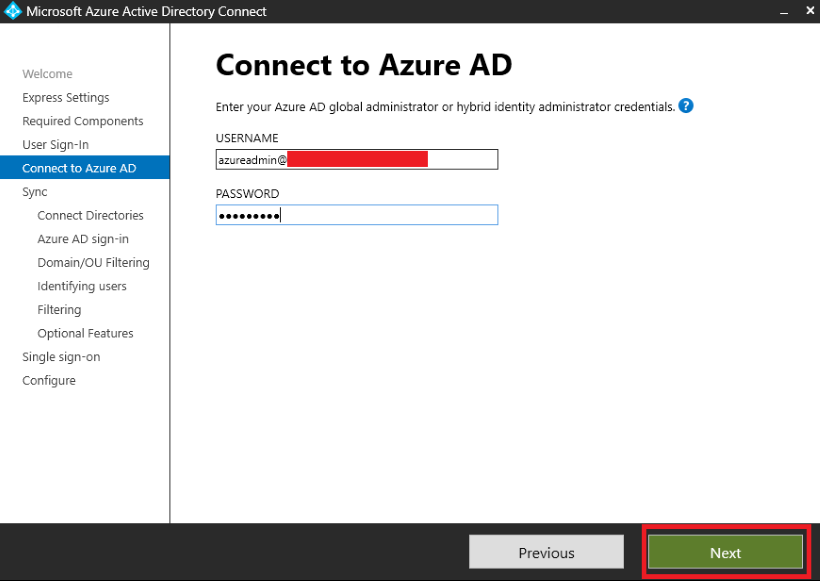
Step 6
Right here you need to enter your M365 World Administrator Credentials. I’ve talked about my credentials under within the screenshot.
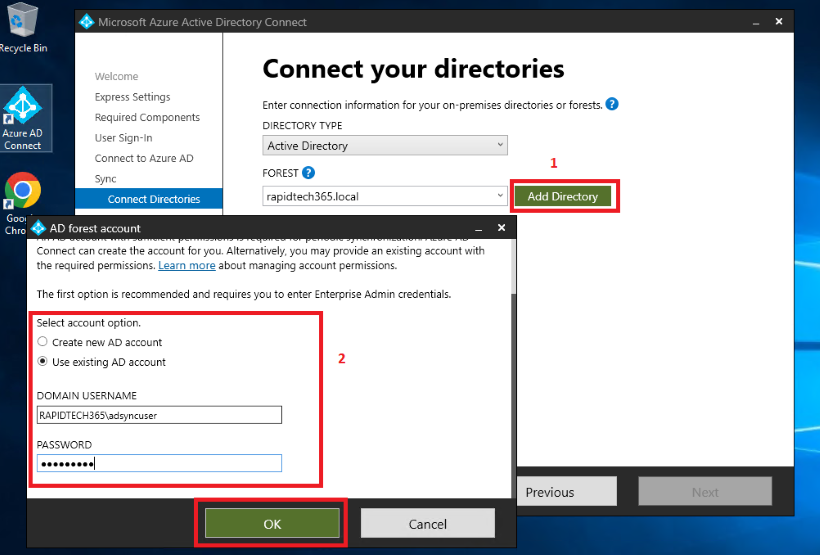
Step 7
Click on Add Listing, then get the AD forest account Wizard and enter any consumer of your On-prem AD. In my case, I’ve created an adsyncuser in my OU group.
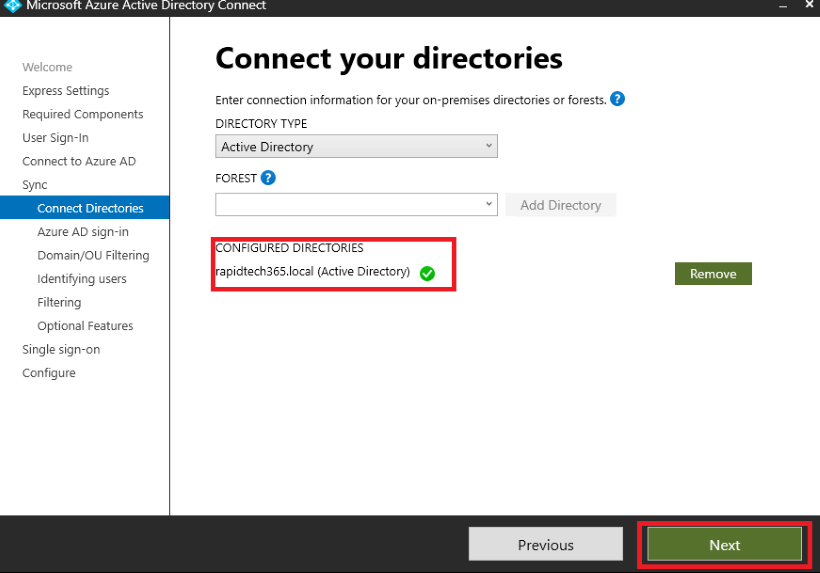
Step 8
Upon getting verified your native area listing, you possibly can click on Subsequent.
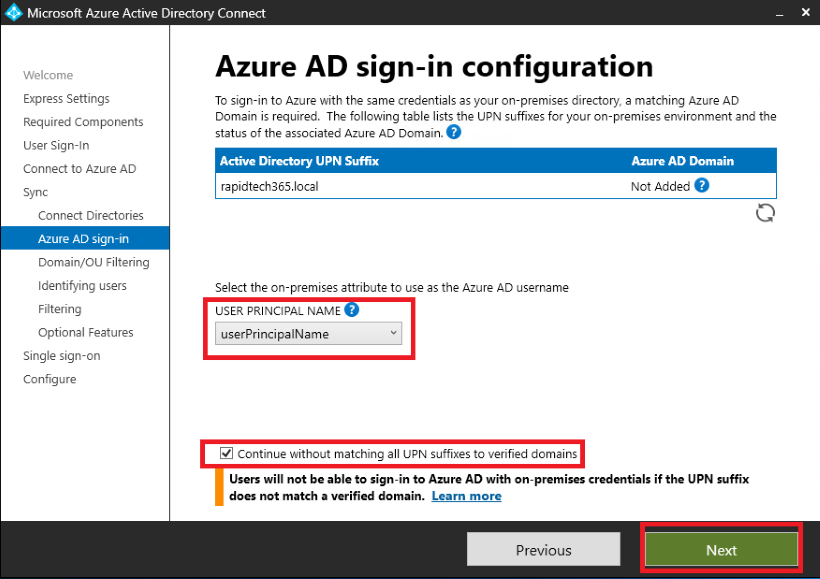
Step 9
Now, please do what’s in the next screenshot.
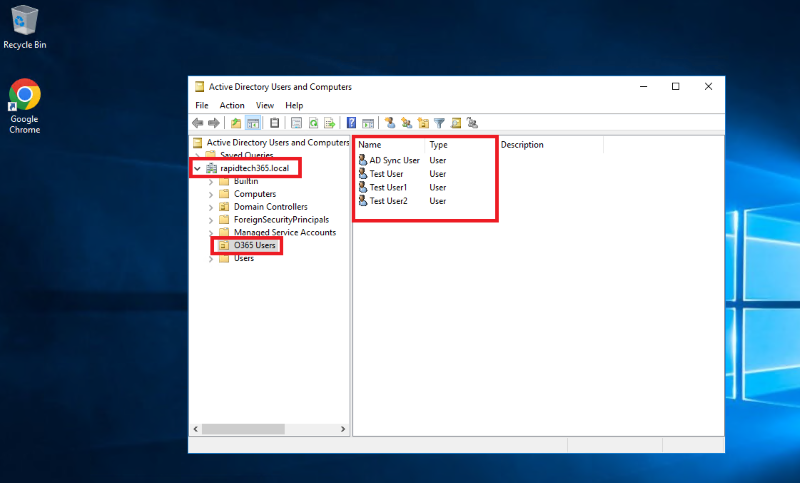
Step 10
That is my On-prem AD consumer. Now I will sync my O365 OU consumer to Azure AD.
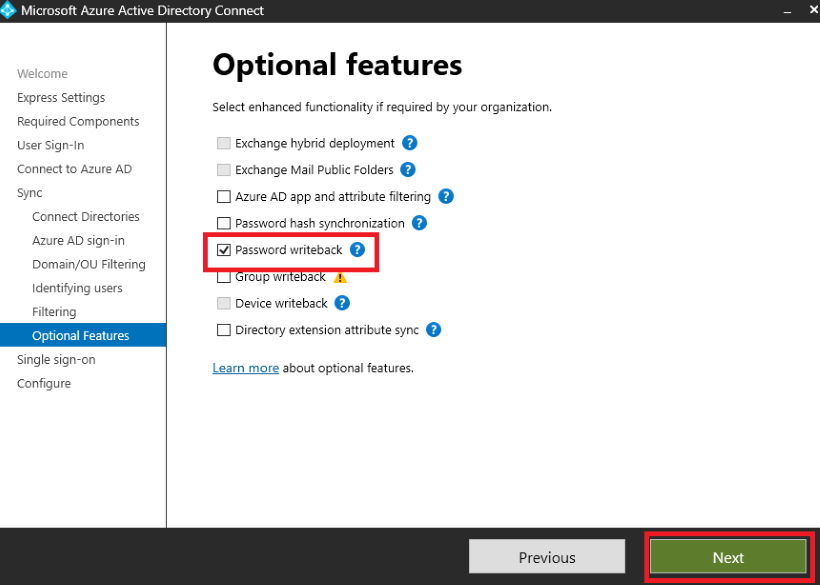
Step 12
In non-obligatory options, simply tick Password writeback solely.
Step 11
I’ve chosen my O365 OU.

Step 13
Enter your On-prem Administrator Credentials.

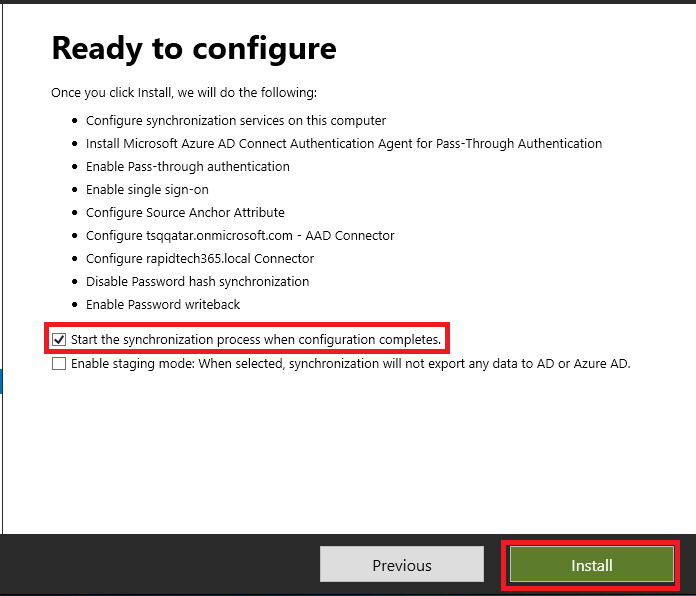
Step 14
Overview your configuration and Set up it.
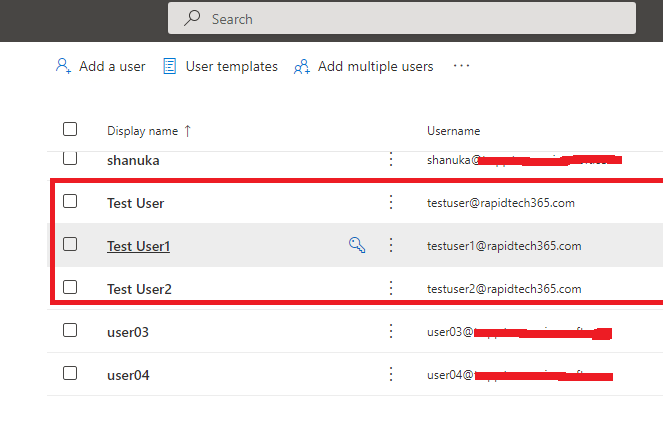
Step 15
My on-prem AD consumer efficiently synchronized to the Azure AD account.
Seamless Signal-On Group Coverage Steps
Step 1
Open the Group Coverage Administration Editor device.
Step 2
Edit the group coverage that’s utilized to some or all your customers. This instance makes use of Default Area Coverage.
Step 3
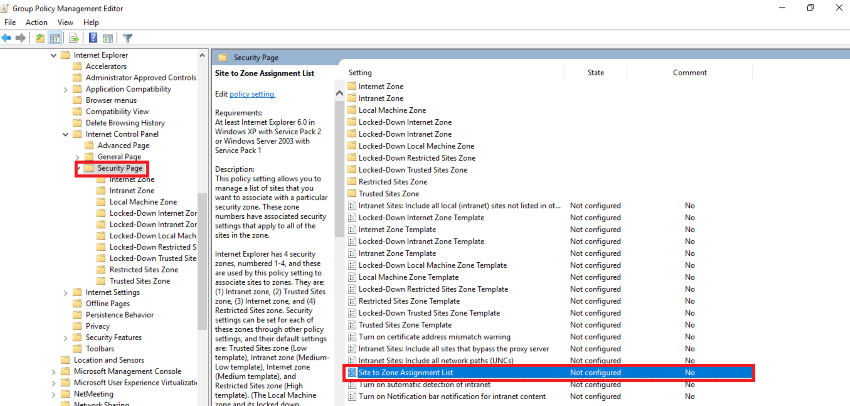
Navigate to Consumer Configuration > Insurance policies > Administrative Templates > Home windows Elements > Web Explorer > Web Management Panel > Safety Web page. Then choose Website to Zone Task Listing.
Step 4
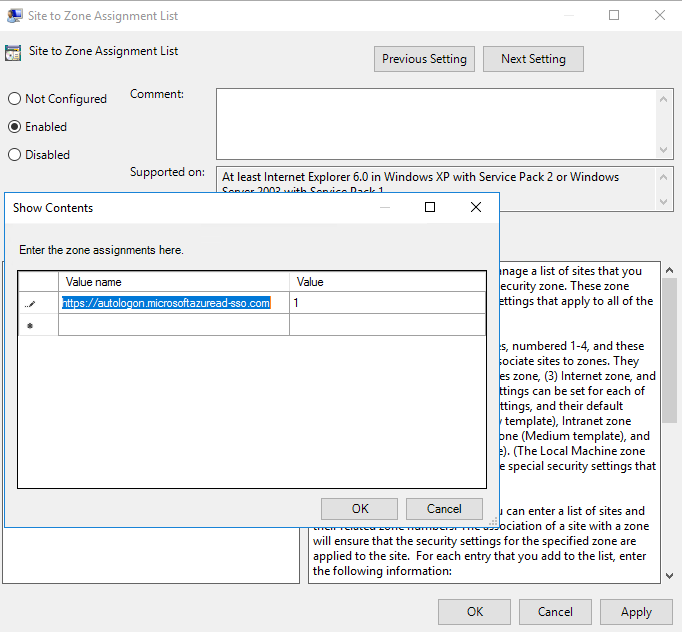
Allow the coverage and add the under talked about URL and Information Worth.
Worth title: https://autologon.microsoftazuread-sso.com
Worth (Information): 1
Step 5
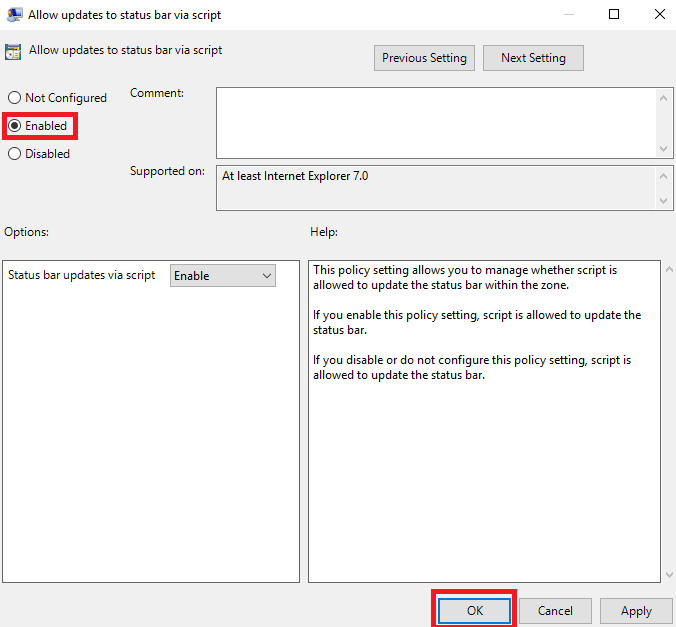
Navigate to Consumer Configuration > Insurance policies > Administrative Templates > Home windows Elements > Web Explorer > Web Management Panel > Safety Web page > Intranet Zone. Then choose Permit updates to standing bar through script.
Step 6
Allow the coverage setting, after which choose OK.

Group coverage choice config setup
Step 1
Open the Group Coverage Administration Editor device.
Step 2
Edit the group coverage that’s utilized to some or all ofyour customers. This instance makes use of Default Area Coverage.
Step 3
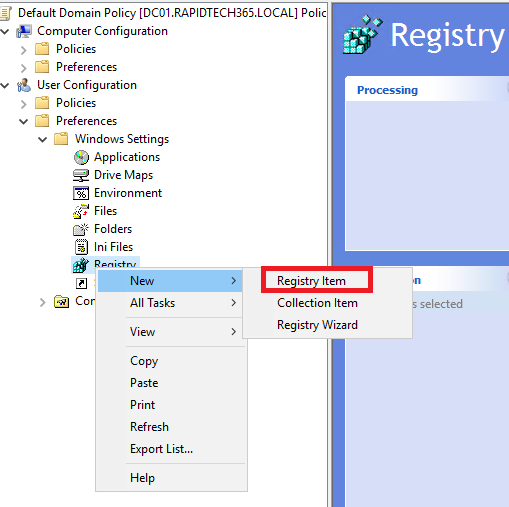
Navigate to Consumer configuration > Preferences> Home windows Settings > Registry > New> Registry merchandise.
Step 4
Ensure that the talked about values have been entered appropriately.
- KeyPath: SoftwareMicrosoftWindowsCurrentVersionInternetSettingsZoneMapDomainsmicrosoftazuread-sso.comautologon
- Worth title: https
- Worth sort: REG_DWORD
- Worth information: 00000001


Step 5
That is my area logged-in laptop.
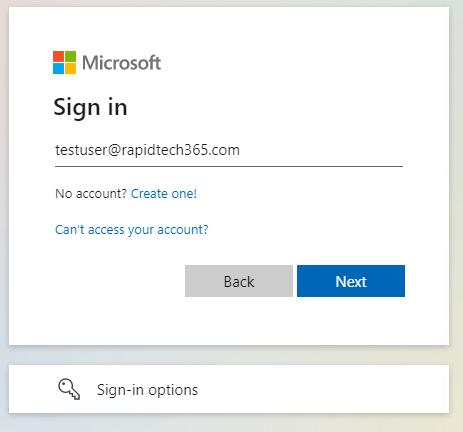
Now, efficiently engaged on my SSO configuration, I’ve given solely my e-mail tackle right here.
Step 6
I’ve signed in efficiently with none password.
Conclusion
This text taught us how you can setup Cross-through authentication PTA and Seamless-Signal-On SSO in Azure AD Join. And when you have any questions please contact me.
Thanks.


