Introduction
The storage account is among the basic items of cloud know-how. It accommodates all of our Azure Storage knowledge objects: blobs, information, queues, tables, and disks. Microsoft affords a number of choices to retailer knowledge on the cloud. Storage can be utilized for 2 functions; one is for truly storing information simply as we do on a tough disk. So it turns into the place we put our backup information, the place we put our database information. As well as, we are able to retailer our jpeg or movies in a storage account. The opposite is because the again finish to a Digital Machine. So truly, many companies inside Azure want a storage account, generally for logging and generally as a basic piece of the know-how. By default, Digital Machine is run on a managed storage account, which is an abstraction on prime of a storage account. We can’t use it to create a Digital Machine on prime of an unmanaged account.
On this article, we’ll perceive the right way to create an Azure blob storage account and add a file on the blob.
There are numerous choices out there within the Azure Storage Account for storing consumer knowledge.
Blob Storage
The phrase blob is an acronym, which stands for a binary massive object. Blobs usually embrace massive information which might be unstructured, reminiscent of photographs, video, music information, backup information, and so forth.
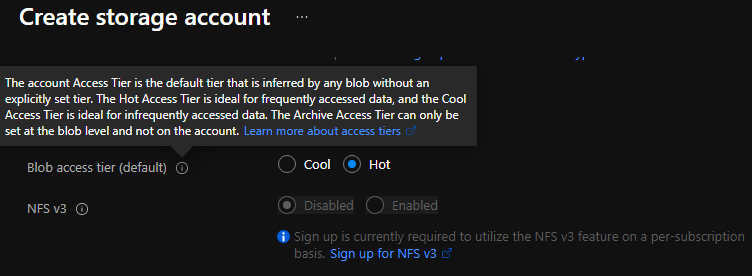
Blob storage may be divided into two entry tiers,
Sizzling entry tier
These knowledge, that are accessed ceaselessly, will come underneath this tier. As well as, the new storage tier is extremely out there in comparison with the chilly entry tier, like 99.9% versus the 99% of the chilly storage tier.
Chilly entry tier
On this tier, knowledge that’s not accessed fairly often will relay. As well as, the chilly entry tier is cheaper than the new entry tier and as such, you’ll be able to retailer extra knowledge at a decrease price.
Notice
We are able to swap between entry tiers at any level if we want to take action.
File Storage
With the assistance of Azure Recordsdata, we are able to arrange extremely out there community file shares that may be accessed by utilizing the usual Server Message Block (SMB) protocol. That implies that a number of VMs can share the identical information with each learn and write entry. We are able to additionally learn the information utilizing the REST interface or the storage consumer libraries.
There are a number of frequent situations the place Azure File storage could be very helpful,
- Retailer configuration information on a file share and entry from a number of VMs.
- We are able to hold useful resource logs, metrics, and crash dumps on a file share and later may be processed or used for evaluation.
Queue Storage
Queue Storage is considerably like MSMQ. It permits us to decouple our elements and have dependable asynchronous communication. In Azure Queue Storage, the variety of queues is just restricted by the capability of the storage account. The Azure Queue service is used to retailer and retrieve messages. Queues and messages may be created programmatically or utilizing the Storage Explorer device.
Desk Storage
Desk storage is used to retailer semi-structured knowledge in a key-value format in a NoSQL datastore. Azure desk storage can retailer petabytes of knowledge, can scale, and is cheap. Desk storage may be accessed utilizing REST and a number of the OData protocols or utilizing the Storage Explorer device. Azure Desk storage is now a part of Azure Cosmos DB.
Disk
An Azure managed disk is a digital exhausting disk (VHD). It is sort of a bodily disk in an on-premises server however virtualized. Azure-managed disks are saved as web page blobs, that are random IO storage objects in Azure. We name a managed disk ‘managed’ as a result of it’s an abstraction over web page blobs, blob containers, and Azure storage accounts.
Azure affords two forms of disk storage,
- Managed – Managed disk has some benefits over unmanaged disks within the sense that disks will probably be created and managed for us. That is an IaaS providing.
- Unmanaged – With unmanaged disks, we should handle them our self. This implies, our digital exhausting disks are saved in a storage account as web page blobs.
Furthermore, Azure affords two forms of disks,
- Premium – Which suggests our knowledge will probably be positioned on solid-state disks
- Customary – The place knowledge is positioned on common exhausting disk drives
Creating my First Azure Storage Account
There are a number of methods to create a storage account,
- Azure portal
- Azure PowerShell
- Azure CLI
- Azure Useful resource Supervisor (ARM) Template
On this article, we’ll use the primary choice i.e. utilizing the Azure portal. For different choices, we’ll perceive in several articles.
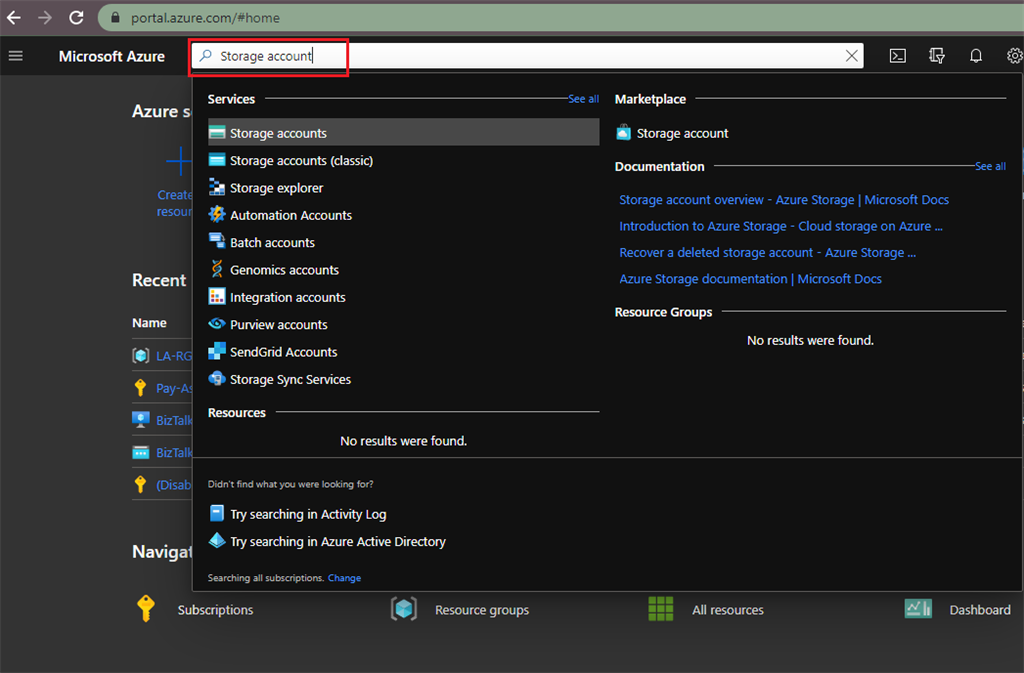
- Log in to the Azure portal ➜ Search Storage Accounts ➜ then choose Storage accounts from the search outcome
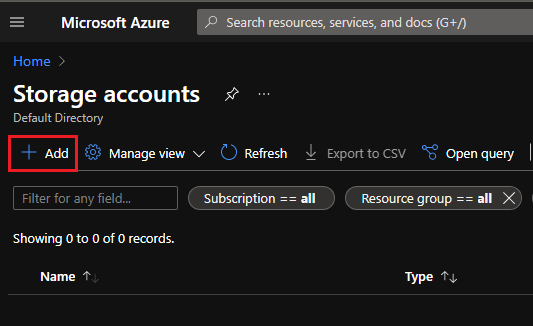
- It should open a Storage account, now now we have to click on on Add,
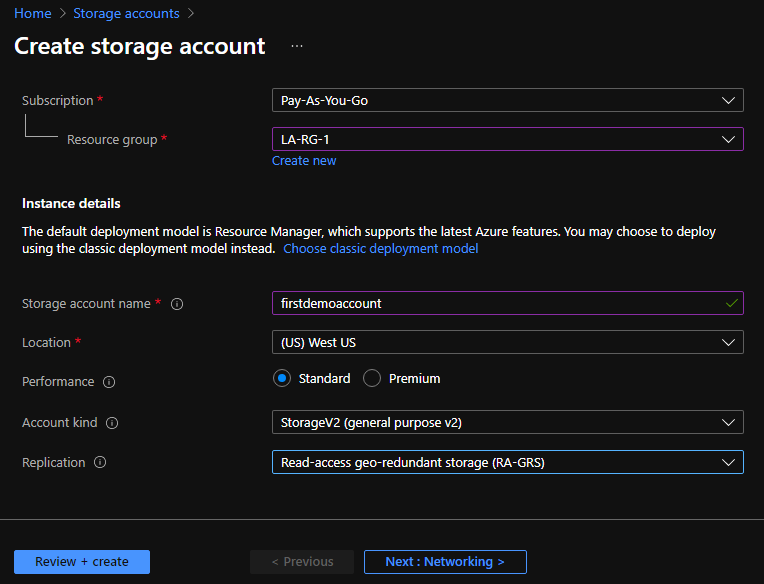
Now now we have to fill within the necessary particulars underneath the Fundamental part, like,
- Choose the Subscription from the dropdown.
- Select the Useful resource Group underneath which this storage account will probably be created.
- Present the Storage account identify, it needs to be distinctive throughout Azure and the size should be between three and 24 characters. Additionally, it could embrace solely numbers and lowercase letters.
- Choose the placement of the Storage account or use the default location.
- Choose a efficiency tier. The default tier is Customary.
- Set the Account type subject to Storage V2 (general-purpose v2).
- Choose replication worth, the default replication choice is Learn-access geo-redundant storage (RA-GRS). It should specify how the storage account will probably be replicated.
After coming into all of the values, it’ll appear like under. If you wish to hold the default values for the following part then click on on ‘Evaluate + create‘, in any other case click on on ‘Subsequent: Networking >‘
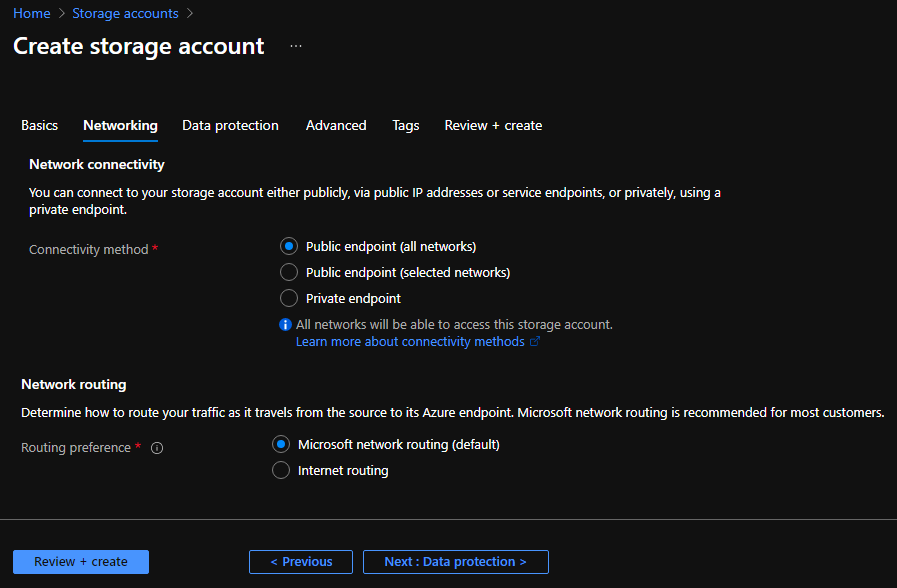
- Now we’re within the networking part, and right here we are able to change the configuration about Community connectivity and Community routing.
In our case, we’ll hold the default as it’s and never going to alter any configuration.
For extra choices, we’ll click on on ‘Subsequent: Knowledge safety >‘.
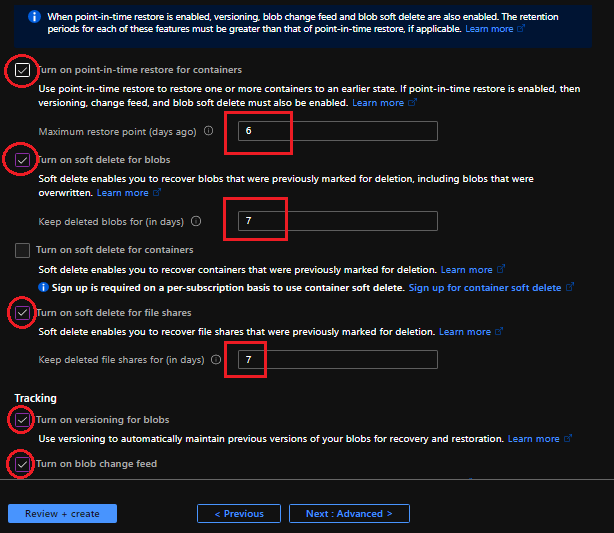
- Within the Knowledge safety part, we are able to outline a number of configurations like if wish to activate point-in-time restoration for containers. With assist of this configuration, we are able to restore a number of containers to an earlier state. We’ve got to bear in mind one level right here if we’re going to allow this ‘Level-in-time restore‘ configuration, then versioning, change feed and blob delicate delete should be enabled. The utmost restore level may be 6 days in the past.
Subsequent configuration, Activate delicate delete for blobs. With this configuration, we are able to get well blobs that had been beforehand marked for deletion. Right here we are able to outline the variety of days to maintain deleted blobs.
Equally, now we have different configurations like,
- Activate delicate delete for containers
- Activate delicate delete for file shares
- Activate versioning for blobs
- Activate blob change feed
In case you change these setting then it’ll appear like under.
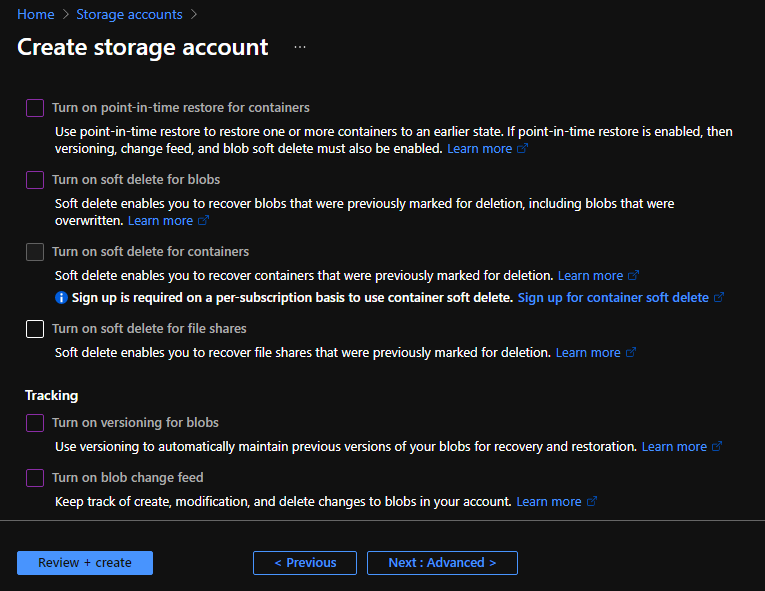
For our state of affairs, we’ll hold it as default and never going to alter any configuration.
For extra choices, we’ll click on on ‘Subsequent: Superior >‘.
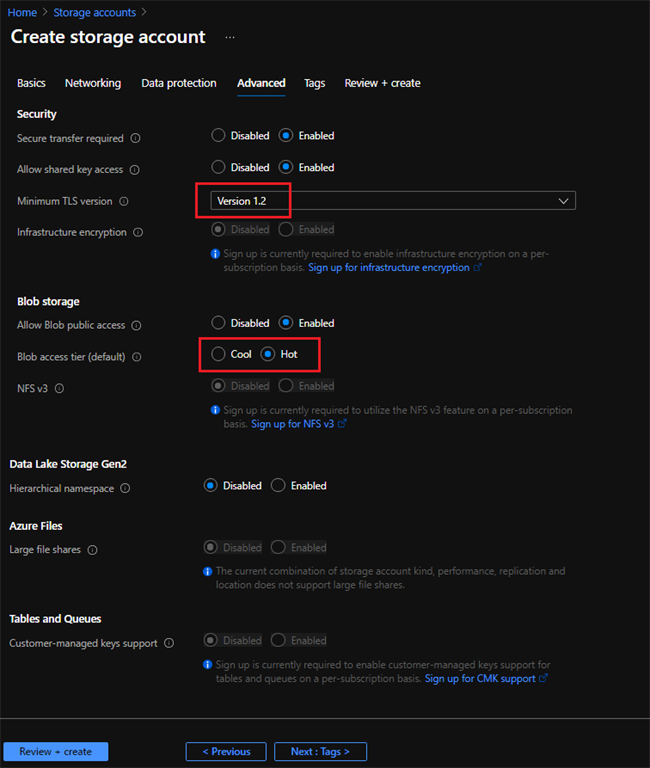
- Within the Superior part, we are able to outline the Safety, Blob storage, Knowledge Lake Storage Gen2, Azure Recordsdata & Desk, and Queues configuration.
Please verify the configuration within the under picture, for our state of affairs I’m conserving the default values.
The following choice is Tags; we’ll bypass this part as a result of right here you’ll be able to simply outline the tags and their values. Now we’ll click on on ‘Evaluate + create‘.
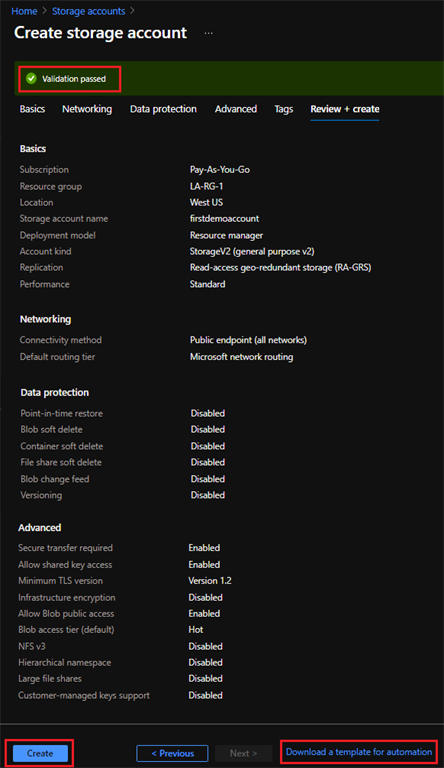
- As soon as we click on on ‘Evaluate + Create‘, it’ll evaluation your storage account settings and provides the results of the evaluation. In case all configurations are correctly outlined, we’ll get the message “Validation Handed”. As well as ‘Create’ button will seem. Clicking on that button will create the Storage account. In case of validation failed then it provides you with the rationale why and the right way to repair that concern.
Right here, we’ll get a hyperlink to obtain a template that we are able to use for automation.
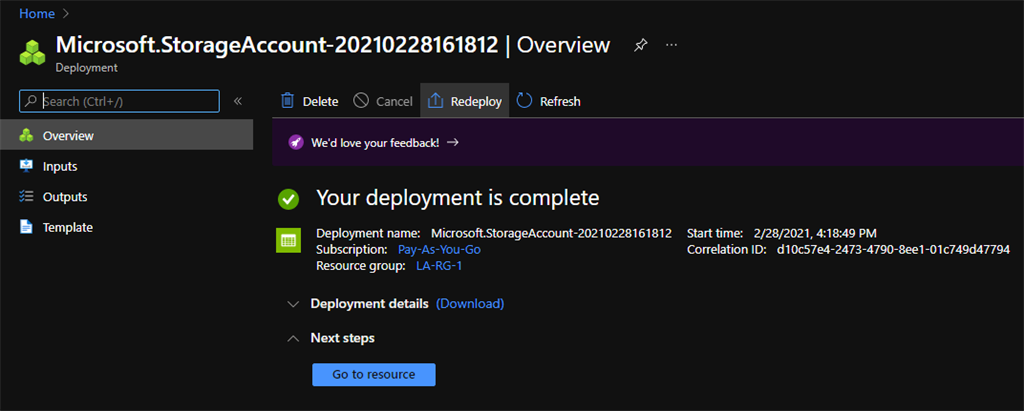
- It should take hardly a minute or two to finish the deployment. As soon as deployment accomplished under display screen will come, then we are able to click on on ‘Go to useful resource’
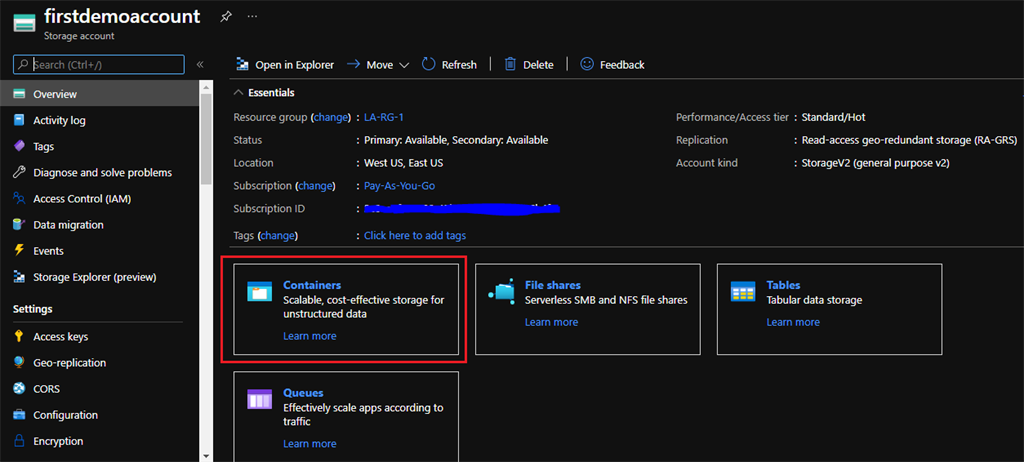
- It should open our newly created Storage account. As soon as it opens then now we have to create a container the place we are able to add the file. Click on on ‘Containers‘ and it’ll open to create a brand new container,
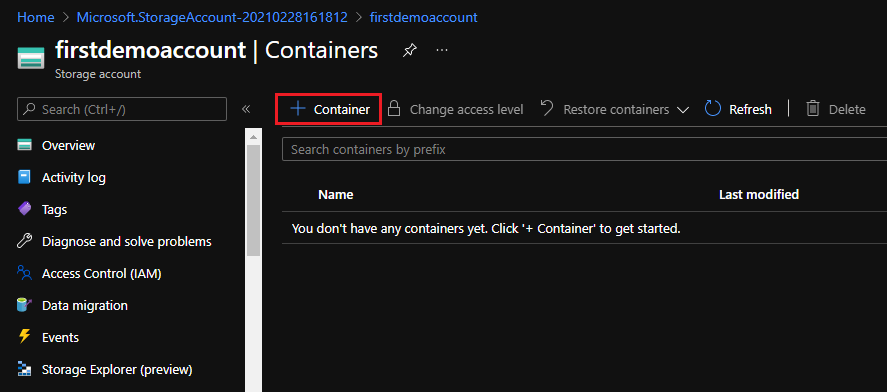
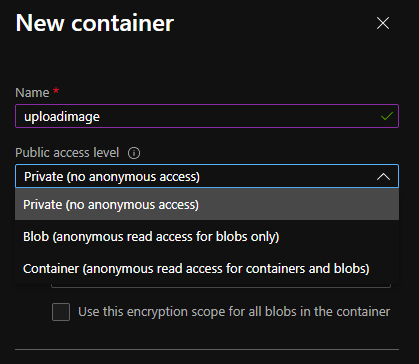
- Click on on ‘+ Container‘ the place we’ll add the pattern file.
- Enter the identify of the container and choose the Public entry degree based mostly on our want. For our state of affairs, we’ll hold this configuration as it’s.
- A container is created efficiently and now our last step left to add the file. Click on on add and it’ll open a brand new panel the place we’ll see a placeholder to pick out a file. As well as, we are able to see a checkbox that will probably be useful to overwrite the already present file.
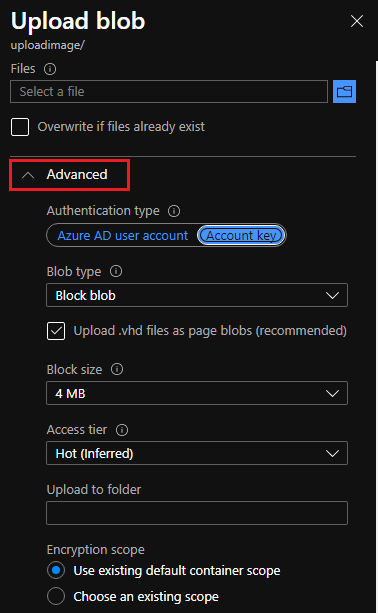
As well as, we could have a sophisticated choice there.

- As soon as we develop Superior, it provides you with the choice to decide on the blob kind, block dimension, and Entry tier. You will discover the under configuration underneath the Advance choice.
For our state of affairs, we won’t contact something on this part and hold this configuration as it’s.
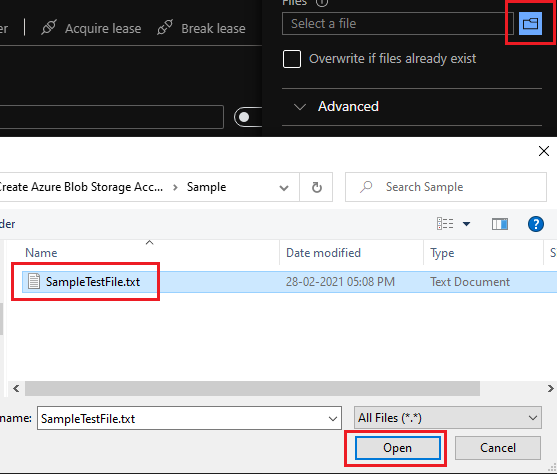
- Now, click on on the folder icon and it’ll open a pop-up to pick out the file from the folder. Choose the file and click on on open. As soon as it chosen then click on on ‘Add’.
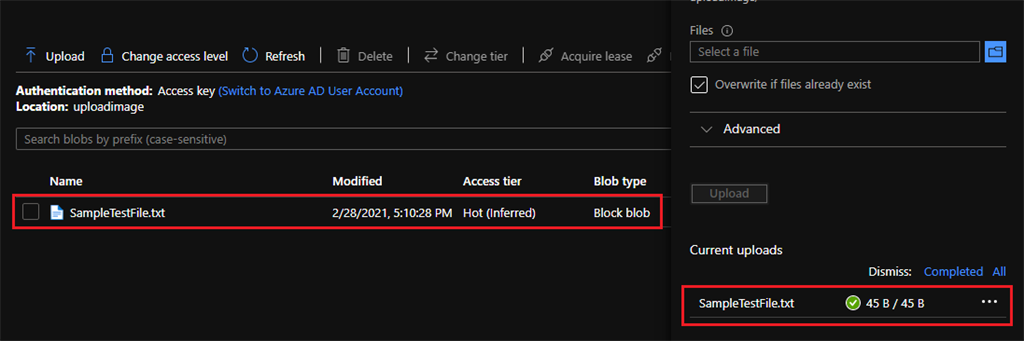
- As soon as the file uploaded efficiently, we are able to see the file out there within the container together with different particulars.
Please confirm the under display screen to verify the standing of the uploaded file on the container.
Delete a storage account
Deleting a storage account deletes all the account, together with all knowledge within the account, and can’t be undone.
There are once more a number of methods to delete the prevailing storage account
- Azure portal
- Azure PowerShell
- Azure CLI
- Azure Useful resource Supervisor (ARM) Template
On this article, we’ll use the primary choice i.e. utilizing the Azure portal. For different choices, we’ll perceive in several articles.
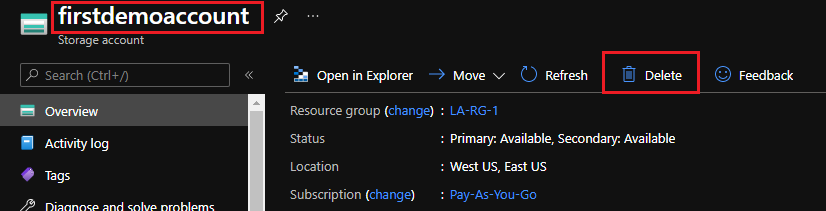
As soon as we open the storage account, we could have an choice to delete it. Click on on ‘Delete’.
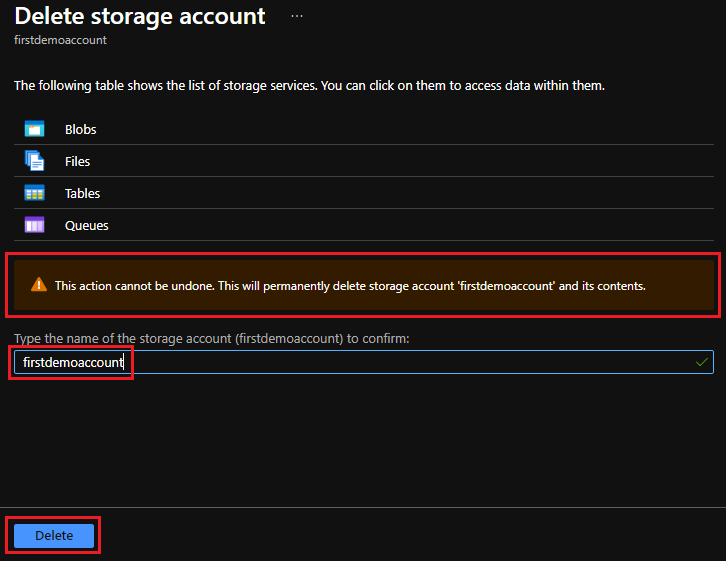
It should open the Delete storage account; right here now we have to kind the identify of the storage account to substantiate. Then click on on ‘Delete‘.
Warning
This motion can’t be undone. This may completely delete the storage account and its contents.
Conclusion
There are a number of benefits to utilizing Azure storage regardless of kind. Azure storage is definitely scalable, extraordinarily versatile, and comparatively low in price relying on the choices we select.


