
Introduction
On this article, we’ll concentrate on how you can generate the token utilizing the Azure lively listing with role-based permission after which validate the Azure administration service utilizing this token.
Azure Lively Listing (AAD): Lively Listing (AD) is Microsoft’s proprietary listing service. It runs on Home windows Server and allows directors to handle permissions and entry to community sources. Lively Listing shops information as objects. An object is a single factor, equivalent to a person, group, utility, or gadget equivalent to a printer. Objects are usually outlined as both sources, equivalent to printers or computer systems, or safety principals, equivalent to customers or teams.
API Administration Providers (APIM): Deploy API gateways side-by-side with the APIs hosted in Azure, different clouds, and on-premises, optimizing API site visitors movement. Meet safety and compliance necessities whereas having fun with a unified administration expertise and full observability throughout all inside and exterior APIs.
Subjects Lined
This text demonstrates how you can construct the next,
- Create and configure AAD.
- Create and configure APIM and Useful resource Group.
- Testing utilizing Postman.
- Clear up sources.
Pre-requisites
- An Lively Azure Account.
- Consumer with enough entry to create Azure sources group, Azure listing, and APIM for this text.
Activity 1. Create and configure an APIM and Useful resource group.
Take into account this Azure API Administration and Useful resource Group Setup
Activity 2. Create and configure the Azure lively listing.
- Register to the Azure portal.
- From the Azure portal menu, choose Azure Lively Listing.
- On the overview web page, choose Handle Tenants.
- Choose Create.
- On the Fundamentals tab, choose the kind of tenant you need to create, both Azure Lively Listing or Azure Lively Listing (B2C).
- Choose Subsequent: Configuration to maneuver on to the Configuration tab.
- On the Configuration tab, enter the next info:
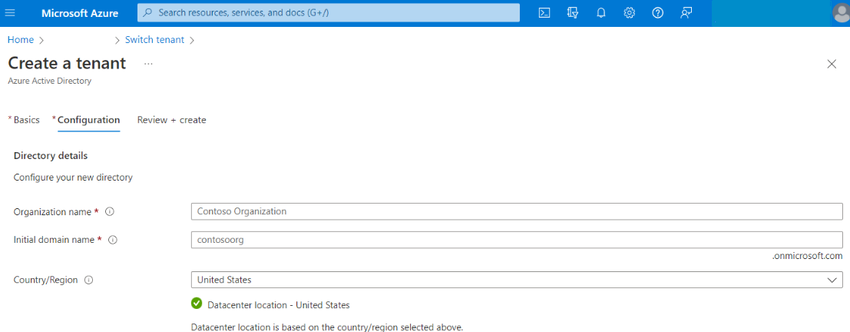
- Kind your required Group identify (for instance Contoso Group) into the Group identify field.
- Kind your required Preliminary area identify (for instance Contosoorg) into the Preliminary area identify field.
- Choose your required Nation/Area or depart the United States possibility within the Nation or area field.
- Choose Subsequent: Overview + Create. Overview the data you entered and if the data is right, choose Create.
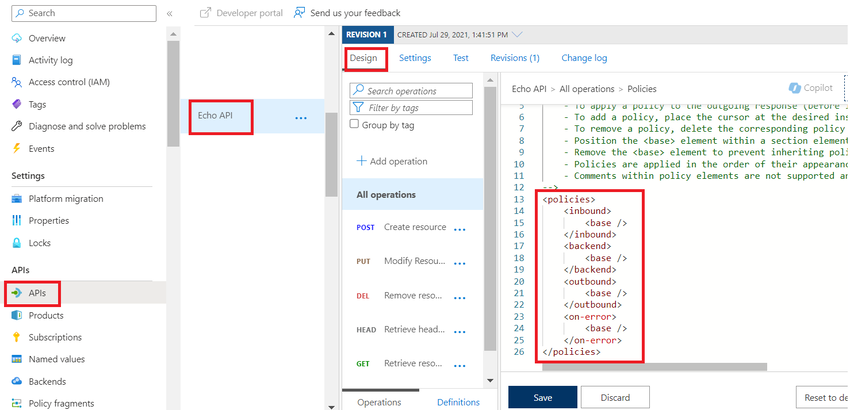
Activity 3. Configure API in APIM.
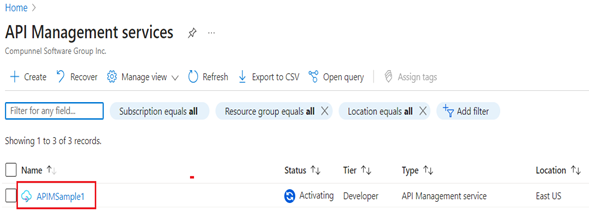
- On the API Administration companies web page, choose your API Administration occasion
- Import and publish a backend API
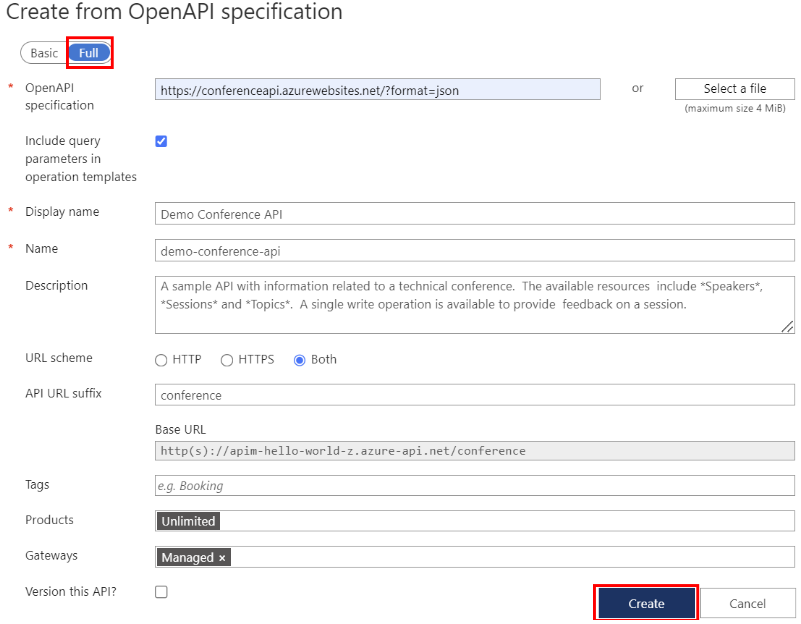
- Within the left navigation of your API Administration occasion, choose APIs.
- Choose the OpenAPI tile.
- Within the Create from OpenAPI specification window, choose Full.
- Enter the values from the next desk.
- You possibly can set API values throughout creation or later by going to the Settings tab.
Activity 4. Configure OAuth in APIM.
- Select the APIM and the beneath choice to create OAuth.
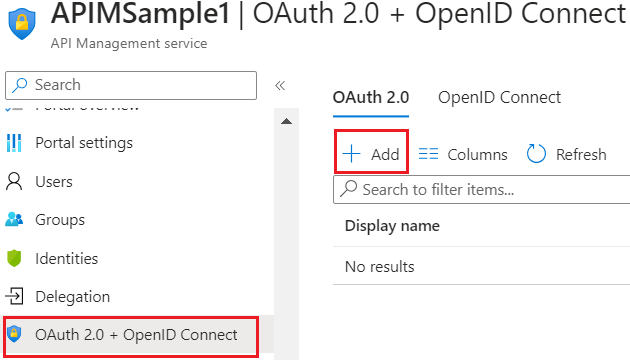
- Select the APIM and the beneath choice to create OAuth.
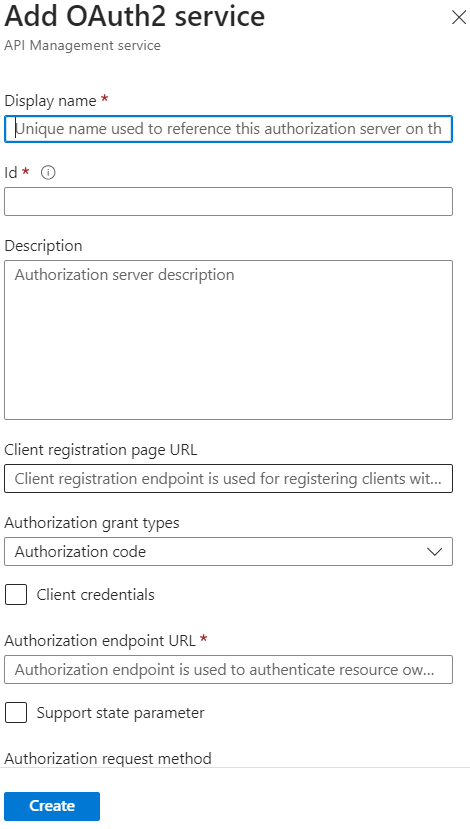
Enter the identify as per your naming conference customary.
Consumer registration Url: Which will probably be your web site URL like ‘https://pattern.com’
- Authorization endpoint URL
- Token endpoint URL
- Authorization request methodology: Within the physique
- Entry Token: Authorization header
- Default scope: Authorization server default scope
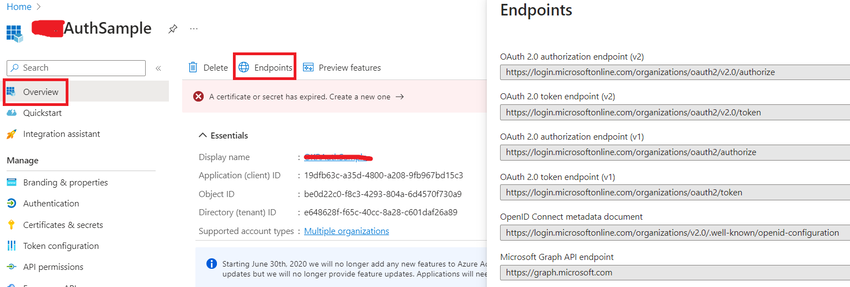
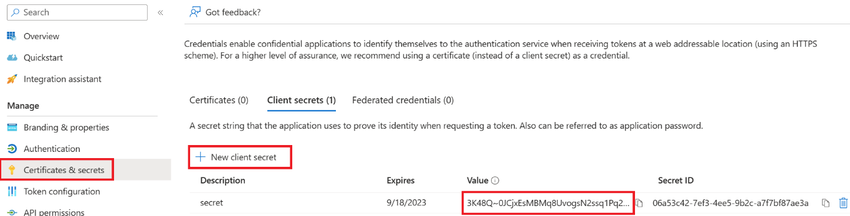
Consumer-Id and Consumer-Secret id you could generate. When you don’t have. Take into account the beneath picture.
- Configure OAuth with API
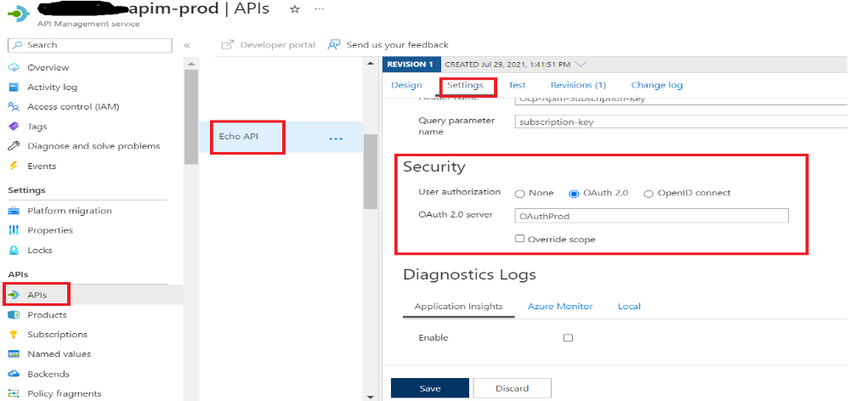
Select your APIM à API à Api Nameà settings after which choose the OAuth2.0. i
In your dropdown select your Auth identify which we created within the above steps.
Activity 5. Configure Coverage.
To validate the request and response primarily based on some customized circumstances. Azure offers us with completely different insurance policies for instance CORS, Validate token, and many others.
Go contained in the APIM à Apis à Select API Identify à Design and it’ll open above display.
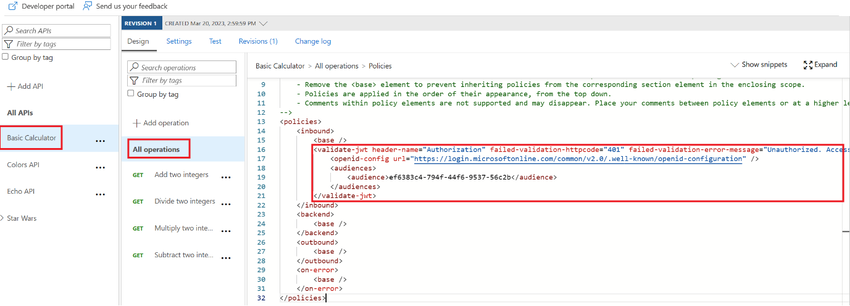
Now take into account the above coverage to validate the viewers and you’ve got different insurance policies additionally, if you wish to embody them as per your requirement.
Activity 6. Configure Permission.
- API Permissions and expose endpoint for the outer world.
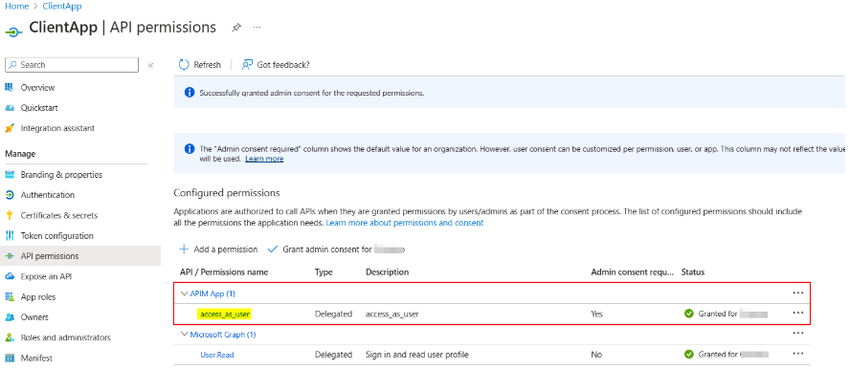
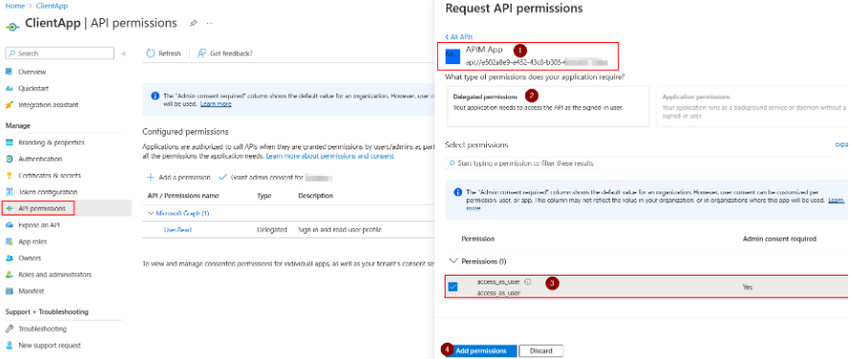
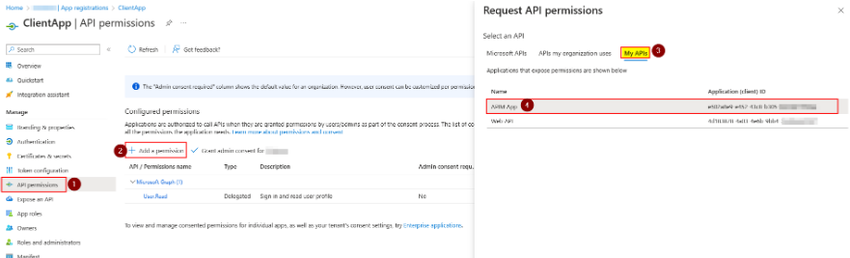
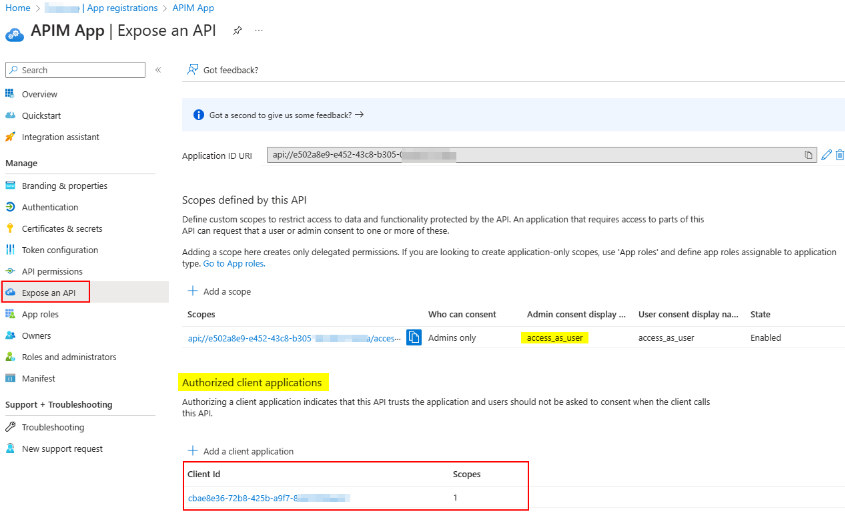
Present respective permission. Select your app à Api permission. Kindly take into account the above pictures.
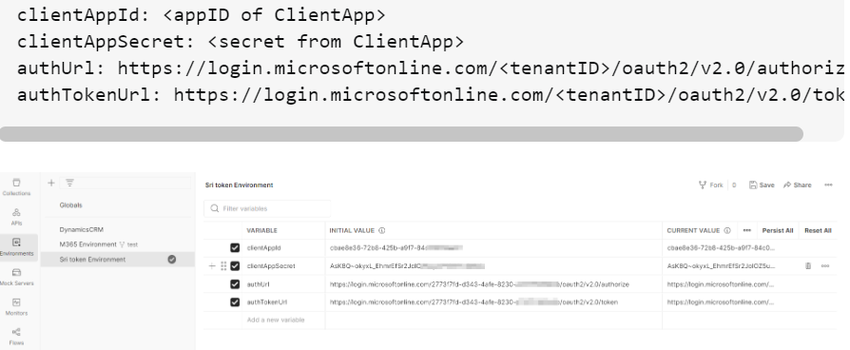
Activity 7. Configure Postman to get the token.
Take into account the beneath parameters.
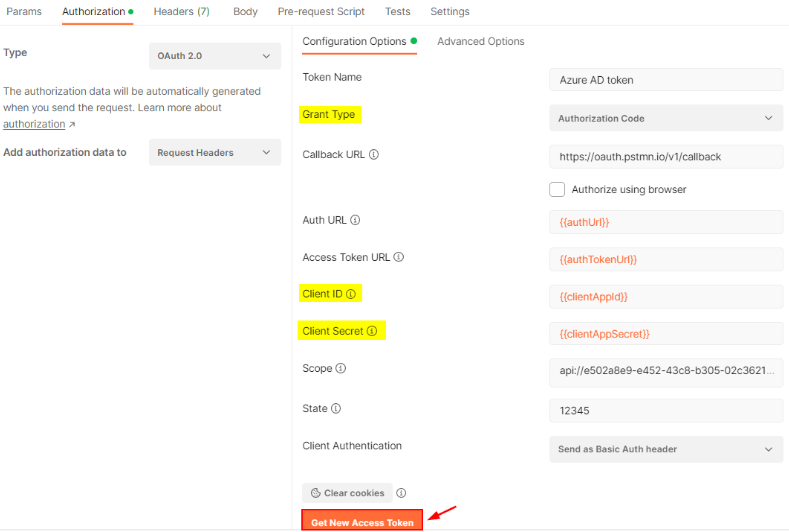
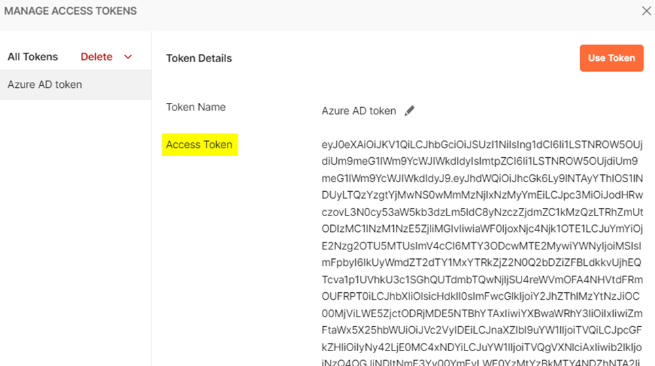
Now with the above token, you possibly can hit your Api endpoint and seize the information.
Word. Utilizing the above postman configuration system seize the token first from the Azure lively listing (AAD) after which we use this token for the API endpoint to get the information. Api OAuth configuration first validates the token from AAD. If the token just isn’t validated primarily based on coverage configuration, we get an error message else we get the response primarily based on API performance.
Activity 8. Clear up sources.
Delete all of the sources to make sure you’re not charged for any companies you are not utilizing.
Know extra about our firm at Skrots. Know extra about our companies at Skrots Providers, Additionally checkout all different blogs at Weblog at Skrots


