Azure Logic App: Using Cognitive Service Laptop Imaginative and prescient and Textual content Analytics API
Azure Logic Apps
Logic App is a cloud-based service. It permits us to react to an occasion in a single service (equivalent to SharePoint on-line) and do one thing with the information from that occasion in one other Service (equivalent to Twitter). It makes it sensible and easy for enterprise processes. The customers construct workflows that mechanically carry out some enterprise duties and processes throughout functions and companies. We are able to join our business-critical apps and companies with Azure Logic Apps, automating our workflows with out writing a single line of code.
Earlier than studying this text, please undergo some vital article hyperlinks, talked about beneath.
Right here, we’ll see tips on how to convert OCR recordsdata to Textual content recordsdata mechanically.
Create a Logic Movement to transform an OCR File to Textual content
Right here, we have to connect with DropBox, Storage (Blob), Microsoft Cognitive Service (Laptop Imaginative and prescient and Textual content Analytics), and OneDrive.
Conditions
- Microsoft Azure Account
- DropBox Account
- OneDrive Account
Observe the beneath steps to construct a workflow utilizing a template.
Step 1. Create Microsoft Cognitive Service Optical Character Recognition(OCR) to Textual content.
Log into https://portal.azure.com/
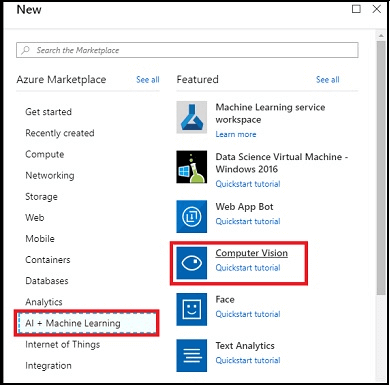
- On the dashboard, seek for “AI + Machine Studying” and click on on “Laptop Imaginative and prescient”.
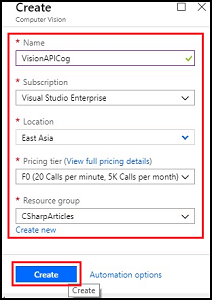
- Enter the title, subscription, pricing tier, and useful resource group for the Laptop Imaginative and prescient API then, and click on on “Create”.
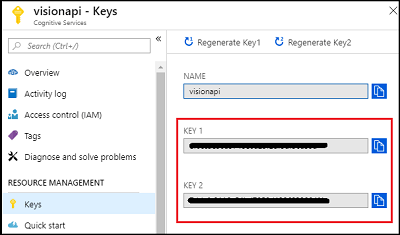
- Underneath Keys, you’ve gotten keys for accessing the Laptop Imaginative and prescient.
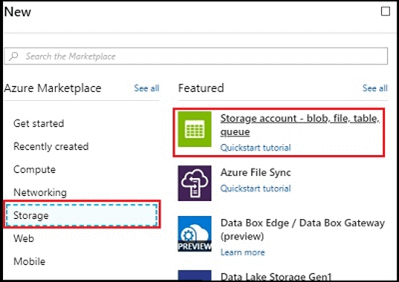
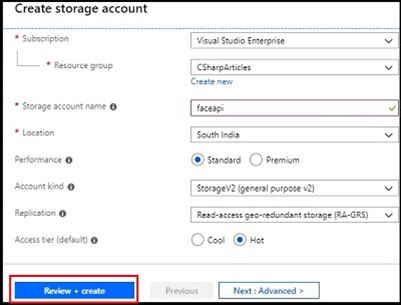
Step 2. Create the Storage Account.
- On the dashboard, choose “Create a useful resource” and click on on “Storage” Now, select Storage account.
- Enter the title, subscription, location, and Entry tier then, click on on “Create”.
- Create the container.
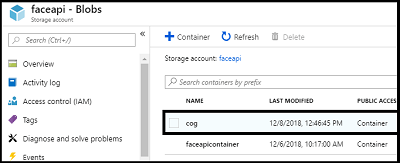
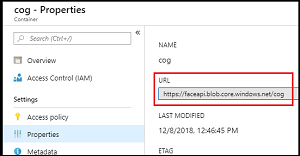
- Open up the container and select properties there we’ve got a storage URL.
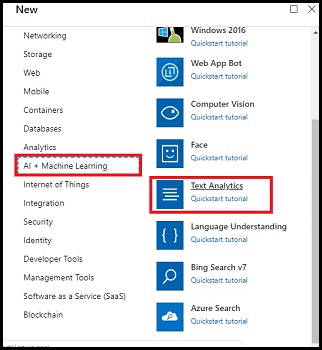
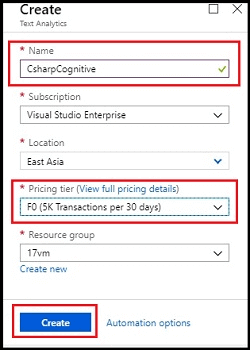
Step 3. Create a Cognitive Service for Textual content Evaluation.
- Within the dashboard, choose “Create a useful resource” and click on on “AI + Machine Studying” Now, select textual content Analytics to create the Cognitive Service
- Enter the title (TextACog) you need to assign to Textual content Analytics, select the subscription and useful resource group the place you set up associated sources, and the situation the place your logic app is saved and the pricing tier then, click on on “Create”.
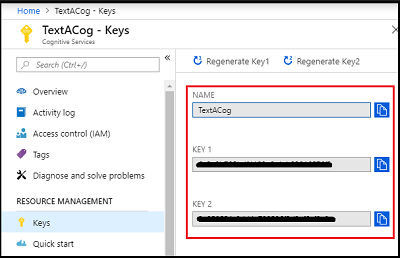
- Underneath the Keys, you’ve gotten keys for accessing the Textual content Analytics.
Step 4. Now, allow us to create the Logic App for changing the OCR File to Textual content and retailer it on the OneDrive.
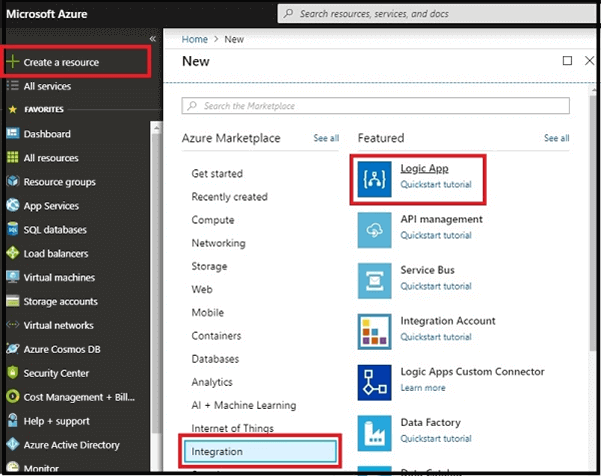
- Within the dashboard, select Create a Useful resource and click on on Integration, Now, select Logic App.
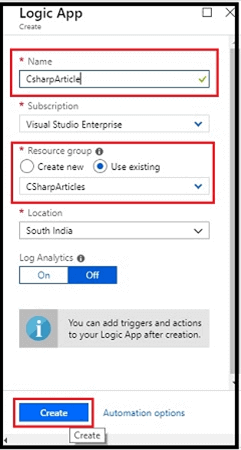
- Enter the title you need to assign to the logic, select the subscription, useful resource group the place you set up associated sources, and site the place your logic app is saved then, click on on “Create”.
- Right here is the dashboard Click on on Logic App Designer.
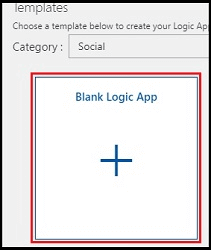
Step 5. Now, click on on the Clean Logic App.
Step 6. Configure the information by signing into DropBox and Excel On-line.
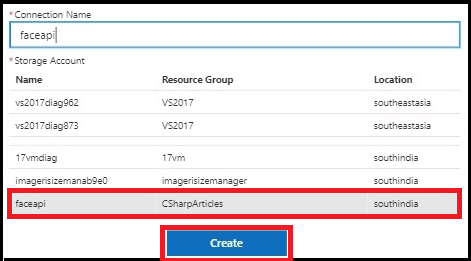
Step 7. Configure the Blob Storage
- Search Blob Storage

- Select the Storage Connection
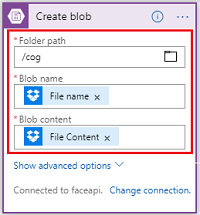
- Subsequent, Select the folder path, Blob title, and Blob content material.
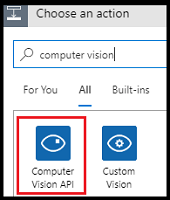
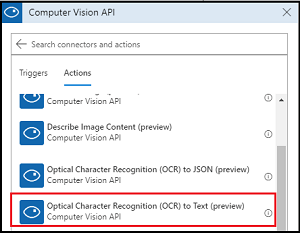
Step 8. Configure the pc Imaginative and prescient API for detecting the sentiment of the tweet.
- Seek for Laptop Imaginative and prescient.
- Select the Motion.
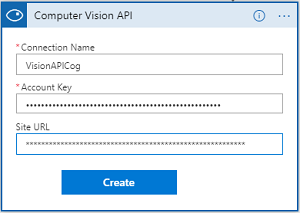
- After that, give the Cognitive Service Connection title and key.
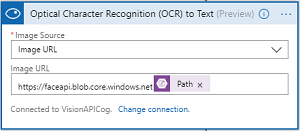
- Configure the situation.
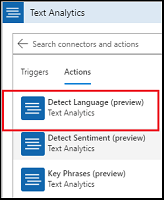
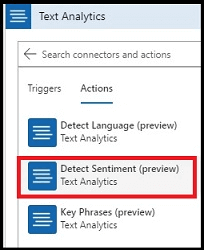
Step 9. Configure the Textual content Analytics for detecting the Language.
- Seek for Textual content Analytics.
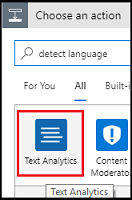
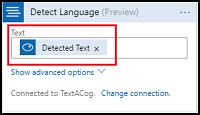
- Then, select an Motion for the workflow.
- Subsequent, select the detected textual content.
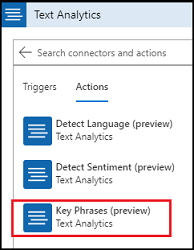
Step 10. Configure the Textual content Analytics for detecting the Key Phrases.
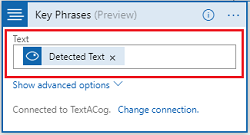
- Select an Motion for the workflow.
- Subsequent, select the detected textual content
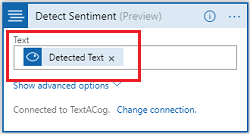
Step 11. Configure the Textual content Analytics for detecting the sentiment of the tweet.
- Seek for the detected sentiment.
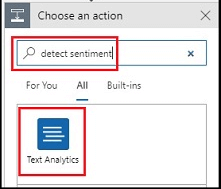
- Select the Motion.
- Subsequent, select the detected textual content
Step 12
Step 13. Now, we have to save the workflow and run it.

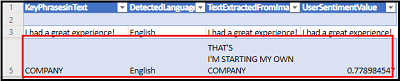
Output
Save an Picture within the DropBox.
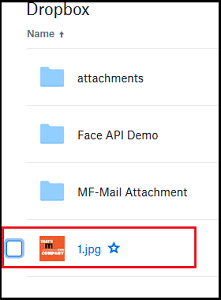
Picture

Now, it extracts the Content material, detects language, Keyphrases, and Sentiment values, and saves these in an Excel Sheet (OneDrive).
Abstract
I hope you perceive tips on how to Convert the textual content offered within the picture to digital format and save the output into an Excel file with the detection of Language, sentiment, and key phrases utilizing Microsoft Cognitive Providers in Azure Logic App mechanically. Keep tuned for extra.
Know extra about our firm at Skrots. Know extra about our companies at Skrots Providers, Additionally checkout all different blogs at Weblog at Skrots


