On this article, we’ll be taught in a step-by-step course of to create a firewall rule for particular consumer IP and digital community within the Azure Synapse Analytics. This step is important in order that our server and databases are safe from any connection from exterior instruments and purposes. Furthermore, connectivity can be secured for our Azure Synapse Service with this step.
This text is part of the Azure Synapse Analytics Articles Collection. You may take a look at different articles within the sequence from the next hyperlinks.
- Azure Synapse Analytics
- Azure Synapse Analytics – Create Devoted SQL Pool
- Azure Synapse Analytics – Creating Firewall at Server-level
Azure Synapse Analytics
Azure Synapse is a limitless enterprise analytics service that permits us to get perception from information analytics and information warehousing. Utilizing devoted sources or serverless structure, information may be queried and gives scalability as per the rise within the dimension of the information. You may be taught extra about it within the earlier article, Azure Synapse Analytics.
Firewall
Firewall may be understood because the set of safety guidelines which determines, controls and displays the continuing visitors in a community and thus acts as a protect in between untrusted community and trusted community in a system linked to web.
The way to Create Firewall at Server-level for Consumer IP in Azure Synapse Analytics?
Step 1
To begin with, we have to create a SQL pool following the earlier article on this sequence, Azure Synapse Analytics – Create Devoted SQL Pool. This allows the creation of Pattern information laid out in Step 7 within the article.
Step 2
As soon as the pattern database is created. Subsequent we will create an easy accessibility to Azure Synapse Analytics for future use.
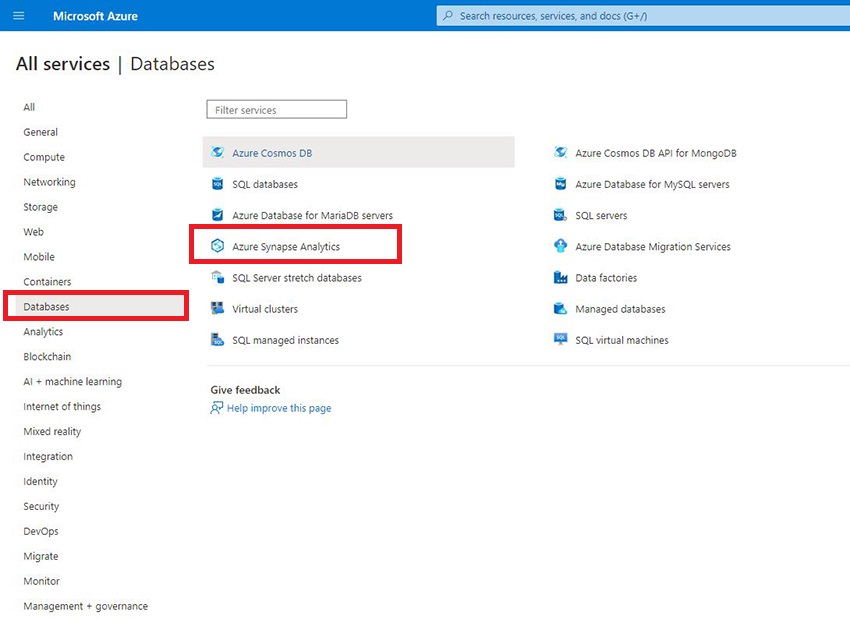
For this, click on on Menu button on the left-hand facet and Choose All Companies.
Subsequent, go choose the Databases on the left-hand facet and hover over Azure Synapse Analytics.
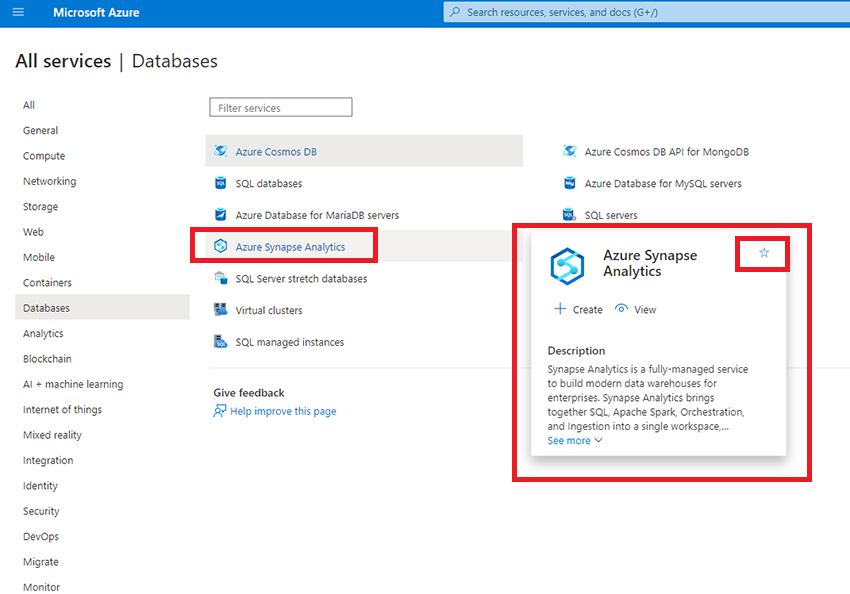
On the highest proper nook, click on on the Favourite Button.
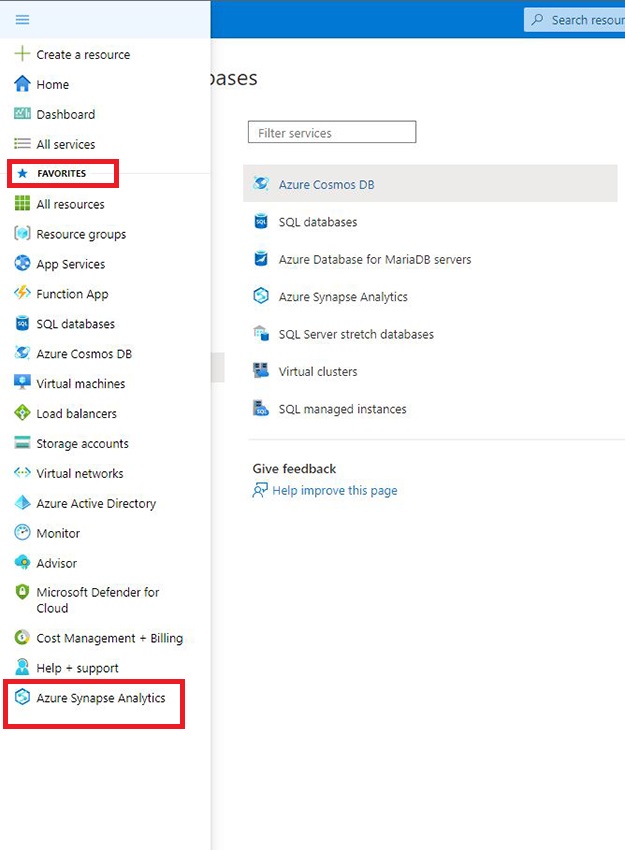
Now, we will see, we will entry the Azure Synapse Analytics from the Favorites within the Menu.
Step 3
Now, we will take a look at our sources.
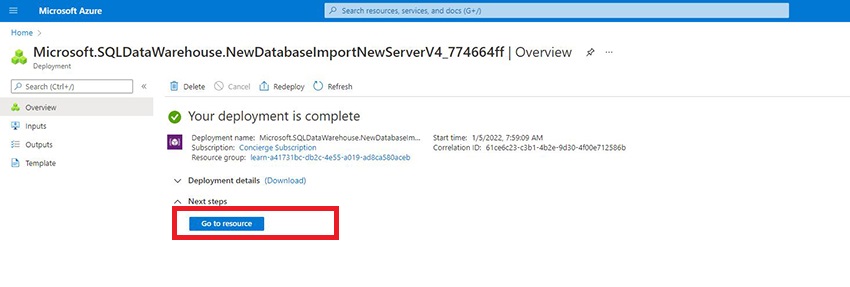
Click on on Go to Sources or you’ll be able to simply entry the database from the favorites we simply created.
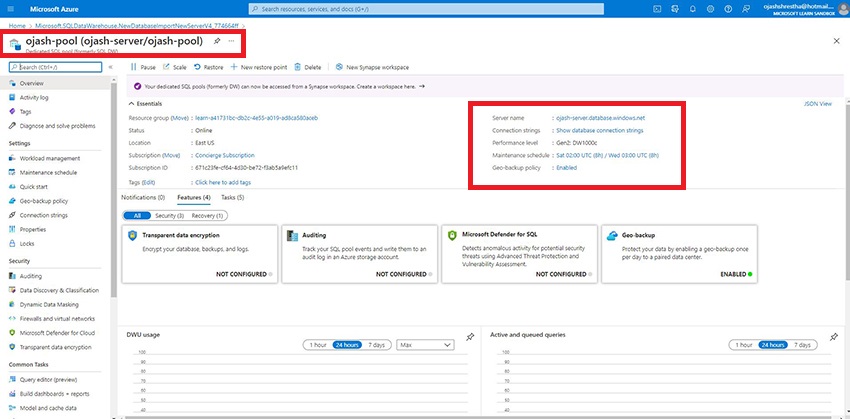
Step 4
Right here, we will see the Server title, Connection Strings the opposite particulars. On the facet of Server title, we will see the Copy Button utilizing which we will join this server to any providers similar to Azure Information Studio.
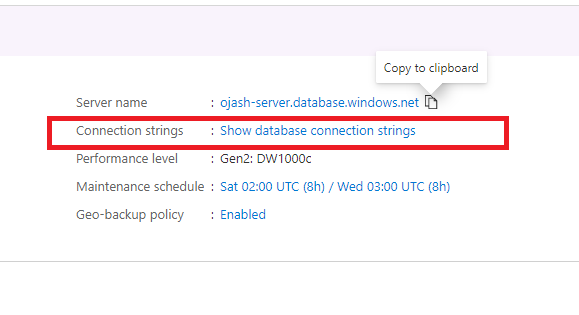
Step 5
Subsequent, Click on on Present database connection Strings below Connection Strings.
Step 6
Now, we’re taken to the sql-server particulars we created below the title ojash-server.
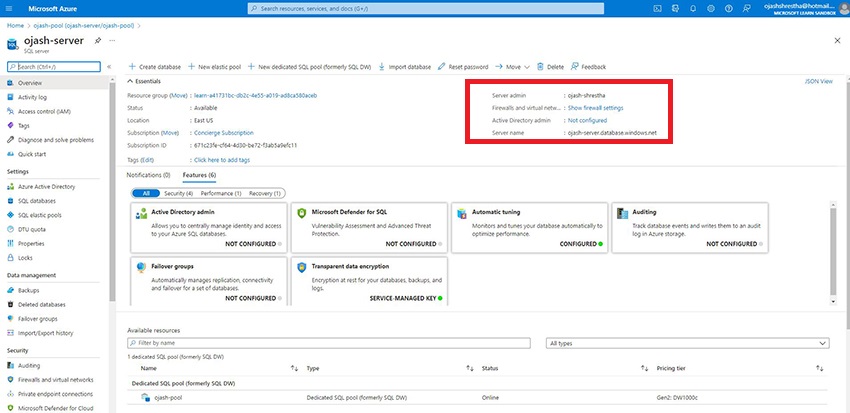
Right here, we will verify out the Firewall settings. We verify it out, Click on on Present firewall settings.

Step 7
Right here, we swap the Enable Azure Companies and Sources to Entry this server to Sure.
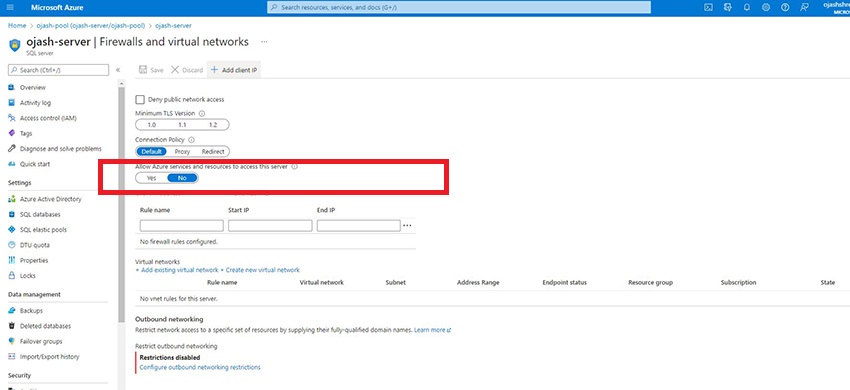
Subsequent, we click on on Add consumer IP.
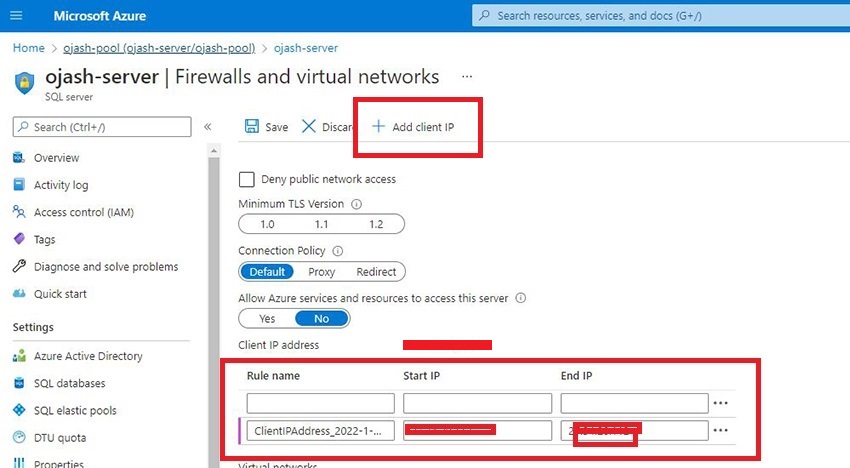
Step 8
We will see the Consumer IP Tackle added below the Rule Title and Begin IP and Finish IP. This can open the Port at 1433 for this IP deal with to entry the server.
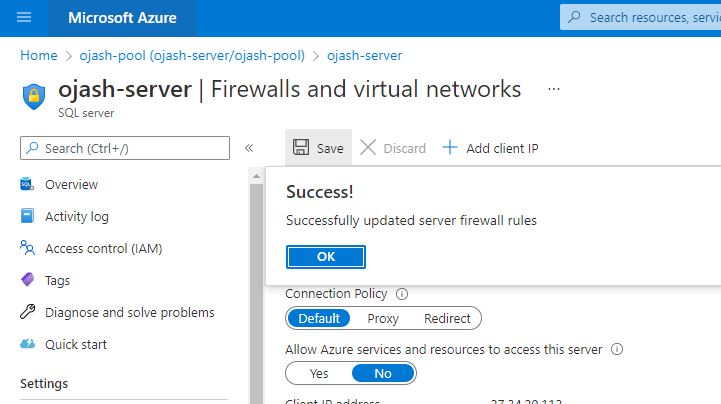
Step 9
As soon as, it’s validated with the Tick Mark, click on on Save.

Step 10
We’re verified with Success Dialog field.
Be sure that, the Sure is chosen in Enable Azure service and sources to entry this server. In any other case, we can’t entry this server.
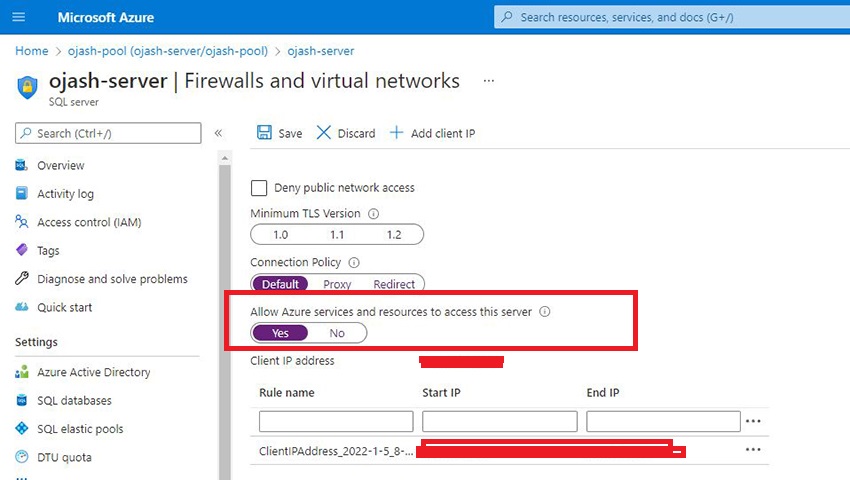
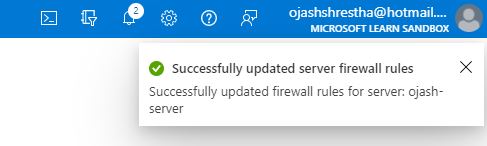
Step 11
Lastly, we can be notified in regards to the success in updating our server firewall guidelines. With this, we have now efficiently learnt to create a server rule for our consumer IP in Azure Synapse Analytics.
Conclusion
Thus, on this article, we realized about Azure Synapse Analytics and about Firewall, after which we realized by means of a step-by-step course of following up within the earlier article to create a firewall for our SQL Server in Azure Synapse Analytics.