Parameterize Pipelines And Datasets In Azure Information Manufacturing facility With Demo
Introduction
In continuation of our earlier article, we’ll have a look at how may we use parameterization in datasets and pipelines. We can even implement a pipeline with easy copy exercise to see how and the place we will implement parameters within the Azure information manufacturing facility.
Take into account a situation the place you wish to run quite a few pipelines with many datasets in your undertaking. At instances this turns into very arduous to handle a number of linked companies one for server title, database with completely different credentials and it turns into a tedious course of. What if there’s a manner to make use of a single linked service or pipeline for all necessities, sounds good proper? That is what precisely parameterization does. It helps us to enter the server title, database title, credentials, and so on., dynamically once we are working the pipeline thereby serving to us to reuse as a substitute of making one for every request.
Parameterization in Datasets
Let’s have a look at a demo on how you can get used to the parameterization in datasets. In my earlier article, I’ve mentioned how you can use parameterization in linked companies. On that, I’ve created a parameter for database title which clearly signifies that I may give completely different DB names dynamically over the run time as a substitute of making a linked service for every requirement.
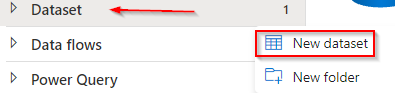
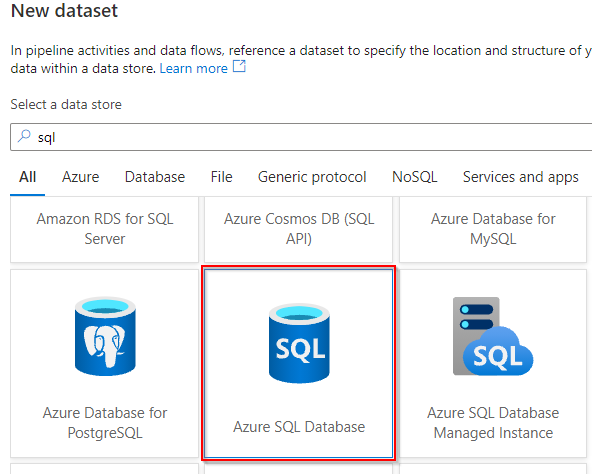
Now go to azure information manufacturing facility studio and create a brand new dataset like given beneath.
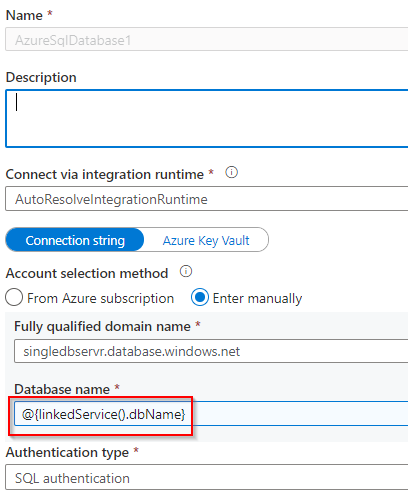
I’ve a SQL database in my azure subscription which I’ll use for this demo. The database may be chosen as per your alternative inside the given checklist.
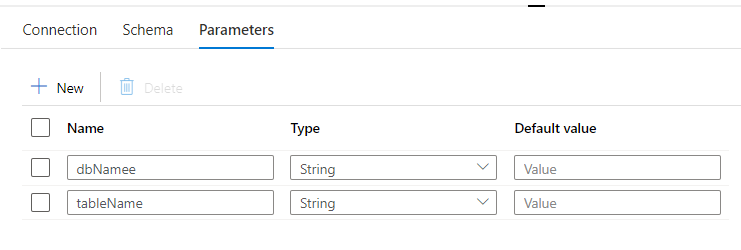
After creating the dataset, I’ve chosen the linked companies which I’ve created earlier after which I’m creating two parameters by way of the parameters tab, one for dbName and tableName. Keep in mind the dbName parameter is which we created when creating Linked companies earlier therefore I’ve referred right here so as to add to the desk title as effectively. The default values may be left clean as we should always be capable to cross the values dynamically when working the pipeline.
As soon as that is carried out you possibly can name your dataset wherever within the pipeline and cross on values at run-time.
Parameterization in Pipelines
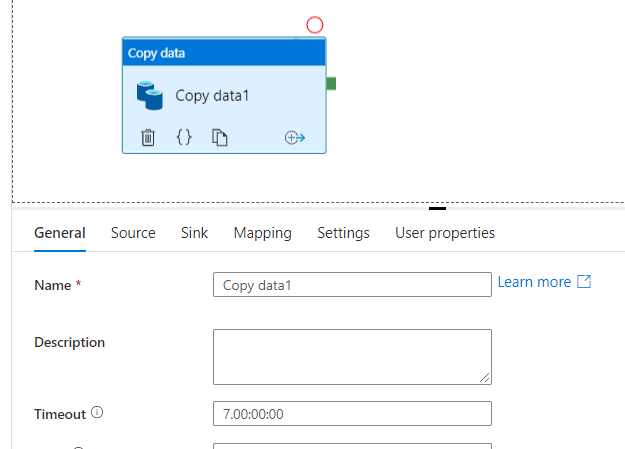
The demo process we’re as we speak is to repeat data from one desk to a different in a SQL database. We are going to create a brand new pipeline after which click on and drag the ‘Copy information’ process from ‘Transfer & remodel’. There can be choices with a number of tables for configuring supply and sink(vacation spot), settings, and so on. as soon as whenever you click on the copy information process.
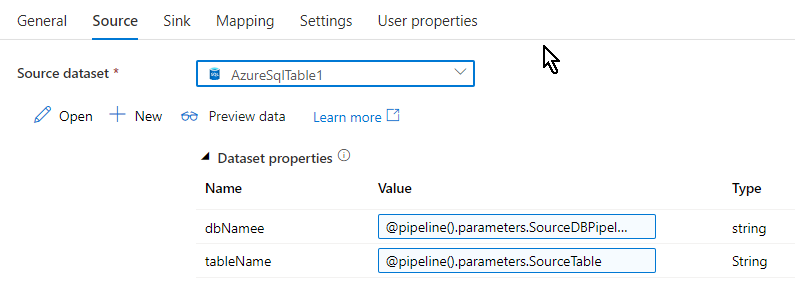
Apart from all of the tabs offered right here, the tabs we’ll work on are supply and sink. Clearly, we have now to name the dataset that we have now created within the earlier part into the ‘Supply’ tab. We are able to see the parameters that we used when creating the dataset can be listed out as quickly as we choose the supply dataset –dbName and tableName on this case.
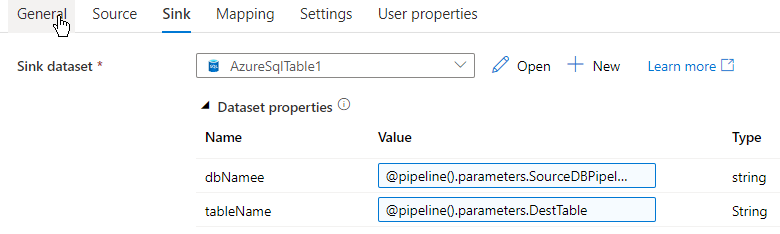
The same setup goes for the vacation spot too, the ‘Sink’ tab. Since it is a demo I’m copying information from one desk to a different in the identical database, you possibly can create the sink to be one other SQL database or another vacation spot as per your alternative. We are able to see the sink tab lists out
By this time in case you are questioning what worth has been given within the parameters for each supply and sink, let me clarify. Since I’m going to repeat data from one desk to a different from the identical database it is vitally easy and simple to hardcode the tableName and dbName however that can limit me to make use of the hardcoded worth solely and can’t be reused with another tableName or dbName. We are able to overcome this by creating parameters on the fly on the pipeline stage.
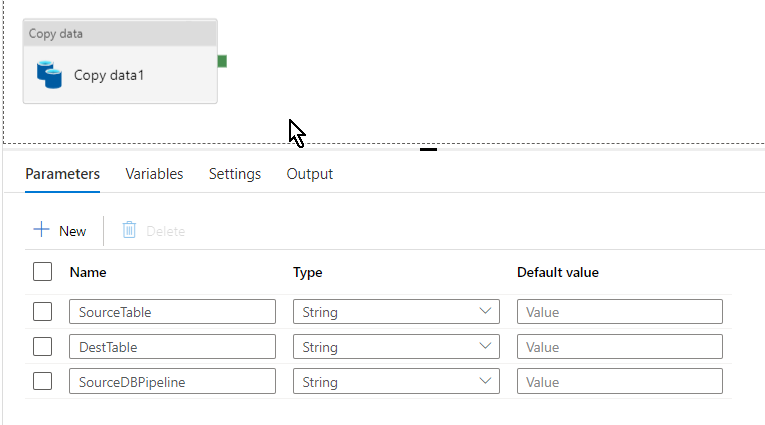
I’ve created three parameters SourceDBPipeline and SourceTable(dbName and tableName from dataset) for supply and DestTable (vacation spot desk the place the data can be copied to) for sink. So now all of the parameters has been created and set how are we going to implement it? The place these parameters are going to be referred to as out from and at which step would we be capable to enter the database and desk title? Right here comes the ultimate half…
Set off
I’ve mentioned triggers in certainly one of my earlier blogs that it’s a scheduler or mechanism the place we may run our pipeline. Right here we’re going to name out the parameters simply once we set off this pipeline.
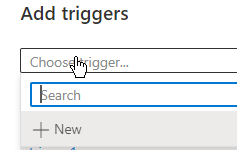
We are able to see the set off button on the prime middle above the pipeline window, Simply click on it and create a brand new set off.
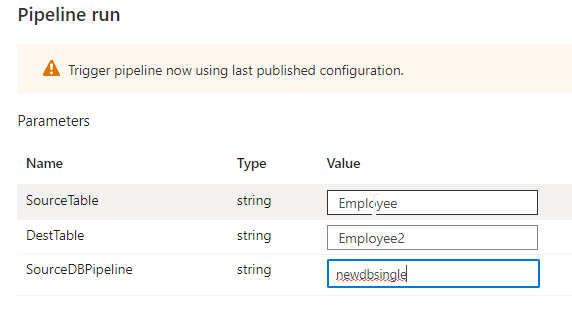
As soon as when you’ve got entered the small print and click on OK and you’ll land into a brand new window referred to as ‘set off run parameters’ the place we can be hardcoding the database title or desk title dynamically as per our requirement at any time when we run the pipeline.
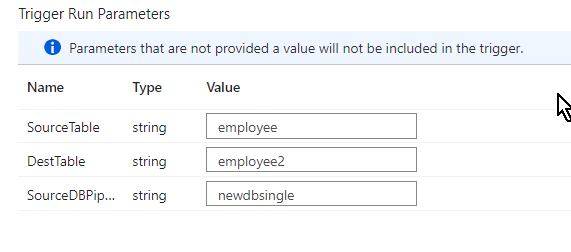
After coming into the small print click on OK after which publish the pipeline to run it. Keep in mind to debug it earlier than you run.
Demo
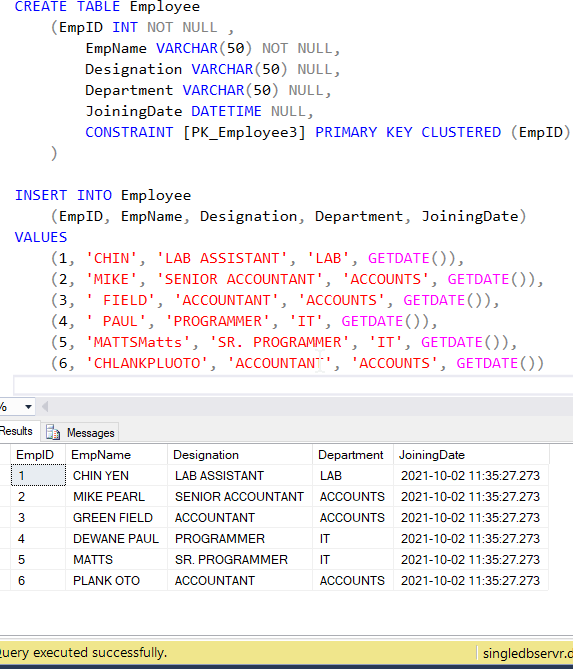
I’ve created a SQL database desk referred to as Worker and stuffed it up few dummy rows only for this demo. This can be appearing as a supply desk and the data from these tables can be copied over the brand new desk utilizing the pipeline.
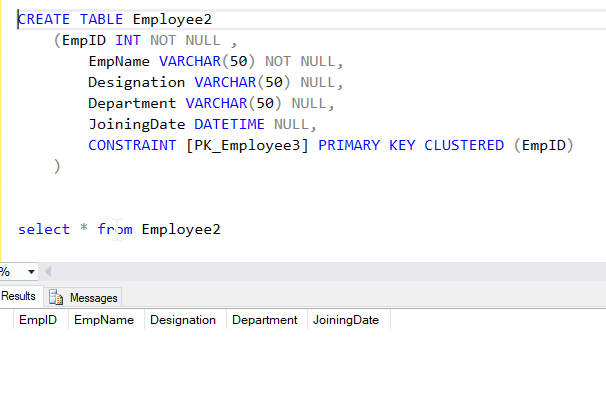
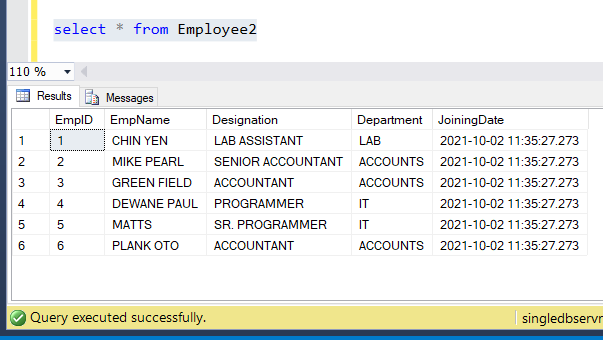
I’ve additionally created one other clean desk Employee2 because the vacation spot desk. Let’s set off the pipeline and see if the data are copied over.
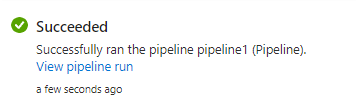
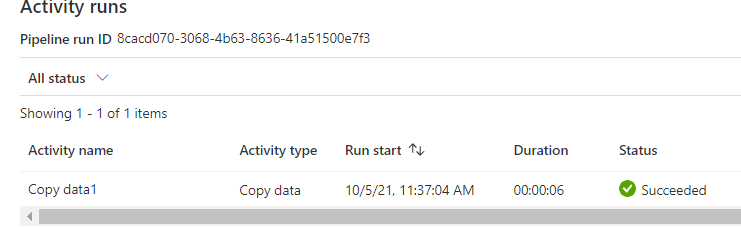
We are able to see the pipeline succeeded.
See the data have been copied to the brand new desk Employee2
Abstract
On this article, we noticed a demo of how end-to-end parameterization could possibly be carried out on each datasets and pipelines in a sensible situation hope this can be useful. We are going to have a look at extra azure information matters within the coming weeks.
References
Microsoft Azure information manufacturing facility official documentation.