One of many comparatively new providers that Azure gives, or at the least one that’s gaining traction, is the Azure Static Internet Pages. This service permits us to host what we all know as Single-Web page Functions (SPA) in a easy and efficient method. This sort of purposes are these targeted on the Entrance-Finish and are created with JavaScript frameworks/libraries (like Angular, React, Vue, and so forth) and even with Blazor. And more often than not consuming Again-Finish providers to eat knowledge or another performance on the server aspect.
On this article, we’re going to evaluate how we are able to implement Again-Finish providers in our Azure Static Internet Apps with Azure Capabilities.
Necessities
This time we’ll primarily use the command line, extra particularly PowerShell along with the Command-Line Interface (CLI) instruments for Static Internet Apps and Azure Capabilities
You’ll find extra details about within the following hyperlinks:
Entrance-Finish
We’ll begin making a vanilla Single-Web page Software (SPA), with the aim of specializing in the Static Internet App/Azure Capabilities topic, however you’ll be able to create your required Entrance-Finish app.
To begin, we have to create a working folder and create a easy HTML file
mkdir swa-vanilla
cd swa-vanilla
New-Merchandise -Path . -Title "index.html"
* Bear in mind we’re working with PowerShell that’s the reason we use New-Merchandise command, however you’ll be able to create the HTML file as you are feeling extra comfy
And the content material for the index.html file is:
<!DOCTYPE html>
<html lang="en">

<head>
    <meta charset="UTF-8">
    <meta identify="viewport" content material="width=device-width, initial-scale=1.0">
    <title>Vanilla JavaScript App</title>
</head>

<physique>
    <major>
        <h1>Vanilla JavaScript App</h1>
        <p>Loading content material from the API: <b id="apiresponse">...</b></p>
    </major>

    <script>
        (async perform () {
            let response = await fetch(`/api/message`);
            let knowledge = await response.textual content();
            console.log(knowledge);
            doc.querySelector('#apiresponse').textContent = knowledge;
        }())
    </script>
</physique>

</html>
As you’ll be able to see, within the JavaScript code we’re making a name to an API known as ‘message‘. And the reference is even relative, it means, we expect to supply the service in the identical area. Let’s proceed to create it.
API with Azure Capabilities
By design, the API must be created utilizing Azure Capabilities. On this case, we’ll create an Azure Operate and after a easy endpoint known as ‘message‘. Right here is the place we’ll use our first CLI or toolset, the “Azure Capabilities Core Instruments“.
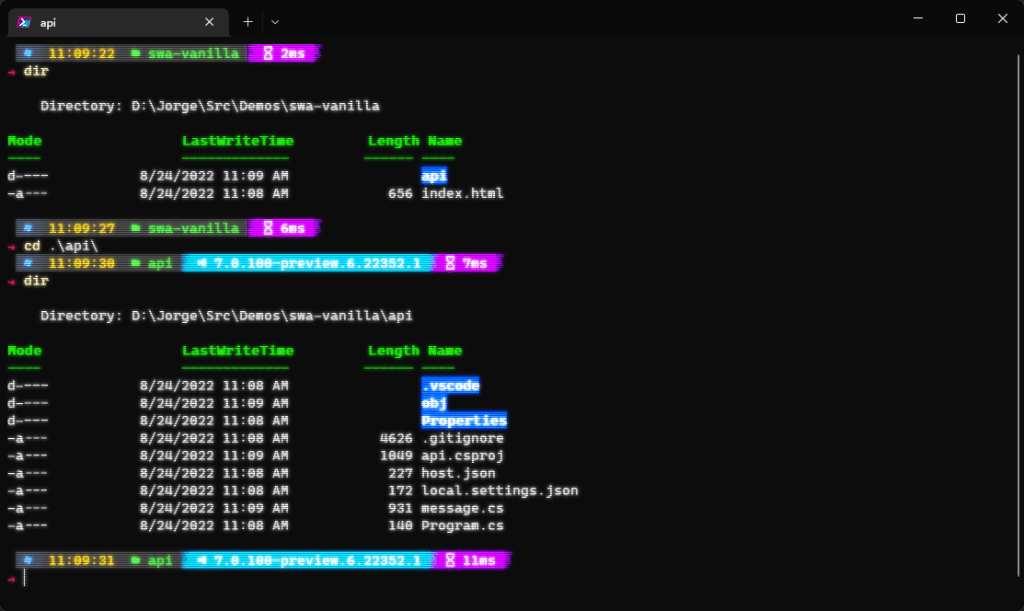
Inside our working folder
func init 'api' --worker-runtime dotnet-isolated --target-framework net6.0
cd api
func new --name 'message' --template "HTTP set off" --authlevel "nameless"
Within the first command we created the Azure Operate undertaking named ‘api’ with an remoted execution mannequin in .NET 6 (you’ll be able to create the undertaking with your personal configurations). And a folder with the identical identify is created, the place after we create the ‘message’ HttpTrigger perform.
utilizing System.Collections.Generic;
utilizing System.Web;
utilizing Microsoft.Azure.Capabilities.Employee;
utilizing Microsoft.Azure.Capabilities.Employee.Http;
utilizing Microsoft.Extensions.Logging;

namespace api
{
    public class message
    {
        personal readonly ILogger _logger;

        public message(ILoggerFactory loggerFactory)
        {
            _logger = loggerFactory.CreateLogger<message>();
        }

        [Function("message")]
        public HttpResponseData Run([HttpTrigger(AuthorizationLevel.Anonymous, "get", "post")] HttpRequestData req)
        {
            _logger.LogInformation("C# HTTP set off perform processed a request.");

            var response = req.CreateResponse(HttpStatusCode.OK);
            response.Headers.Add("Content material-Kind", "textual content/plain; charset=utf-8");

            response.WriteString("Welcome to Azure Capabilities!");

            return response;
        }
    }
}
* This code is generated by the CLI, it’s being proven simply as a reference
Static Internet App (native)
With the folder/recordsdata construction created we’re able to configure the Static Internet App to work on the native machine.
We have to get again to our working folder (bear in mind final motion was executed on our ‘api’ folder) it’s time to use the second CLI, the “Static Internet Apps CLI (SWA CLI)“
cd ..
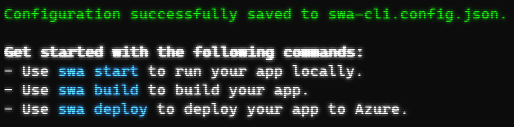
swa init
On the primary parameter, we have to configure what’s going to be the identify for the configuration. It’s often the folder identify or the app identify.
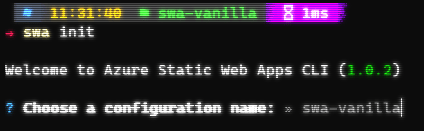
After we configure the identify, the CLI run an evaluation for our code and make some suggestion for the remainder of the configuration which we embrace within the Single-Web page App and the Azure Capabilities. In our case, it is going to be easy since we’re utilizing a vanilla app/static HTML.
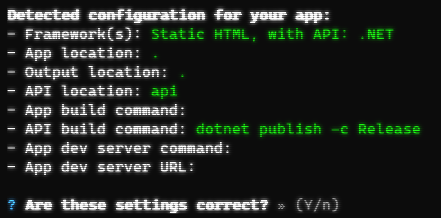
Let’s analyze these configurations
- Framework(s): the framework or languages with which our purposes are written
- App location: the folder the place the Entrance-Finish code is situated
- Output location: the folder the place the results of compilation for the Entrance-Finish code can be
- API location: the folder the place the Again-Finish code is situated
- App construct command: the Entrance-Finish code construct command
- API construct command: the Again-Finish code construct command
- App dev server command: the Entrance-Finish code execution command
- App dev server URL: the Entrance-Finish execution URL
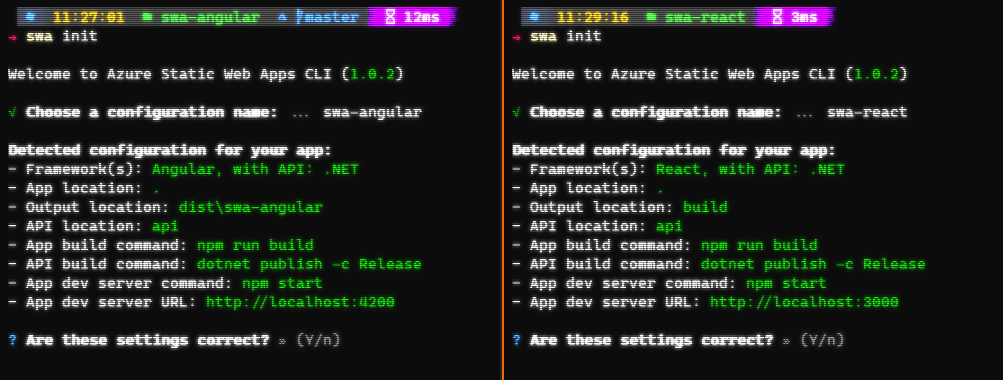
And for instance, for an Angular app and React app, we’ll have configurations like:
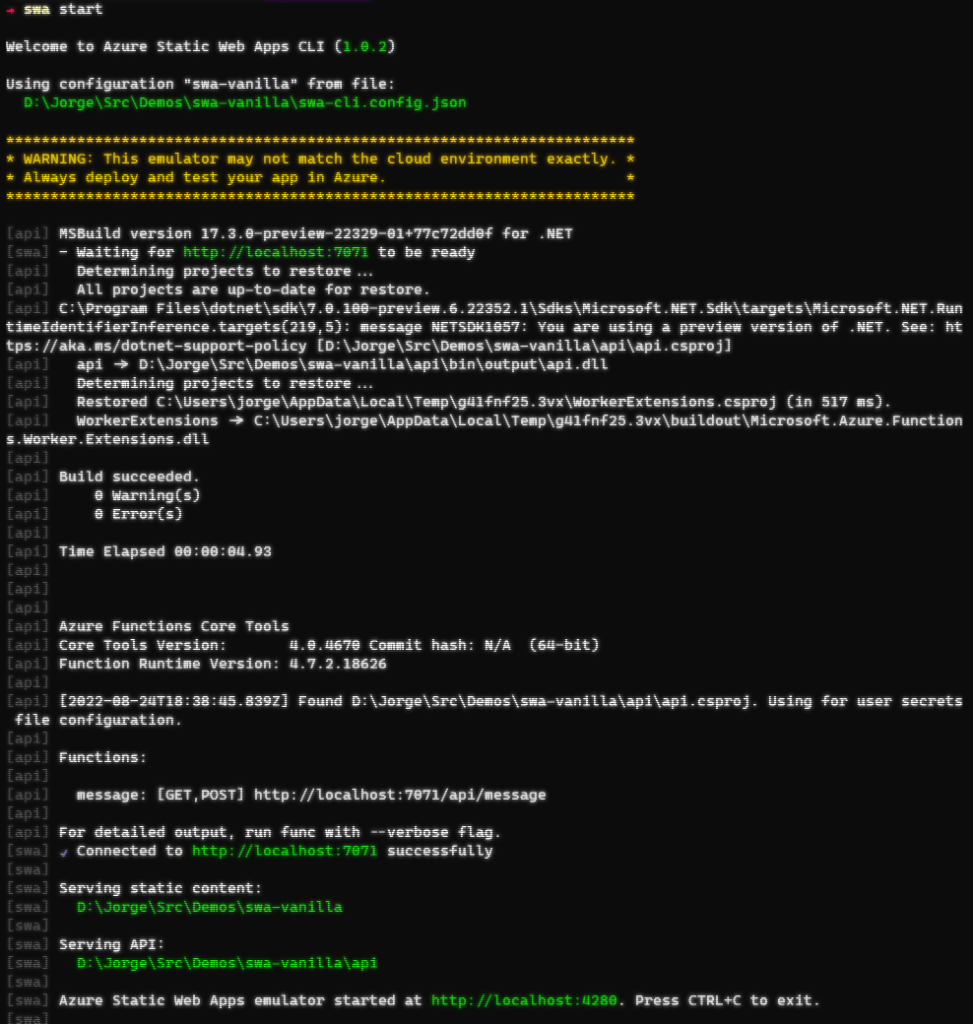
As soon as the configuration is ready, the CLI we’ll run some steps ending the choice we have now:
We’ll proceed to construct our app and begin it
swa construct
swa begin
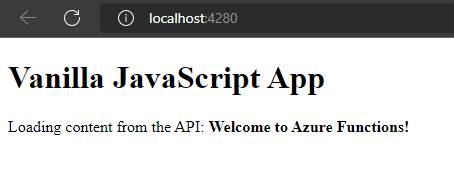
So we’ll see that our utility is being executed within the URL http://localhost:4280/
And the end result on the Entrance-Finish can be like:
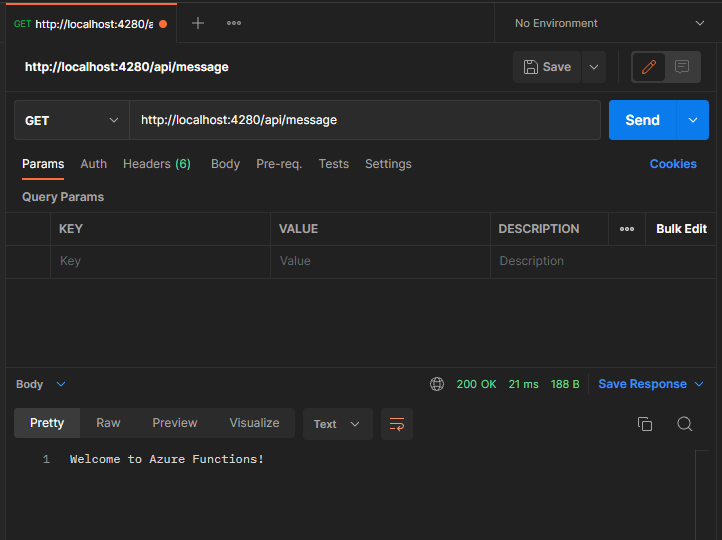
And essentially the most fascinating factor, the Again-Finish is server in the identical area with url http://localhost:4280/api/message
Conclusion
On this entry, I attempted to indicate simply an introduction to Static Internet Apps. In a subsequent submit, I can be writing about how we are able to work with Visual Studio Code, methods to configure this service in Azure, and methods to create a CI/CD pipeline for Azure DevOps.


