Introduction
On this article, we are going to learn to create Azure service bus utilizing Azure portal and in addition perceive its advantages.
What’s Azure service bus?
Azure Service Bus is a completely managed enterprise message dealer with message queues and publish-subscribe matters (in a namespace).
What’s Azure service bus namespace?
An azure service bus namespace is a container for all messaging elements (queues and matters). A number of queues and matters could be in a single namespace, and namespaces typically function software containers.
Why will we use Azure service bus?
Azure service bus is used to decouple functions and providers from one another, offering the of advantages:
- Load-balancing work throughout competing employees
- Safely routing and transferring information and management throughout service and software boundaries
- Coordinating transactional work that requires a high-degree of reliability
Advance Options of Azure service bus messaging
- Message periods
- Auto-forwarding
- Lifeless-lettering
- Scheduled supply
- Message deferral
- Transactions
- Filtering and actions
- Auto-delete on idle
- Duplicate detection
Step 1
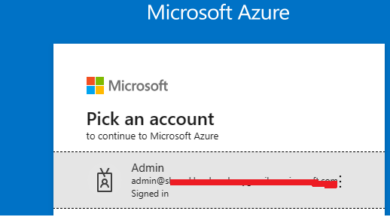
Login into Azure account. If you do not have an Azure subscription, create a free account
Step 2
Register to the Azure portal
Step 3
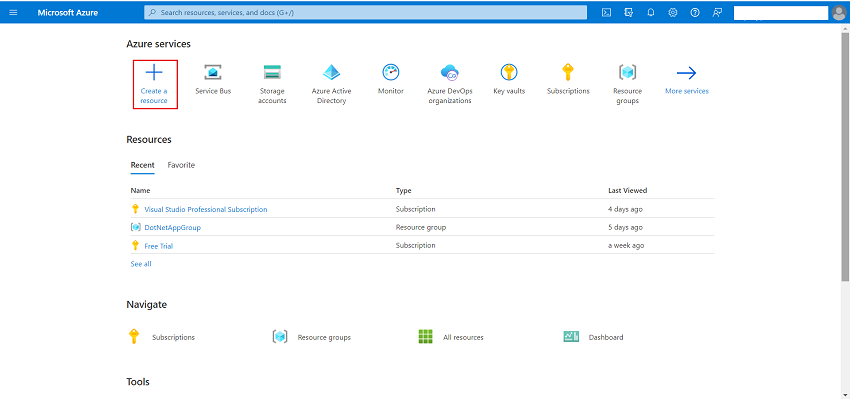
From the Azure portal menu, or from the Dwelling web page, choose Create a useful resource.
Now in Azure portal within the Search field, enter Service Bus.
From the outcomes checklist, select Service Bus.
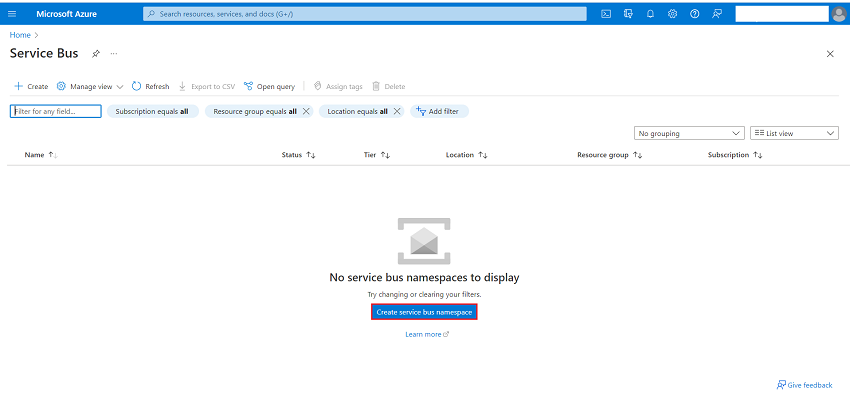
On the Service Bus part, select Create Service Bus namespace.
On the Create Service Bus namespace part present the next data,
- Subscription: Select a subscription
- Useful resource Group, Select Create new and enter a useful resource group identify or you possibly can select current useful resource group created.
- Namespace Identify: A novel identify is required.
- Location: Select area
- Pricing: Select pricing tier.
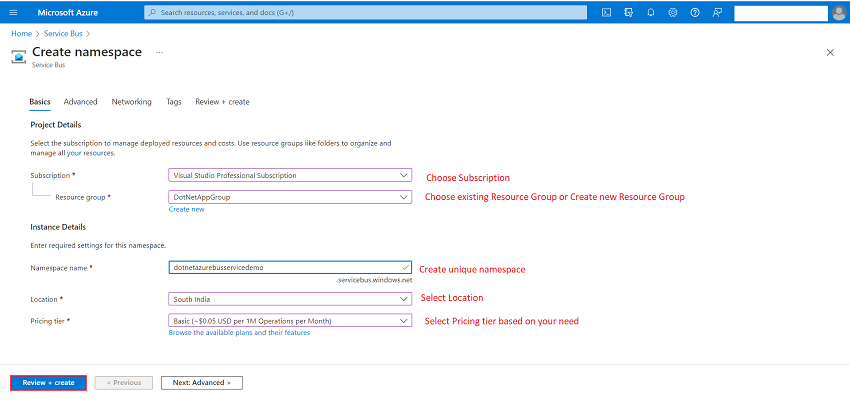
6. After offering the knowledge above, choose Assessment + Create. Subsequent validation web page seems with Create button. You might be completed. You’ve created your first azure service bus.
7. Get the connection string:
- On the Service Bus Namespace web page, choose Shared entry insurance policies on the left menu.
- On the Shared entry insurance policies web page choose RootManageSharedAccessKey.
- Within the Coverage: RootManageSharedAccessKey window, choose the copy button subsequent to Major Connection String, to repeat the connection string to your clipboard for later use. Paste this worth into Notepad or another momentary location.
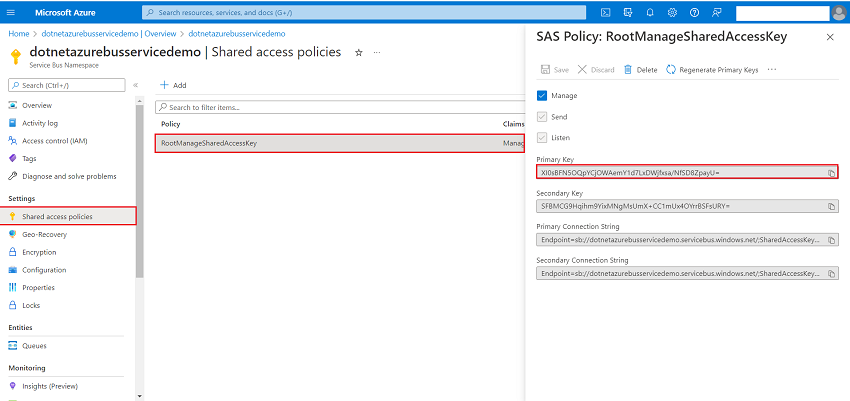
You should utilize this web page to repeat main key, secondary key, main connection string, and secondary connection string.
create queue within the azure portal
- On the Service Bus Namespace web page, choose Queues within the left navigational menu.
- On the Queues web page, choose + Queue on the toolbar.
- Enter a identify for the queue and depart the opposite values with their defaults.
- Now, choose Create.

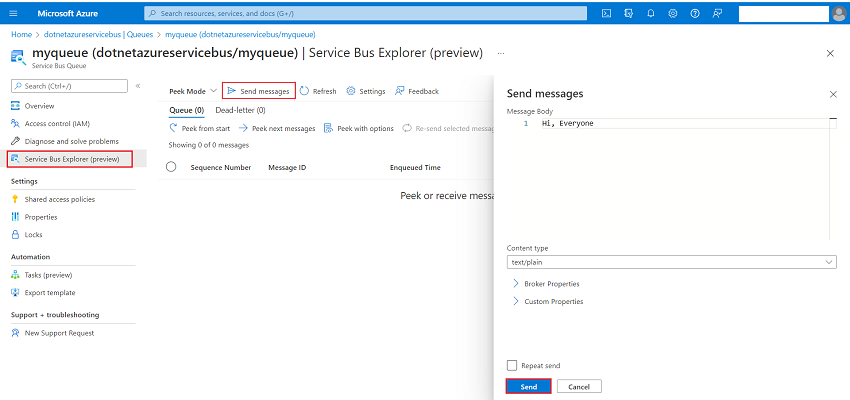
Ship messages to the queue in azure portal
Click on on created queue, choose Service Bus Explorer(preview).
On Service Bus Explorer choose ship messages, “enter message” in message physique selects content material sort plain/textual content and click on on ship button.
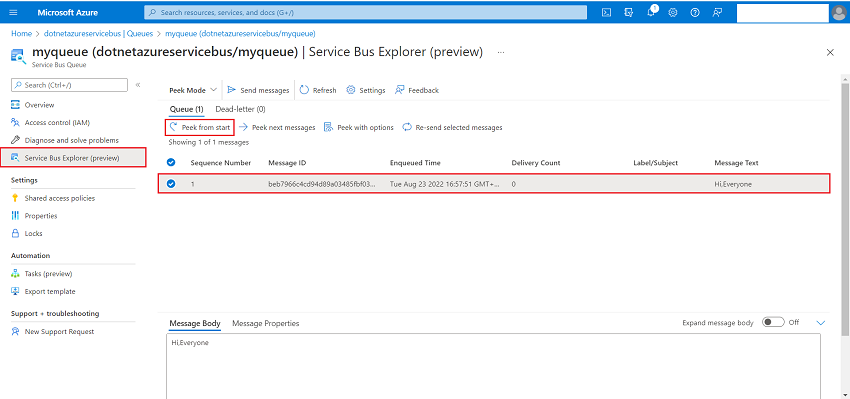
On service bus explorer click on on peek from begin and the message that you’ve got despatched.
Conclusion
Congratulations you’ve got created your first Azure service bus utilizing Azure portal. Azure service bus offers load-balancing work, security routing, and transaction work. You may undergo menu choice offered in created service bus overview web page and be taught extra about it