In a previous article, we discussed the new features of Azure DevOps. In this article, we will delve into Azure Pipelines and how they facilitate continuous integration for a .NET Web Application.
Azure Pipelines are designed to continuously build, test, and deploy to various platforms and clouds. They offer the flexibility to create pipelines for Windows, Linux, and macOS with unlimited minutes.
By automating the build and deployment processes, you can free up time for more productive and creative tasks, making Azure Pipelines significantly faster than VSTS.
Let’s explore how to setup and build a continuous integration pipeline.
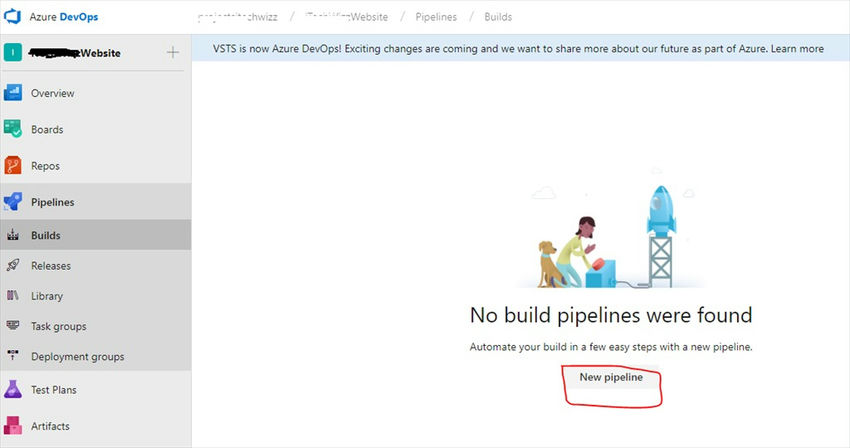
Log in to your Azure DevOps account, navigate to Pipelines, and select Builds. If you are new, you can also click on the New Pipeline button.
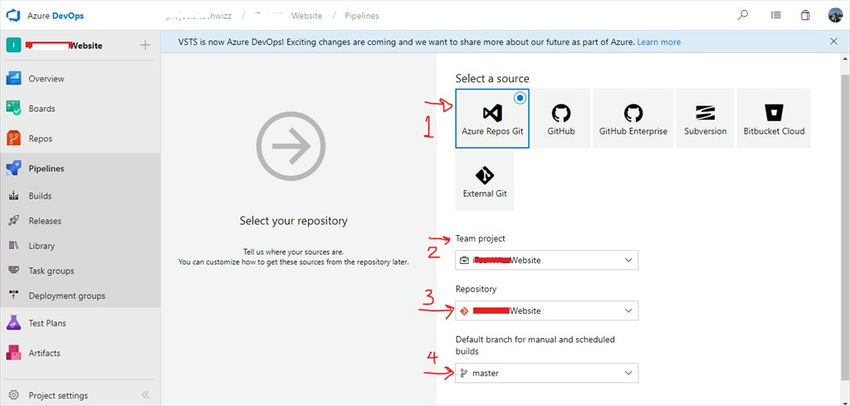
Choose the repository for which you want to establish a build. Select a source from options like Azure Repos Git, GitHub, Subversion Bitbucket cloud, etc. In this example, we’ll choose Azure Repos git as the default source.
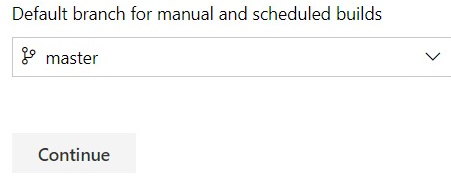
Select the Team project, Repository name, and branch for the Build setup, then click ‘Continue’.
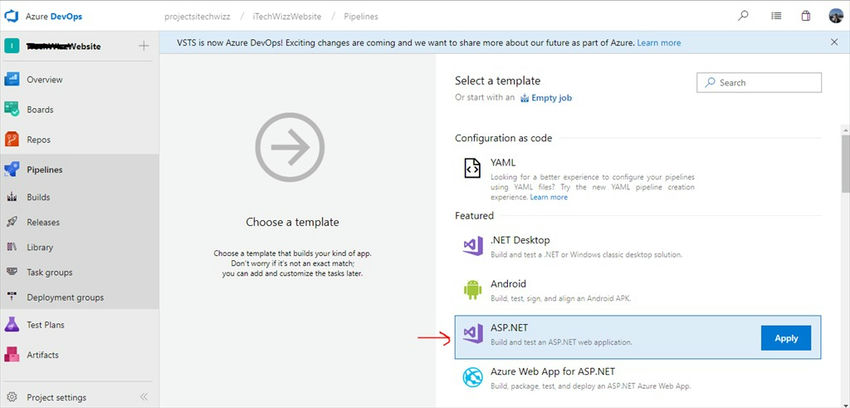
Azure DevOps Pipeline offers various pre-defined templates to choose from based on your requirements. Here, we’ll select the ASP.NET Template and click ‘Apply’.
The template consists of 5 configuration steps: Tasks, Variables, Triggers, Options, and Retention.
Let’s review and configure each step.
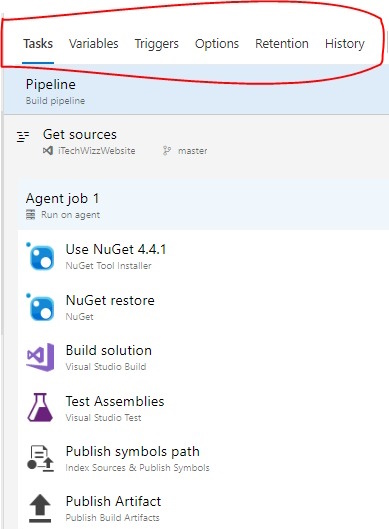
Step 1. Manage Tasks.
These settings help in managing pipeline agent jobs.
Name: refers to the artifact’s name.
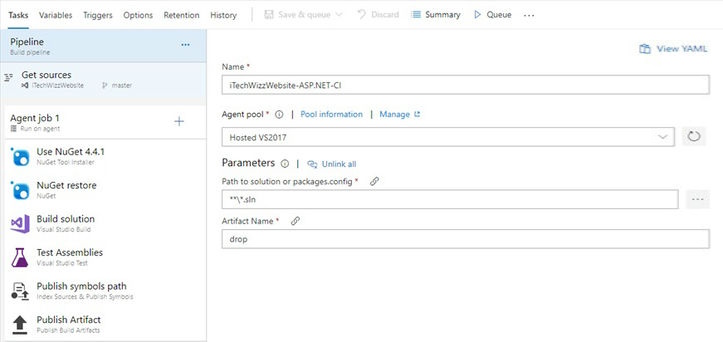
Agent Pool
An Agent Pool comprises build and release agents necessary for building and deploying code, with at least one agent required for the process.
An agent is a software that executes one build or deployment job at a time.
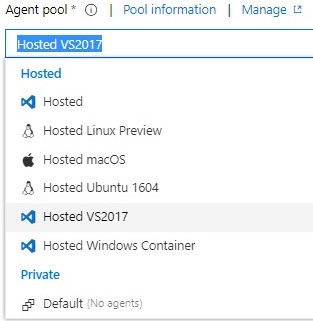
Azure Pipelines provide built agents targeting various platforms including Hosted VS2017, Hosted macOS, Linux, Ubuntu, etc.
Agent Pool Architecture
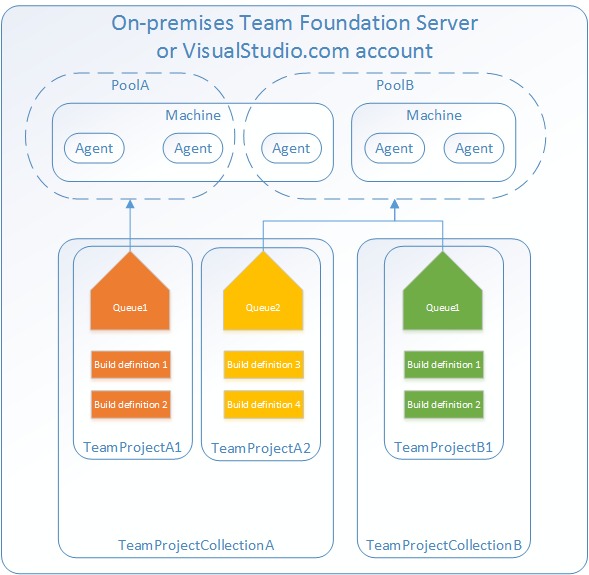
Image reference: https://docs.microsoft.com/en-us/azure/devops/pipelines/agents/pools-queues?view=vsts
Artifacts
Artifacts represent the final output of a process, comprising build files or packages.
‘Drop’ is the default artifacts folder name.
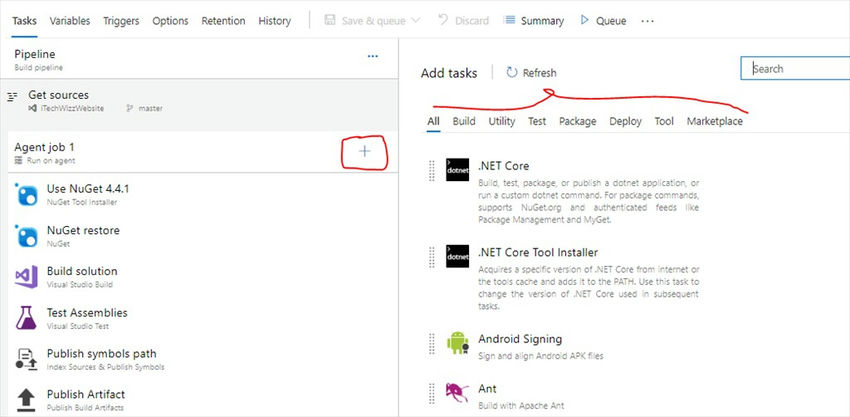
You can further customize agent jobs to meet project requirements. To add a new job, click the +(plus) icon next to the Agent Job tab and access various tasks and tools for build, test, package, deploy, etc.
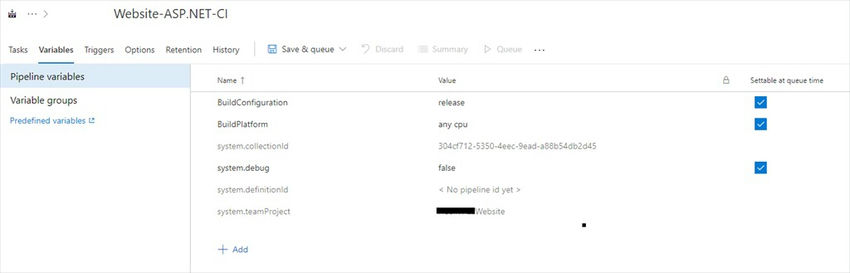
Step 2. Variables provide a convenient way to input essential data across the pipeline. System predefined variables are available along with the option to create user-defined variables.
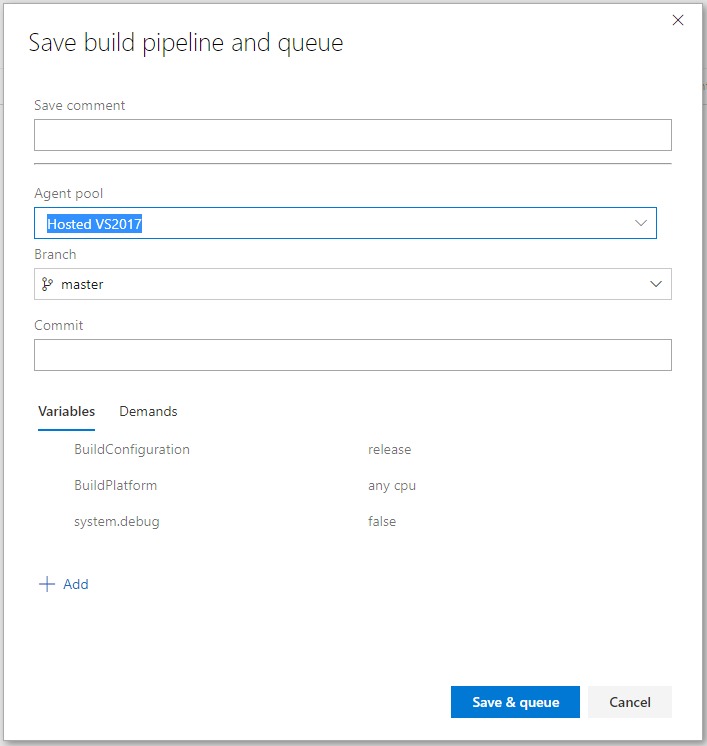
For this setup, we have a build configuration in release mode, Build Platform = any CPU, system. debug mode false.
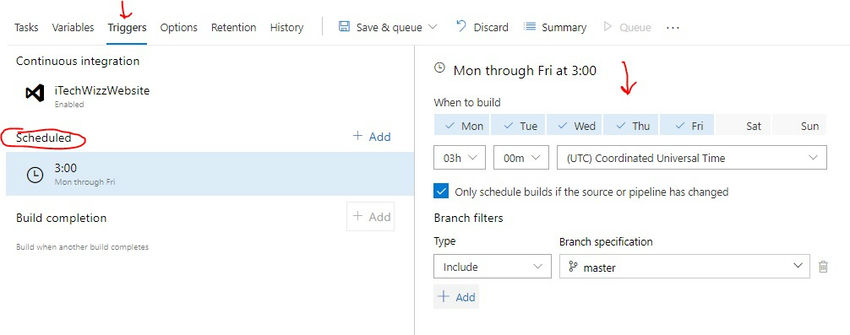
Step 3. Utilize the trigger setting to schedule builds, such as enabling continuous integration upon new check-ins.
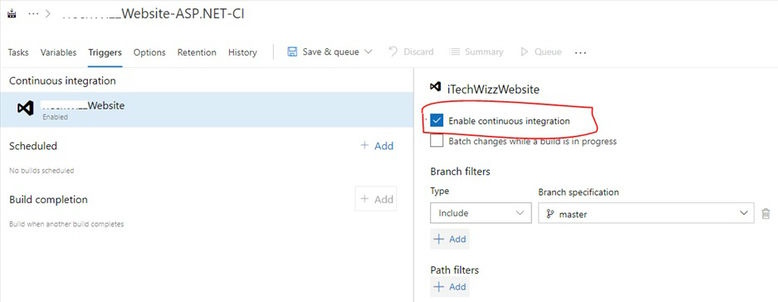
Alternatively, set a specific day and time to automatically initiate the build. Customize branch filters to include or exclude specific branches.
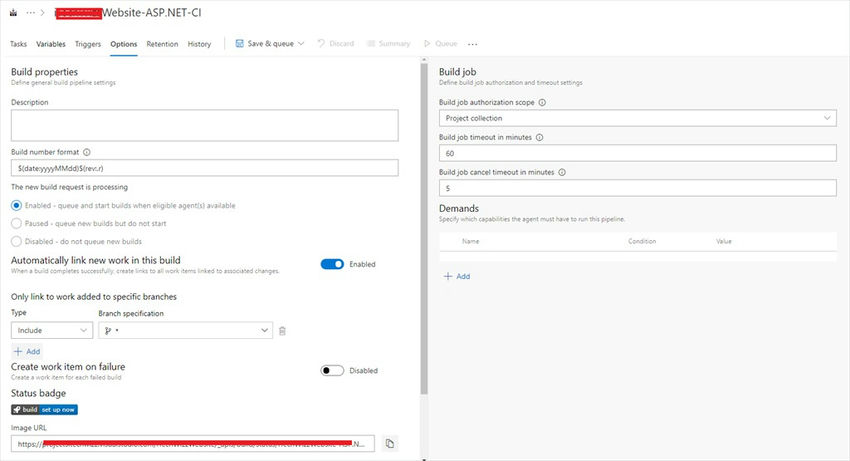
Step 4. Manage general build pipeline settings from the Options tab. Adjust the Build Number Format, toggle new work linking in this build, and configure branch and build job settings.
For now, we’ll retain the default settings.
Step 5. Retention policies determine how long build history backups are kept, like retaining builds for 10 or 30 days.
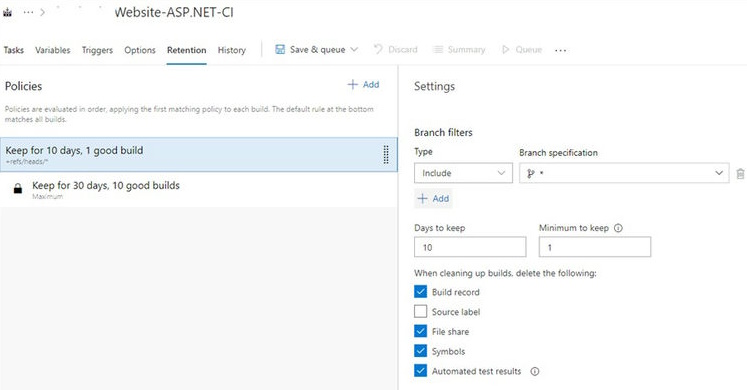
This ensures older, unused builds are automatically deleted.
Step 6. You can save the Continuous Integration setup to queue later. To initiate continuous integration manually, click save and queue. This action will prompt a popup where you select the agent pool, branch (e.g., master branch), and click save and queue.

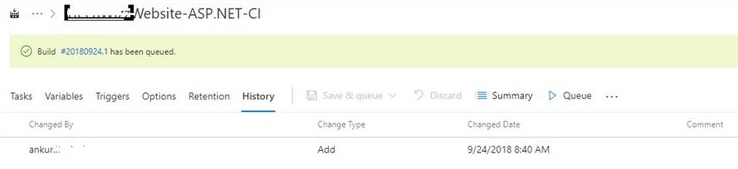
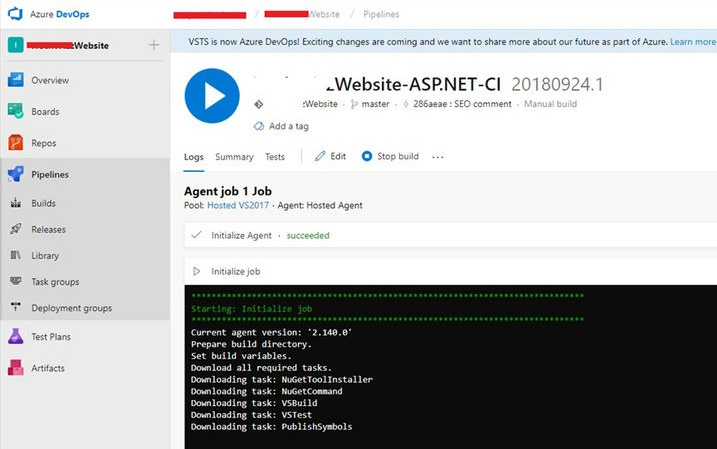
By doing this, the continuous integration process begins, and you can monitor the logs by clicking on the respective Build Number.
Observe as the agents prepare for the requested job.

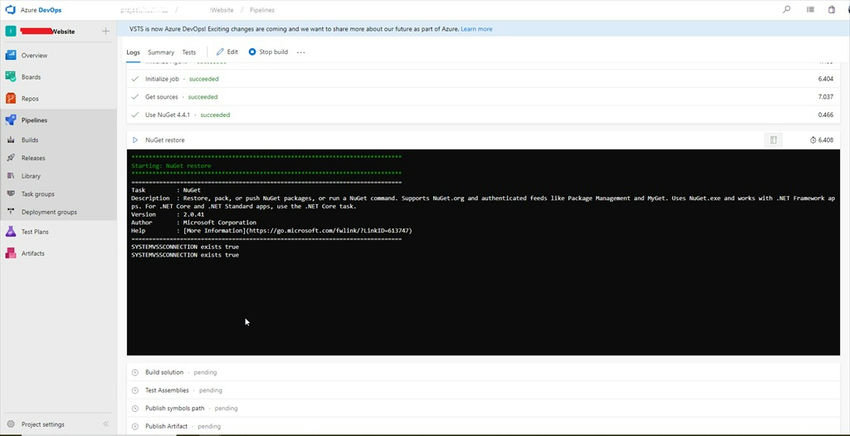
Step by step, all jobs and tasks will be executed.
Upon successful execution of all jobs, the results can be viewed on the builds dashboard.
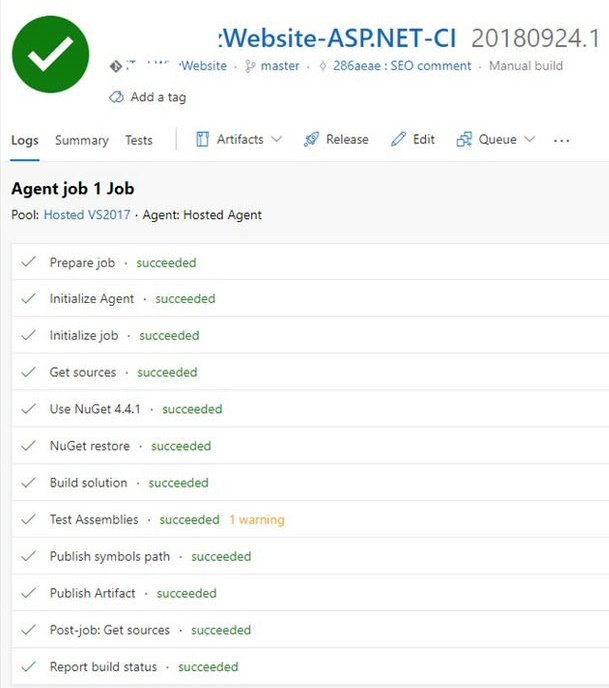

To view the Build History, navigate to the History tab. Click on the build number in the grid to monitor progress, displaying the details as shown in the following screen.
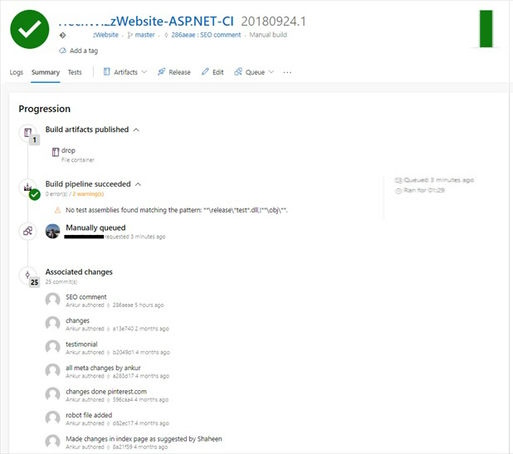
Check the build artifact’s published details, build pipeline status, and associated changes for the latest updates or the newest build.
We hope you found this article insightful. Stay tuned for our next article exploring Azure Test Plan in detail.
We welcome your feedback and comments in the comment section.
Learn more about us at Skrots. Discover the services we offer at Skrots Services. Also, explore other blogs on our Skrots Blog.
