Introduction
On this tutorial, I’m going to elucidate intimately tips on how to obtain, set up, and get began with Azure CLI. This detailed article will cowl the next matters as follows,
- Introduction
- What’s the Azure CLI?
- Present Model of Azure CLI
- Putting in the Newest model of Azure CLI
- Verify your Azure CLI Model
- Replace your Azure CLI
- Azure CLI Examples
- Azure CLI vs Azure PowerShell vs Azure Cloud Shell
- Conclusion
What’s Azure CLI?
Azure Command-Line Interface (CLI) is a command-line device for configuring and managing Azure sources from numerous shell environments.
As per Microsoft, “The Azure Command-Line Interface (CLI) is a cross-platform command-line device to hook up with Azure and execute administrative instructions on Azure sources. It permits the execution of instructions via a terminal utilizing interactive command-line prompts or a script”.
The Azure Command-Line Interface (CLI) is a cross-platform CLI device that may be put in regionally on Home windows computer systems. You need to use the Azure CLI for Home windows to hook up with Azure and execute administrative instructions on Azure sources. The Azure CLI for Home windows may also be used from a browser via the Azure Cloud Shell or run from inside a Docker container.
For interactive use, you first launch a shell corresponding to cmd.exe on Home windows, or Bash on Linux or macOS, after which difficulty a command on the shell immediate.
Present Model of Azure CLI
- The present model of the Azure CLI is 2.43.0.
Easy methods to Set up the Newest Model of Azure CLI?
This tutorial will present you numerous methods to put in the newest model of Azure Command-Line Interface (CLI) on Home windows PCs.
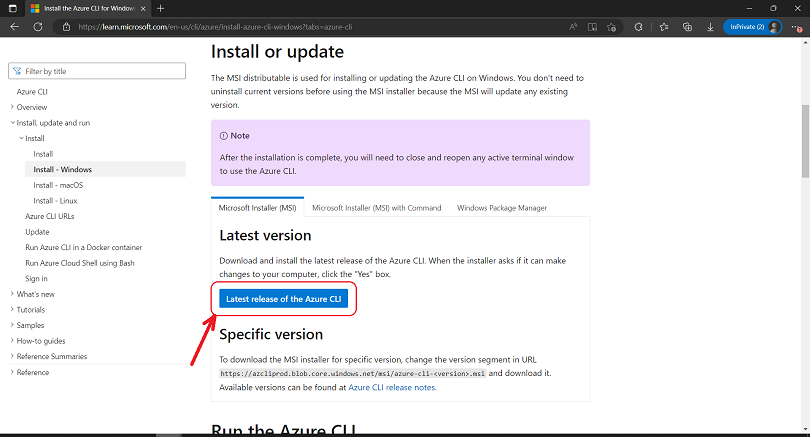
Technique 1 – Utilizing Microsoft Installer (MSI)
On Home windows, the MSI distributable is used to put in or replace the Azure CLI. There isn’t any must uninstall present variations earlier than utilizing the MSI installer as MSI will improve any present variations. You’ll be able to set up the newest model of Azure CLI by following the steps given beneath.
Step 1
To obtain and set up the newest model of Azure CLI, go to the official Azure web site in your net browser.
Step 2
Click on on the “Newest Launch of the Azure CLI” possibility.
Step 3
Double-click on the downloaded “azure-cli-2.43.0.msi” file.
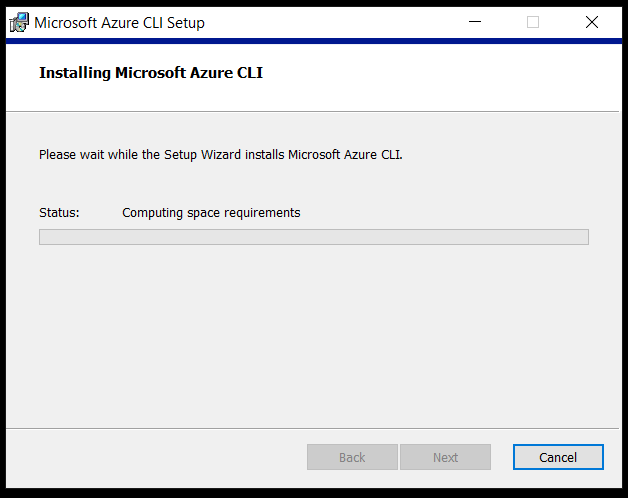
Step 4
Microsoft Azure CLI Setup will seem on the display screen. Now, click on on “I settle for the phrases within the License Settlement” after studying the Microsoft Azure CLI license settlement rigorously. then click on “Set up” to proceed.

Now, the set up of Microsoft Azure CLI will start. Please wait whereas the setup wizard installs the Microsoft Azure CLI.
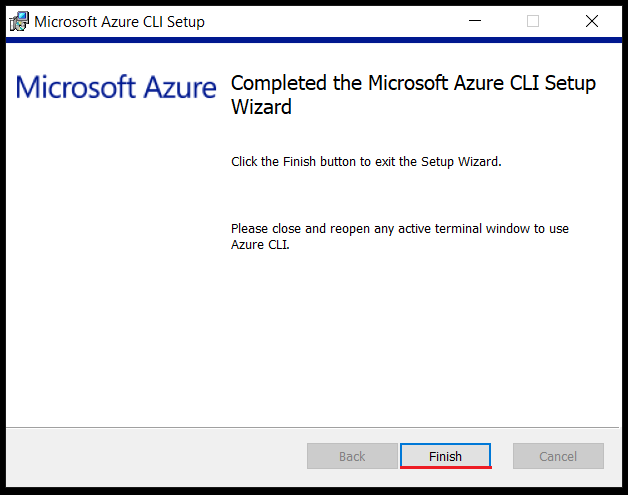
Congratulations, Microsoft Azure CLI is now put in in your system. (Now, please shut and reopen any lively terminal window to make use of Azure CLI).
Technique 2 – Utilizing PowerShell (Admin)
Utilizing PowerShell, the person can simply set up the Azure CLI. Comply with the directions given beneath to proceed additional.
Step 1
Begin PowerShell as Administrator.
Step 2
Now, run the next command:
$ProgressPreference = 'SilentlyContinue'; Invoke-WebRequest -Uri https://aka.ms/installazurecliwindows -OutFile .AzureCLI.msi; Begin-Course of msiexec.exe -Wait -ArgumentList '/I AzureCLI.msi /quiet'; rm .AzureCLI.msi
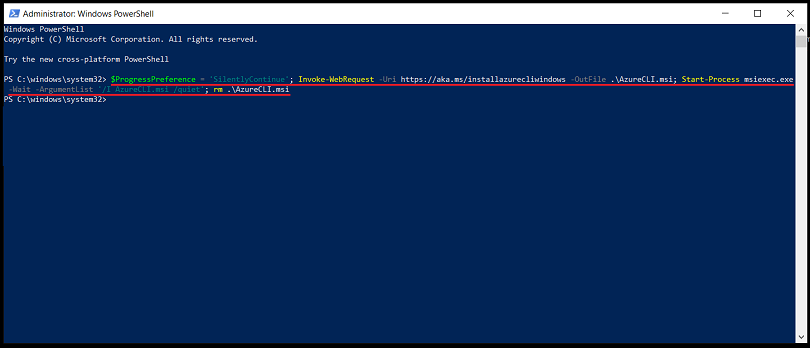
It will obtain and set up the newest model of the Azure CLI for Home windows. If you have already got a model put in, the installer will replace the prevailing model.
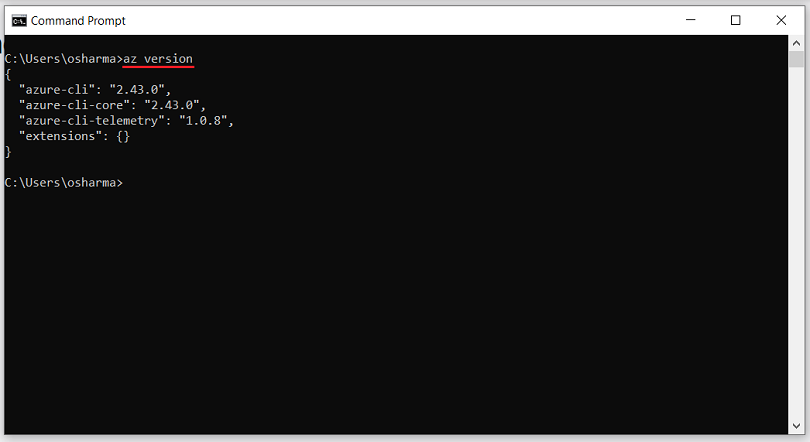
Verify your Azure CLI Model
To search out your put in Azure CLI model and see if that you must replace, run the az model or az –version.
az model
Replace Azure CLI
Azure CLI offers in-tool instructions so that you can improve manually or robotically.
Technique 1 – Guide Replace
To replace to the newest model, use the in-tools command supplied by the Azure CLI: az improve
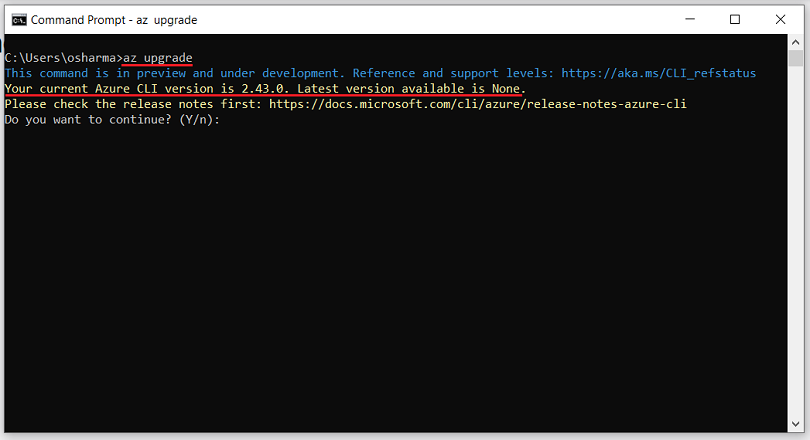
The az improve command was launched in model 2.11.0 and won’t work with earlier variations. Reinstalling older variations will carry them updated. By default, this command can even replace all put in extensions.
Technique 2 – Automated Replace
Azure CLI checks for brand spanking new variations and prompts you to improve after any command is run.
To allow auto-upgrade to maintain up with the newest model, run the next command:
az config set auto-upgrade.allow=sure
To disable or flip off the auto-upgrade characteristic, run the next command:
az config set auto-upgrade.allow=no
Azure CLI Examples
Listed beneath are some Azure CLI examples:
- SignIn to Azure CLI
- Subscription syntax
- Position project syntax
Earlier than utilizing any Azure CLI command with an area set up, it’s essential to sign up with the az login.
az login
Use the next command to change between subscriptions. This is the syntax.
az account set --subscription "my subscription title"
To handle position assignments, use the next command:
az position project create --assignee servicePrincipalName --role Reader --scope /subscriptions/mySubscriptionID/resourceGroups/myResourceGroupName
az position project delete --assignee userSign-inName --role Contributor
Azure CLI vs Azure PowerShell vs Azure Cloud Shell
Azure CLI and Azure PowerShell are each command-line instruments that allow you to create and handle Azure sources. Each are cross-platform and may be put in on Home windows, macOS, and Linux.
Azure Cloud Shell is a hosted shell atmosphere that runs on an Ubuntu container. Azure Cloud Shell offers two shell environments:
Bash (with Azure CLI preinstalled)
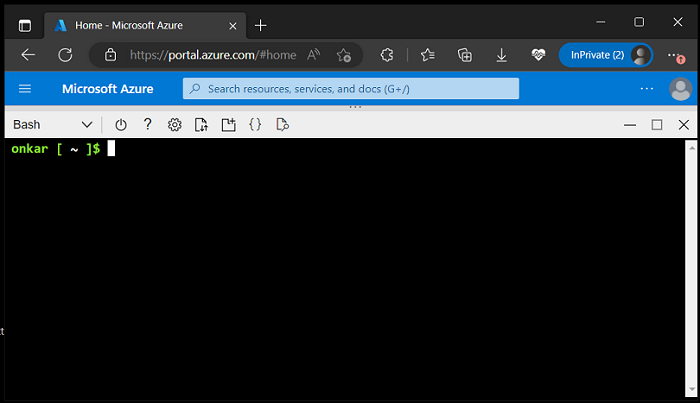
PowerShell (with Azure PowerShell preinstalled)
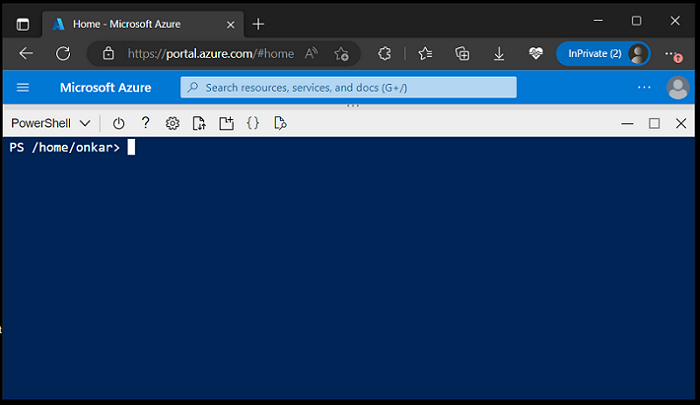
You’ll be able to rapidly change between the 2 environments by deciding on one from the dropdown listing on the high of the Cloud Shell window.
You might also go to my different articles on Azure,
Reference
https://study.microsoft.com/en-us/cli/azure/
See you within the subsequent article, until then take care and be pleased studying.
Conclusion
On this article, we now have mentioned intimately tips on how to obtain, set up, and get began with Azure CLI (Command-Line Interface).
I hope you loved this text. Comply with C# Nook to study extra new and superb issues.
Thanks for studying.


