Introduction
Multi-Issue Authentication, abbreviated as MFA, is a safety process mandating people to furnish a number of types of identification earlier than being granted entry to a system, software, or account. The first goal of MFA is to enhance safety by introducing an extra layer past the traditional username and password, mitigating vulnerabilities to potential assaults like phishing or password guessing.
Though MFA has many benefits however there are eventualities the place it could act as a drawback. We’ll talk about a number of use instances the place we require MFA to be disabled. Additional, we’ll talk about steps how to disable MFA.
Use Circumstances
- Handbook Testing: An organization is deploying an online app with Multi-Issue Authentication (MFA). Handbook testing reveals person confusion and workflow inefficiencies with MFA. To handle usability considerations, the testing staff recommends quickly disabling MFA for particular person roles. This enables centered testing and refinement earlier than re-enabling MFA.
- Automation and Scripting: The combination of MFA with automated testing or scripting could face challenges. A sensible method could contain quickly disabling MFA for particular accounts throughout automated testing, with the situation that thorough consideration and addressing of safety implications are undertaken.
- Handbook Deployment Steps: For important post-deployment duties in Energy Platform similar to updating connectors and adjusting settings, MFA is quickly disabled for a service account, permitting streamlined handbook execution. Enhanced safety measures are in place through the course of, and MFA stays disabled for effectivity.
- Coaching and Onboarding Prices: If MFA creates complexity for end-users, there could be bills related to coaching and onboarding. Quickly deactivating MFA may mitigate these prices within the brief time period; nonetheless, it’s important to prioritize person schooling for long-term effectiveness.
There could be a number of different use instances as properly. Now let’s talk about how we are able to disable MFA.
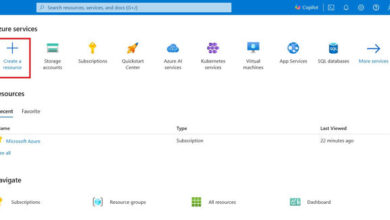
Steps to disable MFA utilizing Azure Portal
Step 1. Login to portal.azure.com with a minimum of a safety administrator position(I’ve World Admin position in my case)
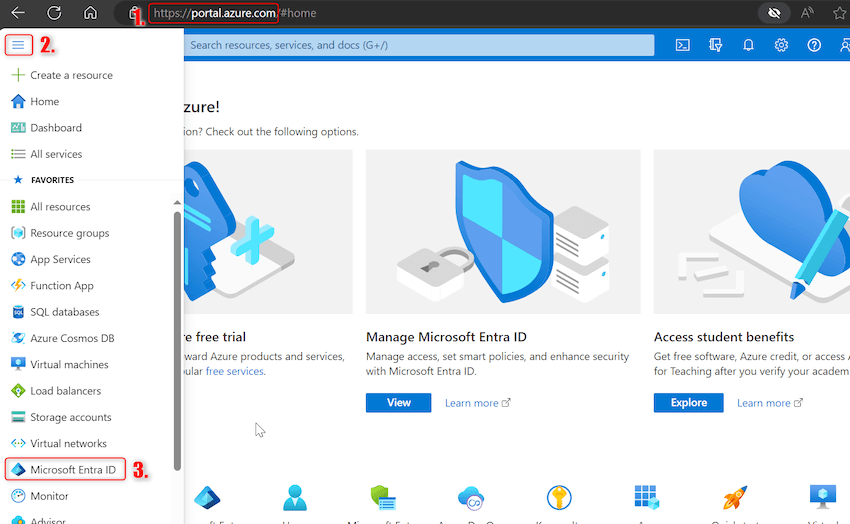
Step 2. Click on on hamburger menu icon -> Go to Microsoft Entra ID (beforehand referred to as Azure Lively Listing) as proven beneath:
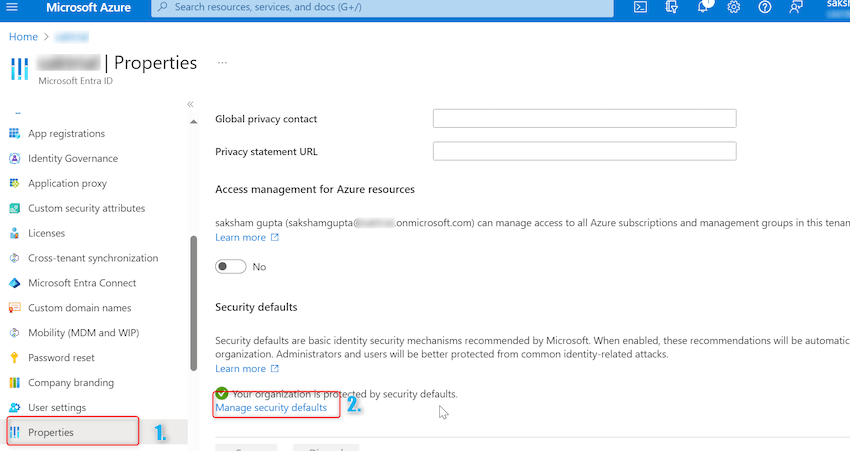
Step 3. A brand new window for Microsoft Entra ID will open. On left hand aspect beneath handle click on on properties. In properties scroll to the underside and click on on Handle Safety defaults hyperlink as proven beneath:
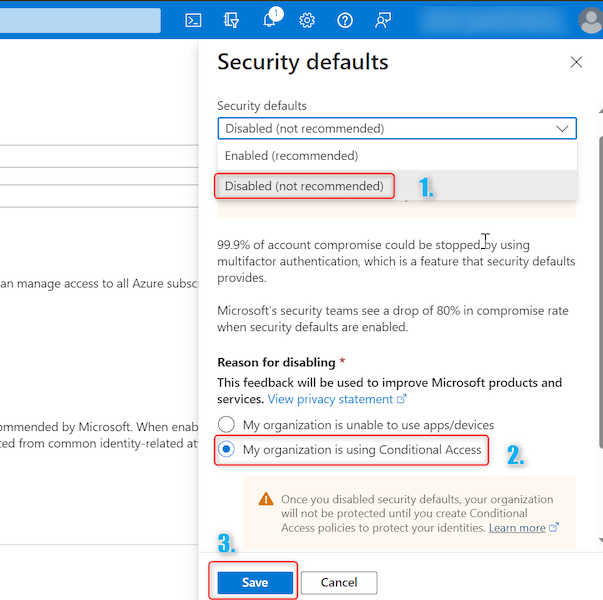
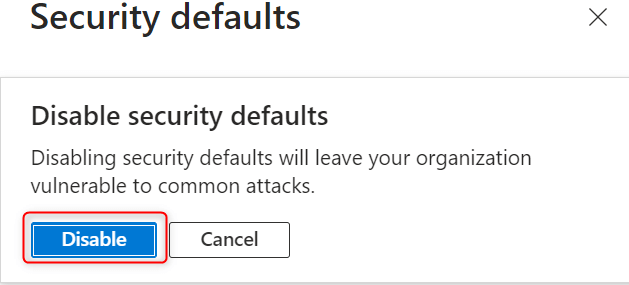
Step 4. A brand new window will open on proper hand aspect. Click on on dropdown and choose Disabled. In Motive for Disabling choose ‘My group is utilizing conditional entry’ (We’ll talk about conditional entry additional on this article) . Now click on on Save as proven beneath:
If any warning pop-up seems choose disable as proven beneath:
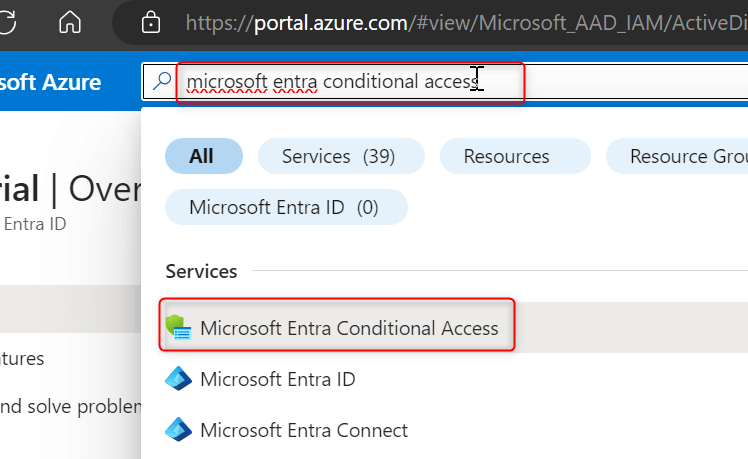
Step 5. After completion of above steps, MFA will likely be disabled for all customers within the group. This isn’t really helpful, we should always solely disable MFA for particular customers/group. To attain this we’ll make use of Microsoft Entra conditional entry. In search field kind ‘Microsoft Entra conditional entry’ and open the service as proven beneath:
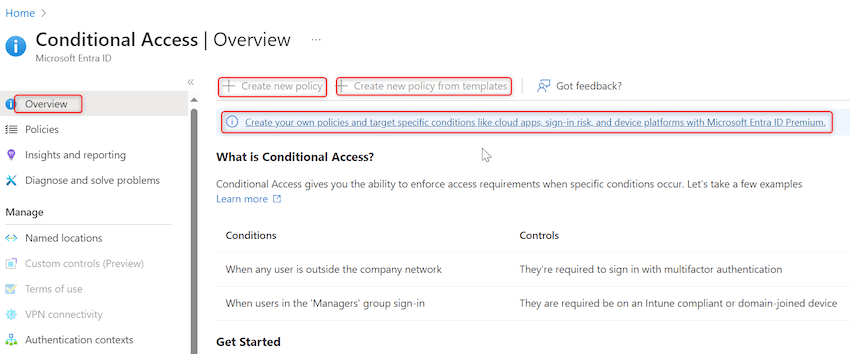
Step 6. A brand new window will open. If logged-in person do not have ‘Microsoft Entra ID P2’ license, Create new coverage choice will likely be disabled for him. To boost a trial request for ‘Microsoft Entra ID P2’ click on on highlighted hyperlink: Create your individual insurance policies and goal particular situations like cloud apps, sign-in danger, and machine platforms with Microsoft Entra ID Premium. as proven beneath:
For detailed pricing and options of ‘Microsoft Entra ID P2’ refer following hyperlinks: Options and Pricing
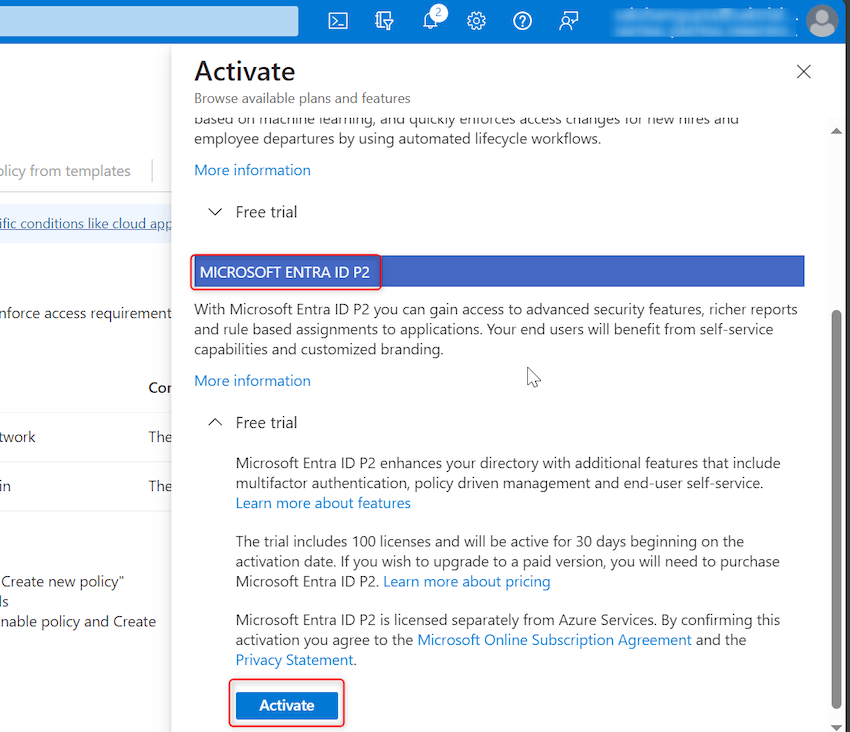
Step 7. A brand new pop-up ‘Activate’ will seem. Below ‘Microsoft Entra ID P2’ part click on on Activate as proven beneath:
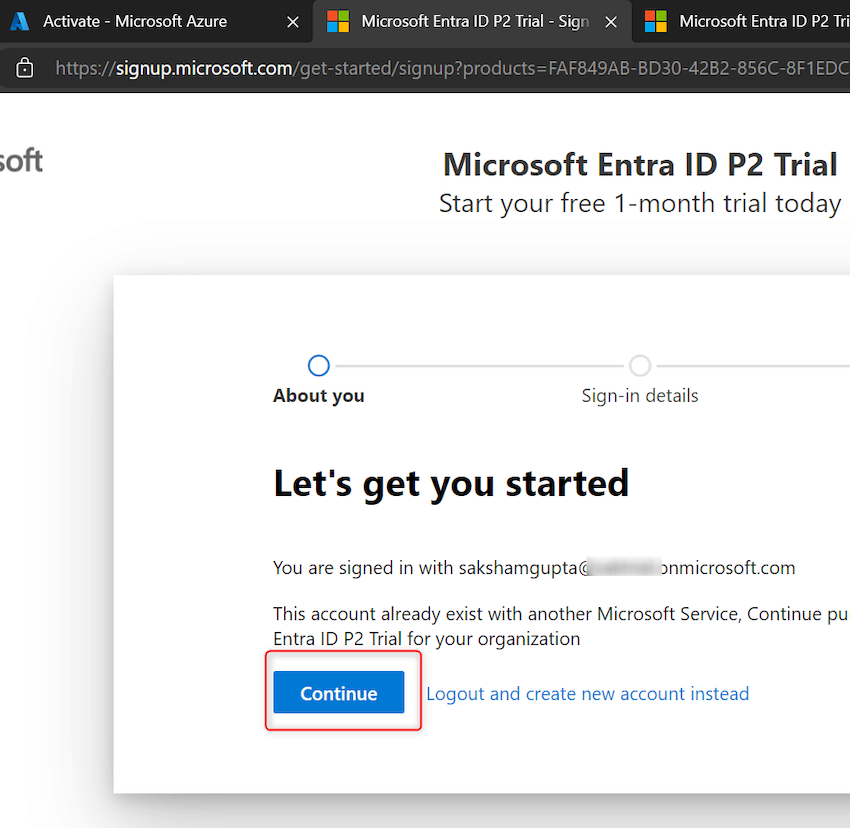
Step 8. A brand new window will open. Click on on proceed as proven beneath:
Step 9. Now click on on ‘Attempt now’ as proven beneath.
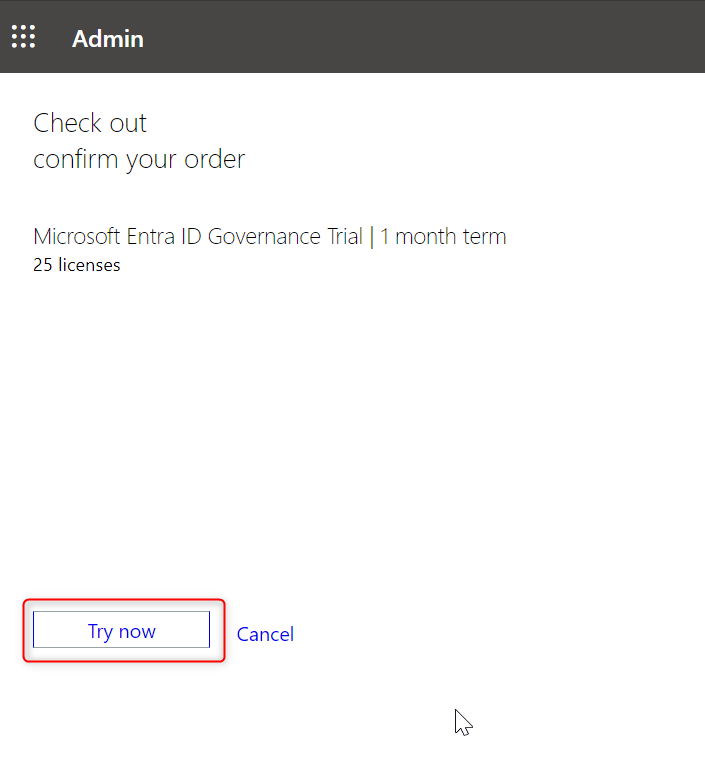
: Please ensure you have fee methodology outlined.
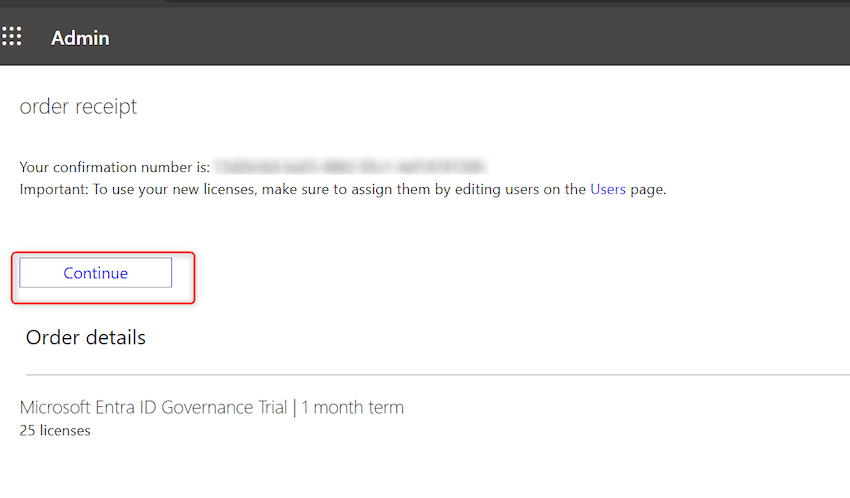
Step 10. Now click on on proceed. ‘Microsoft Entra ID P2’ trial license will likely be added.
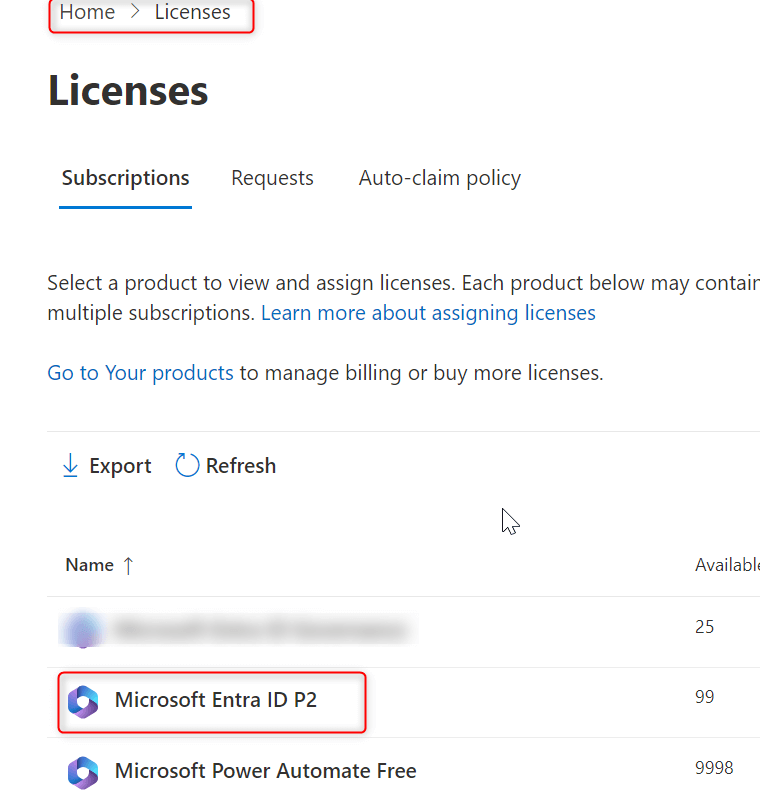
We are able to confirm the license by navigating to Dwelling-> License as proven beneath:
Step 11. Now assign this license to your self. Navigate to Customers-> Lively Customers -> Click on On extra actions icon subsequent to your user-> Click on on Handle product licenses as proven beneath:
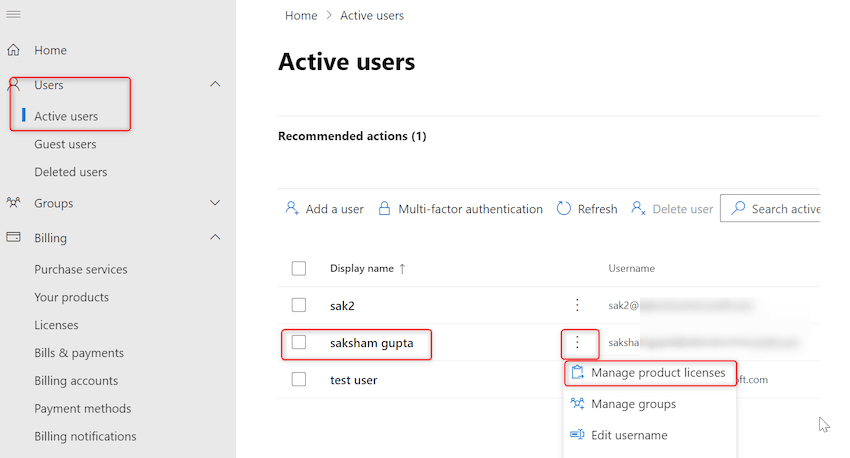
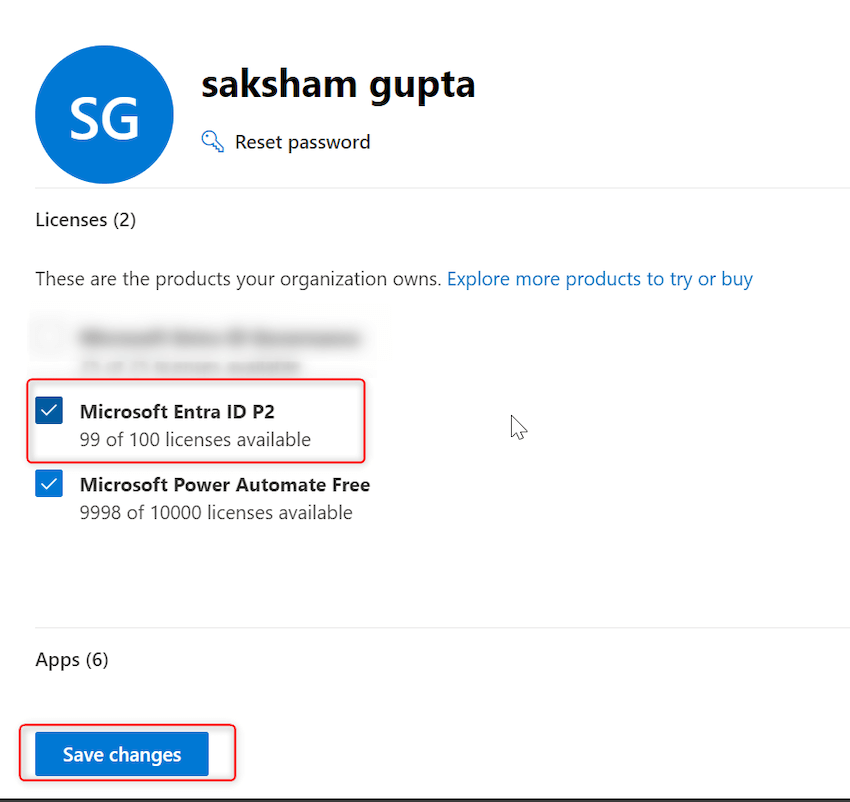
Step 12. A brand new pop-up will seem. Click on on checkbox subsequent to ‘Microsoft Entra ID P2’. Click on on save modifications as proven beneath:
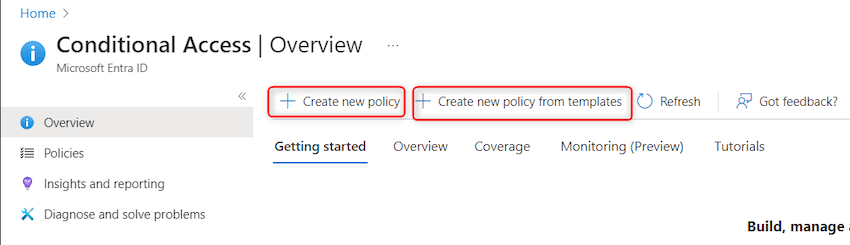
Step 13. Now return to Azure Portal -> ‘Microsoft Entra conditional entry’ and refresh the web page. Confirm ‘Create new coverage’ buttons are enabled now. Click on on ‘Create new coverage from templates’ as proven beneath:
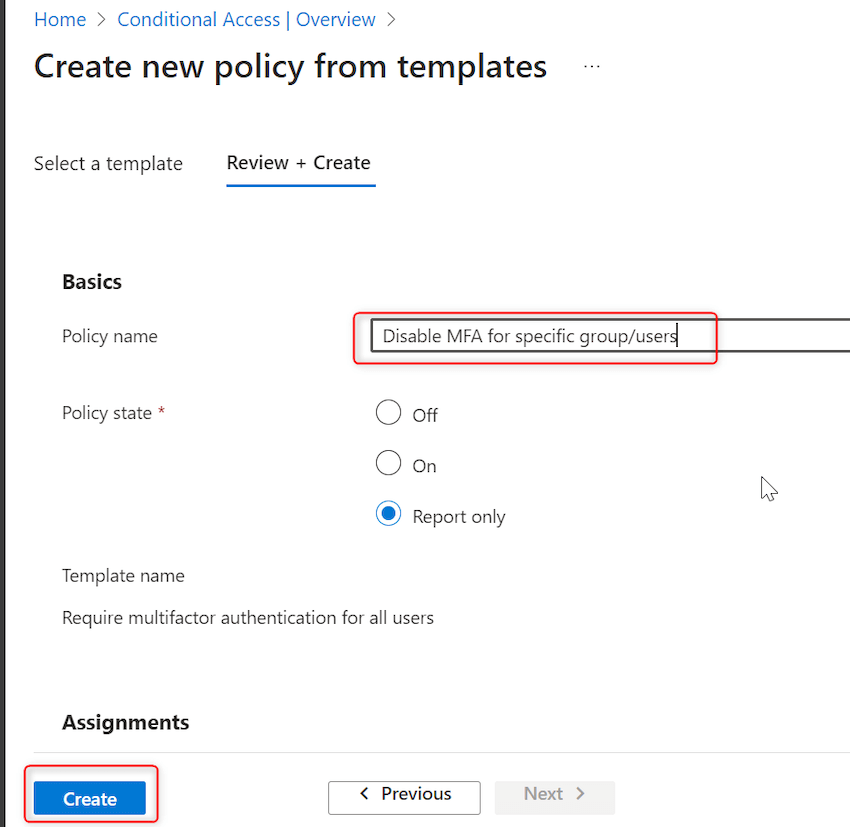
Step 14. Seek for ‘Require multifactor authentication for all customers’ and choose the template. At backside click on on Assessment+Create as proven in picture beneath:

Step 15. Give Coverage title = ‘Disable MFA for particular group/customers’ -> Click on on create as proven beneath:
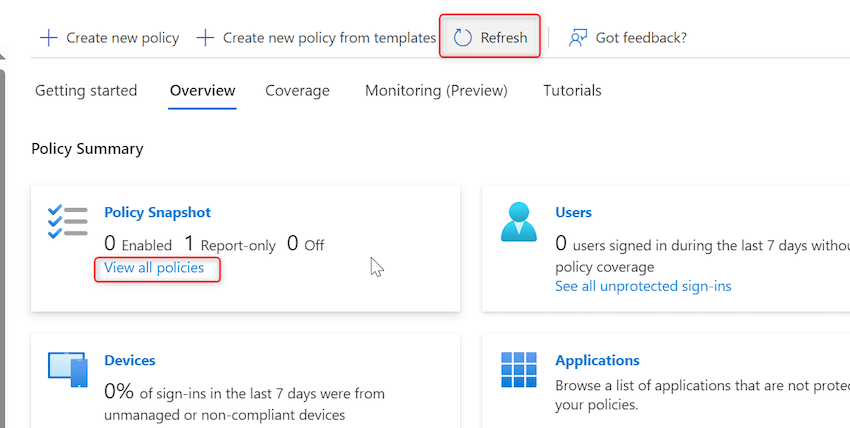
Step 16. Now we’ll add particular group/person for which we do not need MFA to be enabled in exclude listing of coverage created in Step 15. Click on on refresh after which click on on View all insurance policies as proven beneath:
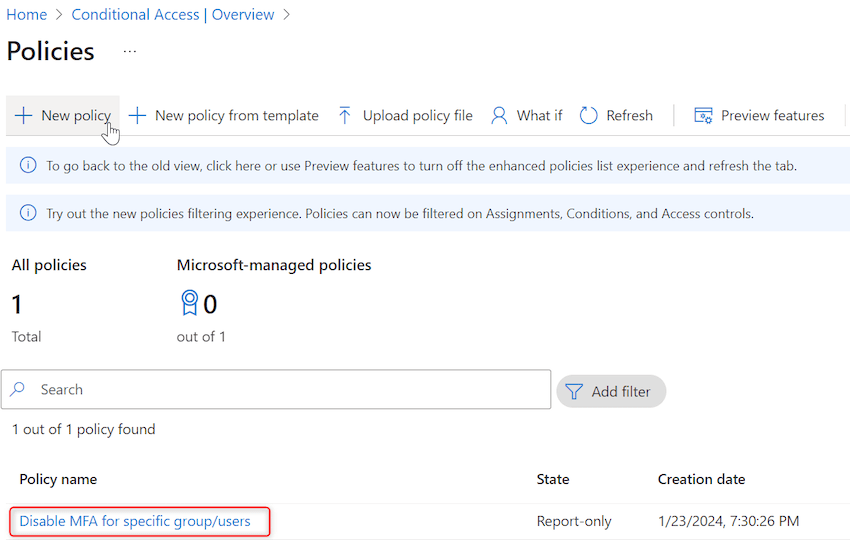
Step 17. Open ”Disable MFA for particular group/customers’ coverage by clicking on it.
Step 18. In Customers part -> Click on on Exclude Tab -> Choose Customers and Teams -> Add customers and teams for which MFA is to be disabled -> In Allow coverage click on ON -> Save as proven beneath:
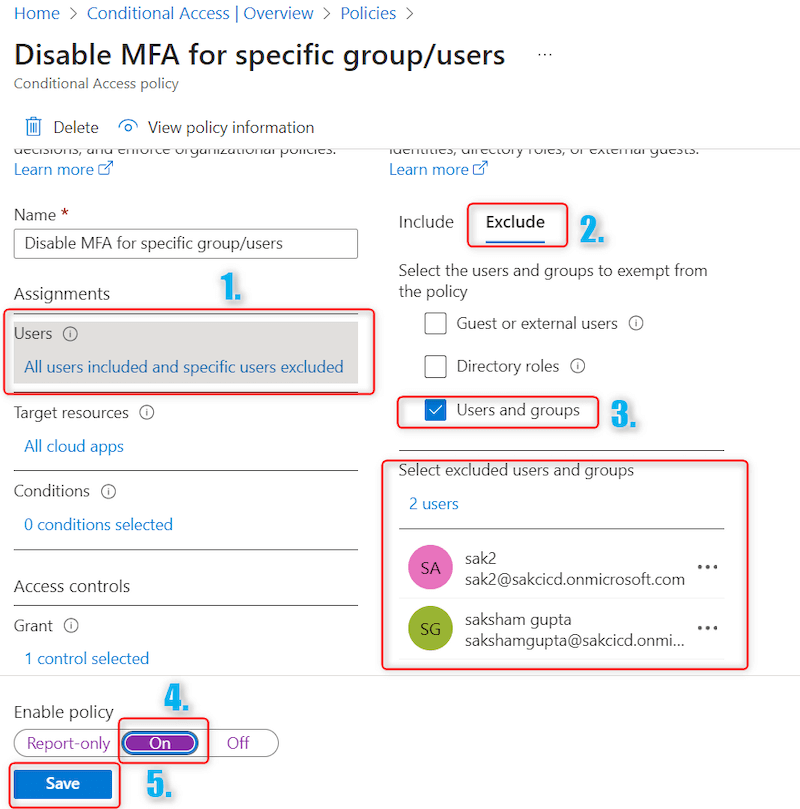
In above Step 18, we excluded customers sak2 and sakshamgupta from situation coverage. Other than these 2 customers, for all different customers MFA is enabled.
Equally, we are able to create a number of situation insurance policies based mostly on necessities and add customers to incorporate/exclude lists accordingly.
Conclusion
We mentioned how we are able to disable MFA for a selected set of customers/teams utilizing situation insurance policies. That is essentially the most environment friendly manner of disabling MFA and is carried out in USE CASES mentioned on this article. Please be happy to succeed in out in case any doubts or clarifications are required.
: MFA needs to be disabled solely when it’s actually required and needs to be carried out by an skilled useful resource/person as it’s associated to safety.
Know extra about our firm at Skrots. Know extra about our providers at Skrots Providers, Additionally checkout all different blogs at Weblog at Skrots