Introduction
In our earlier article, we realized the way to deploy the Azure firewall; on this article, we’ll discover ways to join our Digital machine utilizing the Azure Firewall. Presently, our Digital machine doesn’t have a public IP handle, and we’re going to join our digital machine utilizing the Azure firewall’s public IP handle.
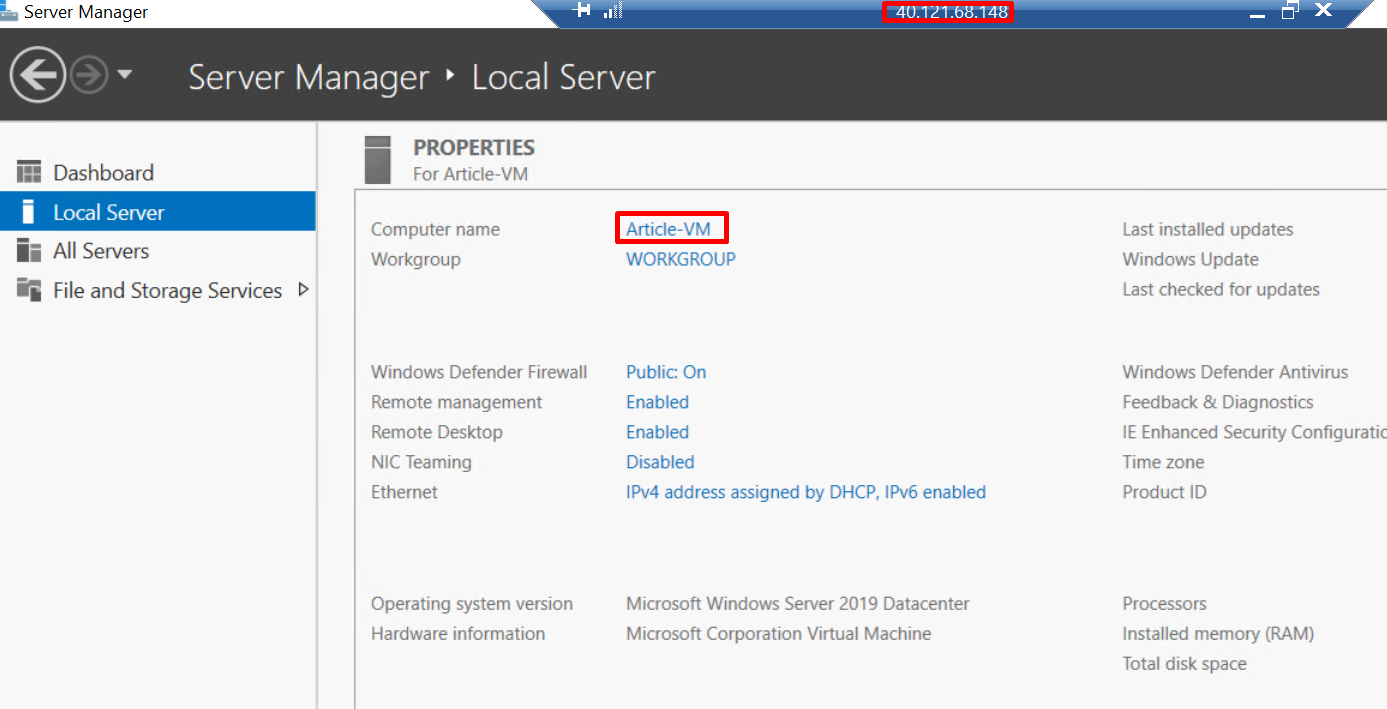
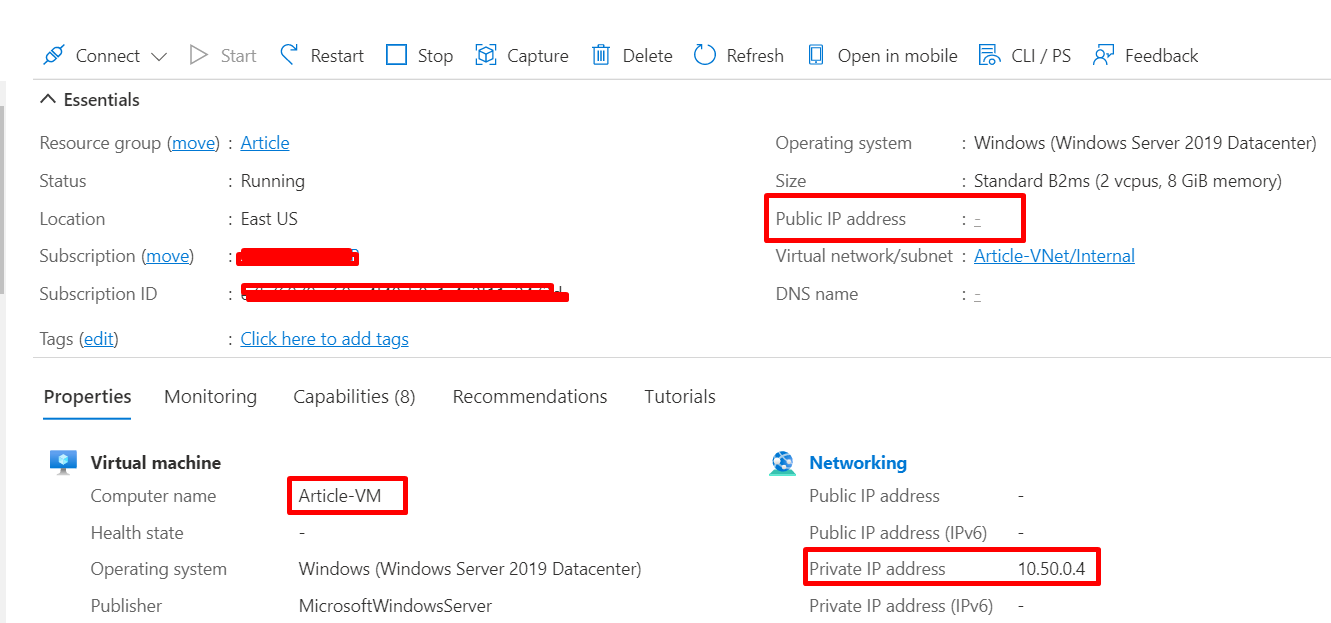
Step 1: Open the Digital Machine and replica the Personal IP handle.
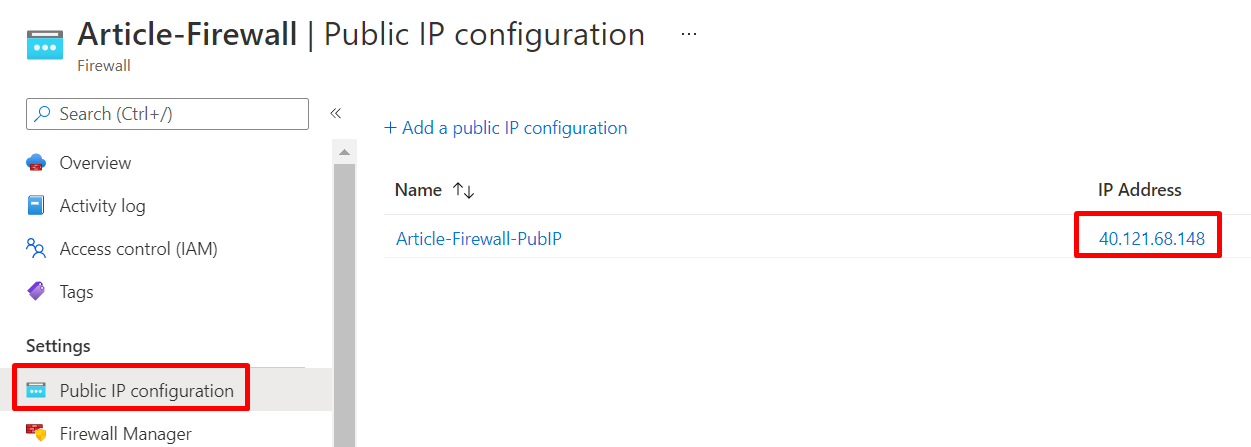
Step 2: Open the Azure Firewall, choose Public IP configuration beneath the Settings, and replica the Public IP handle.
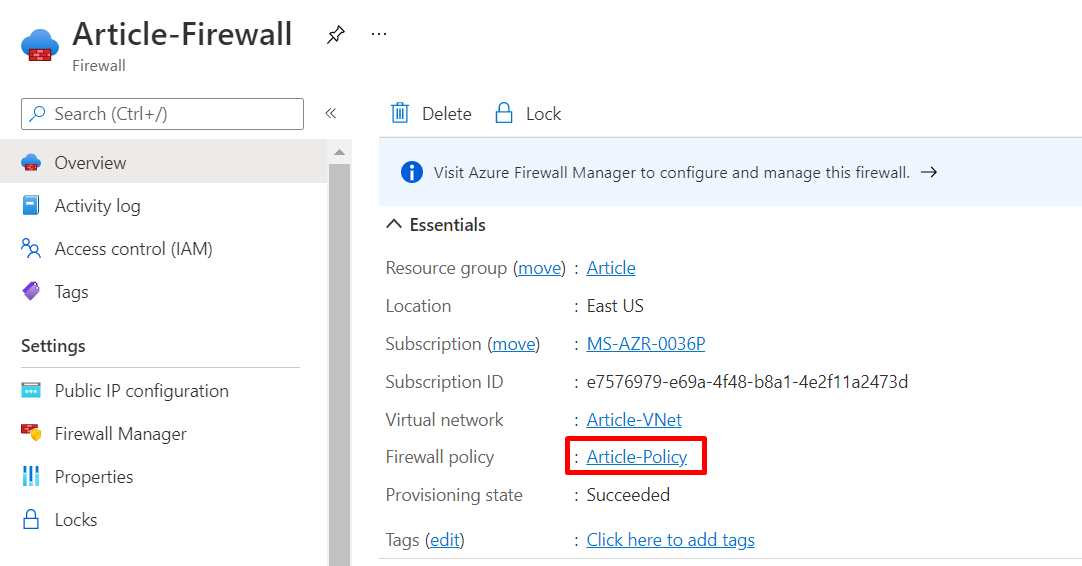
Step 3: Within the Azure Firewall, Choose the Coverage to create the DNAT Guidelines
Step 4: Within the Firewall Coverage web page, Choose the DNET beneath the Settings and click on + Add a rule assortment.

Step 5: To configure the DNAT rule, we want the beneath particulars;
- Digital Machine’s Personal IP: 10.50.0.4
- Firewall’s Public IP: 40.121.68.148
- Our Native Pc Public IP: to get the general public IP, search what’s my IP on google, and we’ll get it. my present Public IP is 112.134.185.186
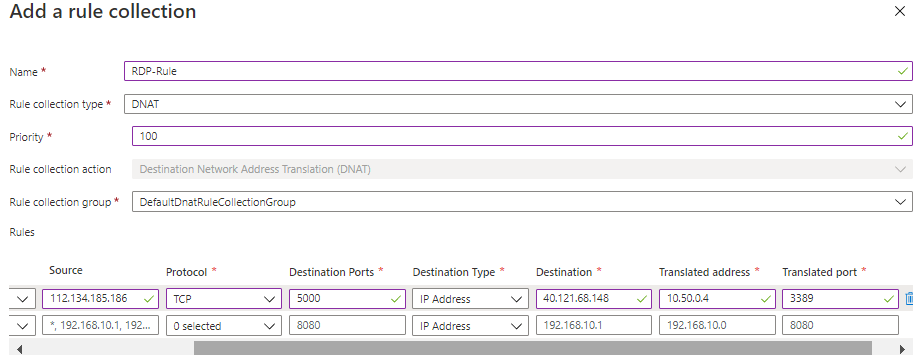
- Title: Our Digital Machine Title (Article-VM)
- Supply sort: IP Handle
- Supply: Our Native pc’s public IP (112.134.185.186)
- Vacation spot Ports: We will select any port quantity (5000)
- Vacation spot Kind: IP Handle
- Vacation spot: Our Firewall Public IP (40.121.68.148)
- Translated Handle: Our Digital Machine’s Personal IP handle (10.50.0.4)
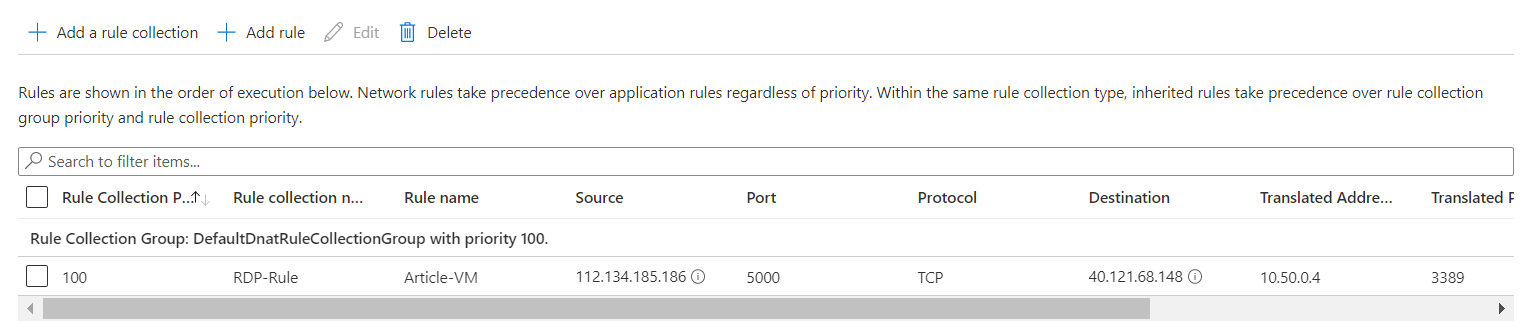
Step 6: Lastly, we’ve created the DNAT rule.
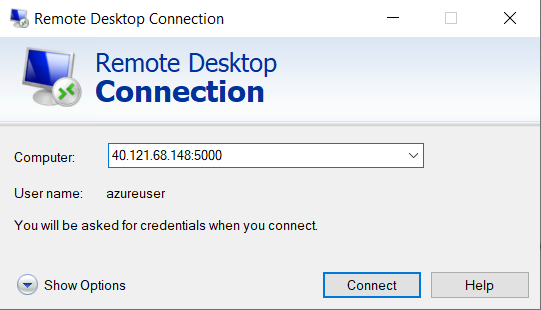
Step 7: Open the Distant Desktop Connection, and enter the Firewall’s Public IP handle with the Port quantity.
Step 8: Now, our Digital machine is linked to the Azure Firewall public IP handle.
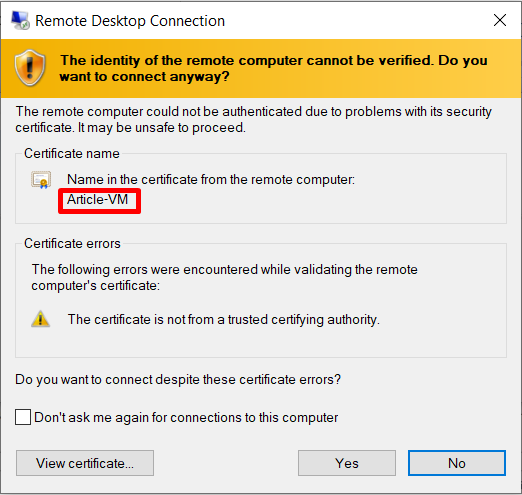
Step 9: We have now efficiently linked our Digital machine utilizing the Azure Firewall public handle.