Introduction
Have you heard about the new Teams Open AI library modules released by MSFT? These services can make your Teams Apps smarter by enabling contextual, meaningful conversations. The Open AI modules handle all the complex tasks behind the scenes, while you configure the intelligent settings. If you want to learn more about Azure Open AI, check out the references section. In this article, we will guide you through the process of obtaining the registration keys and endpoints required to interact with these Open AI cognitive services.
Prerequisites
Before getting started, make sure you have the following prerequisites:
- An active Azure Subscription.
If you’re unsure how to set up an Azure subscription, refer to the references section for more information.
Now, let’s dive into the steps to get the Azure Open AI registration keys and endpoint.
Step 1. Log in to the Azure Portal at https://portal.azure.com using your subscription username and password.
Note. If you have an organization Visual Studio subscription, the Open AI service might not be available. As of the writing of this article, the service is in Public Preview, so you may need to fill out a request form to gain access.
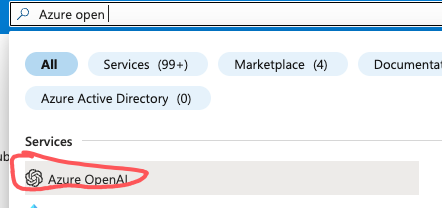
Step 2. Search for Azure Open AI
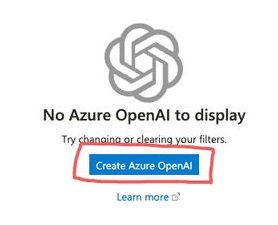
Step 3. You will be directed to the Cognitive Services | Azure Open AI page. If you haven’t set up any other Open AI services, you will see a screen that says ‘No Azure OpenAI to display’. Click on ‘Create Azure Open AI’.
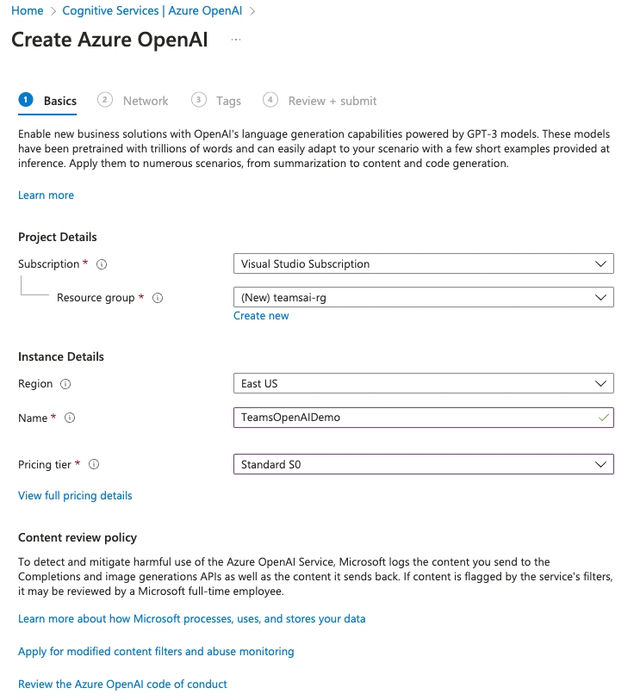
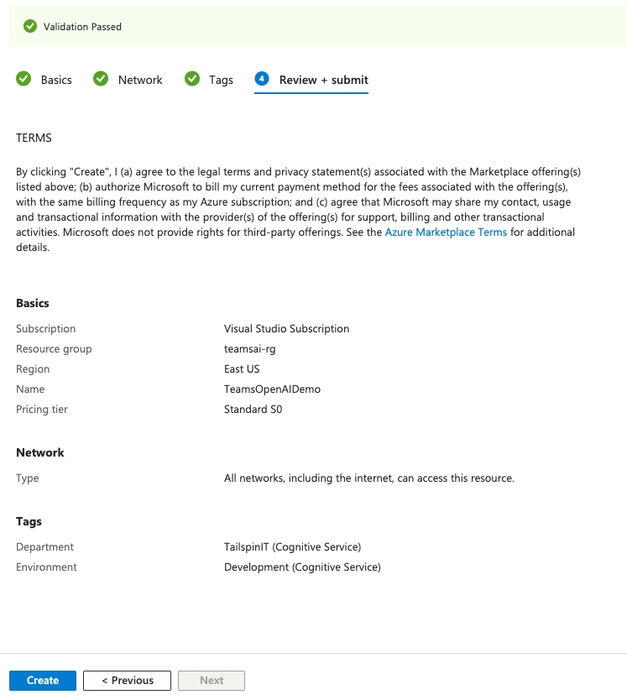
Step 4. Fill in the details in the ‘Basic Tab’.
- Subscription: Select your subscription
- Resource group: Choose a name for your resource group, e.g., teamsai-rg
- Region: Select the region closest to you, e.g., East US.
- Name: Choose a unique name for your service. Only hyphens and alphanumeric characters are allowed. For example, TeamsOpenAIDemo.
- Pricing tier: Choose Standard S0
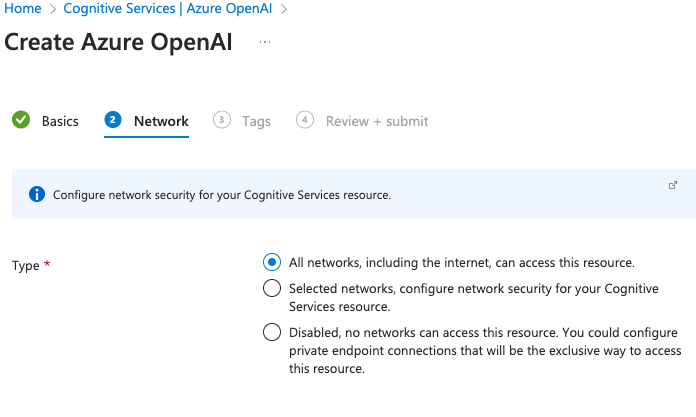
Step 5. In the Network section, you can specify who can access this resource. By default, these resources can be accessed from the internet. You can also use advanced options to restrict access to specific networks and endpoints.
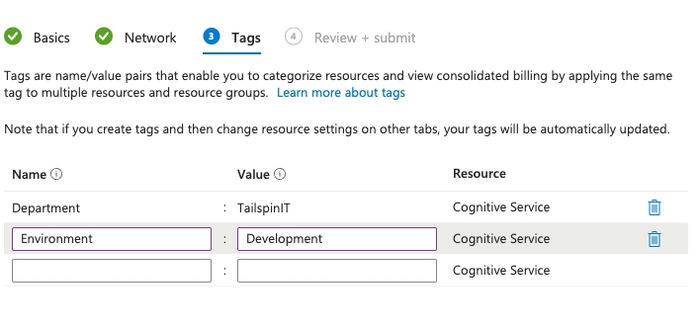
Step 6. In the ‘Tags’ section, you can add tags for better organization and policy management. It’s recommended to provide tags, such as the ones shown below:
| Key | Value |
| Environment | Development |
| Department | TailspinIT |
Step 7. Finally, in the ‘Review + Submit’ section, review your details and submit the request. If everything is successful, you will see an option to create the Azure Open AI service.
Step 8. Validate the deployment and obtain the Open AI registration key needed to interact with Azure Open AI cognitive services. If everything goes well, you will see a screen stating that ‘Your deployment is complete.’
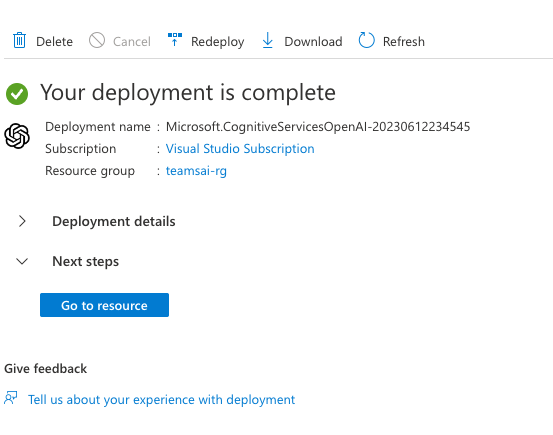
Step 9. Click on ‘Go to resource’ in the above screenshot. Then, go to ‘Resource Management’ and click on ‘Keys and Endpoint’. These details are necessary to interact with the Open AI services.
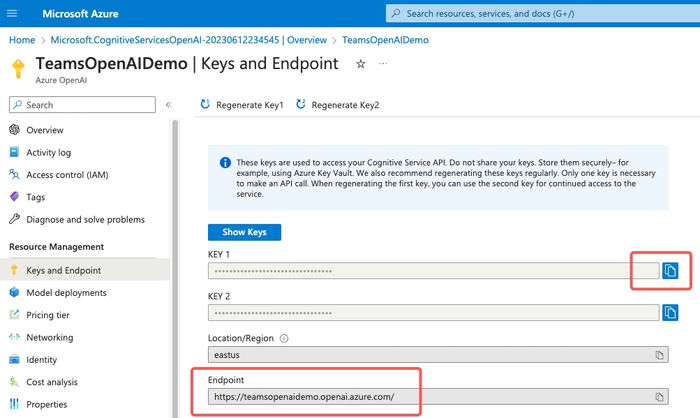
Note. Following these steps, you now have the Azure Open Endpoint and keys. You can use these in Teams AI modules to develop intelligent, contextual conversations.
Conclusion
To summarize, in this article, we explored what Open AI is and how to create Open AI service instances using the Azure Portal. We also learned how to obtain the keys and endpoint details needed to interact with these cognitive services.
References
For more information and resources about Azure Open AI, visit https://skrots.com
For a list of services provided by Skrots, please check out https://skrots.com/services
We appreciate you taking the time to go through this article. If you have any further questions or need assistance, please feel free to reach out to us at Skrots. Visit https://skrots.com to explore our services and how we can help you.


