Within the earlier article, we realized about Azure Knowledge Manufacturing facility. We’ve had a quick introduction to Azure Datasets and an understanding of the pipeline in Azure Knowledge Manufacturing facility. On this article, we’ll go forward and create the Azure Knowledge Manufacturing facility from the Azure Portal. Subsequent, we’ll study to create datasets within the Azure Knowledge Manufacturing facility Studio, create a pipeline and study to debug and set off the pipeline.
Azure Knowledge Manufacturing facility
Azure Knowledge Manufacturing facility is an providing of Azure that permits the administration and constructing of extremely complicated hybrid extract-transform-load (ETL), knowledge integration initiatives, and extract-load-transform (ELT). Azure Knowledge Manufacturing facility makes it doable to orchestrate in addition to operationalize the processes that are important to refine the plethora of uncooked knowledge accrued within the large knowledge into enterprise insights that may serve the companies in multitudes of dimensions.
Allow us to study to create the Azure Knowledge Manufacturing facility in Azure and study to create datasets, pipeline, debugging, and triggering of the Azure Knowledge Manufacturing facility pipeline.
Step 1
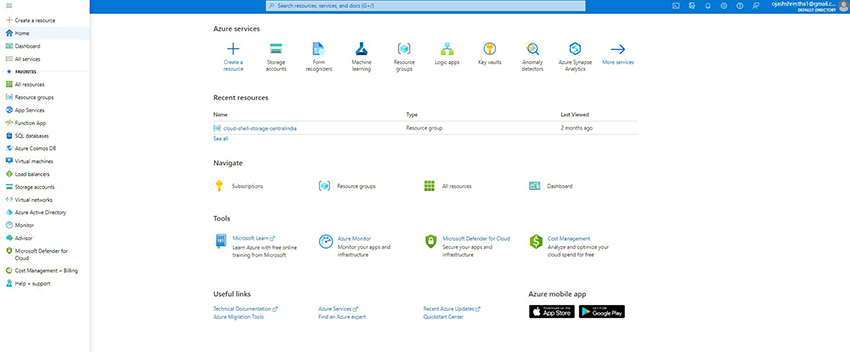
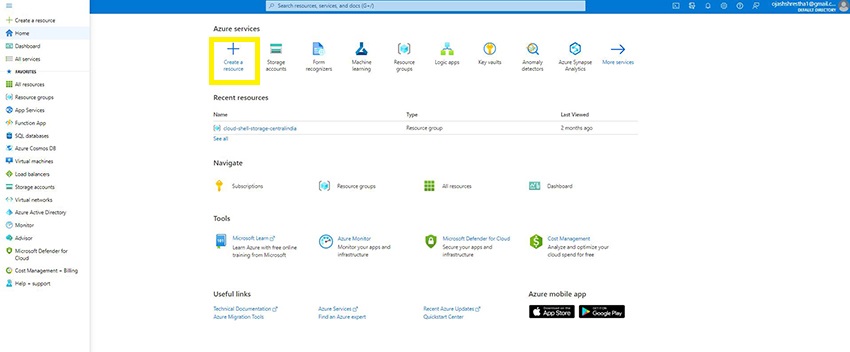
Log in to the Azure Portal. The welcome web page will look much like the one under.
Right here, click on on Create a Useful resource.
Step 2
Now, beneath the Classes, verify for integration.
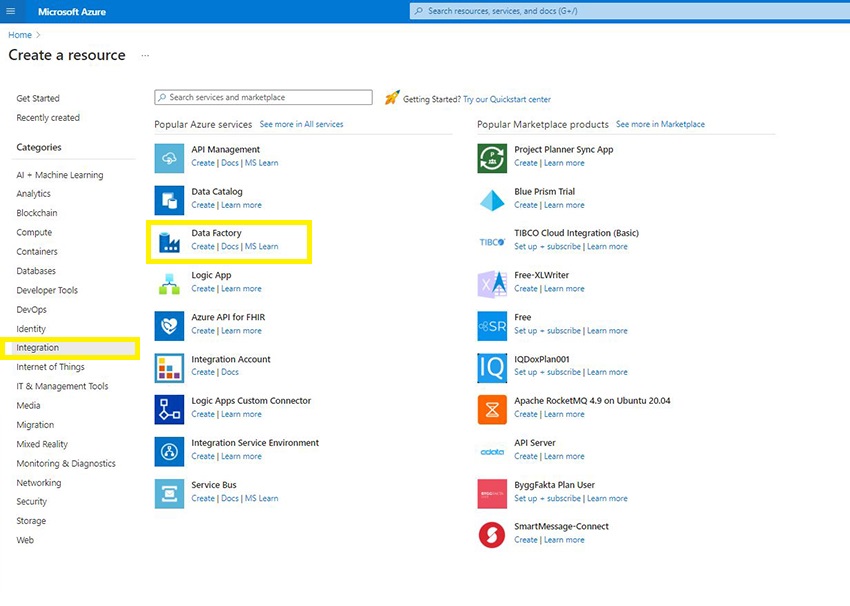
Now, we’ve the listing of in style Azure companies listed. Right here, choose the Knowledge Manufacturing facility.
Step 3
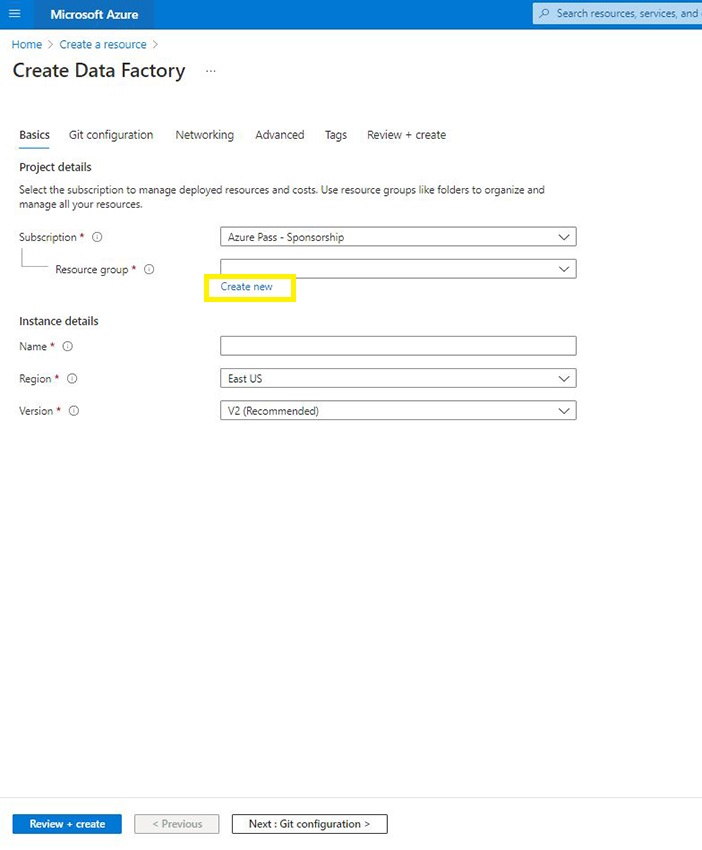
Subsequent, select your useful resource group or create one if you happen to don’t have one.
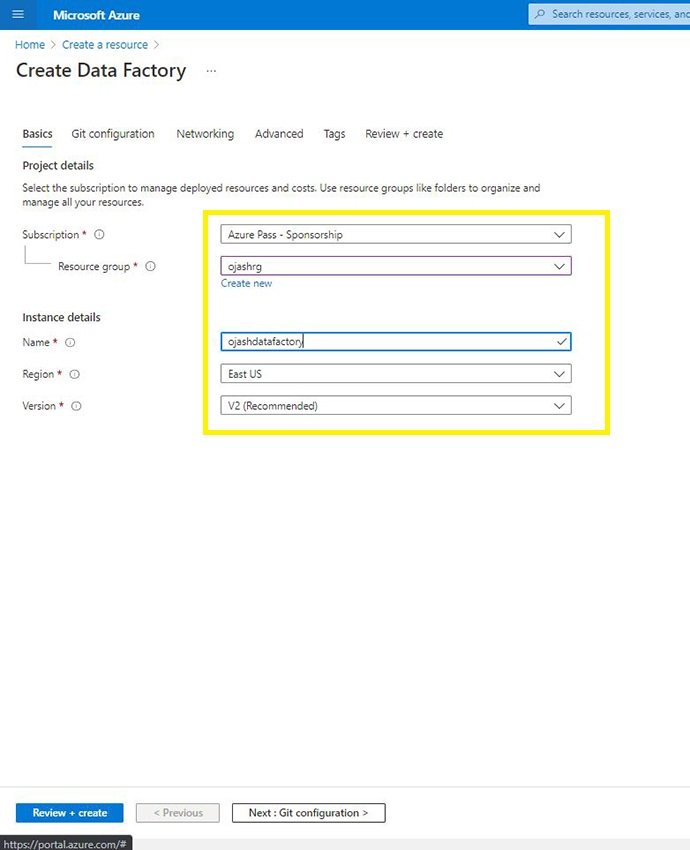
Step 4
Subsequent, identify your occasion, choose the area and the model. The V2 is beneficial as of Might, 2022.
Step 5
Now, go to the Git Configuration.
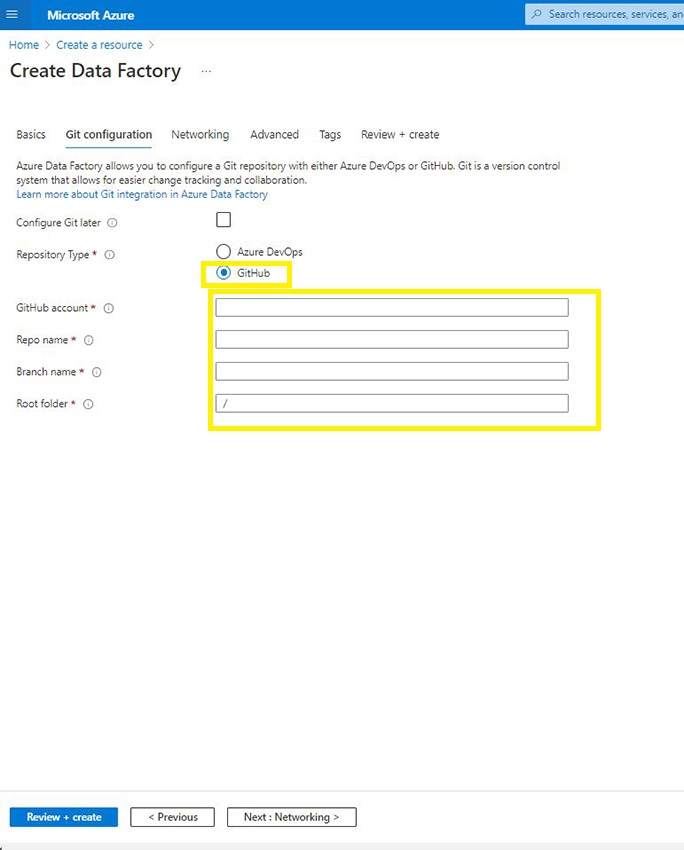
Right here, you could have the choice to setup the Github account by offering the github account hyperlink, repo identify and department with the foundation folder particulars or utilizing Azure DevOps.
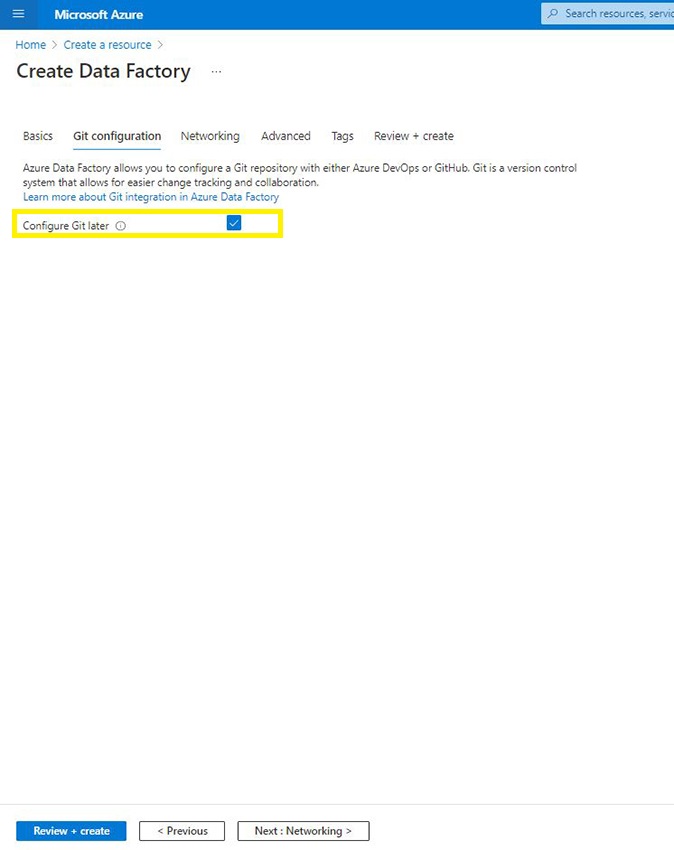
For now, choose Configure Git Later. When you really want to combine github in future, make sure that the setup is chosen.
Step 6
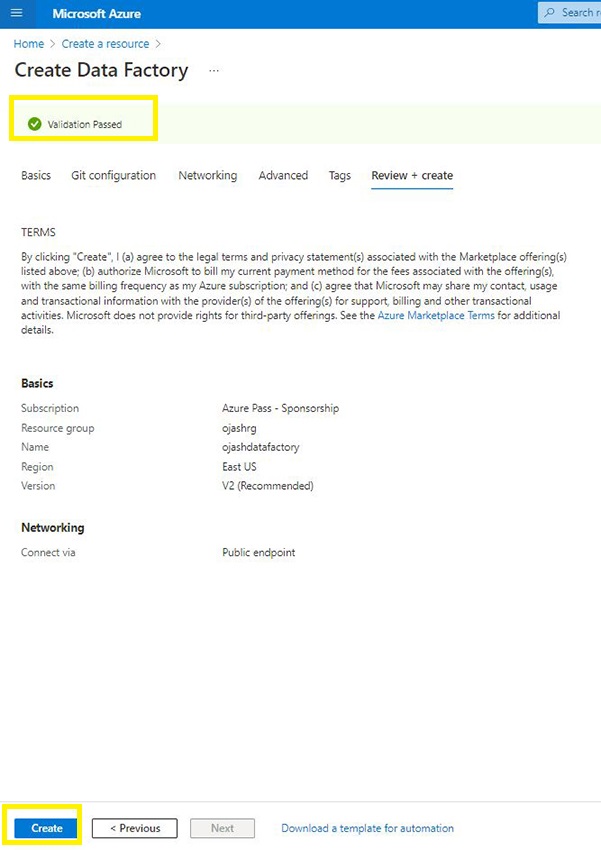
Subsequent, Click on on Overview + Create.
Step 7
Because the validation is finished, we’ve the Create possibility. Choose it.
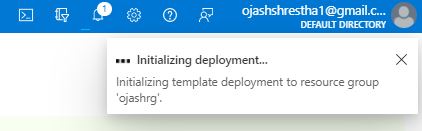
Step 8
The initialization course of for the deployment initiates.
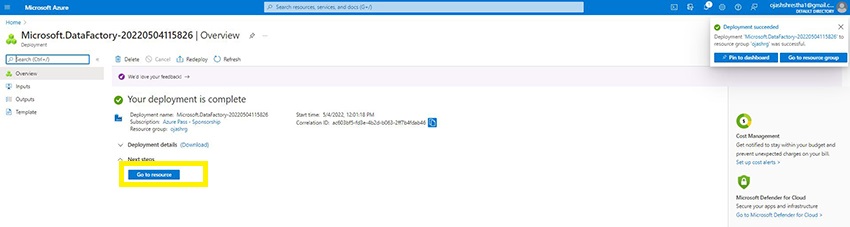
Because the deployment is accomplished, we’ve the Go to Useful resource possibility. Click on on it.
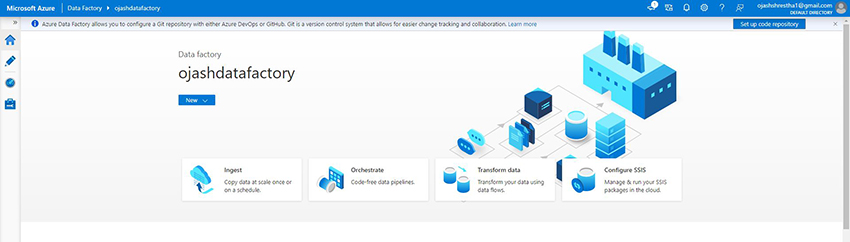
Step 9
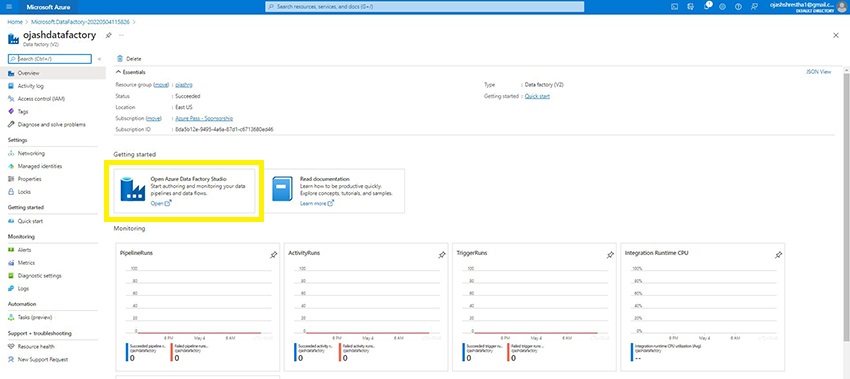
Right here, we are able to see the Knowledge Manufacturing facility being created. We are able to see completely different monitoring visualizations too.
For now, click on on Open Azure Knowledge Manufacturing facility Studio to discover the Azure Knowledge Manufacturing facility.
Step 10
We at the moment are welcomed to the Knowledge Manufacturing facility in Azure.
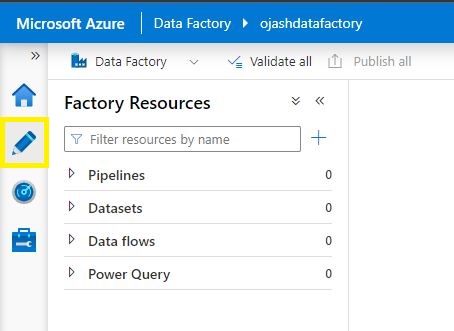
Step 11
Now, choose the second possibility within the left menu for Manufacturing facility Sources.
Now, beneath Pipelines, Choose Dataset.
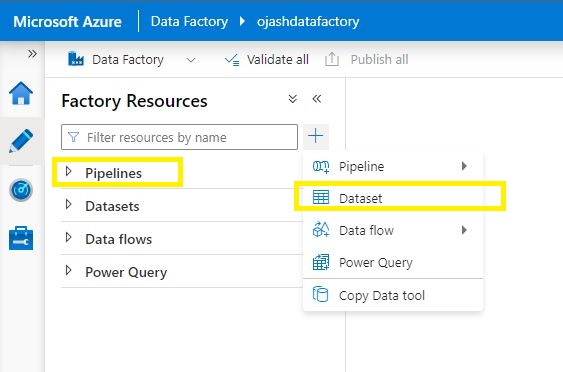
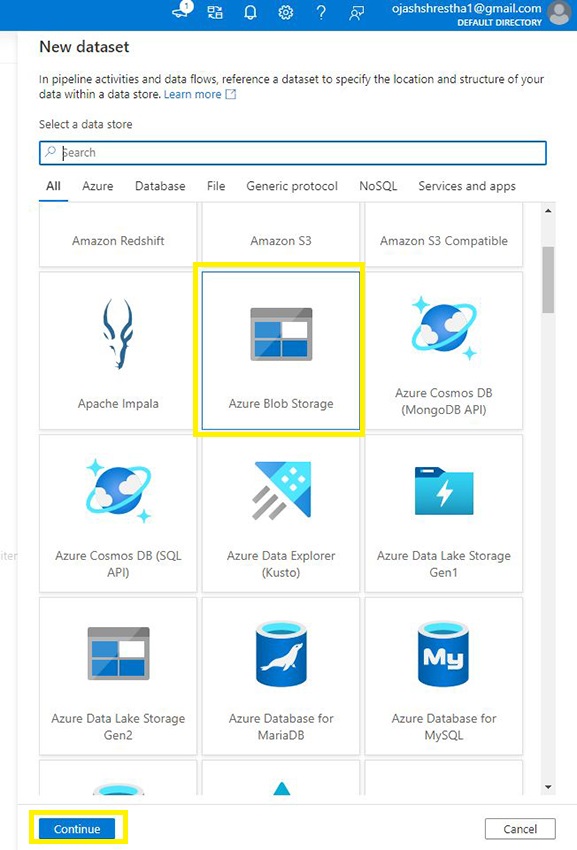
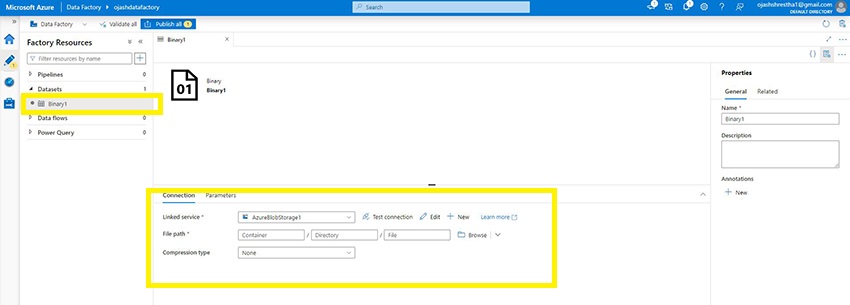
Step 12
Right here, we’ve multitudes of choices.
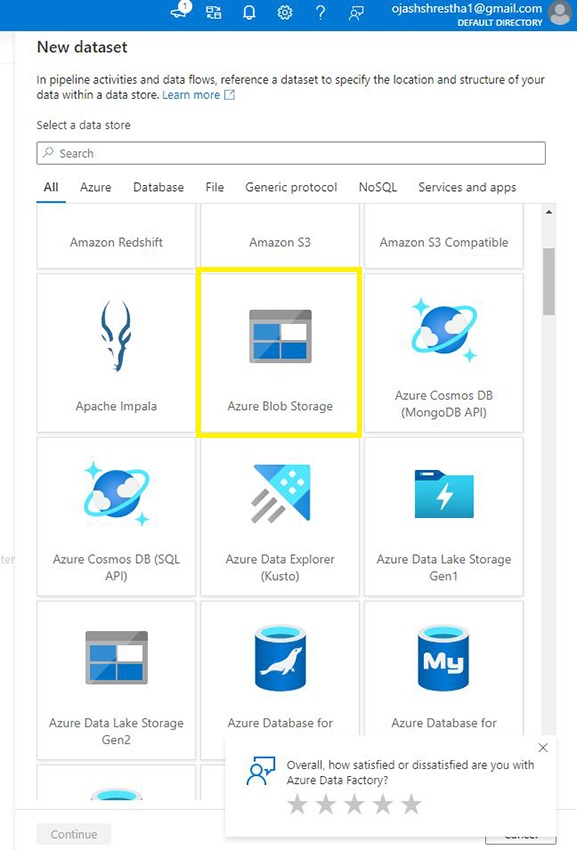
Allow us to select the Azure Blob Storage.
And beneath the Format, choose Binary.
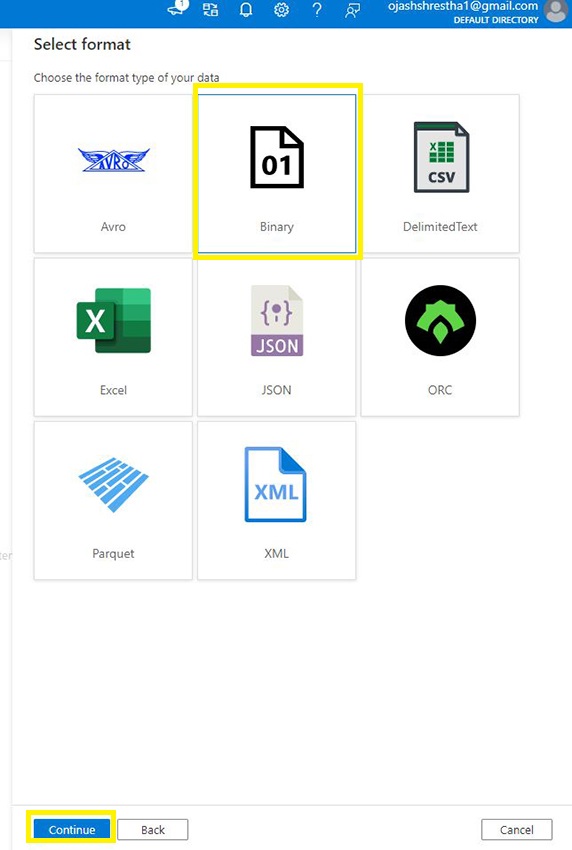
As soon as, chosen, click on on Proceed.
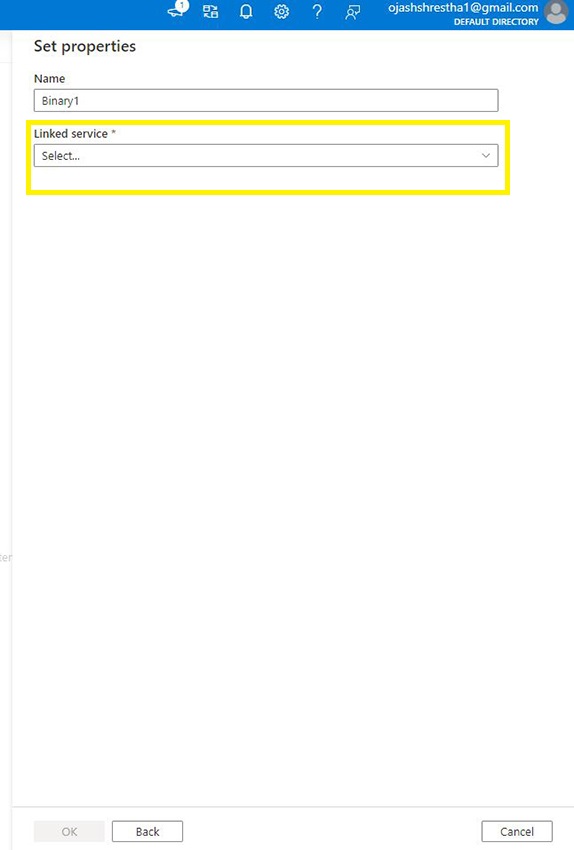
Step 13
Now, we’ve to set properties. Click on on Linked Service.
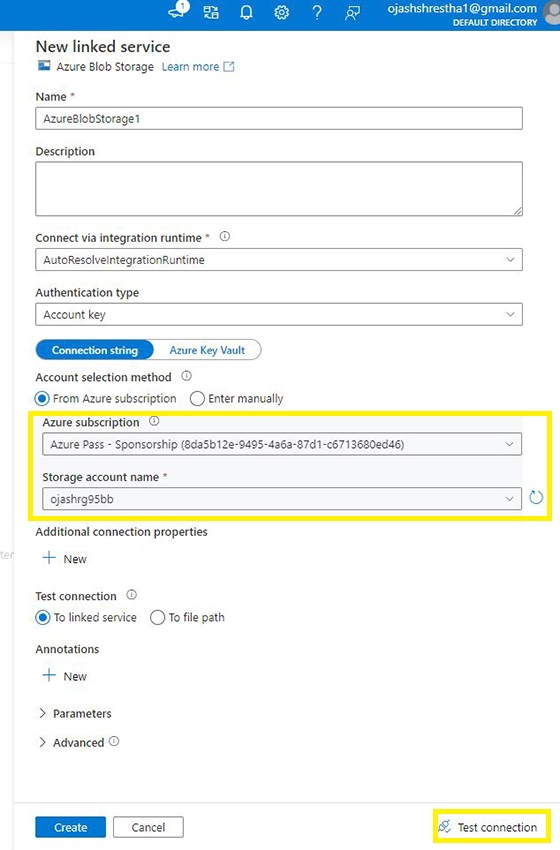
Right here, we’re going to join it to Storage account. You’d must have it created following the Azure Blob Storage.
Now, Underneath Account choice methodology, choose From Azure Subscription.
Choose the Azure subscription and the Storage account.
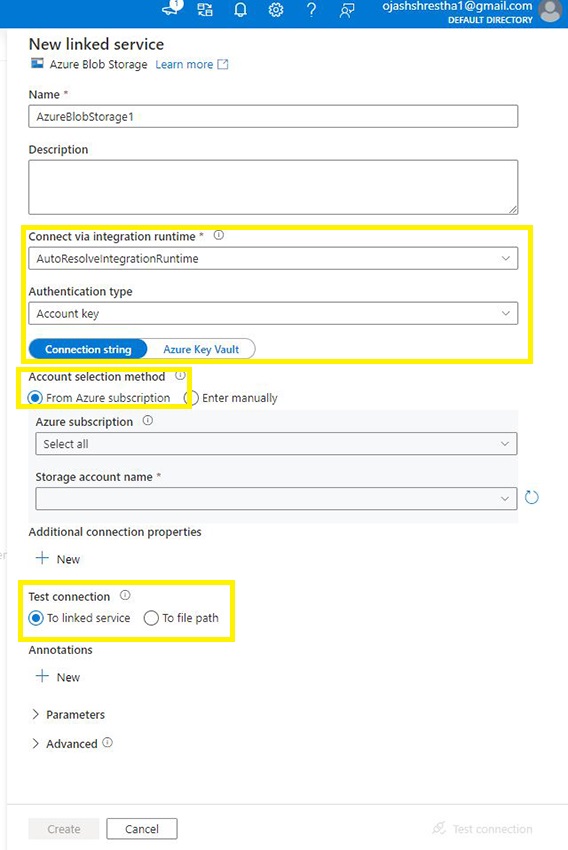
As soon as, these are chosen, we’ve the choice to Take a look at the Connection. Click on the Take a look at Connection Button.
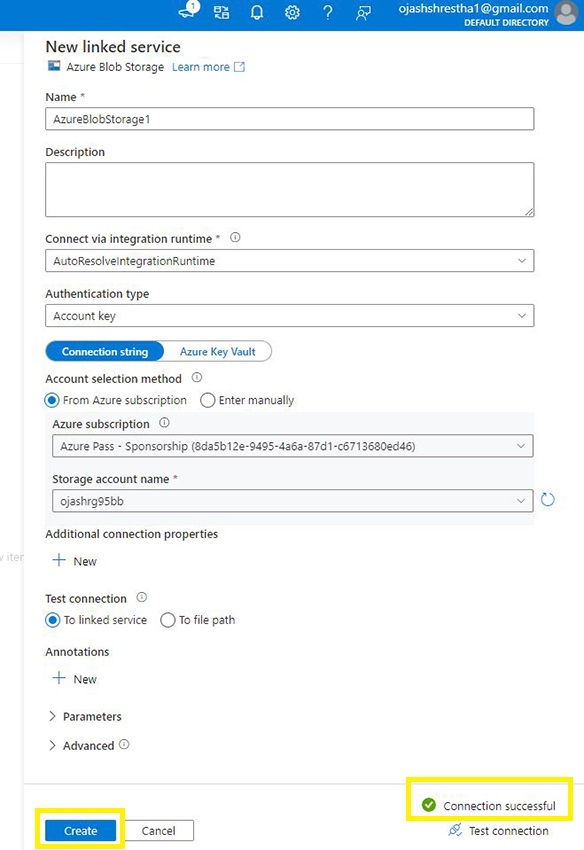
We are able to see the Connection Profitable. Now, we’re related to the Storage account.
Lastly, Click on on Create.
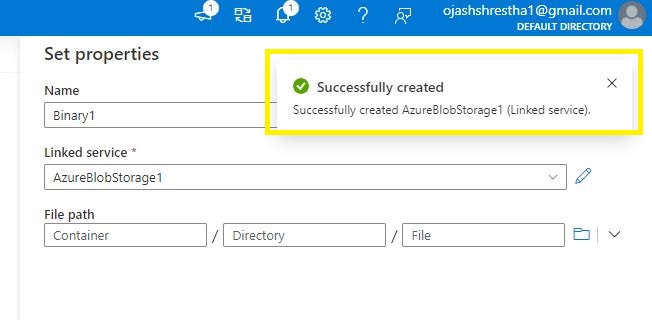
The notification will pop up.
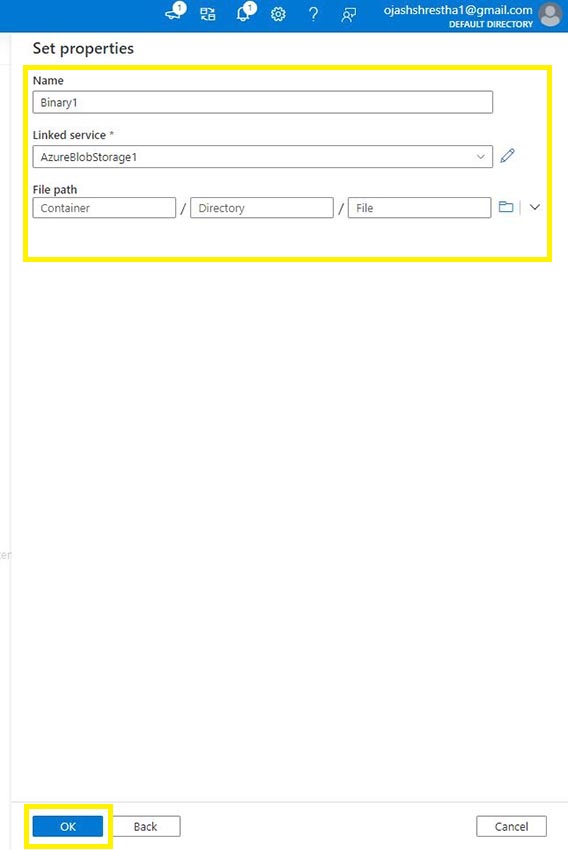
Step 14
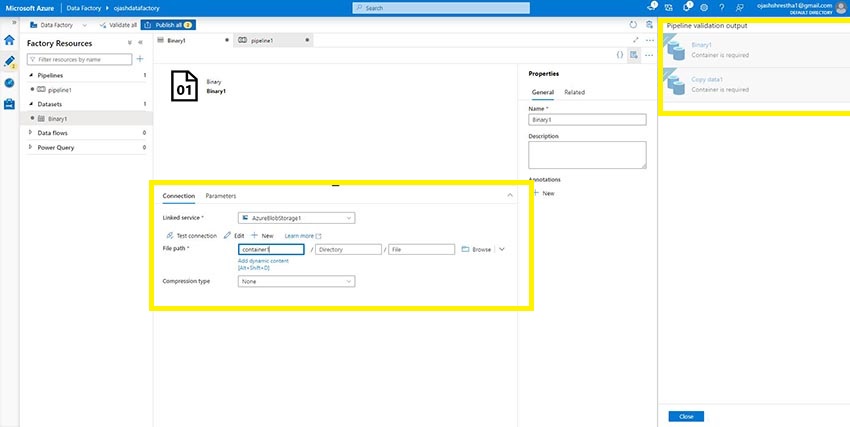
Subsequent, we’re given the File path to setup for utilization.
Step 15
Now, we are able to see, the Binary Dataset has been setup and linked the service to the Azure Blob Storage within the Azure Knowledge Manufacturing facility.
Creating Pipeline
Step 16
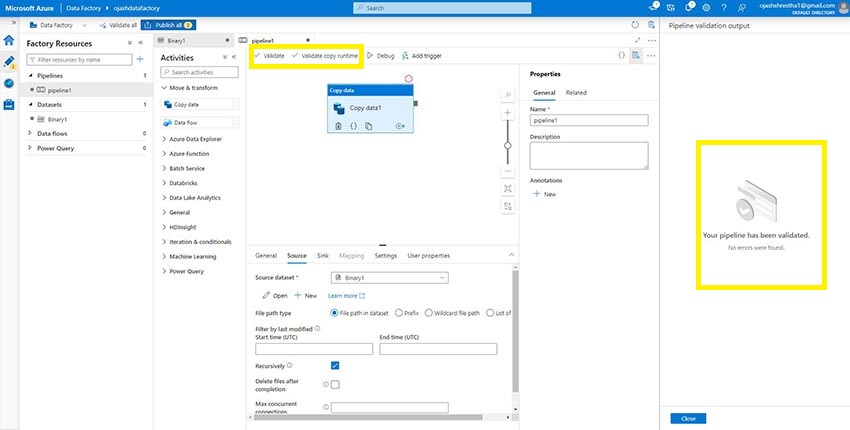
Now, allow us to choose our Dataset Binary1. Underneath the pipeline, choose Pipeline.
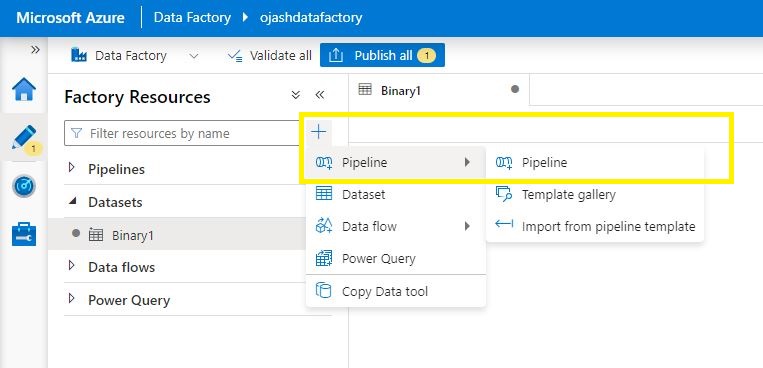
Right here, we’re supplied with the canvas. Underneath the Transfer and Rework possibility, we’ve Copy Knowledge and Knowledge Circulation.
Drag and Drop the Copy knowledge to the pipeline canvas.
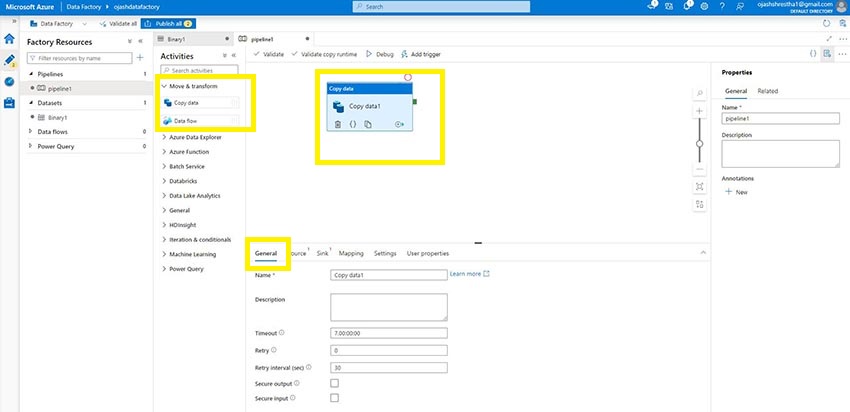
Step 17
Subsequent, we set the file path for the Supply.
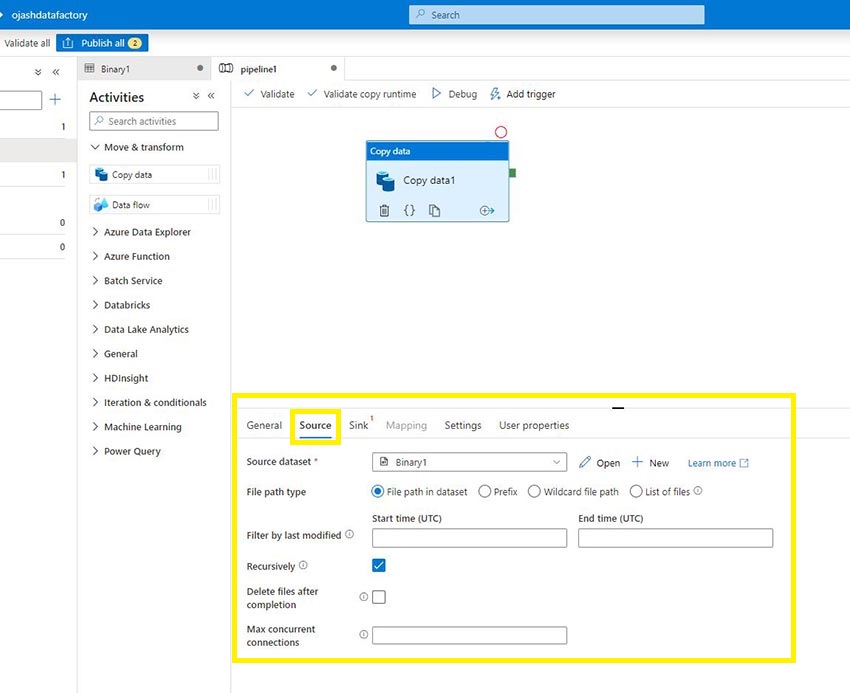
Now we have to setup the container now.
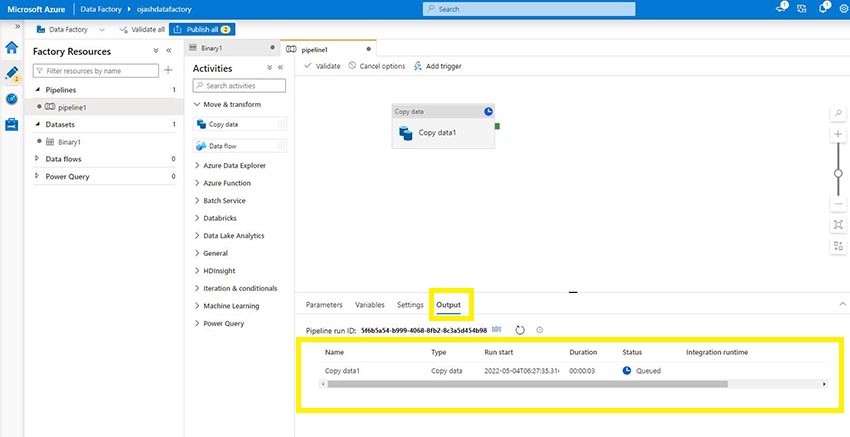
As it’s accomplished, we are able to now Validate it.
The pipeline run will likely be now queued and run.
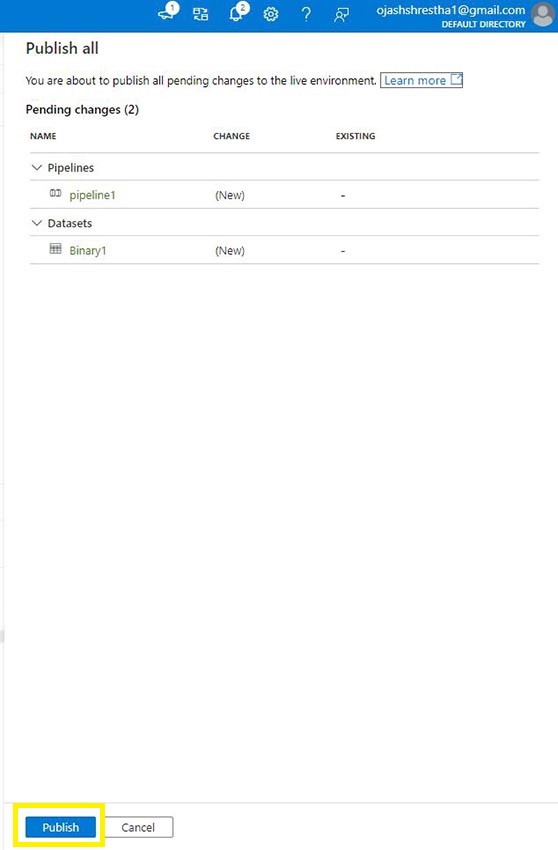
Step 18
As soon as, all our work is finished, we are able to publish it.
Right here, we are able to see our pipeline1 with the dataset Binary1 is all set to be printed.
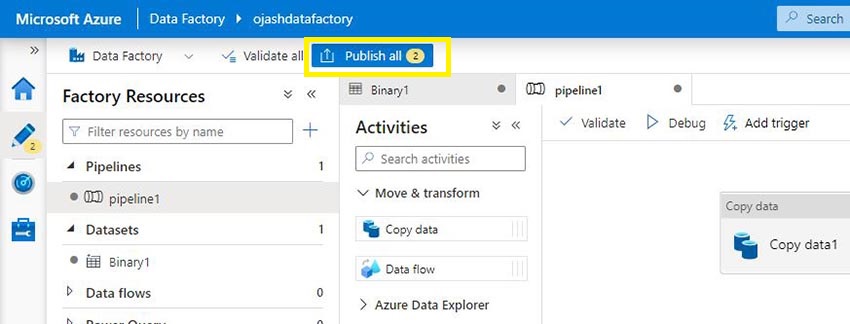
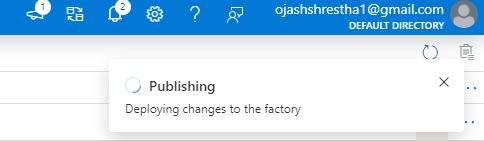
As soon as, the adjustments are deployed to the Azure Knowledge Manufacturing facility, we’ll be notified.

Thus, we’ve efficiently realized about exploring and utilizing the Azure Knowledge Manufacturing facility.
Conclusion
On this article, we’ve realized about Azure Knowledge Manufacturing facility, learn how to create the Azure Knowledge Manufacturing facility utilizing Azure Portal, after which went forward to create pipeline, datasets and the method to debug and set off our pipeline.


