Introduction
Retaining knowledge in the identical VM requires us to extend the disk house when the utilization of allotted house is full. Rising the disk house in Azure is sort of simple with a couple of clicks.
There could also be some challenges confronted by the directors if the specified particulars usually are not supplied. For instance, the VM proprietor would wish to extend the scale of the information disk, however not bear in mind in regards to the particulars which should be supplied or how these may be gathered. So the request can be “Improve the E drive house with 500 GB.” This creates a troublesome scenario for the Azure directors, as they need to discover out the precise disk when the VM has a number of knowledge disks.
There are 2 phases concerned in growing the disk house.
- Figuring out the Disk
- Rising the Disk House
IDENTIFYING THE DISK
Step 1
- Log in to the Azure VM.
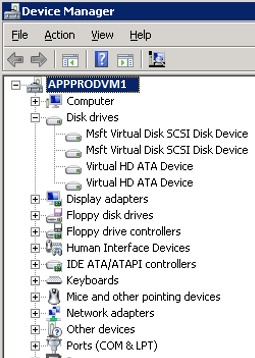
- Open the “System Supervisor” and increase ‘Disk drives’.
2 sorts of disk drives shall be displayed.
- “Digital HD ATA System”: These are the OS drives and the short-term drives.
- “Msft Digital Disk SCSI Disk System”: These are the Information disk drives.
Proper-click on the “Information Disk Drives” and open properties.
Step 2. Word LUN Worth.
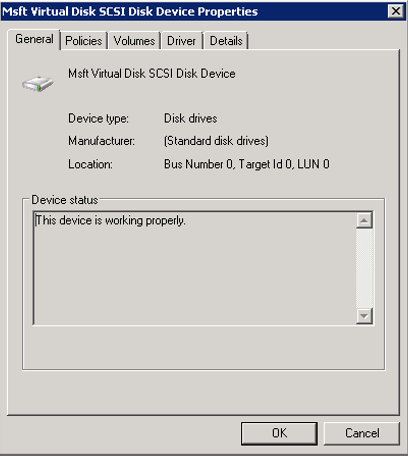
Within the ‘Common’ Tab of the disk property, notice the Location (Particularly LUN worth).
Step 3. Word Quantity Label (Drive Identify).

- Choose the ‘Volumes’ tab.
- Initially, the values for every quantity shall be empty. Click on Populate to see the Quantity particulars of the chosen drive.
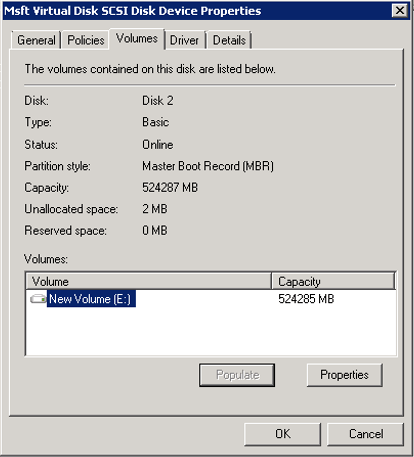
- Word the Quantity Label (drive identify) from the displayed end result.
As soon as the LUN worth and the Quantity Label (Drive identify) is famous, shut down the digital machine.
From the above steps, we perceive the ‘E Drive’ is related to the Information disk with the LUN worth ‘0’.
The Drive Label won’t be out there within the Azure portal. Therefore the disk identification shall be via the LUN worth.
INCREASING THE DISK SPACE

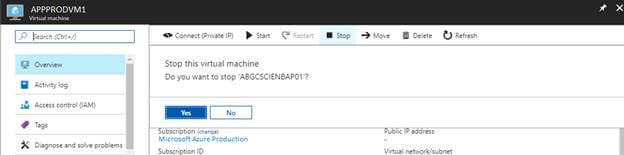
- Login to Azure Portal.
- Navigate to the Digital Machines web page in Azure Portal.
Right here we are able to see that the VM is in a Stopped state, which implies that the VM is turned off via the Energy Possibility out there within the VM.
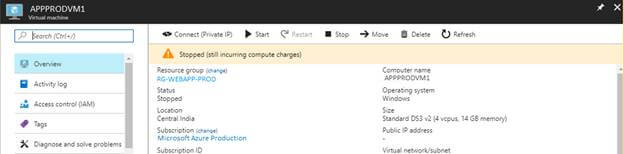
Rising the Disk house requires the VM to be in a “deallocated” state. Shutting down the VM via the VM’s energy possibility will put the VM within the Stopped state. In an effort to deallocate the VM, ‘Cease’ the VM from the Azure portal.
Modify the worth of “Choose the quantity of house in MB” if you need some allotted house to be utilized sooner or later.
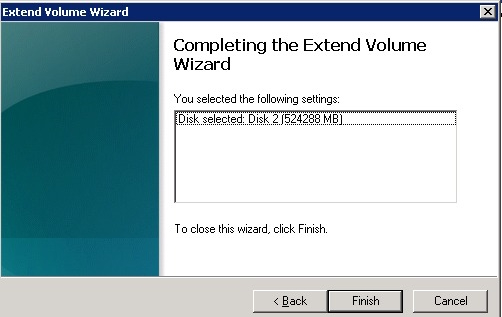
Click on End on the Completion Window of the Lengthen Quantity Wizard.

The newly elevated house is allotted with the prevailing disk house.
Abstract
On this article, I’ve defined about growing the disk house via the Azure Portal.
Beneath are the highlights that should be thought of whereas growing the Disk house.
- The Digital Machine ought to be in a “deallocated” state.
- Elevated house ought to be included within the major partition by extending the amount on the respective disk.
- The Disk shouldn’t be indifferent throughout this course of, as detaching the disk may lead to formatting the disk which in flip results in knowledge loss.
Know extra about our firm at Skrots. Know extra about our companies at Skrots Companies, Additionally checkout all different blogs at Weblog at Skrots


