Deploying ASP.NET MVC Software to Azure Cloud Utilizing Azure DevOps from GitHub
Introduction
On this article, we’ll discover the method of deploying an ASP.NET MVC utility to Azure Cloud utilizing Azure DevOps and GitHub. This method ensures a seamless steady integration and steady deployment (CI/CD) pipeline, facilitating an environment friendly and sturdy growth workflow. By the top of this chapter, you’ll have a complete understanding of organising an end-to-end deployment pipeline from GitHub to Azure utilizing Azure DevOps Basic Editor.
Step 1. Stipulations
Earlier than we dive into the steps, let’s guarantee you might have the mandatory stipulations.
- Azure Subscription: An lively Azure subscription is required to deploy your utility.
- Azure DevOps Account: You want an Azure DevOps account to create and handle the CI/CD pipeline.
- GitHub Repository: Your ASP.NET MVC utility must be hosted on GitHub.
- Primary Data of ASP.NET MVC: Familiarity with ASP.NET MVC will aid you comply with together with the steps.
- Azure App Service: Arrange an Azure App Service the place your utility shall be deployed.
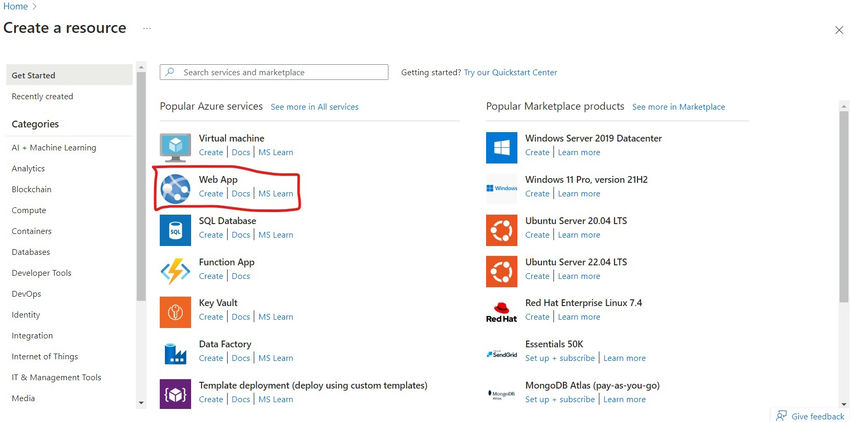
Step 2. Creating an Azure App Service
Azure App Service is a completely managed platform for constructing, deploying, and scaling internet apps. This is the right way to create one:
- Log in to Azure Portal: Navigate to Azure Portal.
- Create a New Useful resource: Click on on “Create a useful resource” within the left-hand menu and choose “Internet App” below the “Compute” part.
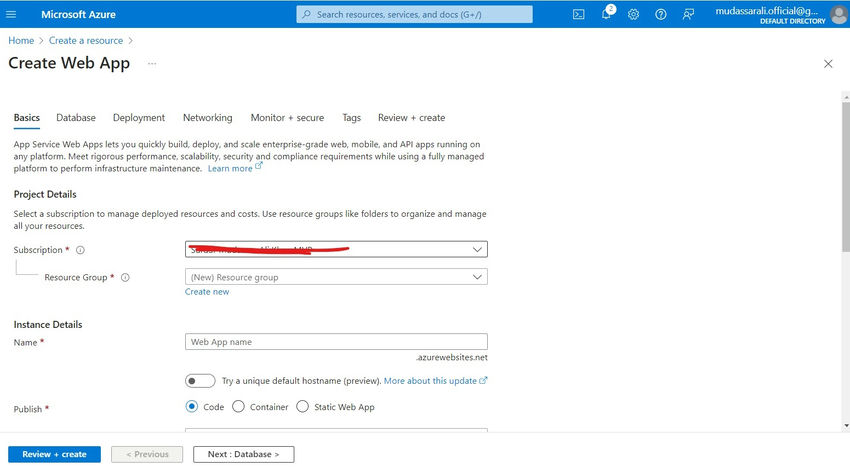
- Configure Internet App
- Subscription: Choose your Azure subscription.
- Useful resource Group: Create a brand new useful resource group or use an present one.
- Title: Present a singular title on your internet app, which shall be a part of its URL (e.g., yourappname.azurewebsites.internet).
- Publish: Select “Code” since you might be deploying an ASP.NET MVC utility.
- Runtime stack: Choose “.NET Core” and the suitable model on your utility.
- Working System: Select “Home windows”.
- Area: Choose a area near your consumer base to cut back latency.
- App Service Plan: Create a brand new plan or choose an present one. The app service plan determines pricing and out there options.
- Evaluation and Create: Click on “Evaluation + Create” to assessment your settings after which “Create” to create the net app.
Create the Azure Internet app and fill in all of the above particulars.
Fill within the particulars after which click on subsequent.
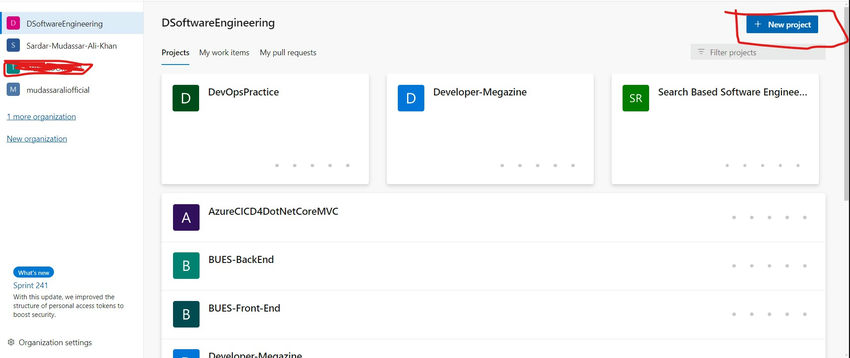
Step 3. Setting Up an Azure DevOps Mission
Azure DevOps is a complete suite of growth instruments that facilitate CI/CD. Observe these steps to arrange your challenge:
- Log in to Azure DevOps: Navigate to Azure DevOps.
- Create a brand new challenge
- Click on on the “New Mission” button.
- Mission Title: Enter a reputation on your challenge.
- Description: Optionally, add an outline to explain the challenge’s function.
- Visibility: Select both public or personal based mostly in your choice.
- Create Mission: Click on “Create” to finalize the challenge setup.
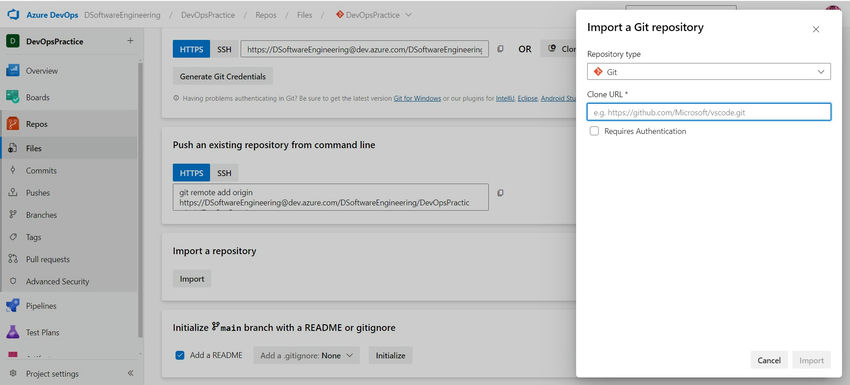
Step 4. Connecting Azure DevOps to GitHub
To hyperlink your Azure DevOps challenge along with your GitHub repository.
- Go to Repos: In your Azure DevOps challenge, navigate to “Repos” from the left-hand menu.
- Import Repository
- Click on on “Import a repository” on the prime proper.
- Clone URL: Present the URL of your GitHub repository.
- Authentication: Enter your GitHub credentials if essential to entry the repository.
- Import: Click on “Import” to create a duplicate of your GitHub repository in Azure DevOps.
Step 5. Making a Construct Pipeline
A construct pipeline automates the method of constructing and testing your utility. Right here’s the right way to create one.
- Go to Pipelines: In Azure DevOps, navigate to “Pipelines” after which “Builds”.
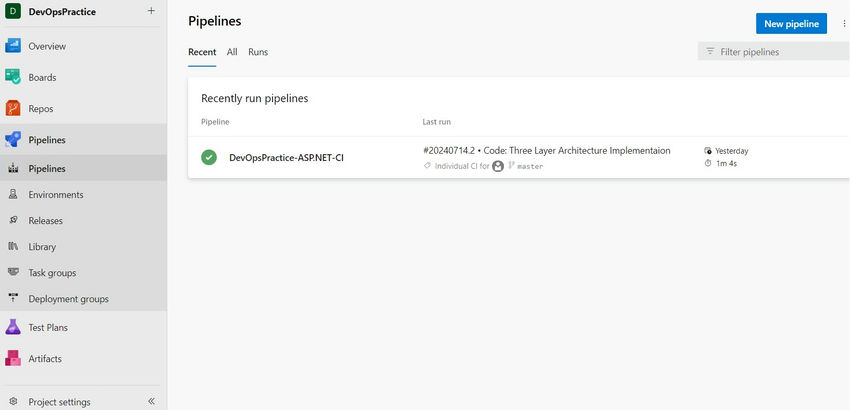
- New Pipeline: Click on on “New pipeline” and choose “Use the basic editor”.
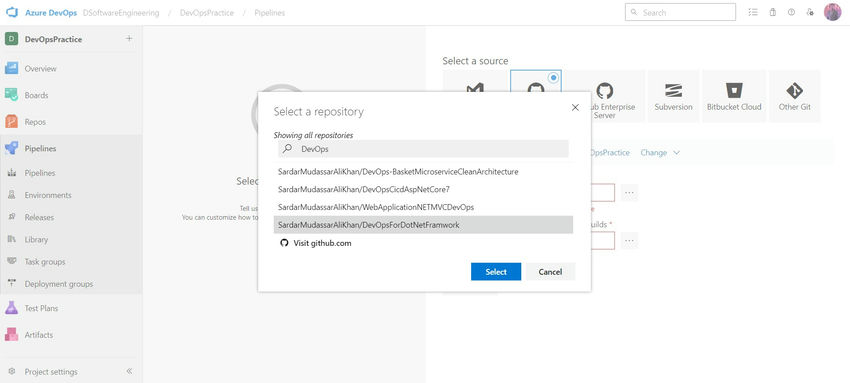
- Choose Repository: Select your GitHub repository.
- Supply: Choose “GitHub”.
- Repository: Select your repository from the listing or present the URL.
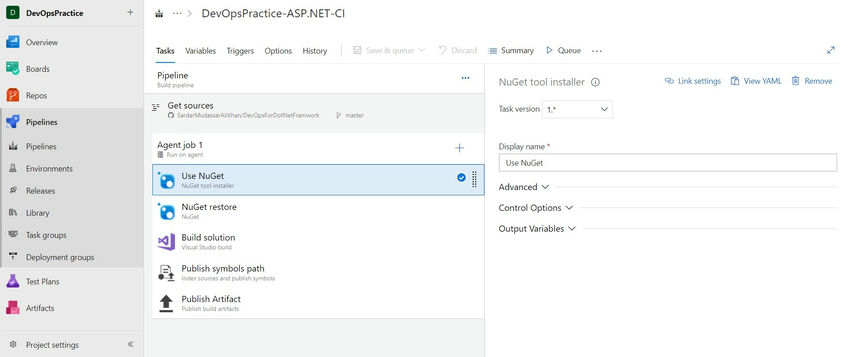
- Choose a Template: Select the ASP.NET Core template, which incorporates duties for restoring, constructing, and publishing your utility.
- Configure Construct Pipeline
- Agent Pool: Select “Azure Pipelines” for Microsoft’s hosted brokers.
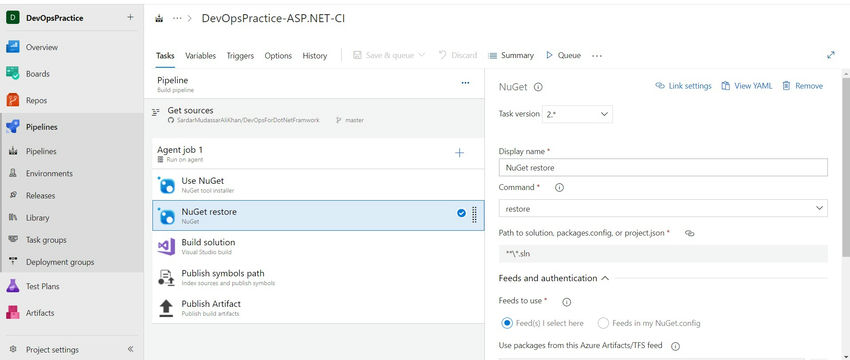
- Restore: Use the “NuGet restore” process to revive NuGet packages.
- Job Title: NuGet restore
- Path to the answer: Present the trail to your resolution file (e.g., **/*.sln).
- Construct: Add a construct process to compile your resolution.
- Job Title: .NET Core
- Command: Construct
- Tasks: Present the trail to your challenge file (e.g., **/*.csproj).
- Check: Optionally, add a process to run exams.
- Job Title: .NET Core
- Command: Check
- Tasks: Present the trail to your check challenge file (e.g., **/*Checks/*.csproj).
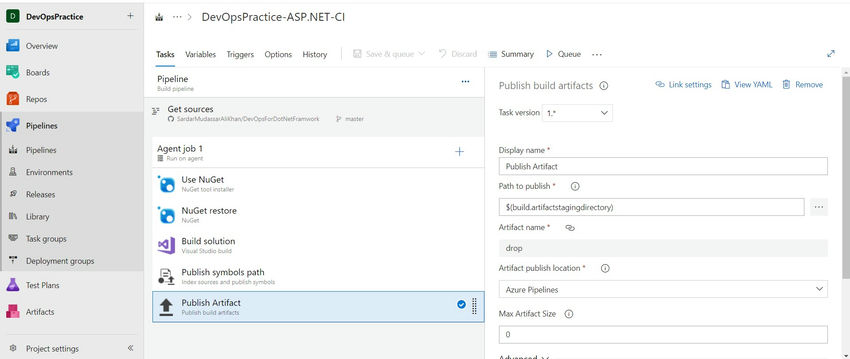
- Publish: Use the “Publish Construct Artifacts” process to publish the construct outputs.
- Job Title: Publish and construct artifacts
- Path to Publish: Specify the trail to the listing containing your construct outputs (e.g., $(Construct.ArtifactStagingDirectory)).
- Artifact Title: Title the artifact (e.g., drop).
- Save and Queue: Save the pipeline and queue a brand new construct to check the setup.
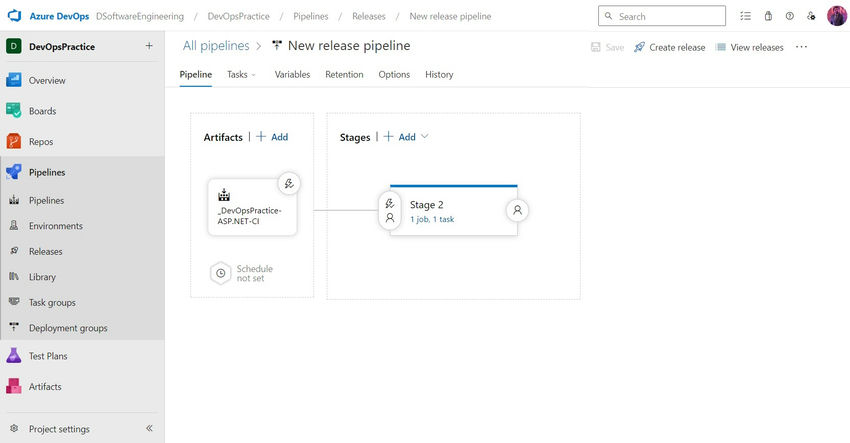
Step 6. Making a Launch Pipeline
A launch pipeline automates the method of deploying your utility to numerous environments. Right here’s the right way to set it up.
- Go to Releases: In Azure DevOps, navigate to “Pipelines” after which “Releases”.
- New Pipeline: Click on on “New pipeline” and choose “Empty job”.

- Add Artifacts: Hyperlink the artifacts from the construct pipeline.
- Supply Sort: Construct
- Mission: Choose your challenge.
- Supply: Select the construct pipeline created earlier.
- Default Model: Choose “Newest”.
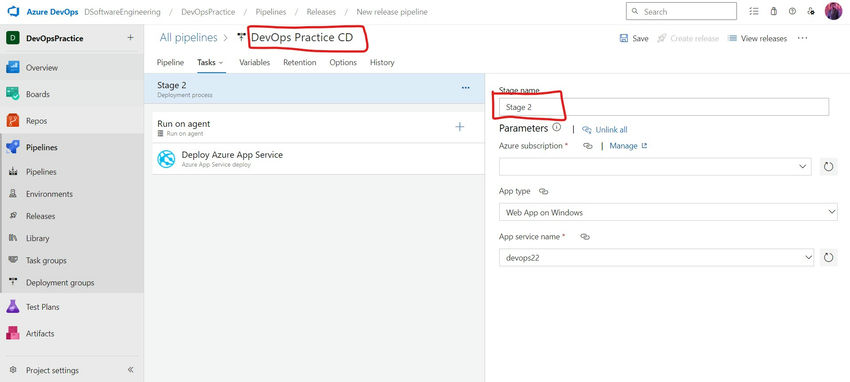
- Add a Stage: Add a brand new stage and title it “Deployment”.
- Stage Title: Present a reputation for the stage (e.g., Dev).

- Stage Title: Present a reputation for the stage (e.g., Dev).
- Add Deployment Job
- Click on on “1 job, 0 process” below your stage.
- Click on the “+” icon so as to add a process and seek for “Azure App Service deploy”.
- Azure Subscription: Authorize Azure DevOps to connect with your Azure subscription.
- App Service Title: Choose the net app you created earlier.
- Bundle or Folder: Level to the construct artifacts (e.g., $(System.DefaultWorkingDirectory)/_your_build_artifact_name/drop).
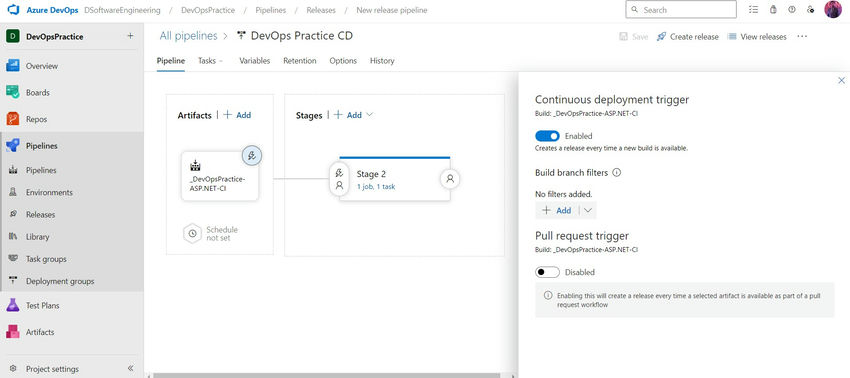
- Configure Steady Deployment: Allow steady deployment triggers to routinely deploy on profitable builds.
- Click on on “Steady deployment set off” and allow it.
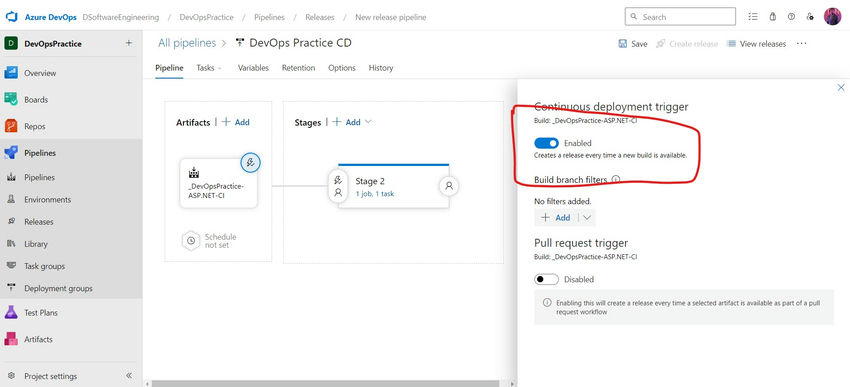
- Click on on “Steady deployment set off” and allow it.
- Save and Create Launch: Save the pipeline and create a launch to check the deployment.
- Click on “Create launch” and choose the suitable phases.
- Click on “Create” to provoke the discharge course of.
Step 7. Monitoring and Verifying Deployment
As soon as the discharge pipeline is about up, it’s vital to watch and confirm the deployment:
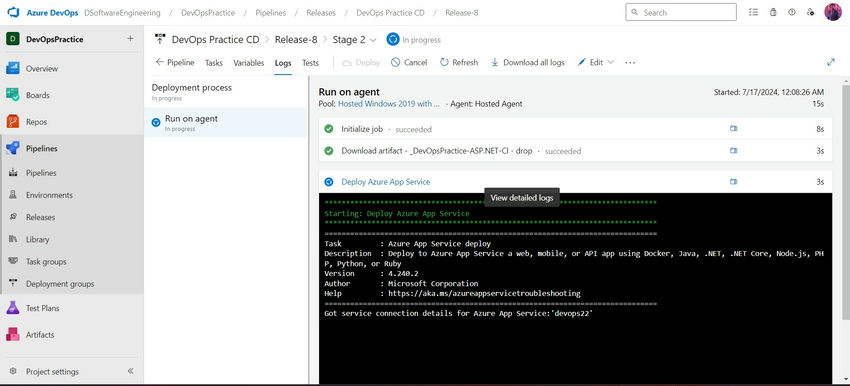
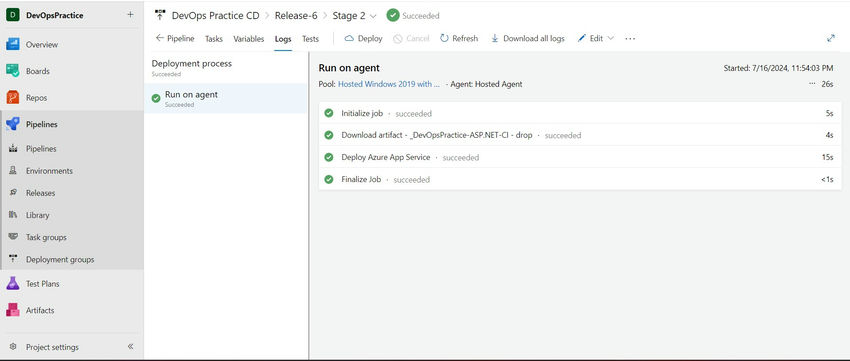
- Monitor Launch: Go to “Releases” to trace the deployment course of.
- Examine logs and deployment standing to make sure the method is accomplished efficiently.
- Confirm Deployment: After deployment, go to the Azure Portal and navigate to your internet app.
- Entry the URL of your internet app (e.g., https://yourappname.azurewebsites.internet) to make sure it’s working appropriately.

- Entry the URL of your internet app (e.g., https://yourappname.azurewebsites.internet) to make sure it’s working appropriately.
- Monitor the discharge pipeline
Conclusion
On this article, you might have realized the right way to arrange an end-to-end CI/CD pipeline for an ASP.NET MVC utility utilizing Azure DevOps and GitHub. By following these steps, you possibly can automate the method of constructing, testing, and deploying your utility to Azure App Service, making certain a streamlined and environment friendly growth workflow. This setup not solely enhances productiveness but additionally ensures that your utility is all the time up-to-date with the newest adjustments, offering a seamless expertise for each builders and customers.
Know extra about our firm at Skrots. Know extra about our companies at Skrots Companies, Additionally checkout all different blogs at Weblog at Skrots


