Introduction
Azure File Share is a cloud-based storage answer supplied by Microsoft Azure Azure File Share is sort of a huge digital space for storing on the web. You’ll be able to hold all of your recordsdata, there, such as paperwork and photos. It is useful as a result of you’ll be able to entry your recordsdata from anyplace with an web connection. Plus, it is nice for teamwork as a result of everybody in your crew can use it like a shared submitting cupboard.
What’s Microsoft Azure?
Microsoft Azure is a cloud computing platform by Microsoft that provides companies like computing, storage, networking, databases, and AI instruments. It permits companies to construct, deploy, and handle purposes utilizing Microsoft’s international information facilities, offering flexibility, scalability, and safety with out the necessity for on-premises infrastructure.
What’s Azure File Share?
Azure File Share is a service from Microsoft Azure that allows you to retailer and share recordsdata within the cloud. It really works with each Home windows and Linux computer systems, utilizing the SMB and NFS protocols. You need to use it to entry and share recordsdata from anyplace, whether or not you are within the workplace or working remotely. It additionally means that you can sync your on-premises recordsdata with the cloud utilizing Azure File Sync, making it simple to maintain your recordsdata up to date in each locations. Plus, it gives backup and restoration choices to maintain your information protected and simple to revive if wanted. This makes it a easy and safe approach for companies to handle file storage.
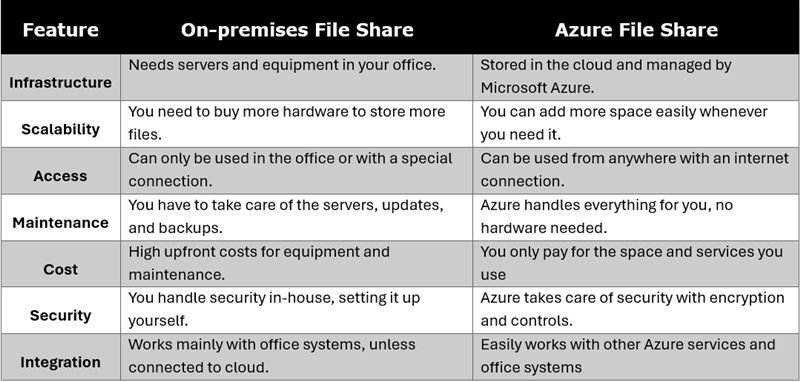
Comparability between On-premises File Share and Azure File Share
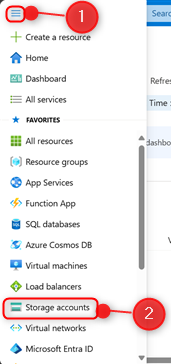
Step 1. Register to the Microsoft Azure portal
- Go to portal.azure.com
- Use your Azure administrative credentials to log in.
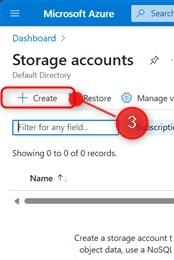
Step 2. Arrange a Storage Account
- Go to the Navigation menu on the left facet
- Then Click on on “Storage Account.”
- Click on + Create
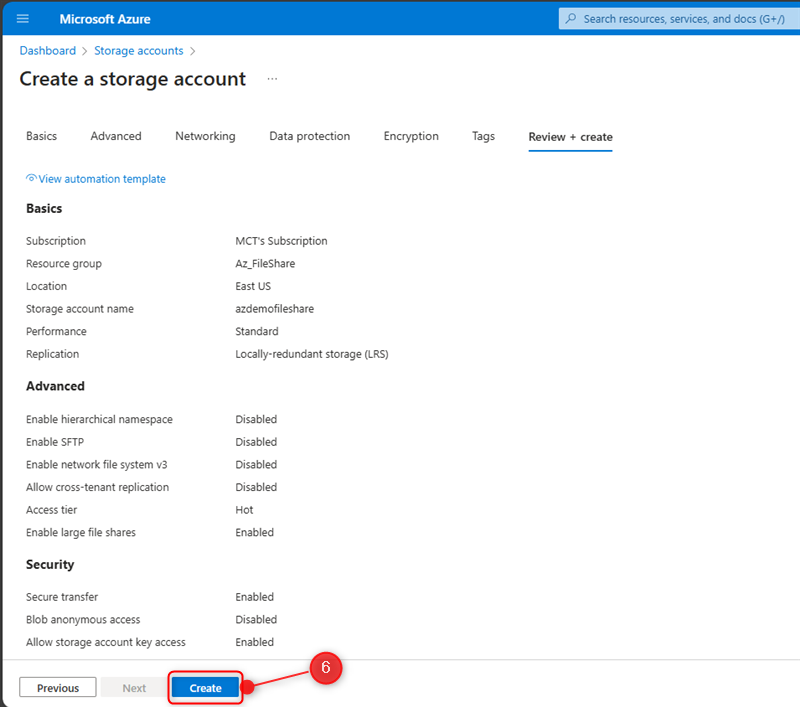
- Within the Primary part, present the challenge particulars.
- Click on Evaluation + Create.

- Click on Create.
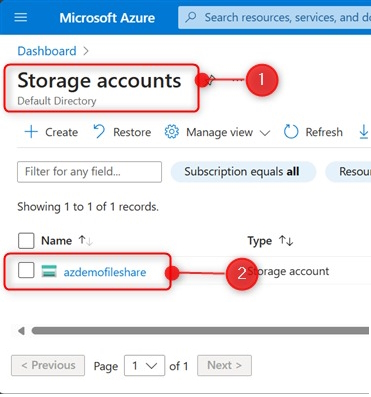
Step 3. Entry your Storage Account
- As soon as your storage account is created, return to the Storage Accounts part.
- Then, choose a storage account to make use of to create a file share.
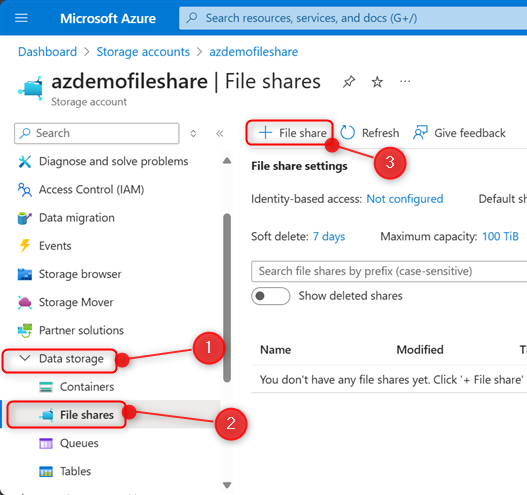
Step 4. Create and Configure a File Share
- Go to the Information Storage
- Choose File Share
- Then Click on “+ File Share” to create a file share
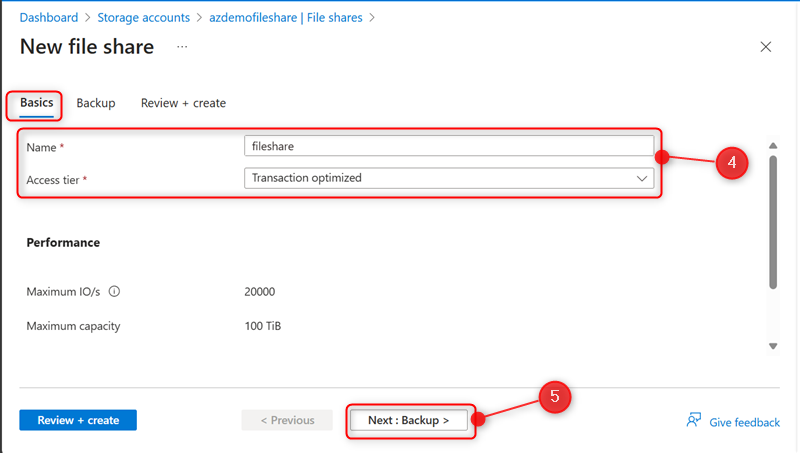
- Within the Primary tab, present a reputation for the file share and Go away “Transaction optimized chosen for Tier.”
- Then click on “Subsequent: Backup >”.
- Within the Backup tab, you’ll be able to allow or disable {test or uncheck the backup field to allow or disable}.
- Create a brand new Restoration Companies Vault.
- Vault title
- Useful resource Group
- To arrange a brand new backup coverage, select Create a brand new coverage.
- Then Click on Evaluation + Create
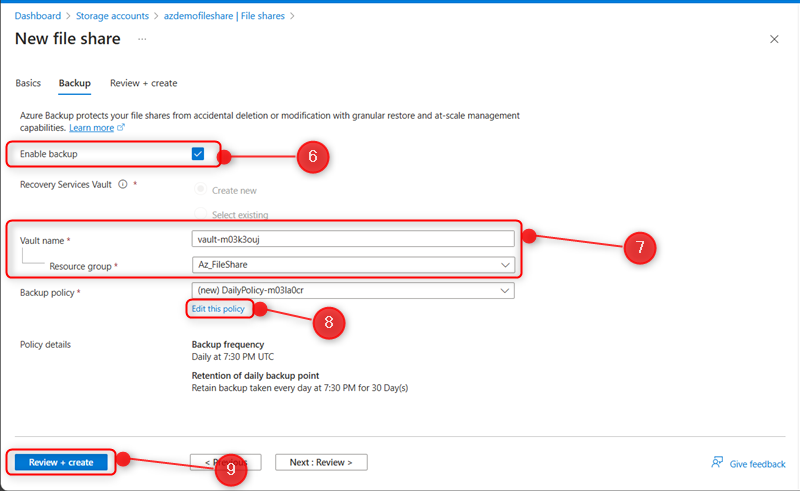
- As soon as Validation has handed, Click on “Create”.

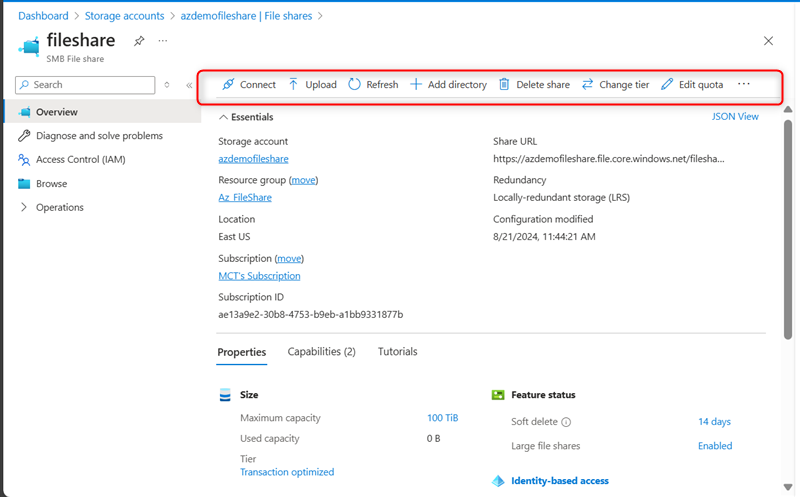
Step 5. Entry your File Share
After the file share is created, you’ll be able to open it by clicking in your file share title.
To mount the file share on a Home windows, Linux, or macOS machine, click on the Join button.
Conclusion
Making an Azure File Share within the Azure Portal is straightforward. You have to arrange a storage account, create the file share, after which comply with the directions to make use of it. This allows you to retailer and handle your recordsdata within the cloud.
Know extra about our firm at Skrots. Know extra about our companies at Skrots Companies, Additionally checkout all different blogs at Weblog at Skrots


