Introduction
Establishing a customized area identify on Microsoft Azure enhances your model’s professionalism and visibility on-line. By utilizing a novel area, companies can create a memorable and reliable presence for his or her functions and providers.
The method begins within the Azure portal, the place you navigate to the related service, resembling App Providers, to provoke the customized area setup. Verification of area possession is an important step, sometimes completed by including particular DNS information like CNAME or TXT by your area registrar. As soon as verified, the customized area could be seamlessly linked to your Azure sources, making certain constant entry for customers. To take care of safety, configuring SSL/TLS certificates is crucial, safeguarding information transmission and constructing consumer confidence. Total, including a customized area to Microsoft Azure is a simple methodology that mixes branding, performance, and safety for a sturdy on-line presence. Utilizing a customized area identify in Microsoft Azure whereas creating Entra ID credentials gives a mixed set of benefits that improve each your model presence and safety:
- Enhanced Model Id: A customized area identify permits you to undertaking knowledgeable picture with a personalised URL, which could be additional secured and managed by Entra ID credentials, making certain that your branded providers are solely accessible to approved customers.
- Professionalism and Belief: Customized domains present a extra credible and polished look to your providers, whereas Entra ID credentials be sure that entry is restricted to authenticated customers, boosting belief and safety.
- Improved Consumer Expertise: By utilizing a customized area, customers can simply acknowledge and keep in mind your service’s URL, and with Entra ID credentials, they will expertise safe and seamless logins, enhancing general consumer satisfaction.
- Safety and Compliance: The customized area could be secured with SSL/TLS certificates, whereas Entra ID credentials implement safe, authenticated entry, making certain compliance with safety requirements and rules.
- Centralized Administration: Each customized domains and Entra ID credentials could be managed by the Azure portal, providing a unified strategy to managing your model’s on-line presence and securing entry to your providers.
- web optimization and Integration: A customized area boosts your search engine rating, and with Entra ID, you possibly can simply combine identification administration throughout a number of Azure providers, sustaining each visibility and safety as your providers scale.
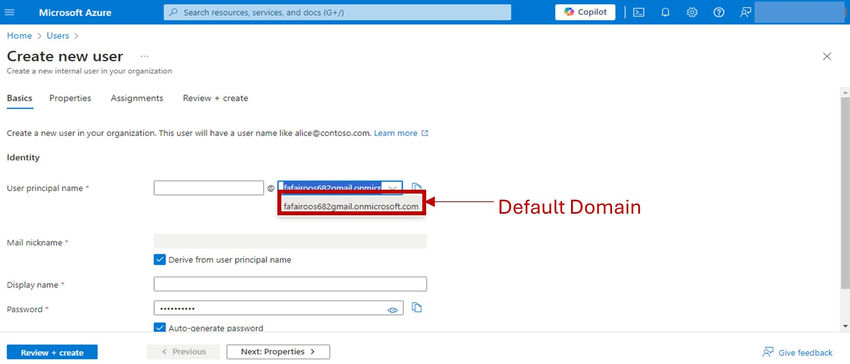
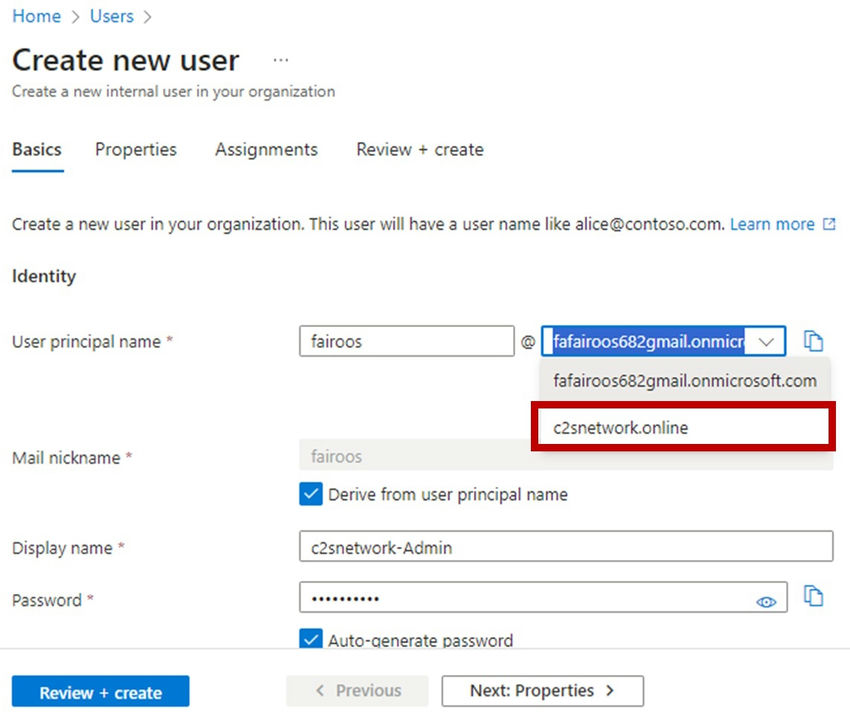
On this situation, I am creating new customers underneath the default “Microsoft” area, which can’t be modified. When you can create customers with this major area, if you wish to use a customized area that displays your model or firm identify, you will must buy it from a website supplier.
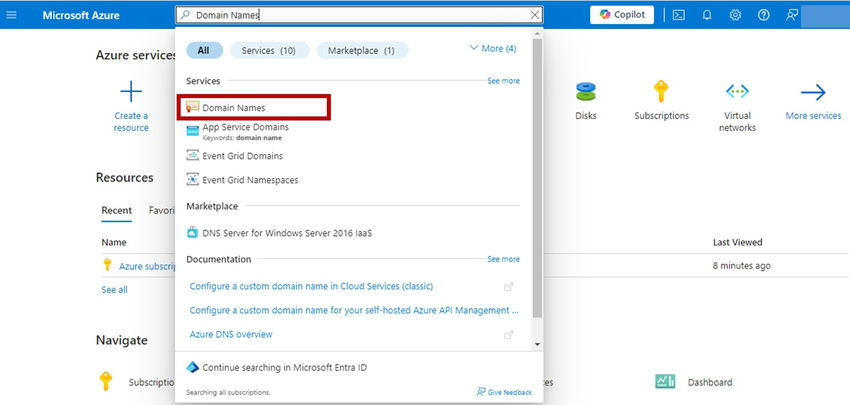
As soon as you’ve got bought a website, you possibly can seek for the “Area Names” possibility within the international search bar inside Azure to start the method of including and configuring your customized area.
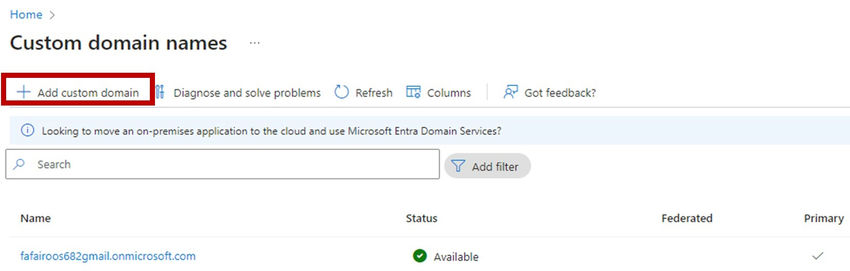
Within the wizard, you will see your default major area. To alter it, merely click on on the “Add customized area” possibility to start configuring your customized area.
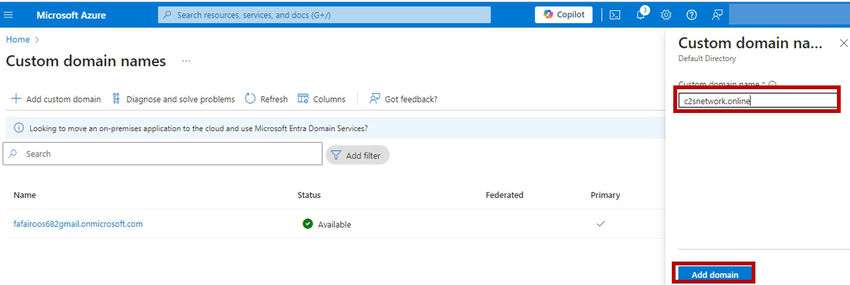
After clicking “Add customized area,” a wizard will seem on the correct facet. Enter your bought area deal with and click on “Add area.” Confirm the deal with is right to make sure profitable setup.
As soon as the process is full, click on on the customized area choice to open the wizard. You’ll want so as to add a DNS TXT file, which is among the required sorts of DNS information. Configure this TXT file together with your internet hosting supplier by inserting the supplied Identify file. After coming into the file into your identify server, it might take 10 to fifteen minutes for the modifications to take impact.
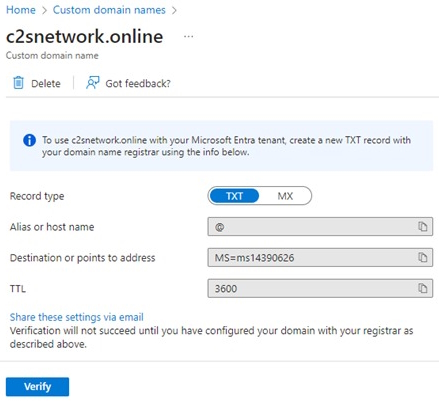
For the area identify “c2snetwork.on-line,” bought by the” Hostinger” web site, I must insert the TXT file into my DNS information. After including the TXT file, assign the suitable function. The DNS modifications will take impact inside 10 to fifteen minutes.
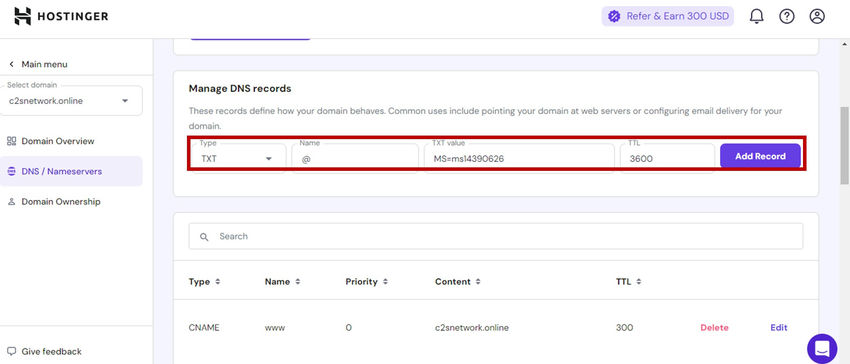
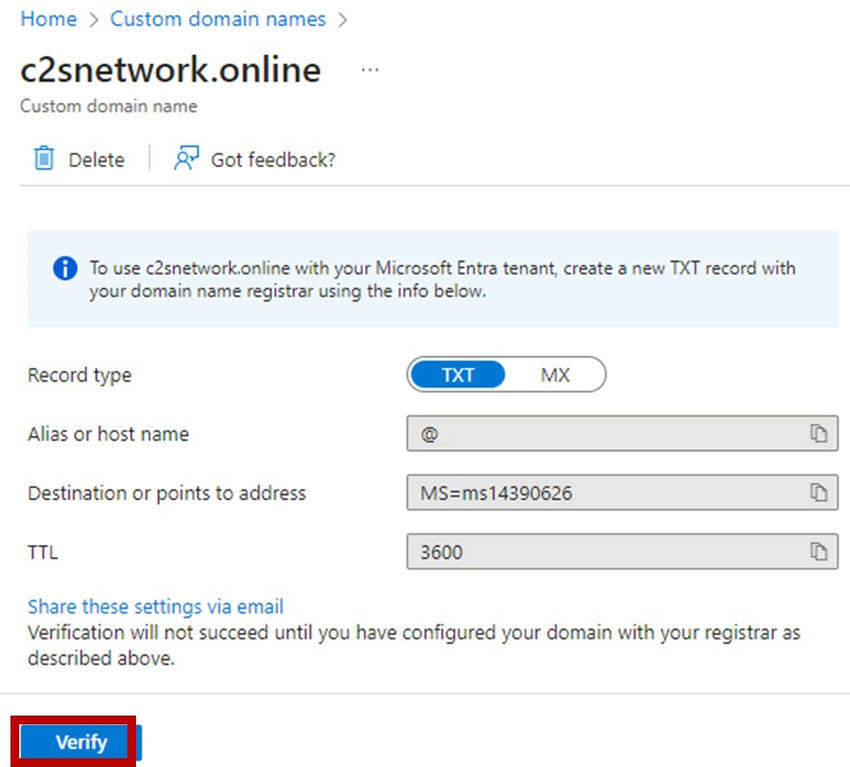
After ready quarter-hour for the DNS file to propagate, click on “Confirm” to verify the modifications.
After finishing the setup, choose your customized area and set it as the first area. If you happen to miss this step, you gained’t be capable of use your customized area identify as the first area.
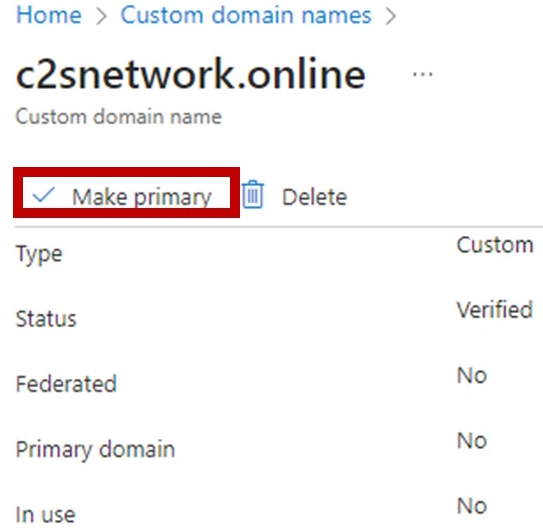
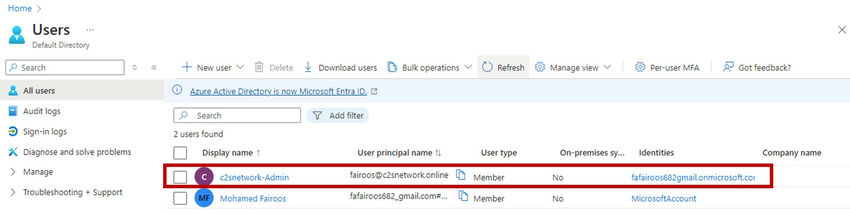
As soon as all steps are appropriately configured, your customized area will likely be seen. On this case, with Entra ID, now you can create new customers with the customized area identify. This setup permits you to totally make the most of your customized area for consumer administration.
Now you can efficiently create an Azure AD customized area with Entra. This setup allows you to use your customized area for consumer administration and different Azure providers.
Conclusion
By following the steps so as to add and configure a customized area in Azure AD with Entra, you possibly can successfully set up a personalised area to your group. This course of includes buying a website, configuring DNS information, and verifying the setup. As soon as accomplished, you possibly can handle customers and sources together with your customized area, enhancing each branding and safety. This ensures a seamless integration of your customized area into Azure providers.
Know extra about our firm at Skrots. Know extra about our providers at Skrots Providers, Additionally checkout all different blogs at Weblog at Skrots


