Azure App Service: Classes Administration in Load Balancing Surroundings Utilizing Redis Cache
Classes in Conventional Load Balancing Environments
Typically, we use in-memory classes (knowledge saved in RAM) in all Net Functions. It really works effectively in a lot of the conventional internet hosting environments the place we host our utility in a devoted VM or any shared internet hosting plans.
Nonetheless, when site visitors grows, we plan for load balancing by creating a number of Net Servers and controlling the site visitors utilizing Load Balancers. In these situations, the session wouldn’t work because the requests (associated to a single session) can be served by a number of servers (the identical server to serve the requests of a single session can be potential, but it surely’s not advised). The answer is to go for storing the classes in a SQL Server which is accessible throughout all of the Net Servers of the Load Balancing surroundings.
Classes in Azure auto-scale surroundings
As an alternative of a theoretical dialogue on this, let’s immediately bounce into some sensible dialogue by creating a small program that makes use of classes and see how classes work in Azure.
Let’s create a Web site (you possibly can create MVC Utility as effectively) with the next Net Pages and deploy the applying as proven in certainly one of my earlier articles,
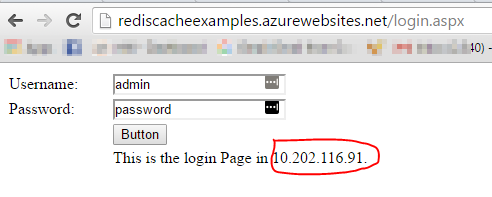
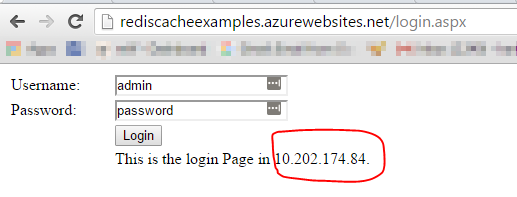
Login.aspx
This web page simply accepts the username and password. On “Login” button click on, create a session and retailer the worth of the logged-in username in a session and redirect the person to the “Default.aspx”.
Please be aware that the web page additionally shows the IPAddress “10.202.116.91” of the Digital Machine the place the web page is hosted.
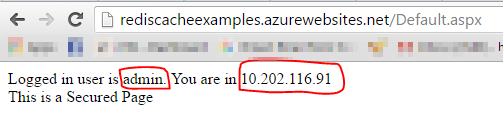
Default.aspx
This web page shows the next messages primarily based on the worth within the Session.
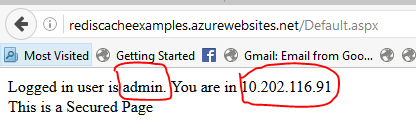
If Session has some worth, then it shows the “Logged in person as admin. You might be in 10.202.116.91” as proven within the under display seize.
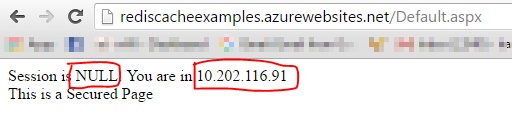
If the session doesn’t have any worth, then it shows the “Session is NULL. You might be in 10.202.116.91” as proven within the under display seize.
Please discover that the IPAddress of the Server in each the Login.aspx and the Default.aspx is identical. All of the requests are being re-directed to the identical server.
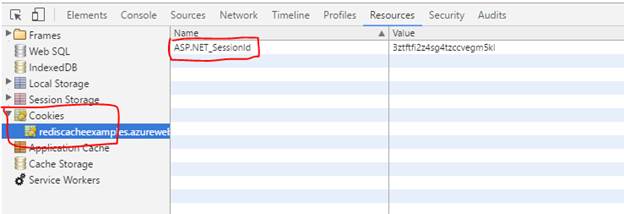
Additionally, as per the under display seize, the classes are maintained utilizing a Cookie named “ASP.NET_SessionID”. This needs to be acquainted to most of us.
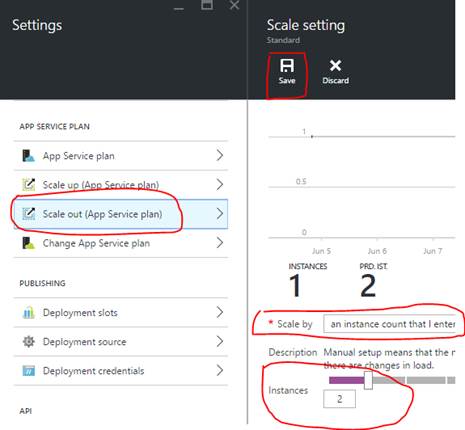
Let’s assume that the site visitors to our web site has grown and we wish to scale it to 2 Cases. Let’s go forward and enhance the Occasion rely to 2.
Observe: Please be aware that you just can not enhance the occasion rely in Free and Shared tiers. Your App Service needs to be in “Fundamental”, “Customary” or “Premium” tiers.
Let’s once more entry the Login Web page and entry it a number of instances by refreshing the web page. Refreshing the web page any variety of instances will NOT change the IPAddress.
You’ll discover that the identical Net Server is serving the pages. Although we enabled scaling to 2 cases, the App Service continues to be serving the requests from one server.
This may be an issue in real-world situations as a result of the identical server is serving the requests although Load Balancing is enabled and the opposite servers will not be being utilized correctly.
The rationale why all of the requests are being served is due to the ARR Cookie as proven under. For extra data, please take a look right here.
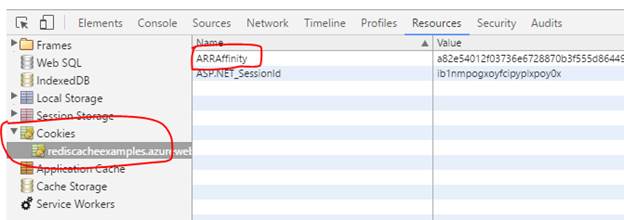
In Easy phrases, this cookie has the Server data from which the preliminary request has been served so that each one subsequent requests from the identical session are served by the identical VM.
Let’s disable the ARR cookie characteristic by navigating to the App Service’s Utility Settings as proven under.
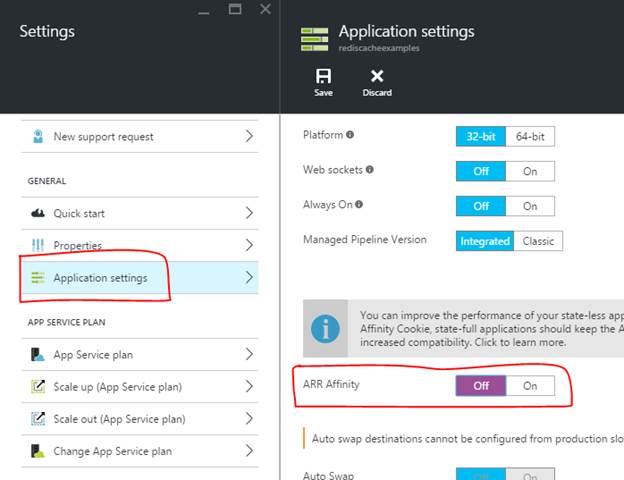
Flip off the “ARR Affinity” as proven within the above display seize and click on on “Save” button to avoid wasting the modifications. Please restart the App Service simply to clear all of the classes.
Please be a bit cautious from now onwards. The next couple of paragraphs are a bit complicated.
Essential
Turning off the ARR Affinity will disable the method of making the cookie ARRAffinity cookie. So, when the cookie is disabled, the requests may be despatched to any of the accessible servers. So, there is no such thing as a assure that the Classes will likely be maintained correctly. Classes will work ONLY when the requests are being served from the Identical server. If any of the requests are served by one other server (as a substitute of the one the place the session is saved) then Classes will likely be NULL.
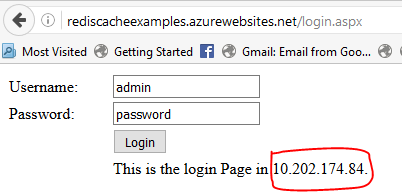
Now, come again to the Net App and navigate to the Login web page and spot the brand new IPAddress “10.202.174.84”. (In your case, initially you may see the identical IPAddress as earlier than. Refreshing the web page would change the IPAddress. In my case, I refreshed the web page twice to get the brand new IPAddress as proven under.)
Clicking on the Login button will NOT assure that the shape will likely be posted to 10.202.174.84. It would publish the info to the opposite server which in my case is “10.202.116.91”.
In my case, after I clicked on the “Login” button of the above display seize, it took me to the Default web page with the next values.
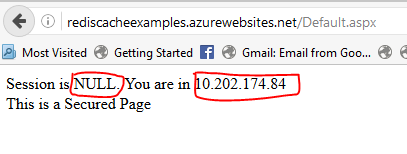
- IP Handle is 10.202.174.84 (this is identical in my login Web page).
- Session is NULL. The reason being, when login is clicked, the request might need gone to the opposite occasion (“10.202.116.91”) the place my session bought saved.
- Refresh the web page a few instances.
Please observe the next.
- Session has some worth “admin”.
- IPAddress is 10.202.116.91.
So, the conclusion right here is “Classes” wouldn’t work as anticipated within the Azure App Service if you configure Load Balancer utilizing the auto-scaling characteristic.
Right here comes the savior. The Redis Cache supplier. Under is the definition from the Azure Official Web page.
Azure Redis Cache relies on the favored open-source Redis cache. It provides you entry to a safe, devoted Redis cache, managed by Microsoft and accessible from any utility inside Azure.
Under are the steps required to make our classes work as anticipated.
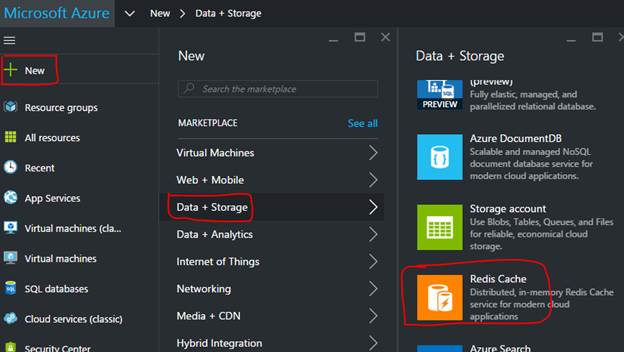
- Create the Redis Cache from the Azure Administration Portal.
- Configure the Utility to make use of the Azure Redis Cache.
- Use the Classes.
Create the Redis Cache from the Azure Administration Portal.
Let’s begin creating the Redis Cache utilizing the Azure Administration Portal as proven under.
Present the small print of the Redis Cache as proven under.
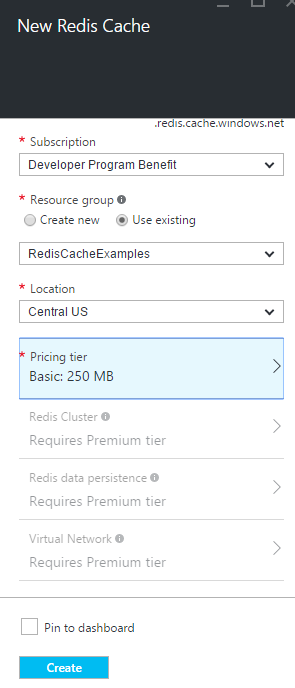
Click on on the “Create” button of the above display seize. It’ll take a few minutes to create the Redis Cache.
Configure the Utility to make use of the Azure Redis Cache
Let’s configure the applying to make use of the Redis Cache that we now have simply created.
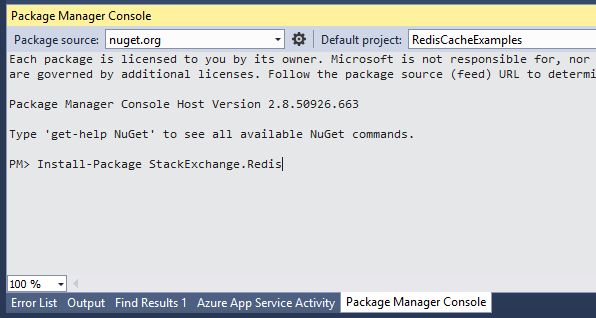
As proven within the above display seize, go-to Bundle Supervisor Console and kind the command “Set up-Bundle StackExchange.Redis” and click on “Enter”.
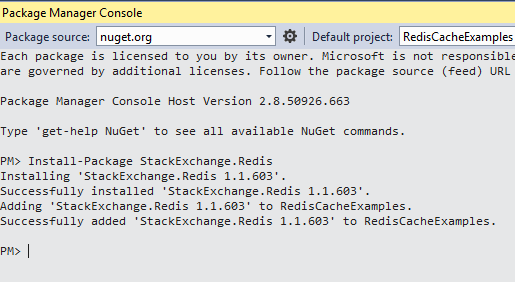
Now, we now have efficiently put in the required packages. (Please be aware that your .NET framework needs to be 4 or greater.)
As a way to use the assemblies, we have to first added the next namespace to each our Login.aspx web page and Default.aspx web page.
Utilizing StackExchange.Redis;
Let’s add a brand new class named “RedisConnection” to the venture. Please refer the hooked up Undertaking.
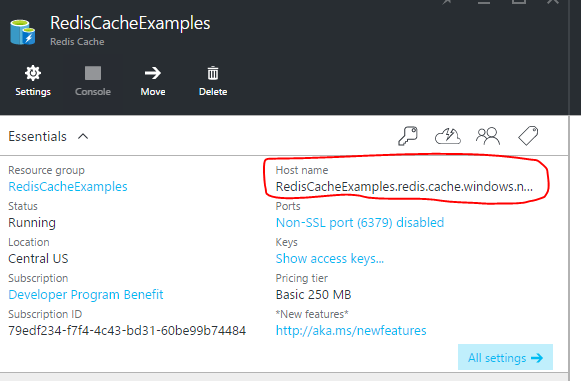
As a way to hook up with Redis Cache, we have to cross the next data to the ConnectionMultiplexer.Join perform. Let’s seize them from the Portal.
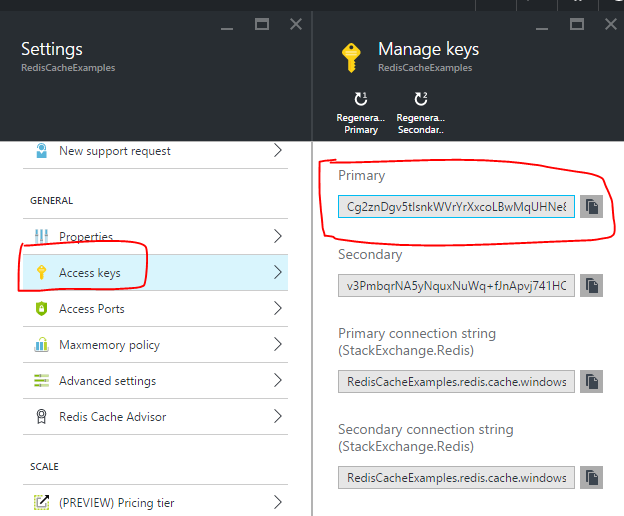
Please don’t save the Keys in Code. To make issues easy, I’m storing the keys within the Supply Code. Please refer this web page which offers data on the way to retailer the credentials.
We are actually prepared with the category that may very well be used to connect with the Redis Cache. Let’s use the category to create session within the Redis Cache.
Open your Login.aspx.cs file and substitute the next line of code.
Session["login"] = this.txtUsername.Textual content.Trim();
With.
IDatabase cache = RedisConnection.Connection.GetDatabase();
cache.StringSet("login", this.txtUsername.Textual content.Trim());
Open the Default.aspx.cs and substitute the next line of code.
protected void Page_Load(object sender, EventArgs e)
{
    if (Session["login"] == null)
    {
        Response.Write("Session is NULL. You might be in " + Request.ServerVariables["LOCAL_ADDR"]);
    }
    else
    {
        Response.Write("Logged in person is " + Session["login"] + ". You might be in " + Request.ServerVariables["LOCAL_ADDR"]);
    }
}
With.
protected void Page_Load(object sender, EventArgs e)
{
    IDatabase cache = RedisConnection.Connection.GetDatabase();
    string strLoginValue = cache.StringGet("login");

    if (strLoginValue == null)
    {
        Response.Write("Session is NULL. You might be in " + Request.ServerVariables["LOCAL_ADDR"]);
    }
    else
    {
        Response.Write("Logged in person is " + strLoginValue + ". You might be in " + Request.ServerVariables["LOCAL_ADDR"]);
    }
}
Let’s deploy the code to the Azure App Service and overview the modifications and navigate to the Login Web page as proven under.
Discover the IPAddress. It’s 10.202.174.84. Now click on on “Login” button. You can be taken to the Default.aspx web page as proven under.
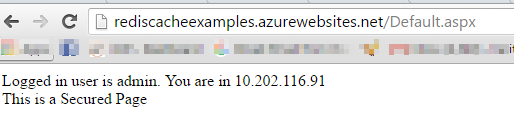
Discover that within the above display seize, although the IPAddress is totally different, nonetheless we’re capable of see the username “admin” as a result of the classes are actually saved in a distributed location “Redis Cache” which is accessible for each the cases.
Now, maintain refreshing the web page a number of instances. You’ll discover that the IP Addresses are altering however not the worth of the username.
That’s it. We now have realized the way to retailer the classes in a load Balancing Surroundings. You possibly can retailer any type of knowledge in Redis Cache.
Hope you loved studying the article. Your suggestions is admittedly appreciated.
Know extra about our firm at Skrots. Know extra about our companies at Skrots Providers, Additionally checkout all different blogs at Weblog at Skrots


