VNet Peering permits two VNets in the identical area to attach with one another with out having to arrange the VPN Gateways.
Previous to VNet Peering, we used to go along with VNet to VNet connection. It didn’t matter if the VNets have been in the identical area or completely different areas.
However now, if the VNets are in the identical area, we are able to join them utilizing VNet peering.
VNet to VNet connection is actually a site-to-site connection so we have to create Digital Community Gateways on each the VNets. However Digital Community Gateways value some huge cash.
VNet peering was launched to take away the necessity for Digital Community Gateways. So we are able to hook up with VNet collectively with out the VPN gateways. It saves some huge cash. The drawback to that is that the VNets should be in the identical area. It received’t work cross-regionally.
Suppose you’ve gotten two completely different subscriptions and you’ve got two digital networks, one in every subscription and also you wish to join them, you are able to do that. The one mandatory factor is that they each must be in the identical area.
Peering simply works bi-directionally. So if you happen to peer a VNet A with VNet B and peer VNet B with VNet C, then VNet A can’t talk with VNet C.
So allow us to first create two digital networks in the identical area.
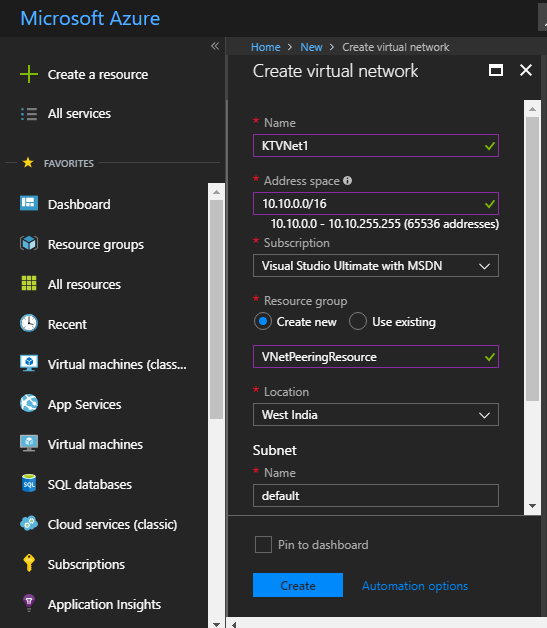
Step 1. Create a digital community KTVNet 1 and put it into a brand new useful resource group. Put within the West India location. Click on on Create.
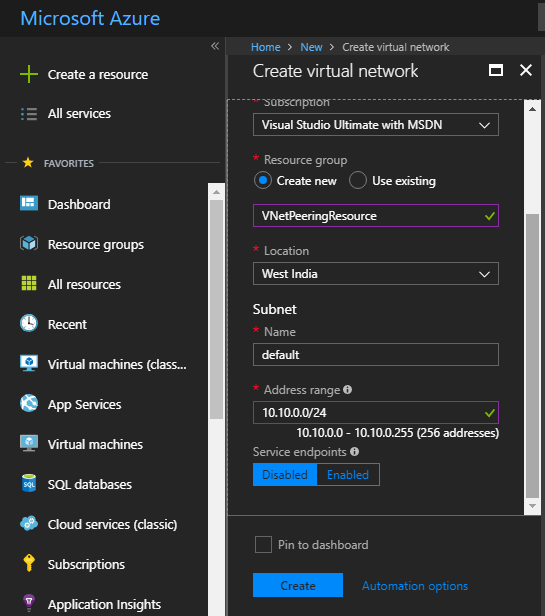
Step 2. Create yet another digital community identify KTVNet2 and put it beneath the identical useful resource group and identical location; i.e., West India.

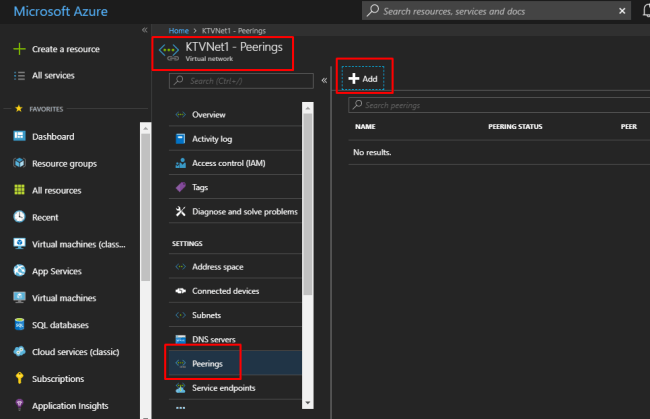
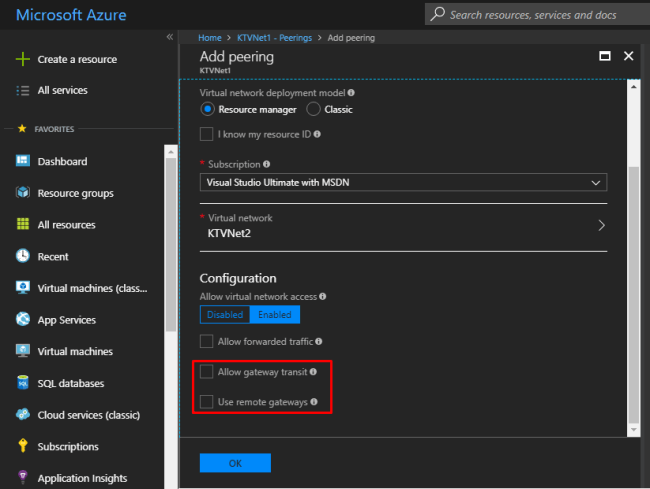
Step 3. Go to KTVNet1 and go to peerings. Click on on Add.
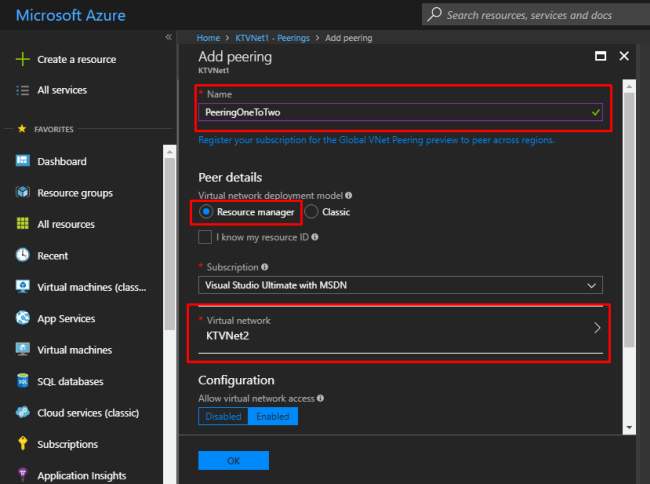
Step 4. Give a reputation to the peering. Choose useful resource supervisor. For those who don’t know the digital machine or the subscription, you may choose the useful resource ID. Then select the digital community. And hold the digital community entry as enabled.
Step 5. Enable ahead visitors permits the visitors of peered VNet into this VNet. Enable gateway transit permits the peered VNet to make use of this VNet’s gateway (if any), however for that, “use distant gateways” should be enabled within the peered VNet. Click on on OK.
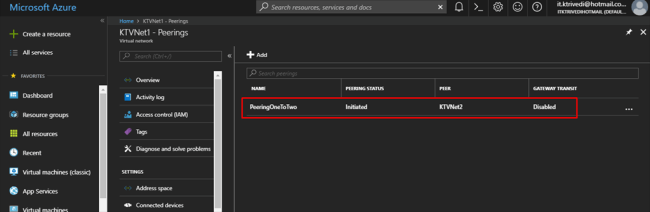
Step 6. The peering will probably be listed and the standing will probably be proven as initiated. Now we have to add a peering to KTVNet2 as effectively.
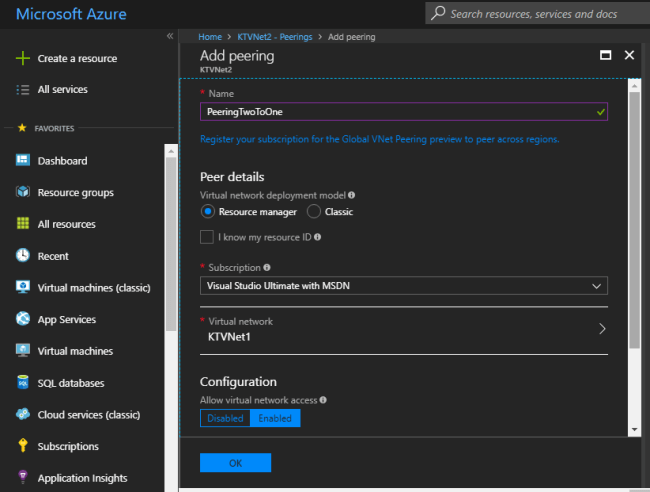
Step 7. Add a peering to the KTVNet2 as proven beneath. And hold forwarded visitors, gateway transit, and distant gateways as unchecked as a result of we do not need any gateway in any of the VNets. Click on on OK.
Step 8. It may be seen in each the VNets that the connection is established.
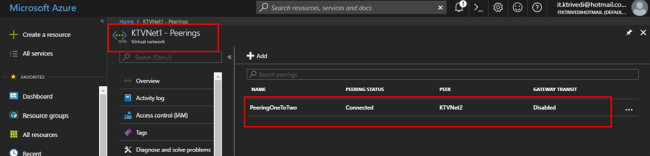

Therefore we are able to say that we’ve established a profitable VNet peering.
Know extra about our firm at Skrots. Know extra about our companies at Skrots Companies, Additionally checkout all different blogs at Weblog at Skrots


