On this article, we’ll see learn how to get began with Azure Scheduler.
- Idea
- Implementation: Creating an Azure Scheduler on Azure Portal.
- Implementation: Working Azure Scheduler.
Idea About
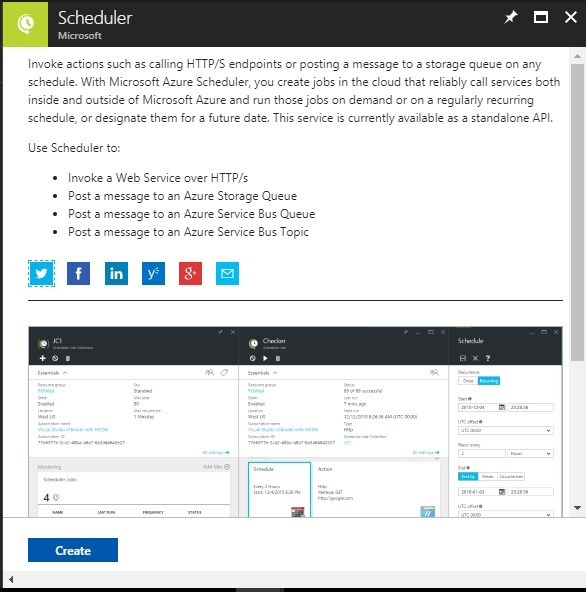
- Azure Scheduler permits you to describe actions to run within the cloud. You possibly can schedule and run the actions robotically. You possibly can schedule the scheduler by utilizing Relaxation API or Azure PowerShell.
- The scheduler creates, maintains, and invokes the scheduled work.
- It mainly doesn’t host any workloads or any code.
- The first position of this scheduler is to invoke the code hosted anyplace like in Azure, on-premises, or with one other supplier.
- The main benefit of utilizing it’s you could invoke it by way of HTTP, HTTPS, a storage queue, a service bus queue, or a service bus subject.
- It permits you to create, replace, delete, view, and handle jobs or a job assortment programmatically, by utilizing scripts.
Implementation
Creating an Azure Scheduler on the Azure Portal
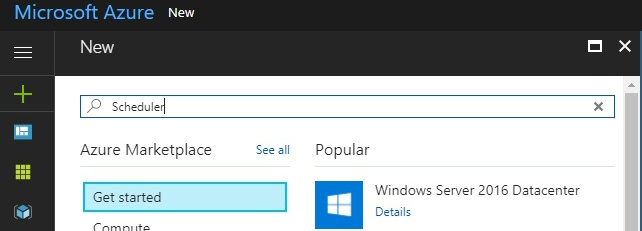
- Check in to the Azure Administration portal.
- Open the Azure portal and click on on “+”.
- Sort “Scheduler” within the Search field.
- Then, click on on “Create”.
- Fill in all of the required particulars like Title, Job assortment, or create a brand new job in that.
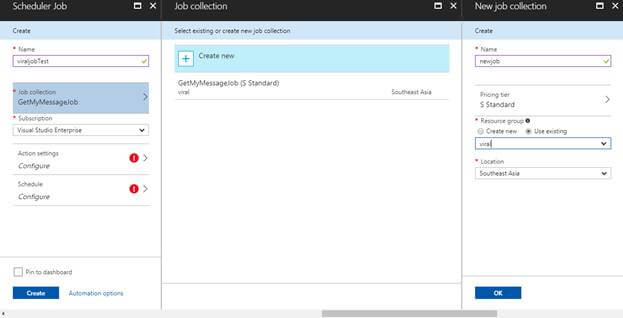
- After making a Job assortment, we have to set the motion settings.
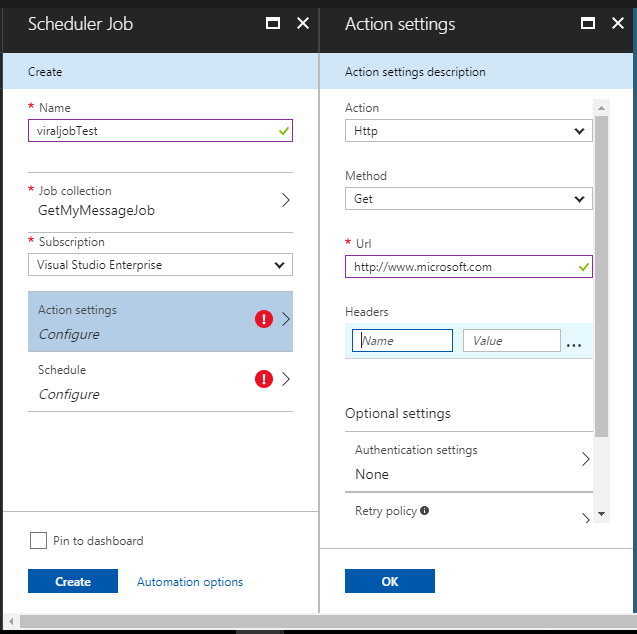
- Set Http or Https; set technique Get, Put up, Put, Delete; and set URL on which web site or API you want to schedule a job.
- You may as well give the personalized API that you’ve got created within the URL.
- Title
- Subscription: Your Azure subscription
- Job Assortment: Choose an present job assortment, or click on Create New > enter a reputation.
- Subsequent, in Motion Settings, outline the next values.
- Motion Sort: HTTP
- Methodology: GET
- URL: http://www.microsoft.com
- Lastly, let’s outline a schedule. The job could possibly be outlined as a one-time job, however let’s decide a recurrence schedule.
- Recurrence: Recurring
- Begin: Immediately’s date
- Recur each: 12 Hours
- Finish by: Two days from at present’s date
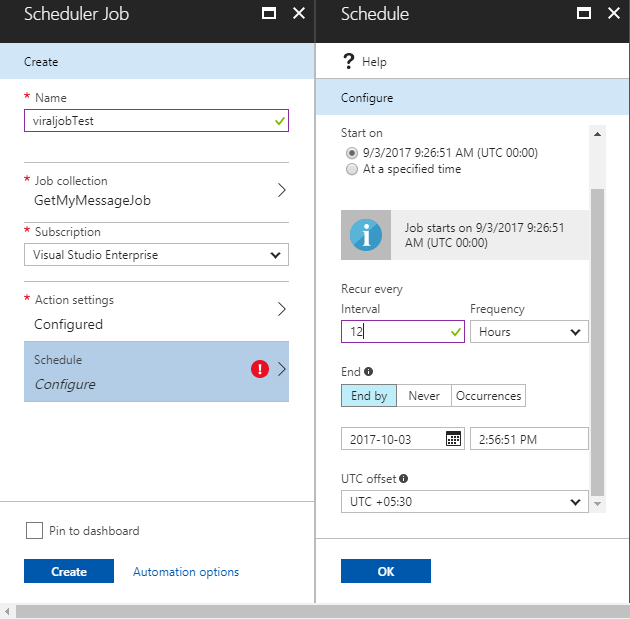
- Click on “Create”.
- As soon as a job is created, click on on the job and a brand new window opens with the next tabs.
- Properties
- Motion Settings
- Schedule
- Historical past
- Customers
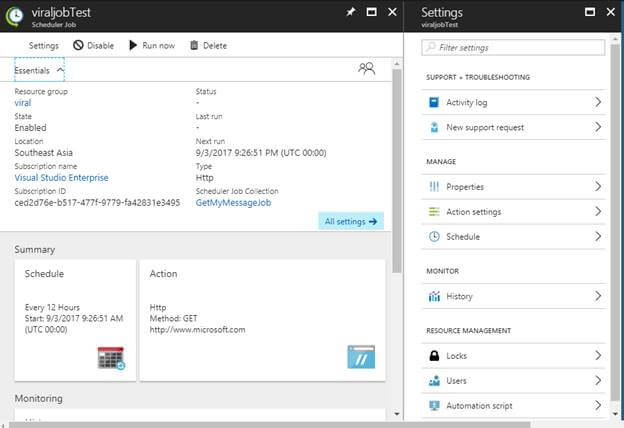
- These read-only properties describe the administration metadata for the Scheduler job.
Historical past
The historical past tab shows chosen metrics for each job execution within the system for the chosen job. These metrics present real-time values relating to the well being of your scheduler.
- Standing
- Particulars
- Retry makes an attempt
- Prevalence 1st,2nd,third
- Begin time of execution.
- Finish time of execution.
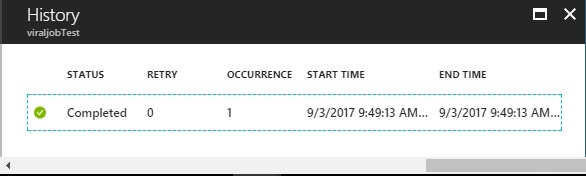
- You may as well run your job manually by clicking on the “Run” button.
- You possibly can click on on run to view its historical past particulars, together with the entire response for each execution.
That is how one can schedule the job by Azure Scheduler.
Know extra about our firm at Skrots. Know extra about our providers at Skrots Providers, Additionally checkout all different blogs at Weblog at Skrots


