Implementing Steady Integration and Steady Deployment (CI/CD) for SQL Server databases ensures that database modifications are routinely constructed, examined, and deployed to varied environments. This information will stroll you thru establishing a CI/CD pipeline for a SQL Server database venture utilizing Visual Studio and Azure DevOps, together with methods to routinely synchronize modifications from a dwell database to your venture.
Conditions
Earlier than beginning, guarantee you could have,
- Visual Studio 2019/2022: With SQL Server Information Instruments (SSDT) put in.
- Azure DevOps Account: For managing your CI/CD pipelines.
- SQL Server Database Undertaking: Both create a brand new one or use an current venture.
- Git Repository: For supply management, ideally built-in with Azure DevOps.
Step 1. Setting Up the SQL Server Database Undertaking
Making a New SQL Server Database Undertaking
- Open Visual Studio.
- Go to File > New > Undertaking.
- Choose SQL Server Database Undertaking from the listing of templates.
- Present a reputation to your venture and click on Create.
- Import current database objects if relevant, or begin creating new objects akin to tables, views, saved procedures, and so forth.
Importing an Present Database
- Proper-click on the venture in Resolution Explorer.
- Select Import > Database.
- Connect with the prevailing database by offering the server identify and credentials.
- Choose the database objects you need to import and click on End.
Step 2. Model Management Integration
Committing Your Undertaking to Supply Management
- Initialize a Git repository to your venture if it’s not already below model management.
- Use the Crew Explorer window in Visual Studio to commit and push your modifications to the distant repository.
Step 3. Creating the CI Pipeline Utilizing Azure DevOps Traditional Editor
Setting Up the Construct Pipeline
- Import the venture from the GitHub repository.
- Choose the Repository from the listing.
- Now click on on the import venture.
- Navigate to Azure DevOps and open your venture.
- Go to Pipelines > Builds.
- Click on New Pipeline and choose Use the traditional editor to create a pipeline with out YAML.
- Choose the GitHub possibility, after which make the reference to Github.
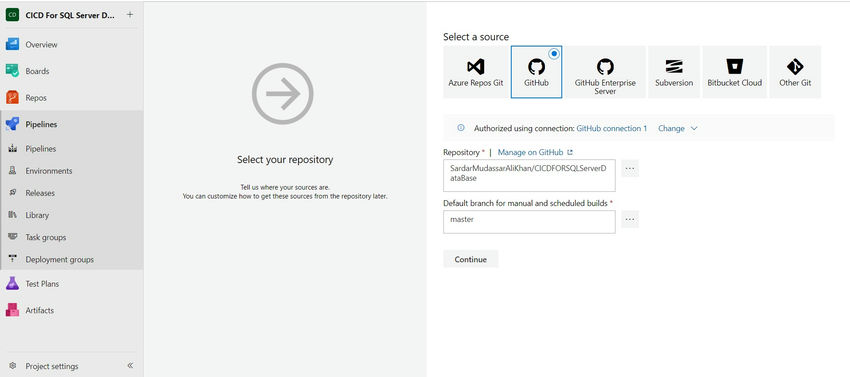
- Choose the repository the place your SQL Server Database venture is saved.
- Select the Visual Studio Construct template.
Configuring the Construct Pipeline
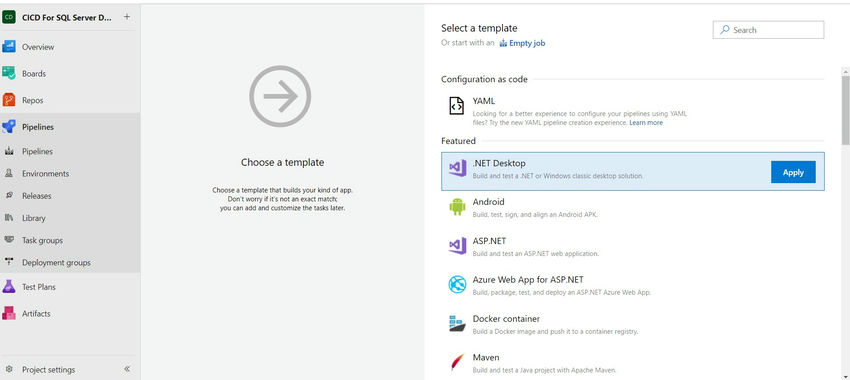
- Choose the .NET Desktop possibility from the listing for SQL Server Database venture CICD.

- Add a NuGet restore job.
- Click on + so as to add a job.
- Seek for NuGet and add the NuGet restore job.
- Configure it to revive packages to your resolution.
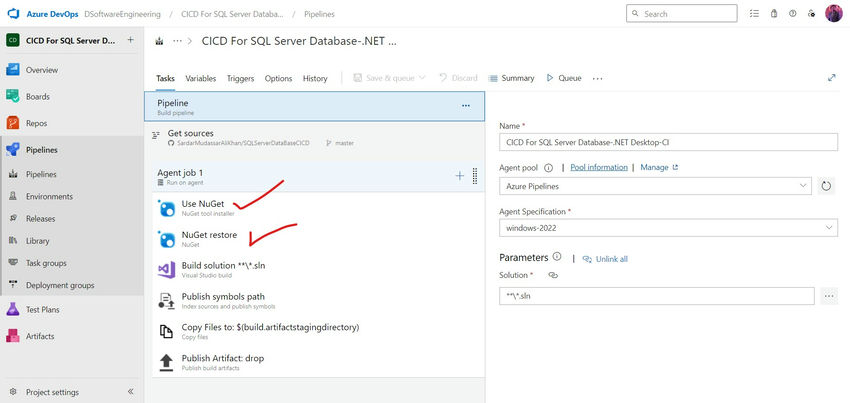
- Add a Visual Studio construct job.
- Click on + and add the Visual Studio Construct job.
- Choose your resolution file (.sln) and set the configuration to Launch.
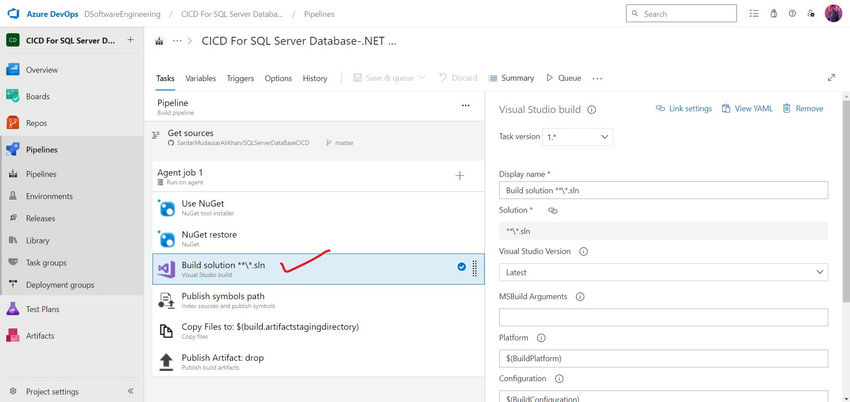
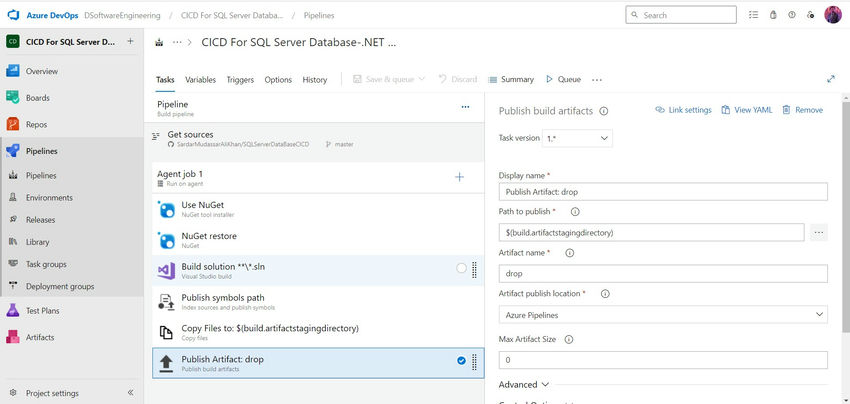
- Add a Publish Construct Artifacts job.
- Add the Publish Construct Artifacts job.
- Set Path to Publish to $(Construct.ArtifactStagingDirectory).
- Set Artifact Identify to drop.
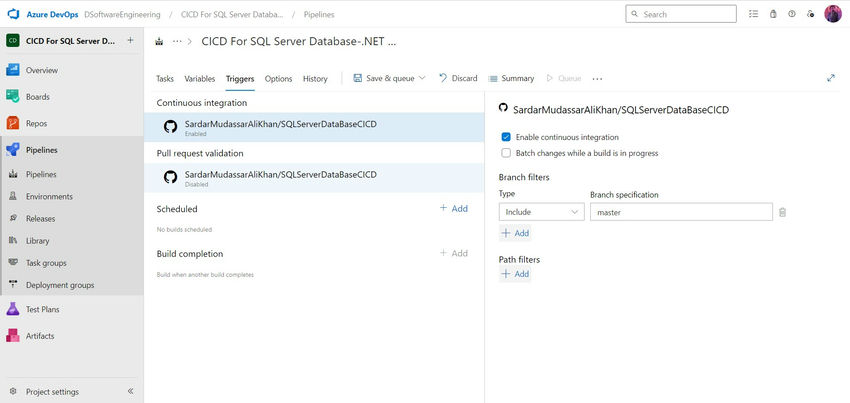
- Configure the Set off Choice for Steady Integration.
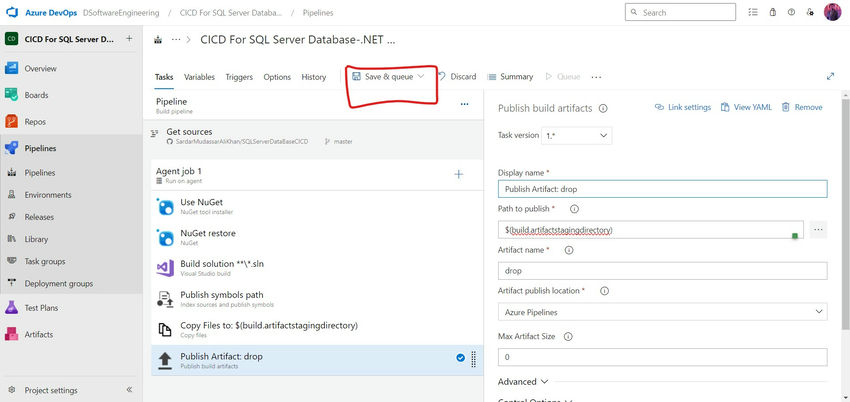
- Save and queue the construct.
- Save the pipeline, give it a reputation, and click on Queue to run the construct.
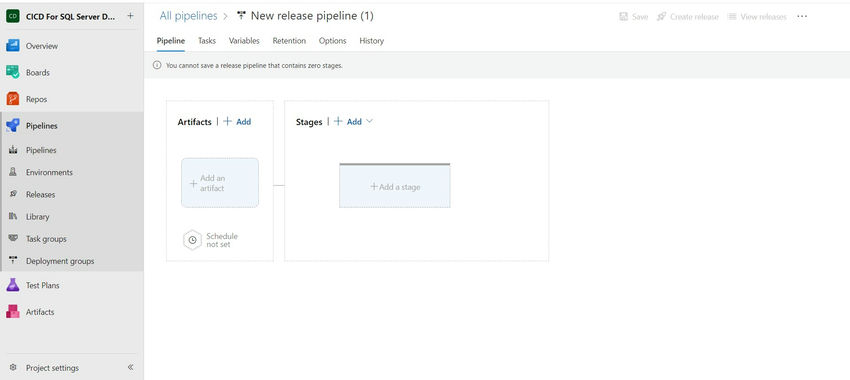
Step 4. Setting Up the CD Pipeline Utilizing Azure DevOps Traditional Editor
Creating the Launch Pipeline
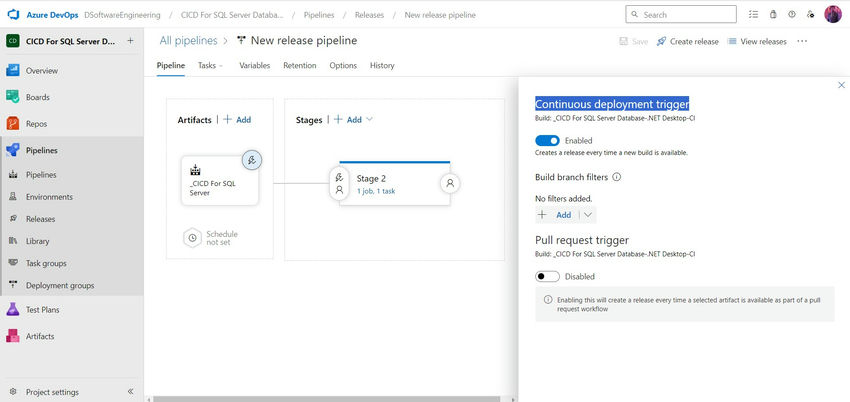
- Navigate to Pipelines > Releases.
- Click on New Pipeline and choose Begin with an Empty Job.
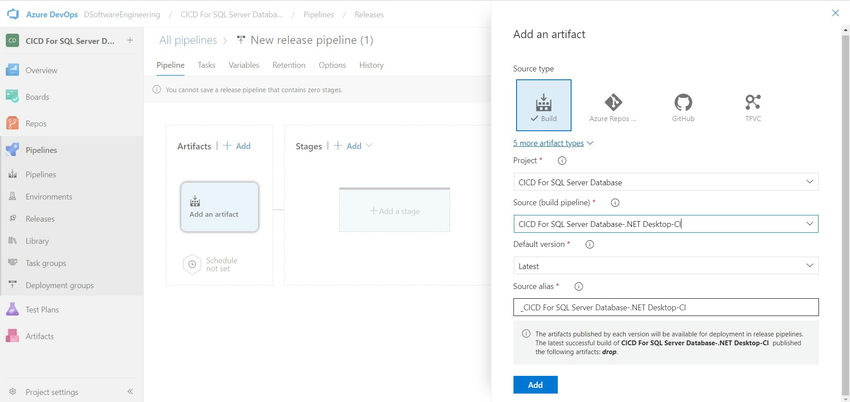
- Add an Artifact.
- Click on Add an Artifact and choose the construct pipeline you created.
- Select the default model (newest).
Steady deployment set off

Configuring the Deployment Stage
- Click on Add a job within the stage.
- Seek for Azure SQL Database Deployment and add it to the pipeline.
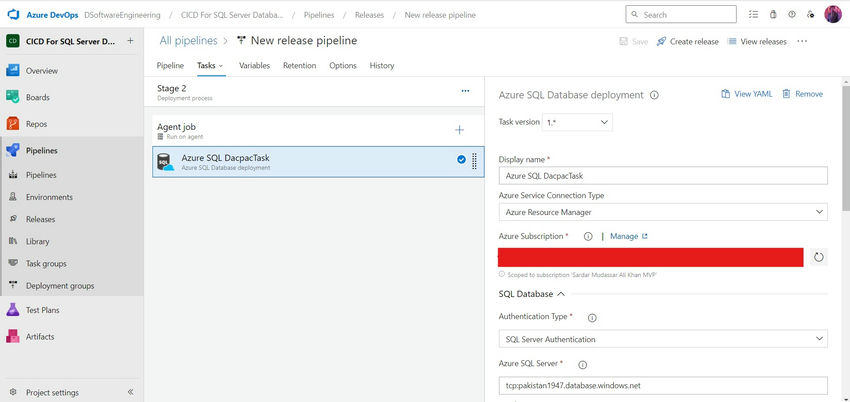
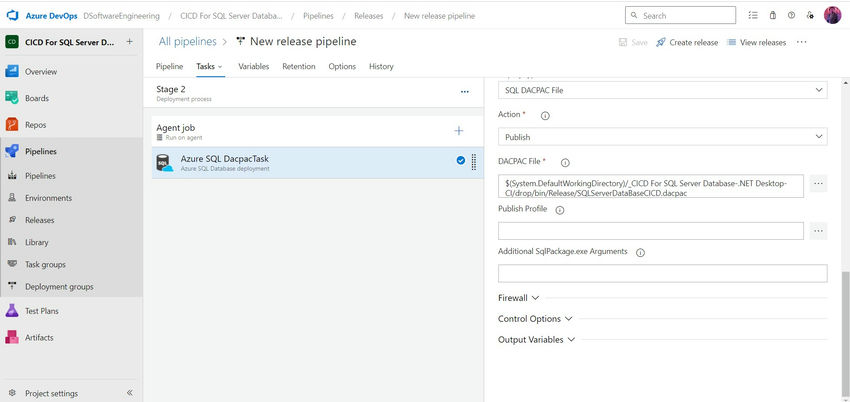
Configure the Azure SQL Database Deployment job
- Azure Subscription: Choose your Azure subscription.
- SQL Server Identify: Enter your SQL Server identify.
- Authentication Kind: Select SQL Server Authentication and supply credentials.
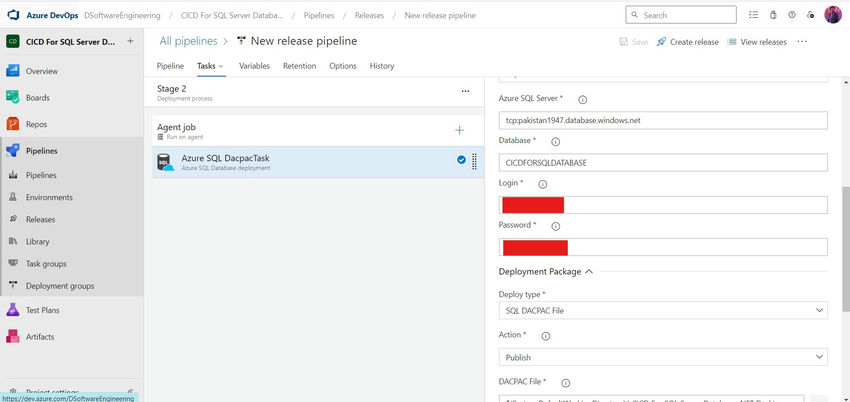
- Database Identify: Enter the goal database identify.
- DACPAC File: Level to the DACPAC file within the artifact ($(System.DefaultWorkingDirectory)/_drop/*.dacpac).
- Deployment Choices: Configure choices as wanted (e.g., drop objects not in supply).
Configuring Deployment Triggers
- Computerized Deployment: Set the pipeline to set off routinely after every profitable construct.
- Guide Deployment: Add approval steps if you wish to manually management when deployments occur.
- Save and Deploy: Save the pipeline and set off a deployment.
Step 5. Automating Database Modifications Import
Synchronizing Your Undertaking with Database Modifications

Schema Evaluate
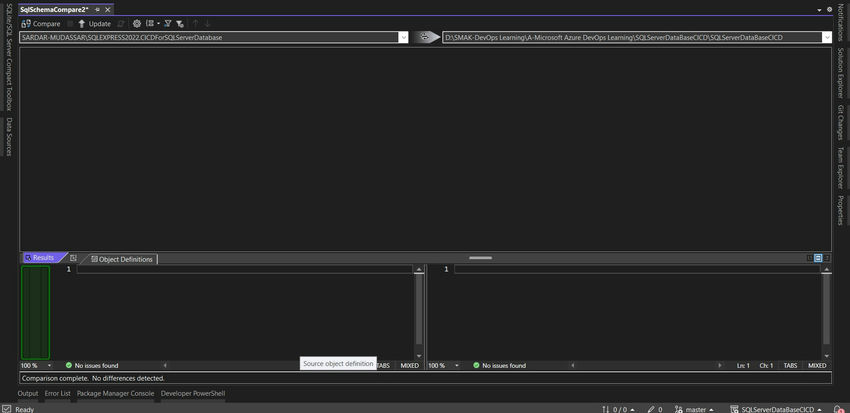
- In Visual Studio, go to Instruments > SQL Server > New Schema Comparability.
- Set the supply because the dwell database and the goal as your venture.
- Click on Evaluate to view the variations between the database and the venture.
- Choose the modifications you need to import into your venture and click on Replace.
Automating Schema Synchronization (Non-obligatory)
- You possibly can schedule PowerShell scripts or use SQLPackage.exe to automate schema synchronization duties, although this requires customized scripting.
- Now let’s test the supply CI Pipeline.
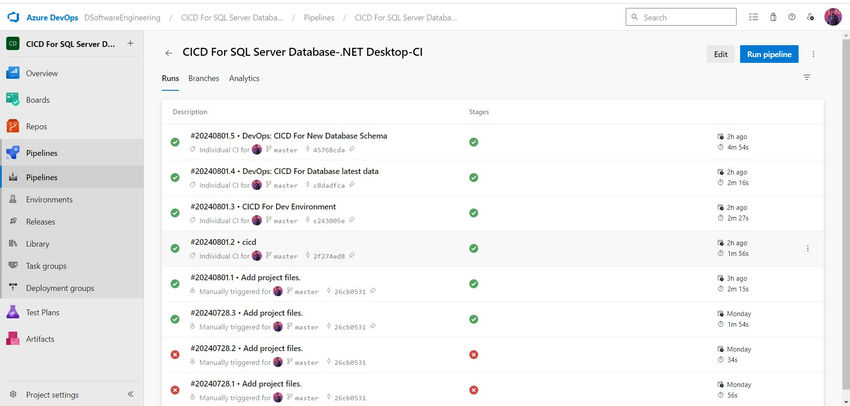
- Now you may see that our CI half has been efficiently executed.
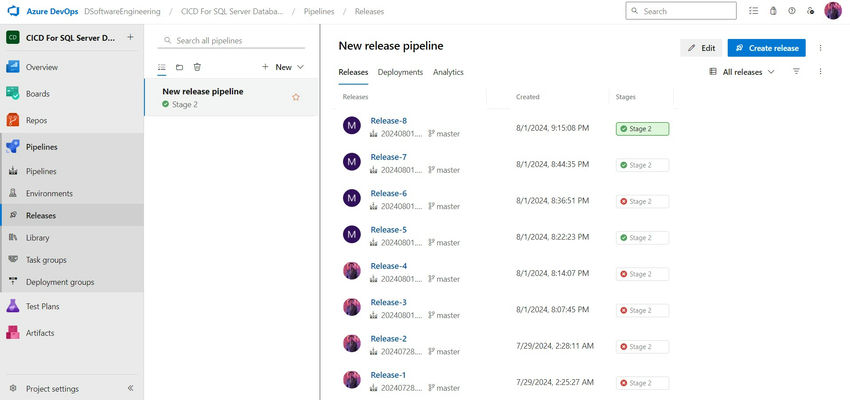
- Now Let’s Examine the CD Pipeline.
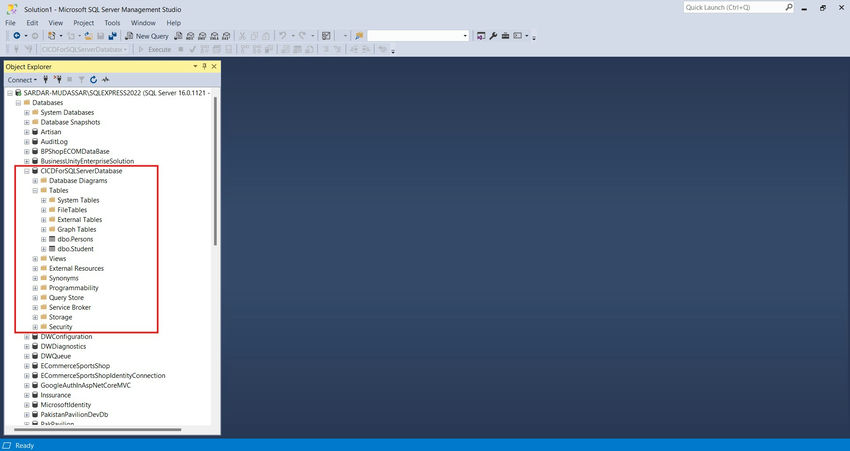
- Now Let’s Evaluate the SOURCE $ DESTINATION Databases
Supply Database
Vacation spot Database
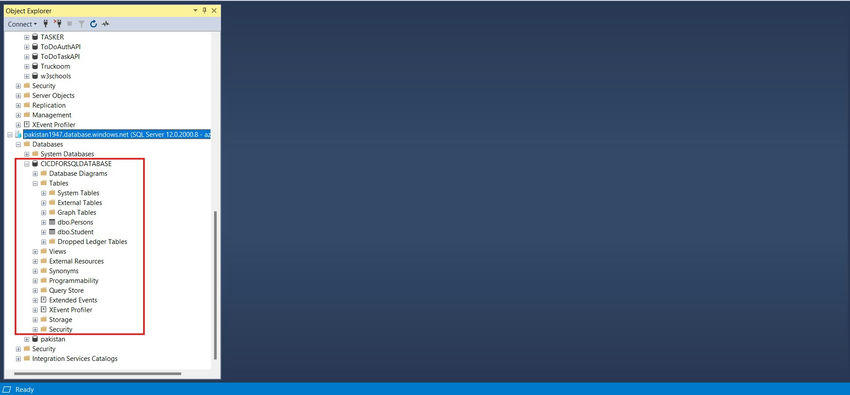
All database modifications from the supply database to the vacation spot database have been deployed to the Azure cloud database utilizing the CICD Piple line.
Step 6. Monitoring and Alerts
Setting Up Monitoring for CI/CD Pipelines
- Allow Azure DevOps Notifications: Arrange notifications for construct and launch failures.
- Monitor Pipeline Logs: Recurrently evaluate pipeline logs for errors.
- Combine with Azure Monitor: Observe the efficiency and well being of your deployed database.
Submit-Deployment Verification
- Add Submit-Deployment Scripts: Embrace scripts in your pipeline to confirm database integrity after deployment.
- Automated Testing: Incorporate T-SQL unit assessments to validate the deployment.
Conclusion
By following this information, you may set up a strong CI/CD pipeline to your SQL Server database utilizing Visual Studio and Azure DevOps’ Traditional Editor. This setup ensures that database modifications are routinely constructed, examined, and deployed, serving to you preserve consistency throughout environments and rushing up your growth and deployment cycles.
Know extra about our firm at Skrots. Know extra about our companies at Skrots Companies, Additionally checkout all different blogs at Weblog at Skrots


