Within the outdated days, we used to entry the Azure Key Vaults utilizing the Vault URL and its Secret Key, we have been inserting this within the config file and going from there.
Putting delicate info within the config file is a foul thought, it might trigger a safety breach and lack of information.
This text will clarify how we will entry the Azure Key Vault info utilizing Self-signed certification, which entails the under steps.
- Create self-signed certificates
- Create a non-public key for the certificates
- Create Azure AD App
- Assign certificates to Azure AD APP
- Present permission to Azure AD app in Key Vault
- Register/publish the certificates on a neighborhood machine (Within the present state of affairs we’re storing the certificates in a neighborhood machine, we will register the certificates in Azure app service additionally)
Coming to precise implementation.
Step 1. Creating Self-Signed certificates
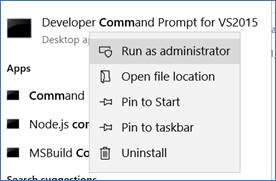
Open Visual Studio command immediate as administrator.
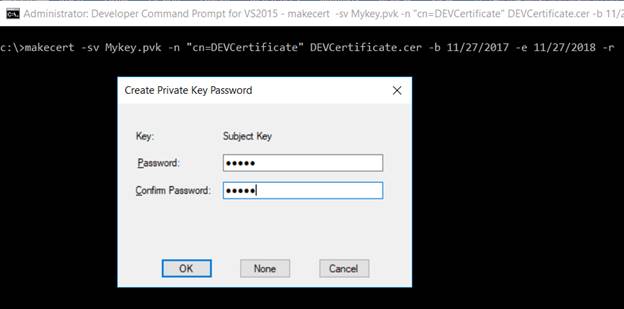
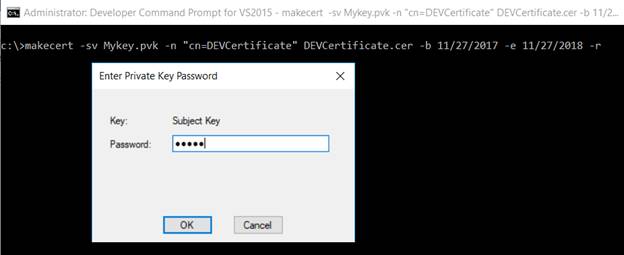
Execute the under command to create the certificates. It can immediate for the non-public key password; present the identical password in all of the locations.
makecert -sv Mykey.pvk -n "cn=DEVCertificate" DEVCertificate.cer -b <<StartDate>> -e <<Finish Date>> -r
Step 2. Create a non-public key for the certificates
Use the under command to create a non-public certificates. Right here, we have to cross the certificates title and desired pfx file title and personal key.
pvk2pfx -pvk Mykey.pvk -spc DEVCertificate.cer -pfx DEVCertificate.pfx -po <<Password>>
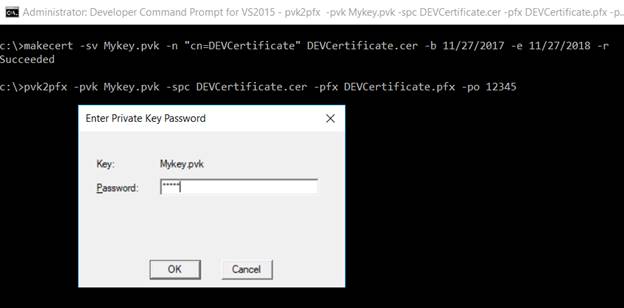
It created each, private and non-private, certificates.

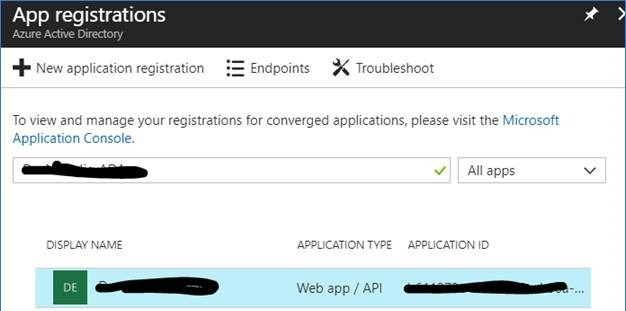
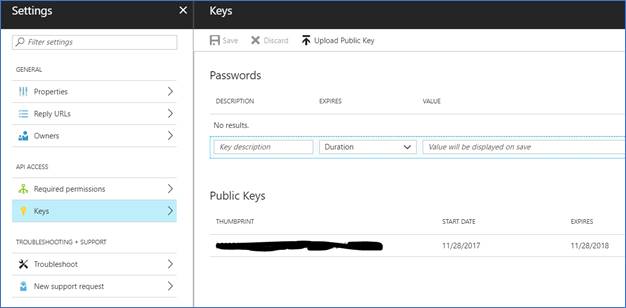
Step 3 & 4. Create an Azure AD App and Assign a certificates
The under PowerShell script will import the certificates, create an Azure AD App, and assign the certificates to that app.
$certificates = New-Object System.Safety.Cryptography.X509Certificates.X509Certificate2
$certificateFilePath = "C:DEVCertificate.cer"
$certificates.Import($certificateFilePath)
$rawCertificateData = $certificates.GetRawCertData()
$credential = [System.Convert]::ToBase64String($rawCertificateData)
$adApplication = New-AzureRmADApplication -DisplayName "DevClientApp" -HomePage "http://www.DevClient.com" -IdentifierUris "http://www.DevClient.com" -CertValue $credential -StartDate $certificates.GetEffectiveDateString() -EndDate $certificates.GetExpirationDateString()
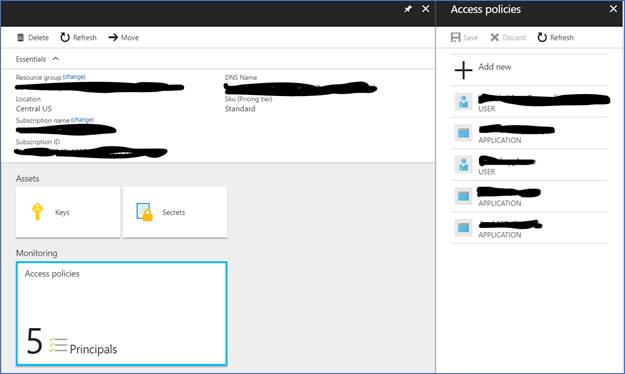
Step 4. Present permission to the Azure AD app
The under script will give permission to the Azure AD App in Azure Key Vault.
$servicePrincipal = New-AzureRmADServicePrincipal -ApplicationId $adApplication.ApplicationId
Set-AzureRmKeyVaultAccessPolicy -VaultName 'RKDevKeyVault' -ServicePrincipalName $servicePrincipal.ServicePrincipalNames[0] -PermissionsToSecrets all -PermissionsToKeys all
You will get the thumbprint of the certificates through the use of the Certificates Thumbprint operate.
$certificates.Thumbprint
Now, we’ve achieved all the mandatory configuration for registering the certification with Azure, and created an utility to entry the important thing vaults.
Step 5. Register certificates in Native Machine
Open the non-public certification (.psk file) and comply with the under steps to register the certificates on a neighborhood machine.
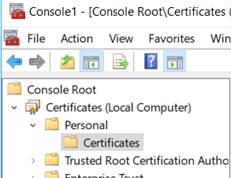
Choose default choices present a non-public key and end the wizard, it will register the certificates on a neighborhood machine. We will discover the registered certificates in MMC (Microsoft Administration Console).
Seek for MMC and open.
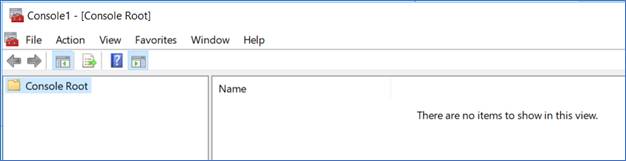
Open the File menu and click on on Add/Take away Snap-in. Choose Laptop Account and Native Laptop so as to add the certificates part.
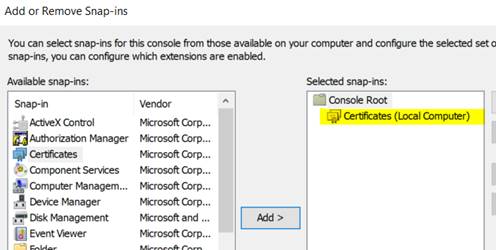
Open the Certificates folder. You’ll be able to see all of the registered certificates right here.

Step 6. Creating an utility to entry the important thing vaults
Right here, I’m making a easy Visual Studio console utility for demo functions.
Create a console utility and add the under helper name to the venture.
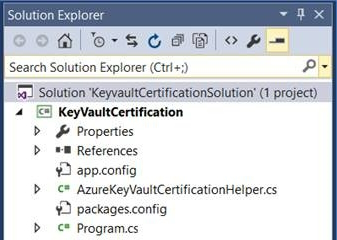
AzureKeyVaultCertificationHelper.cs
utilizing Microsoft.Azure.KeyVault;
utilizing Microsoft.IdentityModel.Purchasers.ActiveDirectory;
utilizing System;
utilizing System.Collections.Generic;
utilizing System.Configuration;
utilizing System.Linq;
utilizing System.Safety.Cryptography.X509Certificates;
utilizing System.Textual content;
utilizing System.Threading.Duties;
namespace KeyVaultCertification
{
    public class AzureKeyVaultCertificationHelper
    {
        public static X509Certificate2 FindCertificateByThumbprint(string thumbprint)
        {
            X509Store retailer = new X509Store(StoreName.My, StoreLocation.LocalMachine);
            strive
            {
                retailer.Open(OpenFlags.ReadOnly);
                X509Certificate2Collection col = retailer.Certificates.Discover(X509FindType.FindByThumbprint, thumbprint, false);
                if (col == null || col.Rely == 0)
                {
                    throw new Exception("ERROR: Certificates not discovered with thumbprint");
                }
                return col[0];
            }
            catch (Exception ex)
            {
                Console.WriteLine(ex.Message);
                return null;
            }
            lastly
            {
                retailer.Shut();
            }
        }
        public static ClientAssertionCertificate AssertionCert { get; set; }
        public static void GetCertification()
        {
            var clientAssertionCertPfx = FindCertificateByThumbprint(ConfigurationManager.AppSettings["ThumbPrint"]);
            AssertionCert = new ClientAssertionCertificate(ConfigurationManager.AppSettings["ClientApplicationId"], clientAssertionCertPfx);
        }
        public static async Process<string> GetAccessToken(string authority, string useful resource, string scope)
        {
            var context = new AuthenticationContext(authority, TokenCache.DefaultShared);
            var outcome = await context.AcquireTokenAsync(useful resource, AssertionCert);
            return outcome.AccessToken;
        }
        public static string GetKeyVaultSecret(string secretNode)
        {
            var secretUri = string.Format("{0}{1}", ConfigurationManager.AppSettings["VaultUrl"] + "/secrets and techniques/", secretNode);
            GetCertification();
            var keyVaultClient = new KeyVaultClient(new KeyVaultClient.AuthenticationCallback(GetAccessToken));
            return keyVaultClient.GetSecretAsync(secretUri).Outcome.Worth;
        }
    }
}
Program. cs
utilizing System;
utilizing System.Collections.Generic;
utilizing System.Linq;
utilizing System.Textual content;
namespace KeyVaultCertification
{
    public class Program
    {
        static void Most important(string[] args)
        {
            string sourceUrl = AzureKeyVaultCertificationHelper.GetKeyVaultSecret("SourceUrl");
            Console.WriteLine(sourceUrl);
        }
    }
}
Present certificates Thumbprint, Azure AD App shopper ID, and Vault URL.
app. config
<?xml model="1.0" encoding="utf-8"?>
<configuration>
  <startup>
    <supportedRuntime model="v4.0" sku=".NETFramework,Model=v4.7.1"/>
  </startup>
  <appSettings>
    <add key="ThumbPrint" worth="4444B4EDC4BFA4444444C44E4FF53B13B444C444"/>
    <add key="ClientApplicationId" worth="abcdef-ghij-413e-klmn-1922ff69xyz"/>
    <add key="VaultUrl" worth="https://RKkeyvault.azure.web"/>
  </appSettings>
</configuration>
Output

Know extra about our firm at Skrots. Know extra about our providers at Skrots Companies, Additionally checkout all different blogs at Weblog at Skrots


