
Introduction
Grafana is an open-source software you should use to visualise and analyze knowledge. It is significantly well-suited for holding monitor of how laptop techniques are performing. When constructing microservices or different forms of functions it’s possible you’ll want to investigate your log knowledge, simply visualize it, or arrange particular alerts to be notified about some occasions occurring in your system.
Here is why it’s possible you’ll want Grafana
- Collects knowledge: It may possibly pull knowledge from quite a lot of sources, together with databases, cloud providers, and monitoring instruments. You’ll be able to take into consideration Grafana as a container of a number of knowledge sources.
- Creates visualizations: It turns that knowledge into graphs and charts, making it simpler to identify tendencies and patterns.
- Permits for evaluation: You should use Grafana to zoom in on particular knowledge factors and examine totally different metrics side-by-side.
- Units up alerts: If one thing goes incorrect, Grafana can ship you notifications so you may take motion.
Grafana helps you perceive what’s occurring together with your techniques and knowledge by turning uncooked numbers into clear and informative visuals.
The right way to set up Grafana utilizing Azure?
First issues first, we’ve got a number of choices to put in Grafana. You’ll be able to set up it on to your laptop for various OSs, or you are able to do it through Docker, and even higher, you should use some cloud instruments Like Aws, Azure, DigitalOcean, and so forth. to correctly set up Grafana to your cloud digital machine.
On this tutorial, we’re going to put in Grafana through Azure. First, go to portal.azure.com. Azure gives a free trial account to experiment and really feel the sweetness and energy of Azure providers. First, we have to create a digital machine the place we plan to put in Grafana.
Here’s what you could do to run your Digital Machine on Azure
- Go to portal.azure.com
- Create your free account, in the event you haven’t but
- From the house section, choose “Digital Machines” underneath Azure Providers
- Click on on the “Create” button within the center and choose “Azure Digital Machine”
- You’ll be redirected to the Create a Digital Machine – Microsoft Azure web page the place you could fill within the inputs to create your digital machine.
- To make use of your free account, choose “free trial” for Subscription, and the “useful resource group” create a brand new one you haven’t specified any useful resource group but
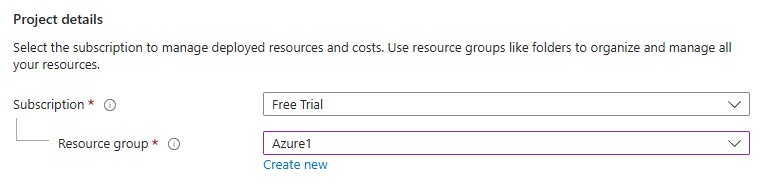
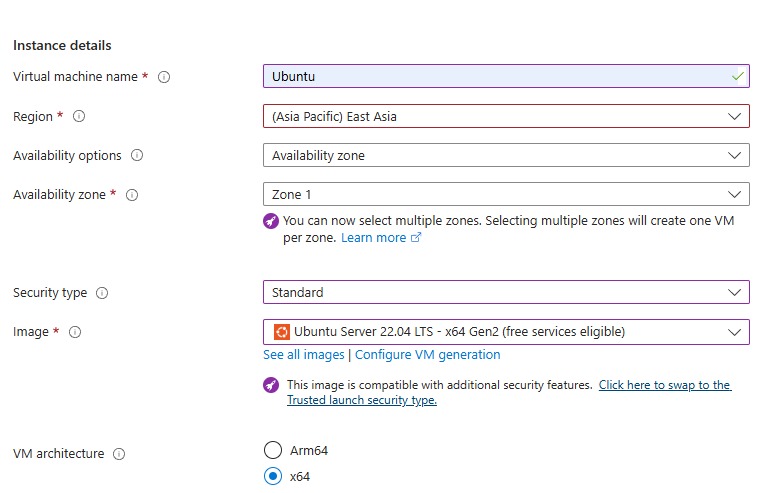
Right here is my occasion data:
You additionally want to supply dimension and administrator account data:
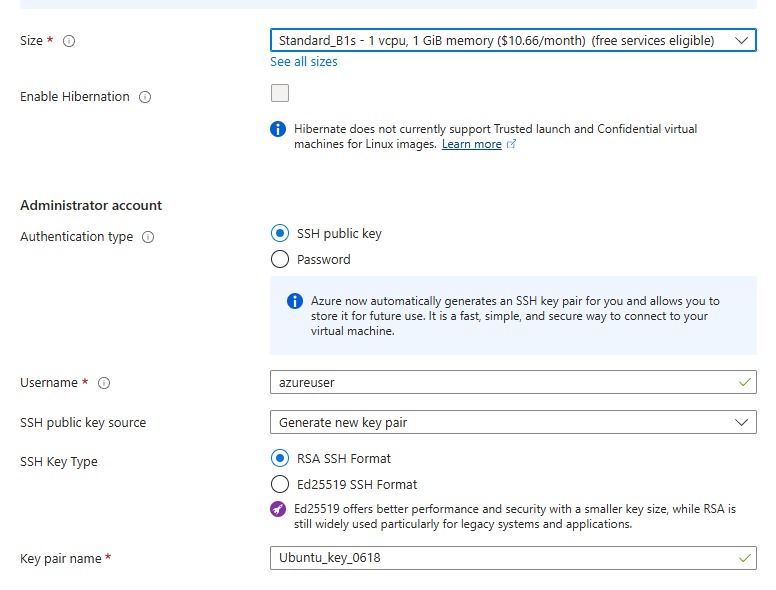
Choose SSH for authentication kind and supply a “username” with the right key pair identify. You’ll be able to click on the “Subsequent:disks” button however for now “Overview+Create” shall be sufficient for us. After validation passes efficiently simply hit the “Create” button.
A modal window will pop up with a suggestion to Obtain your personal key and create a useful resource
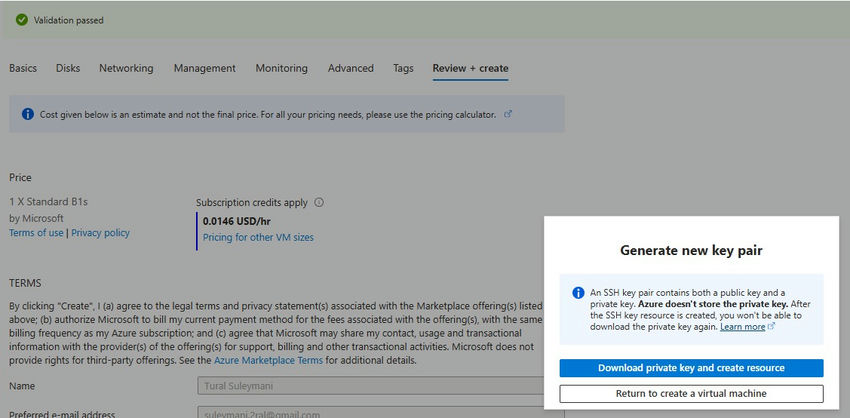
Then you could wait a number of seconds for Azure to organize your assets.
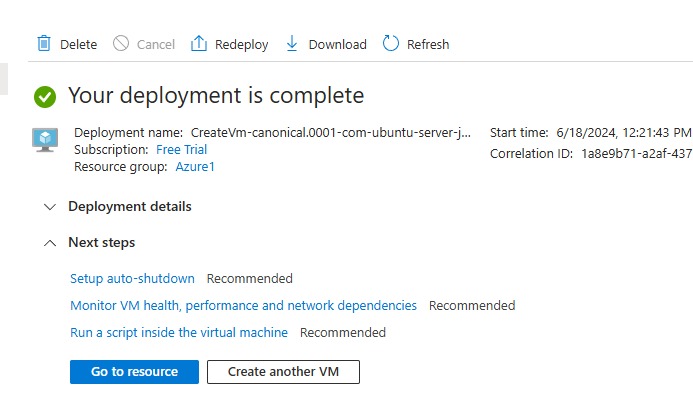
Now we’ve got a useful resource and likewise a personal key in .pem format.
I exploit Putty to connect with our Azure useful resource utilizing SSH. When you haven’t downloaded Putty but, simply go to Obtain Putty (0.81) for Home windows, Linux and Mac – Set up SSH in PuTTY (puttygen.com) and obtain it. We’d like the PuttyGen utility additionally to transform our .pem key to the Putty comprehensible key.
Changing your key to the Putty key
To Hook up with our Azure useful resource, we use Putty, however it requires a particular key format, which is totally different than the .pem format. Open the PuttyGen application->Conversions-> Import key->discover the important thing you may have simply downloaded, open it, choose the “save personal key” button, and save your key.
Connecting to Azure Useful resource
To hook up with our Azure Useful resource(Ubuntu Digital Machine) do the next:
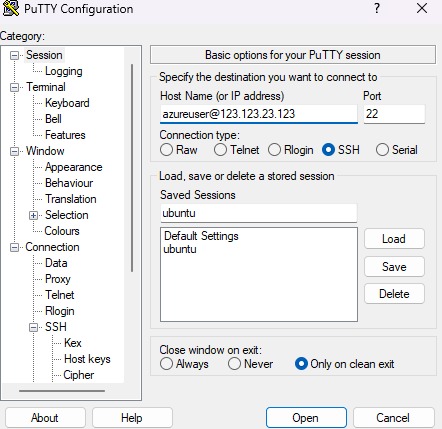
- Open Putty
- Within the Host identify part kind “your_azure_username”@your_public_ip_address. You’ll find your public IP tackle from the digital machine part. For instance, [email protected] and the port ought to stay 22
- Go to the SSH tab on the left of Putty choose “Auth” and cargo your personal key
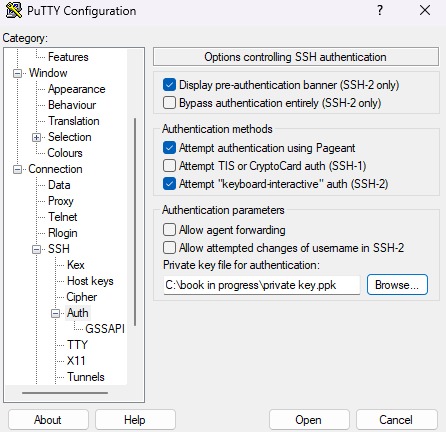
- Return to “Session”, put it aside, and click on open
Earlier than connecting, it might be higher to verify if a connection out of your native machine is feasible or not. Right here is how one can verify it
- Go to the Ubuntu digital machine
- Within the above, you may have “Join” ->” Join”
- Choose “native SSH” and look forward to validation
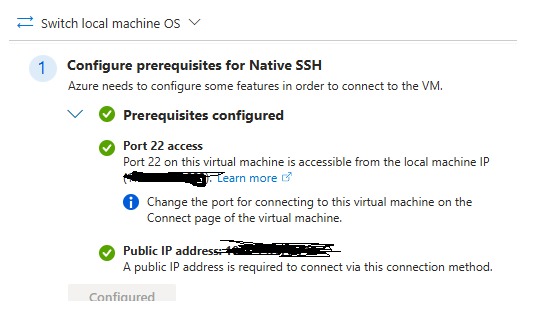
When clicking “Open” it ought to efficiently connect with the Digital machine. In case of any connection issuer, you may reset the SSH key or password.
After efficiently connecting, you may run the next instructions within the given order to put in Grafana in your digital machine
sudo apt-get set up -y adduser libfontconfig1 musl
wget https://dl.grafana.com/enterprise/launch/grafana-enterprise_11.0.0_amd64.deb
sudo dpkg -i grafana-enterprise_11.0.0_amd64.deb
After profitable set up, we have to configure the firewall to permit us to connect with submit quantity 3000. Right here is how you are able to do it:
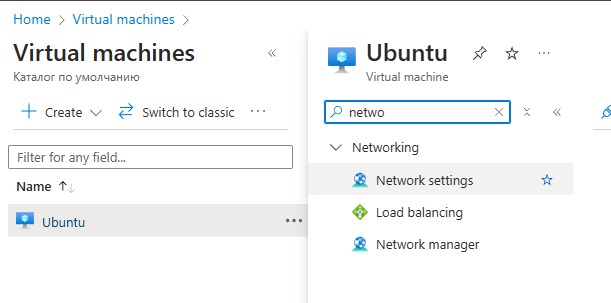
- Go to digital machines
- Choose your ubuntu
- Discover networking settings
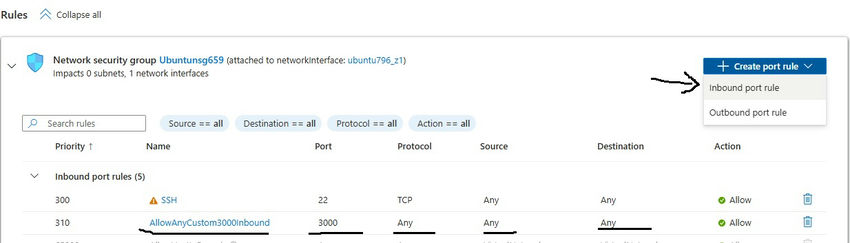
From the inbound port rule, create a rule to permit port 3000. You’ll find it under
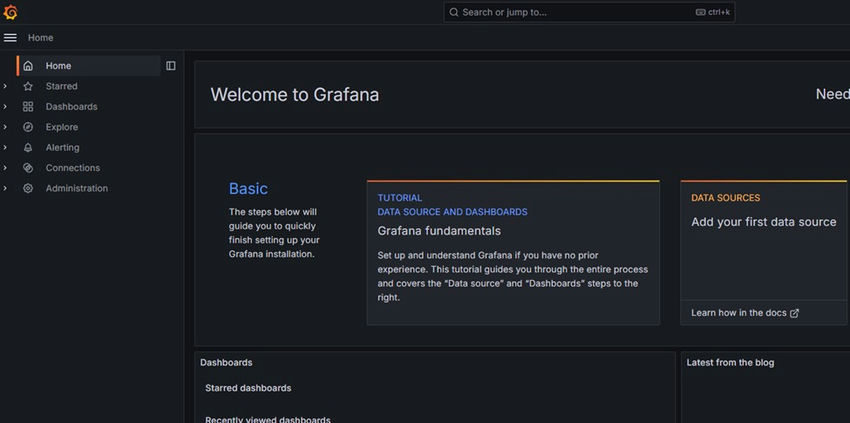
Now open your browser, navigate to your_public_ip_address:3000, and hit enter. You need to see Grafana’s login web page and by typing “admin” for each login and password you may log in. For the second web page, you may “Skip” or reset your password.
Conclusion
There are a number of methods of putting in Grafana. This text merely demonstrates find out how to set up Grafana in Azure Cloud for Ubuntu OS.
Know extra about our firm at Skrots. Know extra about our providers at Skrots Providers, Additionally checkout all different blogs at Weblog at Skrots


