Introduction
On this article, I’ll focus on the best way to create, run, cease, refresh, log, and delete net jobs in Azure.
Azure net job is sort of a service that may run the duty within the background. It doesn’t include any consumer interface and it’s the identical as our Home windows service.
The situations the place we use Azure net jobs are.
- Picture processing or different CPU-intensive background work.
- Queue processing.
- File upkeep, reminiscent of aggregating or cleansing up log information.
- Lengthy-running duties reminiscent of sending emails.
Stipulations
Microsoft Azure account.
Agenda
- Create an internet job.
- Run net job.
- Cease the net job.
- Refresh net job.
- Logs of net job.
- Delete net job.
Create Internet Job
Beneath, I’ll clarify the best way to create an internet job within the Azure portal.
- Login to your Azure account with the correct credentials.
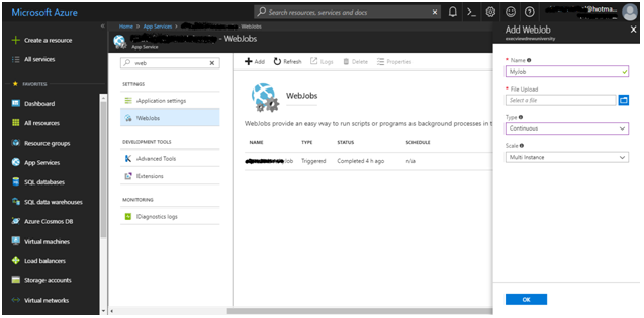
- Go to app companies and click on on a selected app service that you just wish to choose.
- Go to net jobs.
- Click on on add and a brand new popup will come from the right-hand facet.
- Within the popup, add a reputation, add zip file (zip file of our console utility), choose kind as steady and choose scale as multi-instance/ single occasion, and click on on okay which is proven within the beneath determine.
It’s going to take a while to create an internet job and after that, the net job will present underneath the net jobs part.
To know extra about the kind of net jobs observe this hyperlink, Sorts Of Internet Job
Run Internet Job
Beneath, I’ll clarify the best way to run an internet job within the Azure portal.
- Login to your Azure account with the correct credentials.
- Go to app companies and click on on a selected app service that you just wish to choose.
- Go to net jobs.
- Choose a selected net job and click on on the run which is proven within the beneath determine.
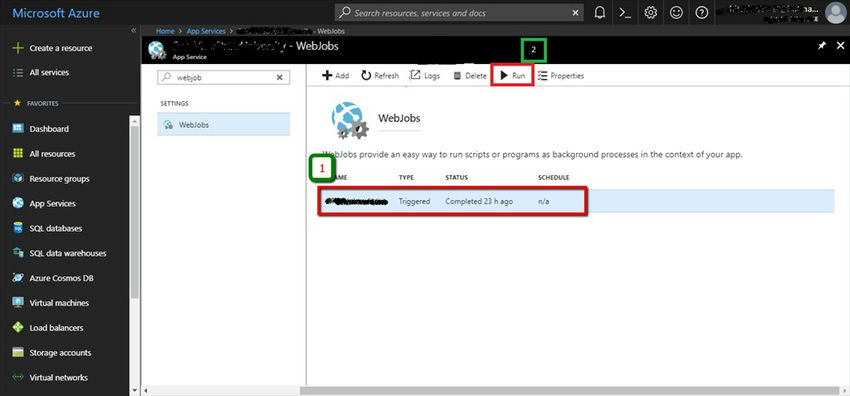
- After clicking on the run button, the present standing of the net job will change to working which will likely be proven within the standing column.
Cease Internet Job
Beneath, I’ll clarify the best way to cease an internet job within the Azure portal.
- Login to your Azure account with the correct credentials.
- Go to app companies and click on on a selected app service that you just wish to choose.
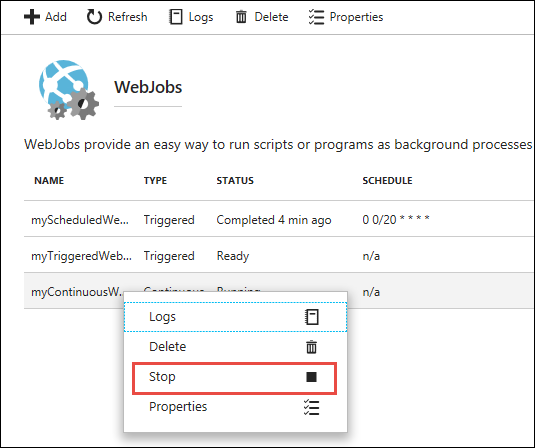
- Go to net jobs.
- Click on on the internet job which is in working standing and right-click on it.
- Choose a cease and which can cease the net job which is proven within the beneath determine.
Refresh Internet Job
Beneath, I’ll clarify the best way to refresh an internet job within the Azure portal.
- Login to your Azure account with the correct credentials.
- Go to app companies and click on on a selected app service that you just wish to choose.
- Go to net jobs.
- Choose net job and click on on refresh which is proven within the beneath determine.
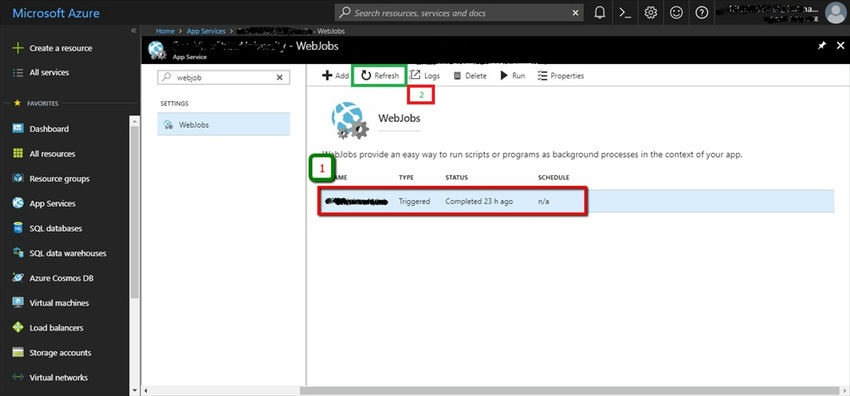
- After clicking on the refresh button, it can replace the newest standing of an internet job.
Logs of Internet Job
Beneath, I’ll clarify the best way to verify the logs of an internet job within the Azure portal.
- Login into your Azure account with correct credentials.
- Go to app companies and click on on a selected app service that you just wish to choose.
- Go to net jobs.
- Choose the net job and click on on Logs which is proven within the beneath determine.
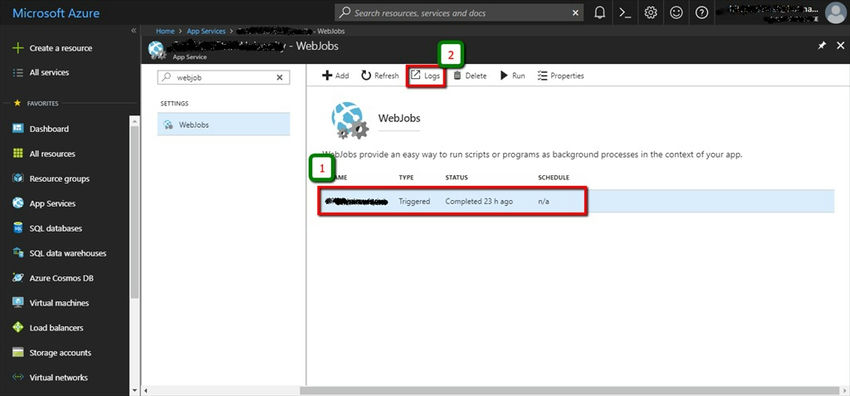
- After clicking on logs, it can open a brand new window and there it can present all of the logs of that individual net job and which is proven within the beneath determine.

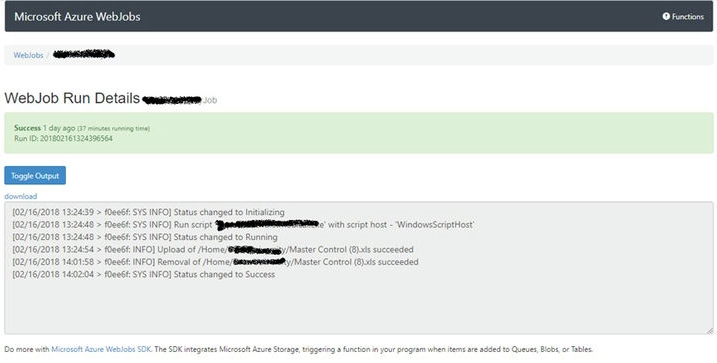
- Click on on the actual hyperlink within the title sections which can present a listing of latest jobs.
- Once more click on on a selected job then it can present particulars that are proven within the beneath determine.
Delete Internet Job
Beneath, I’ll clarify the best way to delete an internet job within the Azure portal.
- Login into your Azure account with correct credentials.
- Go to app companies and click on on a selected app service that you just wish to choose.
- Go to net jobs.
- Choose an internet job and click on on the delete button.
- Within the affirmation window if we press ‘sure’ then it can delete the net job in any other case not which is proven within the beneath determine.

Know extra about our firm at Skrots. Know extra about our companies at Skrots Providers, Additionally checkout all different blogs at Weblog at Skrots


