Overview
This article is part of a series of four articles that guide you through deploying an ASP.NET website on Azure App Services using Azure Repos and Azure Pipelines.
Azure DevOps For Website Development – Part One
This is the second article in the series, focusing on creating your local Git repository and pushing it to Azure Repos.
Managing Code with Azure Repo
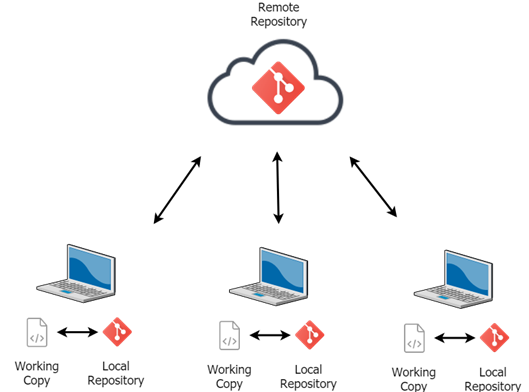
Git is a popular version control system that helps in tracking file changes, coordinating code modifications within a team, and facilitating easy code version control. Azure Repos integrates Git, offering free, unlimited private Git repositories where you can work with tools like Git for Windows, and various IDEs.
When you navigate to Repos in Azure DevOps, you can access the code section, which initially displays an empty Git repository with guidelines on how to start with Azure Repos. The portal also offers keyboard shortcuts for efficient navigation, like quickly reaching the Code section by pressing G C.
Here are the options to bring your code to Azure Repos:
- Clone the repository to your local machine using Git CLI or IDEs with Azure DevOps Plugin integration.
- Push an existing repository using Git commands.
- Import a repository from a URL.
- Initialize the repository with README & .gitignore.
This article utilizes an ASP.NET project from Visual Studio, demonstrating the process of pushing code from a local machine (Option 2) using Git for Windows.
Step 1. In the solution folder, run git init to initialize the Git repository.
Step 2. Add all files using git add.
Step 3. Commit changes with git commit -m "<message>".
After these steps, you are ready to push the repository using the provided commands in Azure DevOps.
The git remote add origin <link to remote server> command adds a remote repository to the local one, while git push -u origin --all pushes the code to the remote repository, linking branches and instructing to push all branches.
Once you run the push command, authentication is required to verify permission to alter the remote repository on Azure Repos.
Upon successful authentication, your code will be pushed and visible online.
Conclusion
In this second installment of the Azure DevOps for Website Development Series, we covered initializing a local Git repository and pushing code to Azure Repos for effective code management and collaboration. Stay tuned for the upcoming article in the series, focusing on automating builds using Azure Pipelines.
See Also
Learn more about Skrots, our services at Skrots Services. Explore more blogs at Skrots Blog.


