Securing Net App Utilizing Personal Endpoint And Connecting By means of Level To Web site VPN with Gateway Transit
Introduction
Azure Webapps – Microsoft constructed and operates Azure Net Apps, a cloud computing-based platform for internet hosting web sites. It is a platform as a service that permits you to create Net apps that function on quite a lot of frameworks and are written in quite a lot of programming languages, together with Microsoft’s personal and third-party ones.
Hub digital community: The hub digital community is the hub of your on-premises community’s connectivity. It is a location the place providers might be hosted that may be consumed by the varied workloads operating on the spoke digital networks.
Spoke digital networks: Spoke digital networks isolate workloads in their very own digital networks which are managed independently of different spokes. Every workload may have many layers, every linked through Azure load balancers to quite a few subnets.
Digital community peering: A peering hyperlink is used to attach two digital networks. Peering connections between digital networks are non-transitive and have a low latency. The digital networks trade visitors through the Azure spine with out the requirement for a router as soon as they have been peering..
P2S VPN – A VPN gateway connection that’s point-to-site (P2S) lets you set up a safe connection to your digital community from a single shopper machine.
Personal Endpoint – You need to use Personal Endpoint to permit shoppers in your non-public community to securely entry your Azure Net App utilizing Personal Hyperlink. An IP deal with out of your Azure VNet deal with area is utilized by the Personal Endpoint. Visitors between a shopper in your non-public community and the Net App is routed by way of the VNet and a Personal Hyperlink on the Microsoft spine community, avoiding public Web publicity.
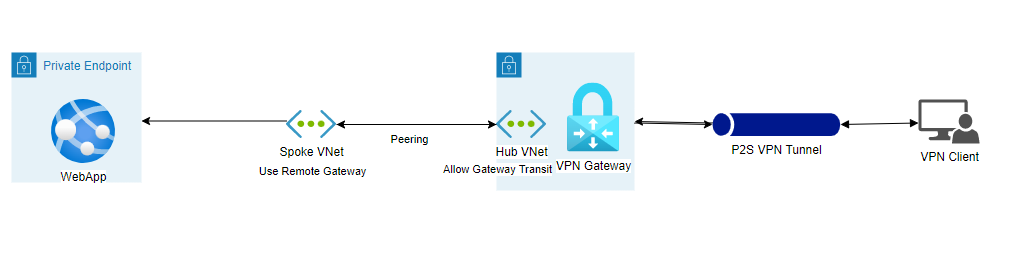
We’re using an Azure Net App, two Vnets as Hub and Spoke, and peering each VNets, in addition to a VPN Gateway for Level to Web site VPN and a Personal Endpoint on this case.
The state of affairs’s architectural diagram is proven Under,
I’ve already created a Useful resource Group referred to as Article, and I will be constructing the remainder of the assets one after the other.
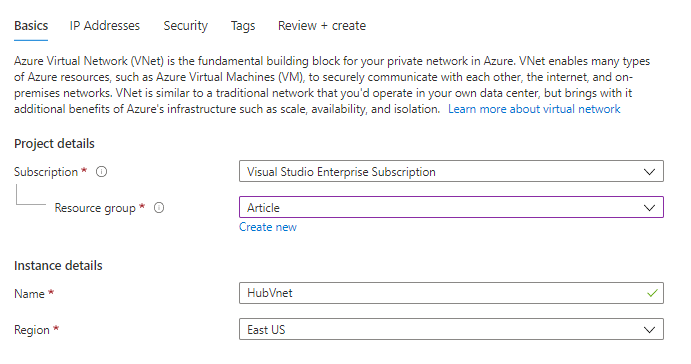
Step 1 – Creating Hub VNet
Search Digital Networks

Create digital community
Subsequent IP Tackle
So I am giving the IP Tackle House as 172.160.0.0/24
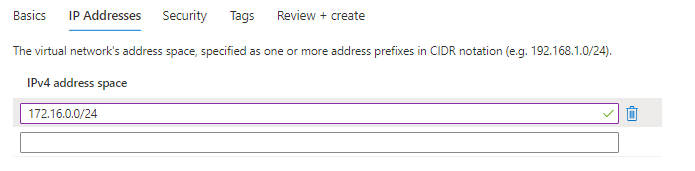
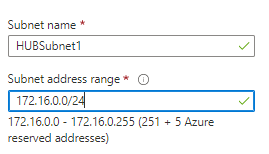
Add Subnet
Then Evaluation + Create.
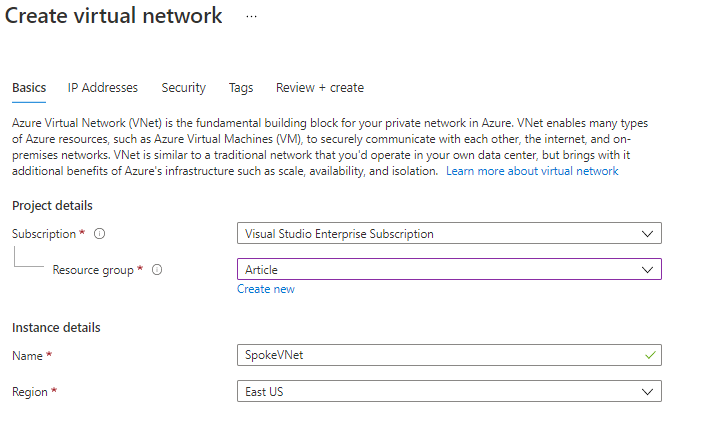
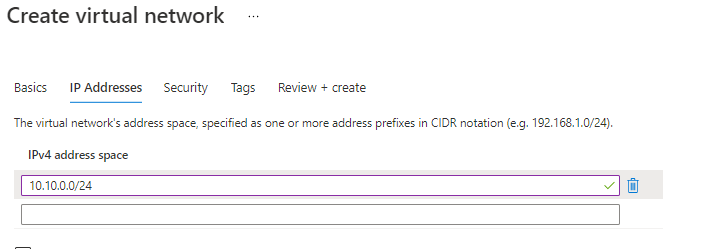
Step 2 – Creating Spoke VNet
Subsequent IP Tackle
I’m giving the IP Tackle House as 10.10.0.0/24
Add Subnet

Subsequent Evaluation + Create
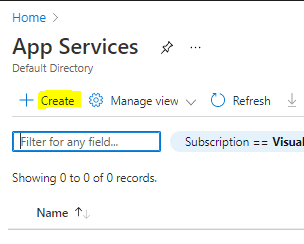
Step 3 – Creating the Azure WebApp
Search App Providers

Create
Choose Useful resource Group
Net App Title – myawebapp02
Publish – Code
Runtime Stack – ASP.NET V3.5
Working System – Home windows
Choose Area
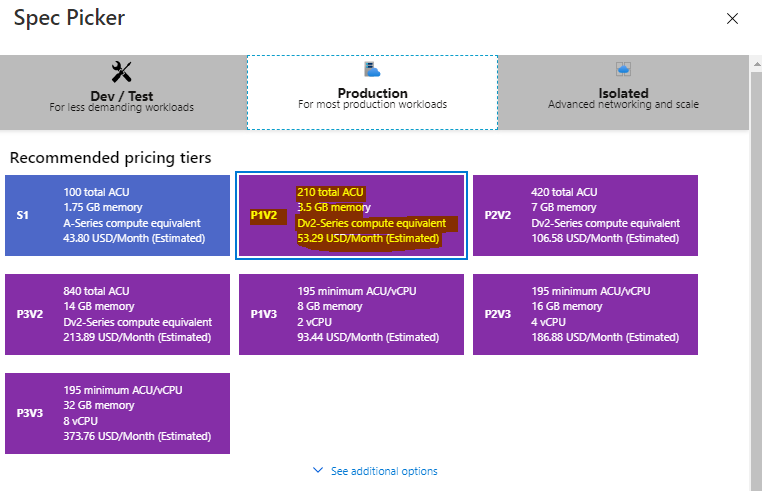
SKU & Dimension – Choose P1V2
Subsequent Evaluation + Create
Step 4 – Add Gateway Subnet
Search Digital Networks
Choose HubVNet
Navigate to Tackle House and Add Extra Tackle area for the gateway subnet
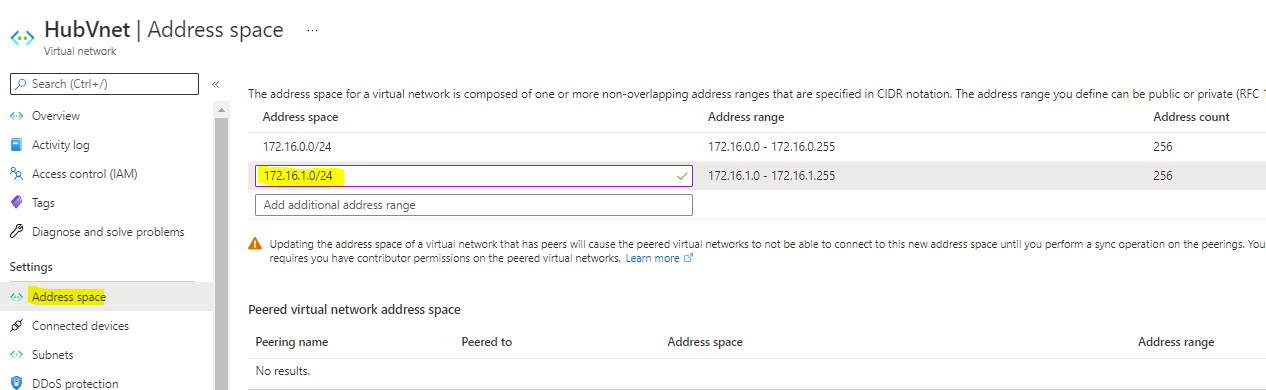
Save
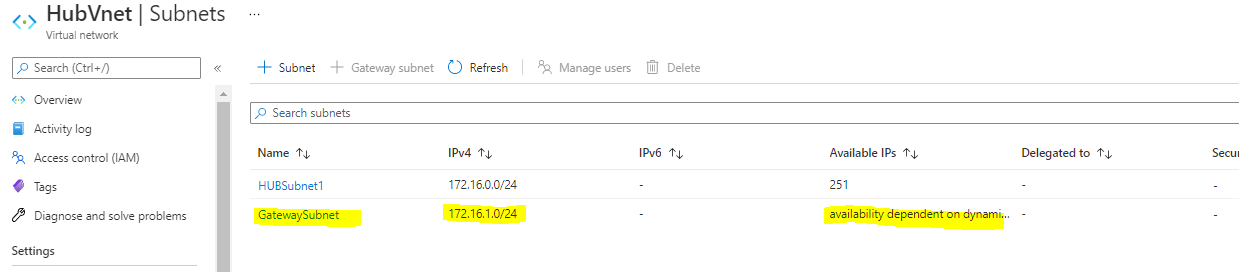
Navigate to subnet

Choose Gateway Subnet
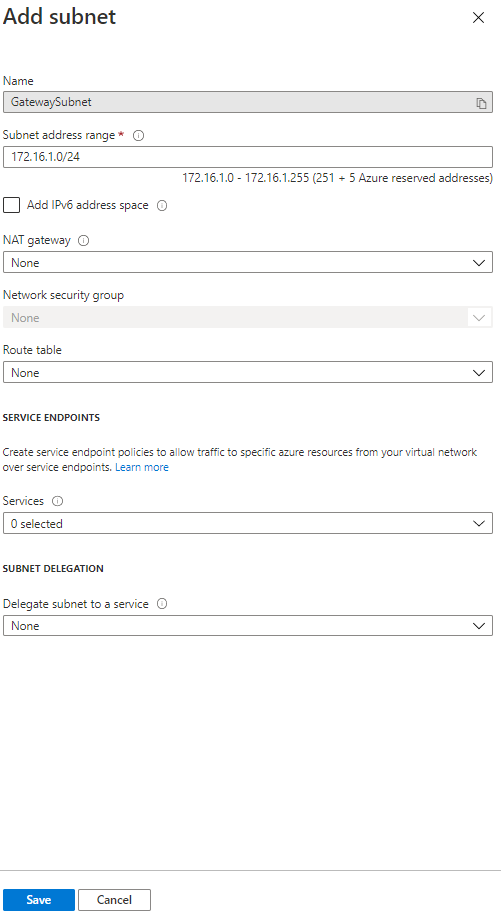
Click on Save
Now You possibly can see the gateway subnet
Step 5 – Digital Community Gateway
Search digital community gateway

Create Digital Community Gateway
Choose the beneath highlighted standards’s,
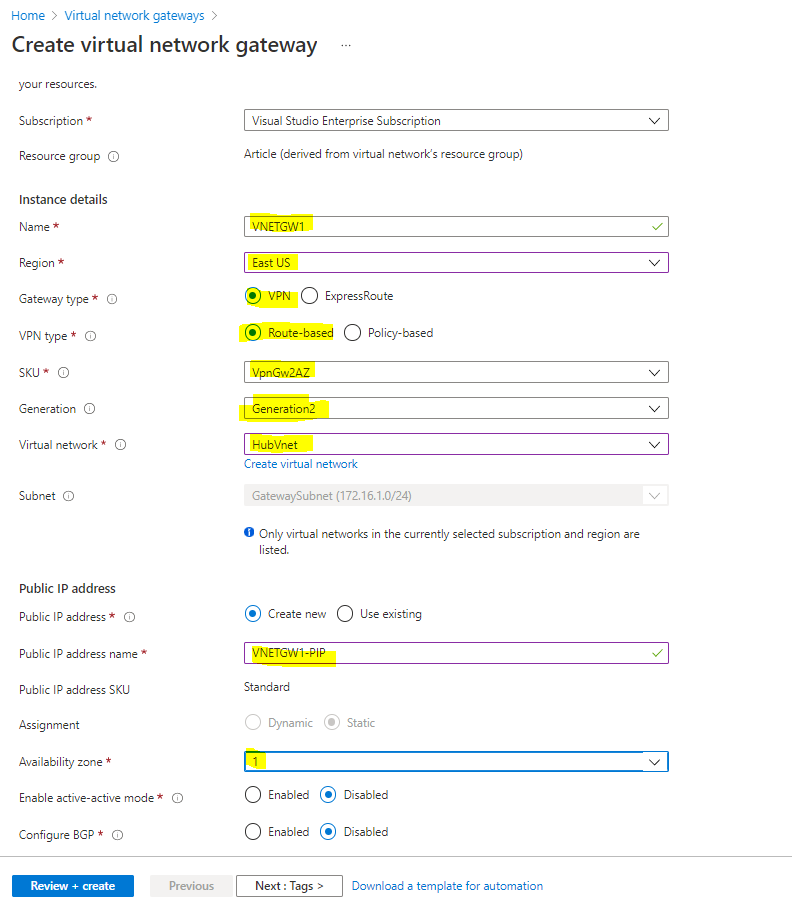
Evaluation + Create
This may take 20-40min to create the Digital Community Gateway
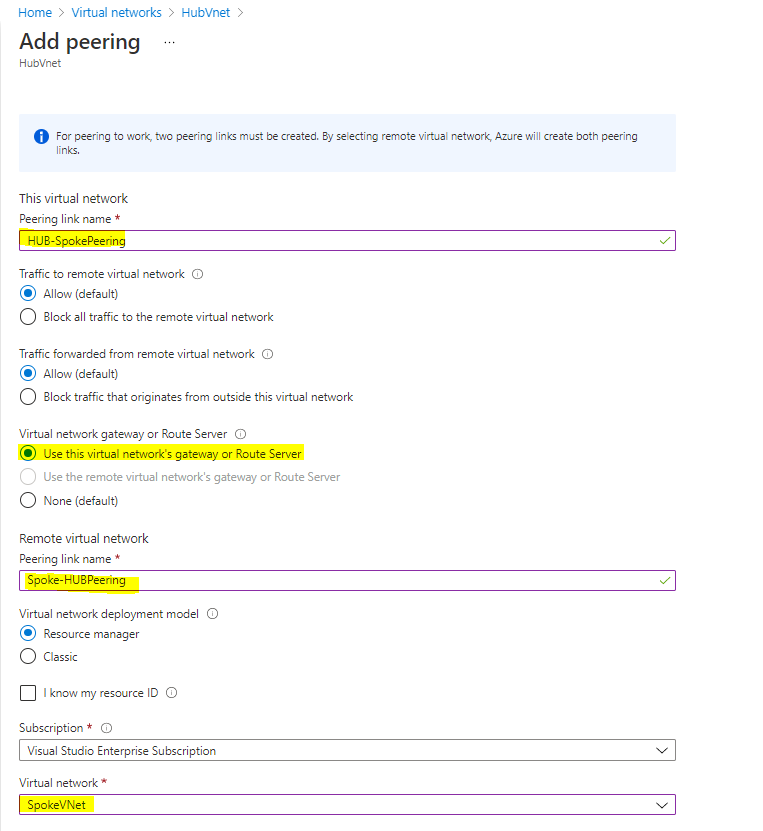
Step 6 – Peering Hub Vnet and Spoke Vnet
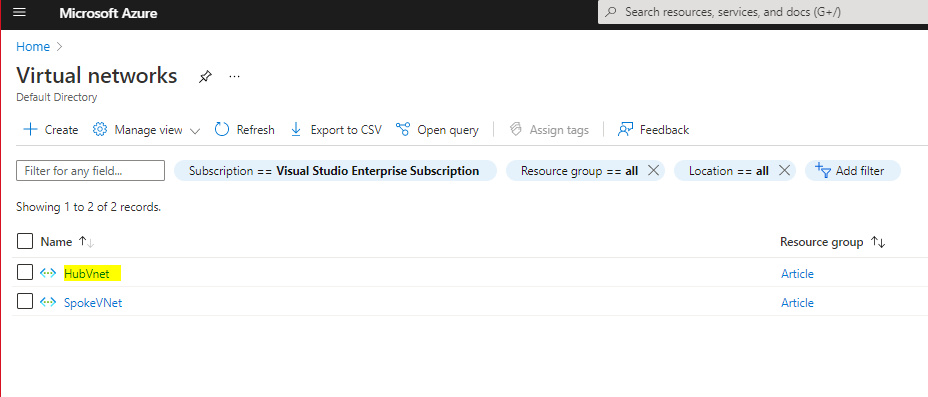
Navigate to Digital Networks and Choose Hub Vnet
In HubVNet navigate to Peering’s
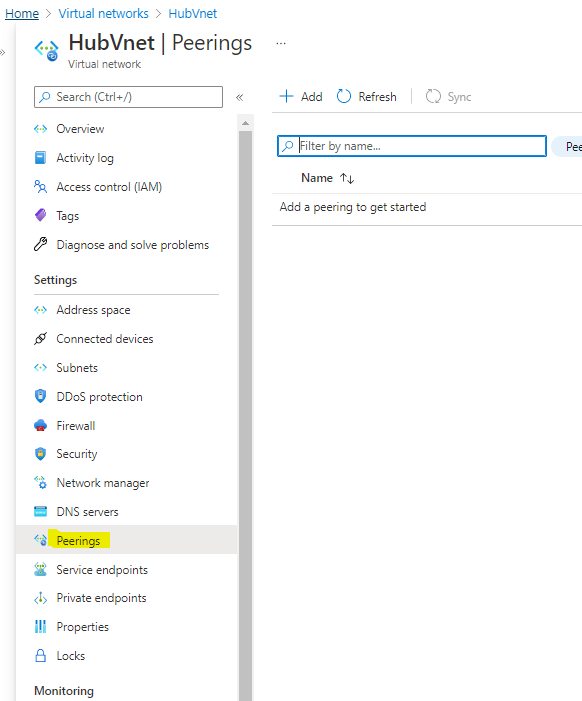
Add
Choose the values as Highlighted,
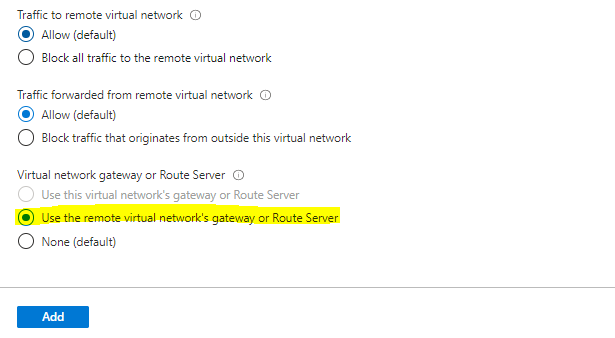
Click on Add then it is going to add the Digital Community Peering.
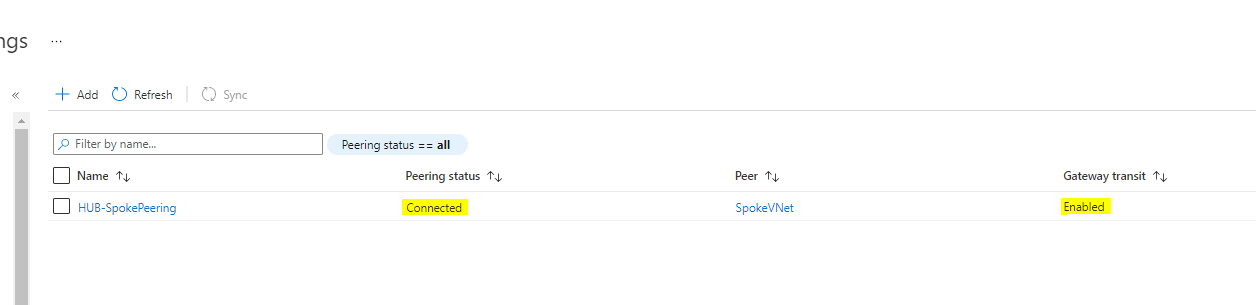
Now you possibly can see the peering standing as Linked and Gateway Transit Enabled.
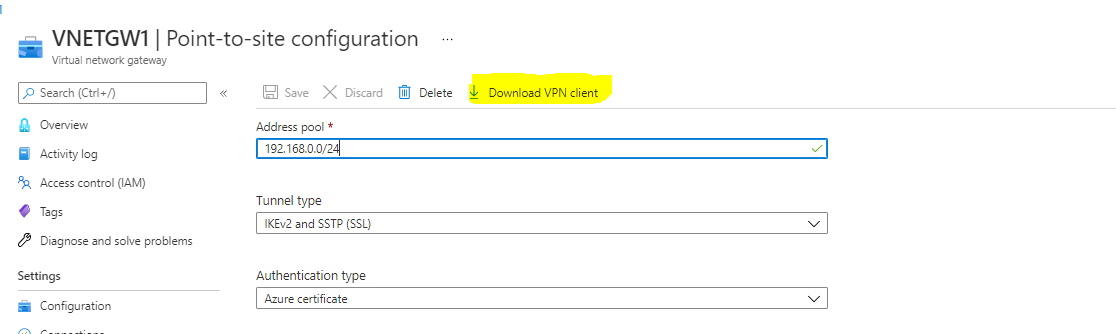
Step 7 – Level to Web site VPN
Search Digital Community Gateway

Choose the Create Digital Community Gateway
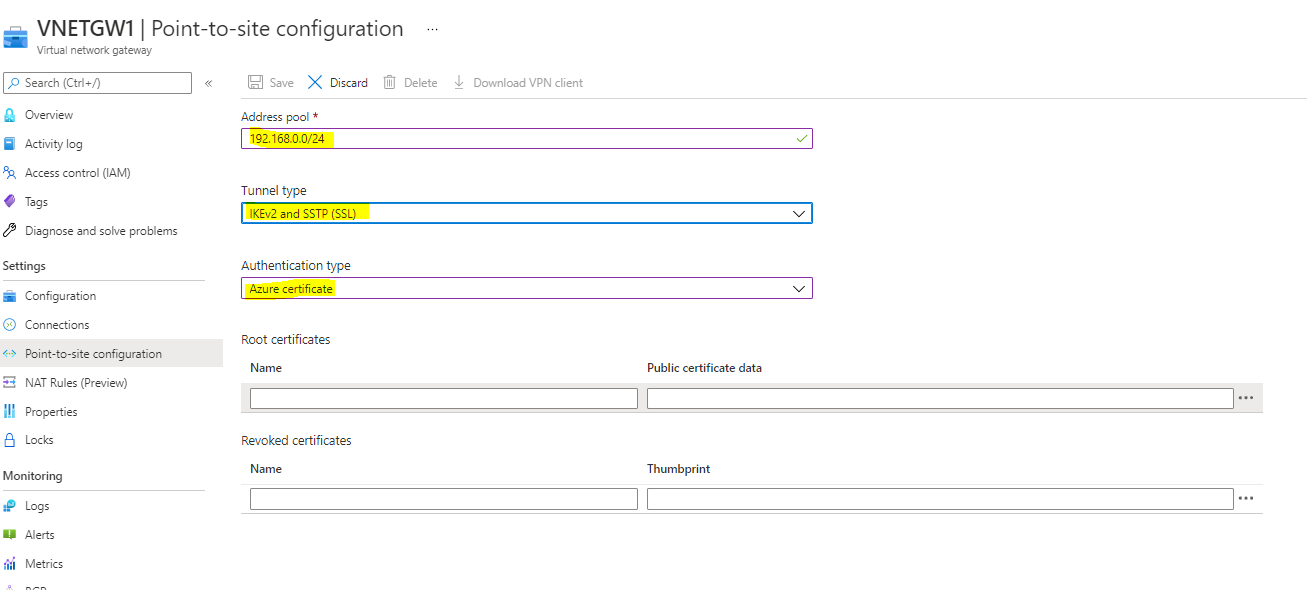
Navigate to Level to web site Configuration and Configure now

Choose the Tackle Pool – 192.168.0.0/24 (This deal with pool will use for VPN Shopper and VPN shoppers dynamically obtain an IP deal with from the vary that you simply specify)
Choose Tunnel Kind as Each SSTP & IKEv2
Authentication Kind – Azure Certificates
Now depart this and create self-signed root and shopper certificates and get again to right here.
Create Self-sign root & shopper certificates
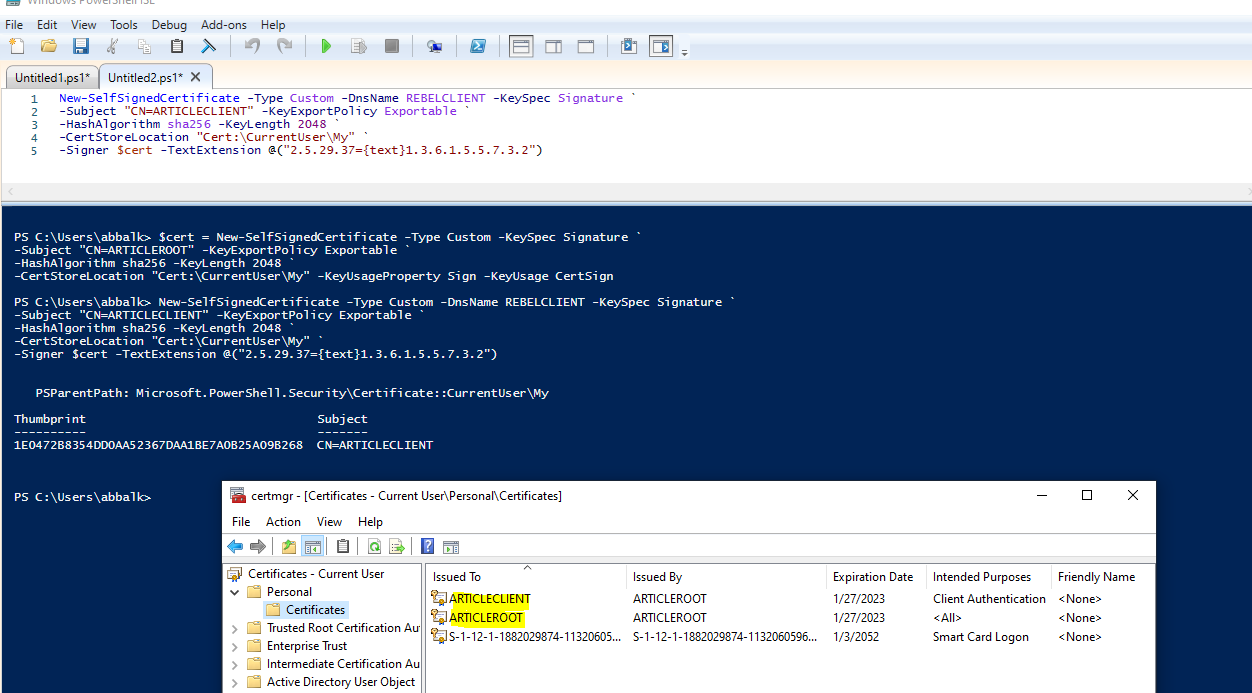
As first step I’m going to create root certificates. In Home windows 10 machine I can run this to create root cert first.
Open Powershell ISE as run as Admin and run the beneath powershell command.
$cert = New-SelfSignedCertificate -Kind Customized -KeySpec Signature `
-Topic “CN=ARTICLEROOT” -KeyExportPolicy Exportable `
-HashAlgorithm sha256 -KeyLength 2048 `
-CertStoreLocation “Cert:CurrentUserMy” -KeyUsageProperty Signal -KeyUsage CertSign
This may create root cert and set up it underneath present consumer cert retailer.

Then we have to create shopper certificates. We are able to do that utilizing
New-SelfSignedCertificate -Kind Customized -DnsName REBELCLIENT -KeySpec Signature `
-Topic “CN=ARTICLECLIENT” -KeyExportPolicy Exportable `
-HashAlgorithm sha256 -KeyLength 2048 `
-CertStoreLocation “Cert:CurrentUserMy” `
-Signer $cert -TextExtension @(“2.5.29.37={textual content}1.3.6.1.5.5.7.3.2”)
This may create cert referred to as REBELCLIENT and set up in similar retailer location.
Now we now have certs in place. However we have to export these so we are able to add it to Azure.
To export root certificates,
Proper click on on root cert inside certificates mmc.
Click on on All Duties- Export
In non-public key web page, choose to not export non-public key,
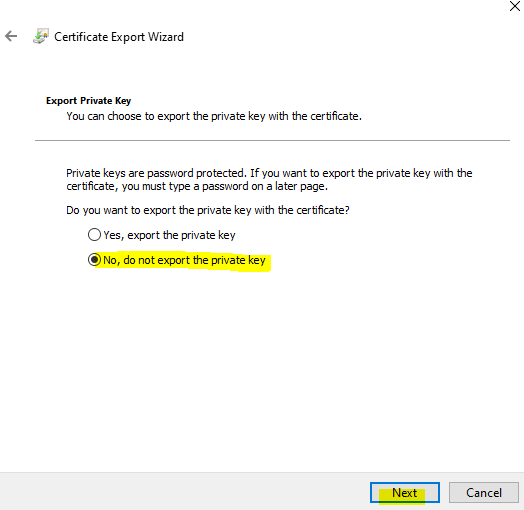
Choose Base-64 encoded X.509 as export file format.
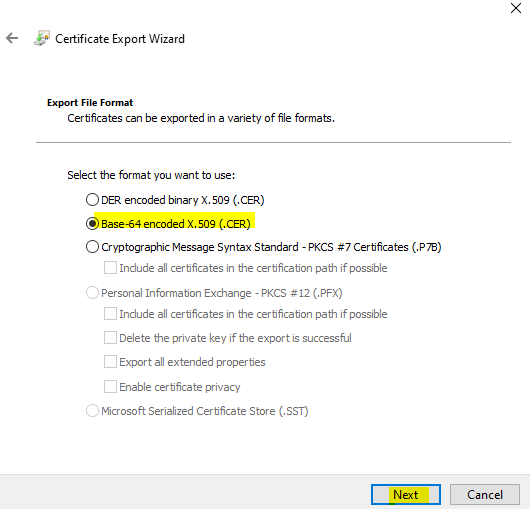
Full the wizard and save the cert on laptop.
To export shopper certificates,
Proper click on on root cert inside certificates mmc.
Click on on All Duties- Export
In non-public key web page, choose Sure export the non-public key,
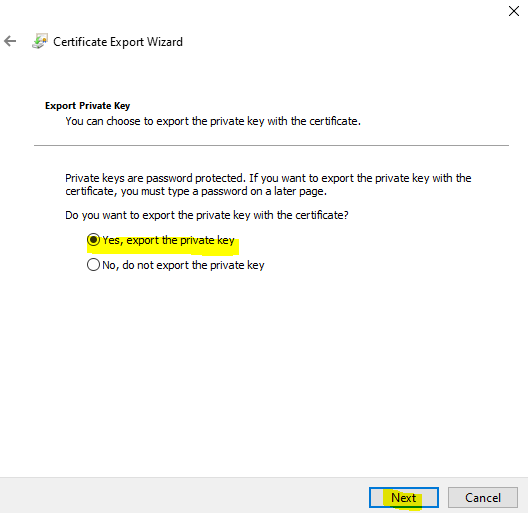
In file format web page, depart the default as following and click on Subsequent
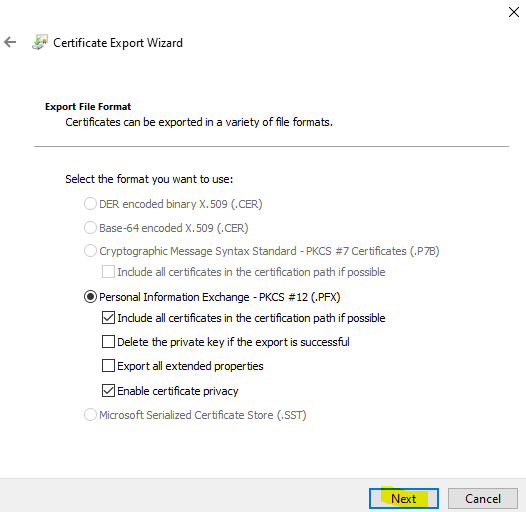
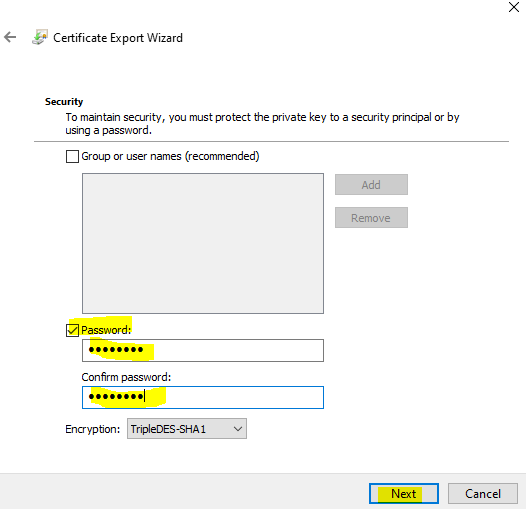
Outline password for the pfx file and full the wizard.
Solely root cert will use in Azure VPN, shopper certificates can set up on different computer systems or Shoppers which want Level to web site connections.
Now open the exported root certificates as Notepad,
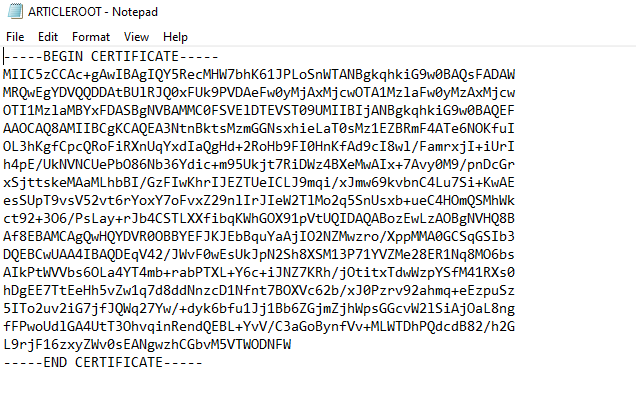
And Copy the certificates knowledge
Once you paste certificates knowledge, don’t copy —–BEGIN CERTIFICATE—– & —–END CERTIFICATE—– textual content.
Now go to the Azure portal the place the configure now Level to web site has ended, and underneath the Root Certificates Tab, give the certificates a reputation and paste the certificates knowledge within the public certificates knowledge tab.
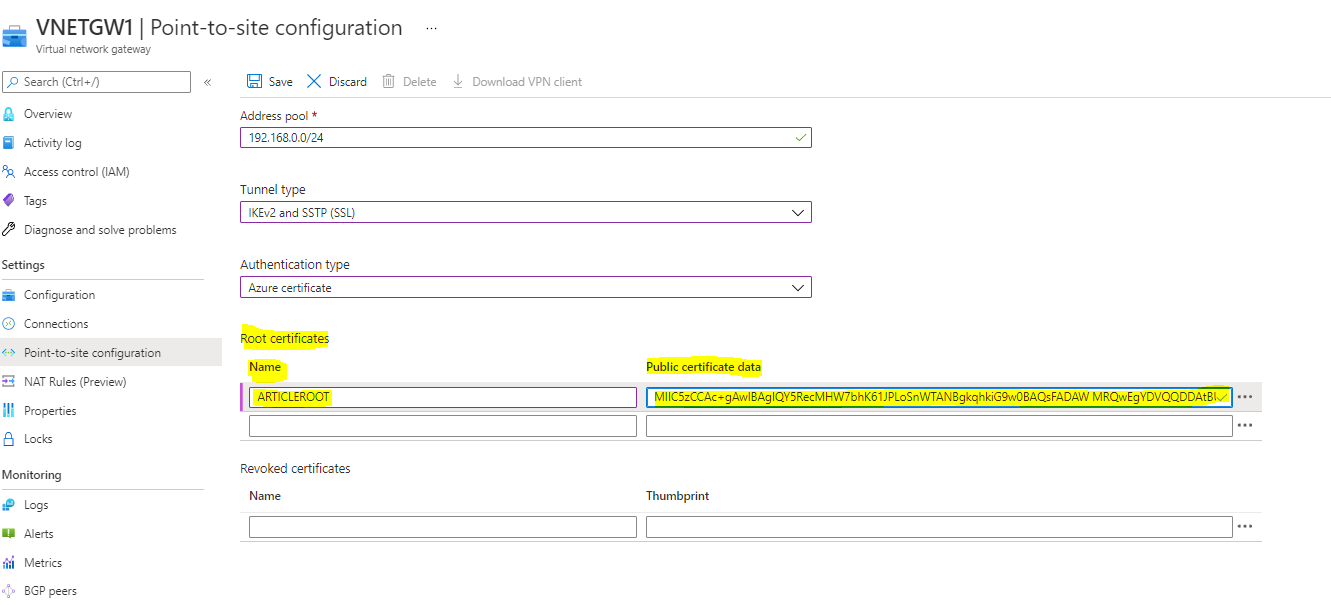
Save.
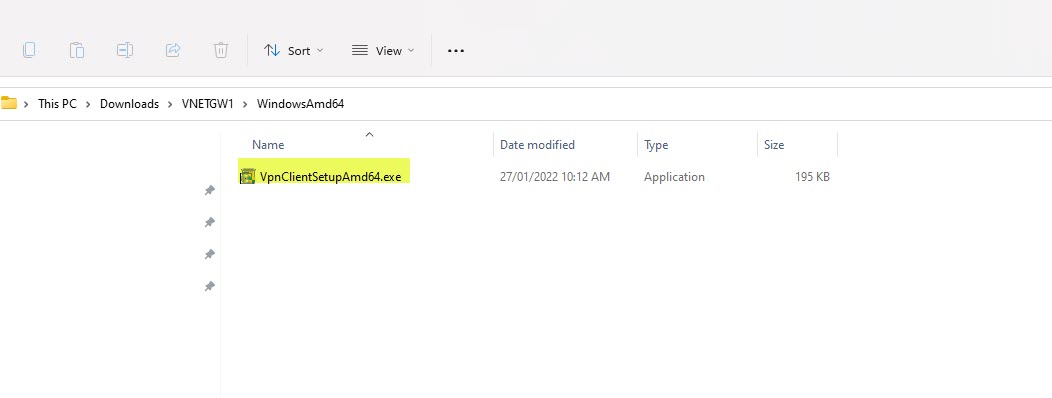
Now Obtain the VPN Shopper
Extract the VPN Shopper and double click on on the VPN shopper setup. In my case I’m utilizing 64bit vpn shopper
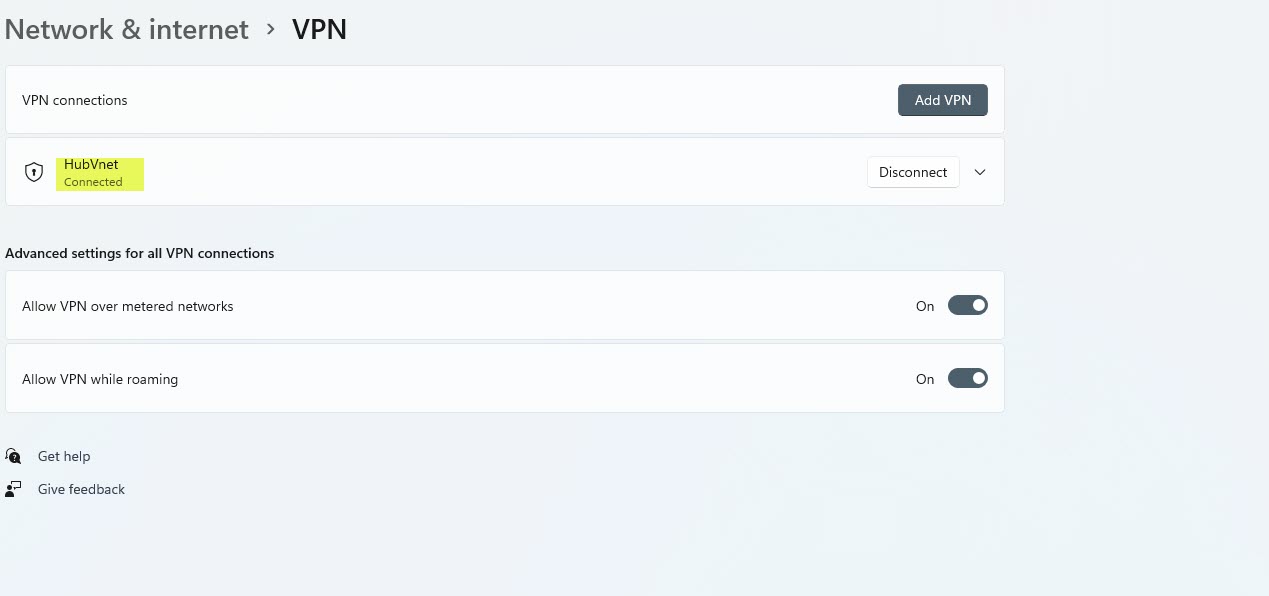
After that, we are able to see new connection underneath home windows 10 VPN web page.
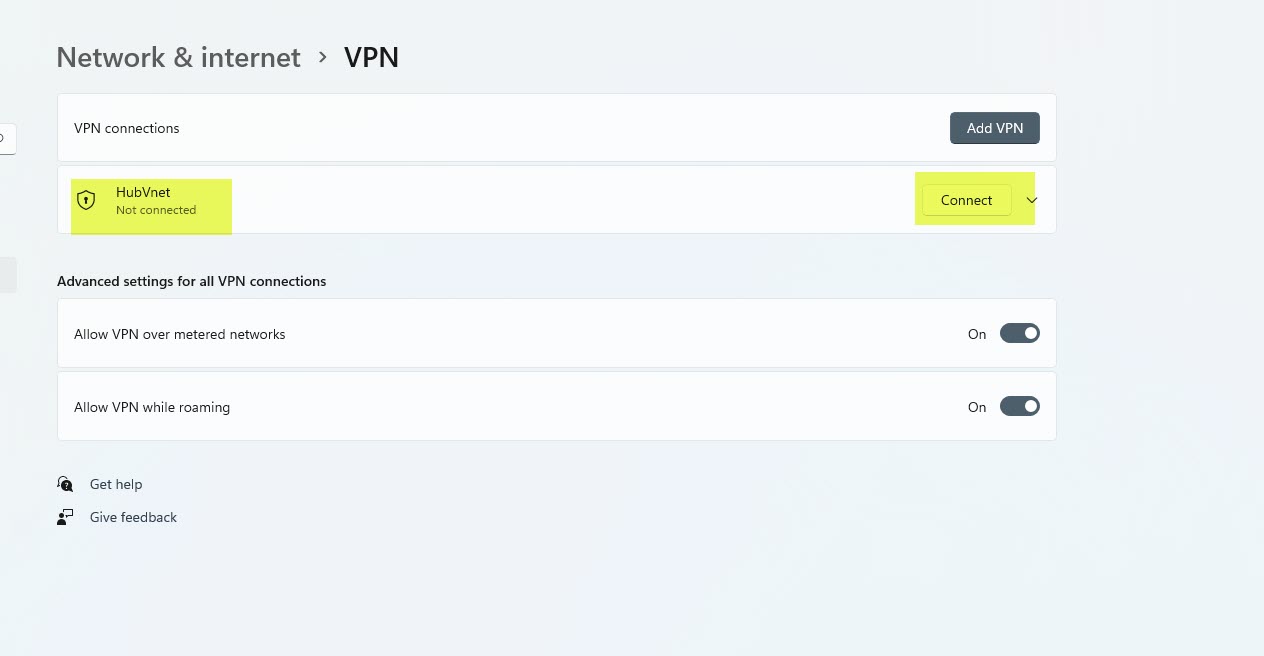
Click on on connect with VPN. Then it is going to open up this new window. Click on on Join in there.
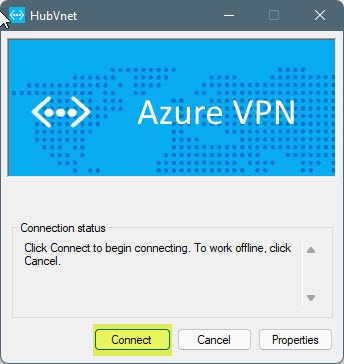
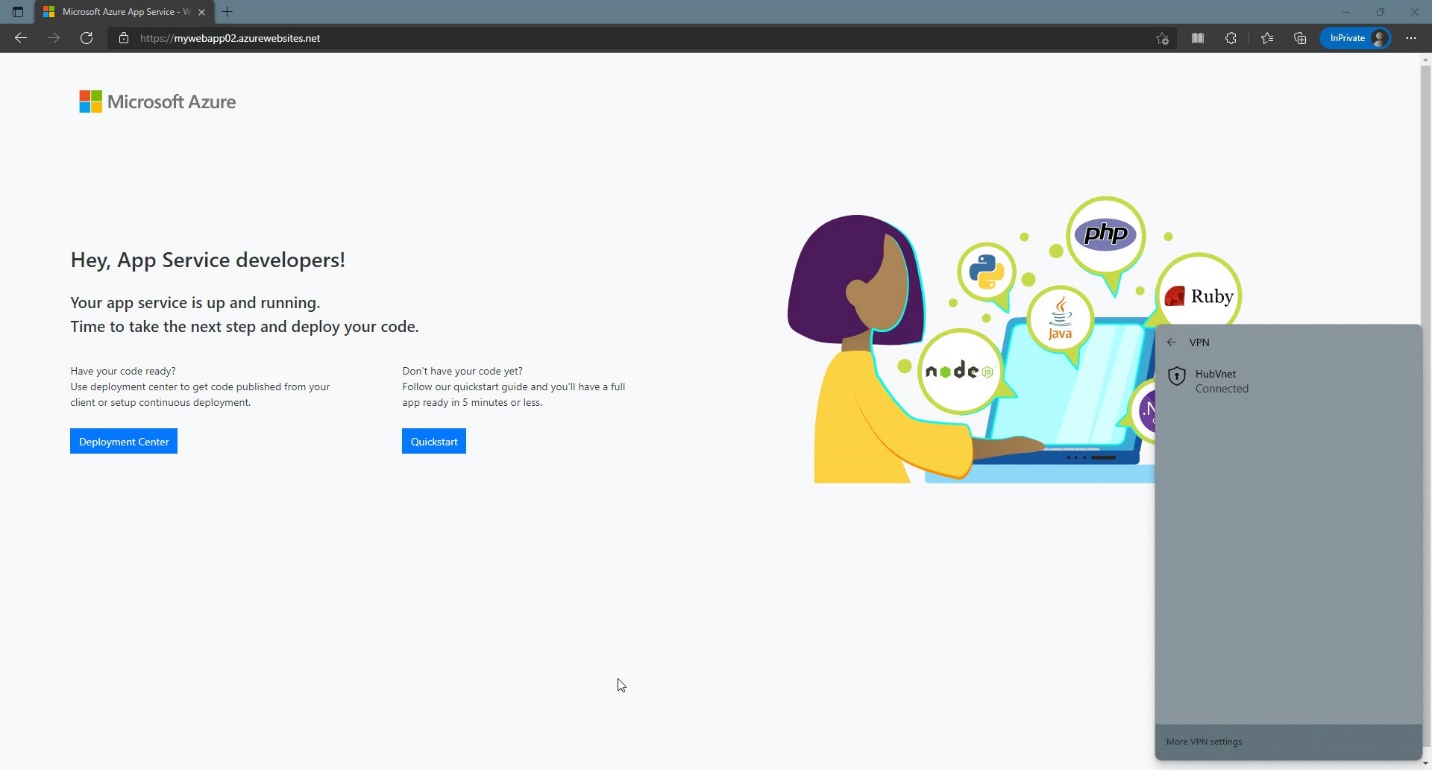
Now you possibly can see HubVnet is Linked.
Now Disconnect the VPN So we are able to examine the deployed app service is operating or not by looking the app service URL in Browser.
Please Notice: If you happen to make any adjustments to Peering’s, Eliminated the present VPN Shopper and Re obtain the VPN Shopper once more and join, since new adjustments include the downloaded VPN Shopper XML.
Step 8 – Personal Endpoint
Search App Service

And choose the deployed App service
In Overview – Copy the URL
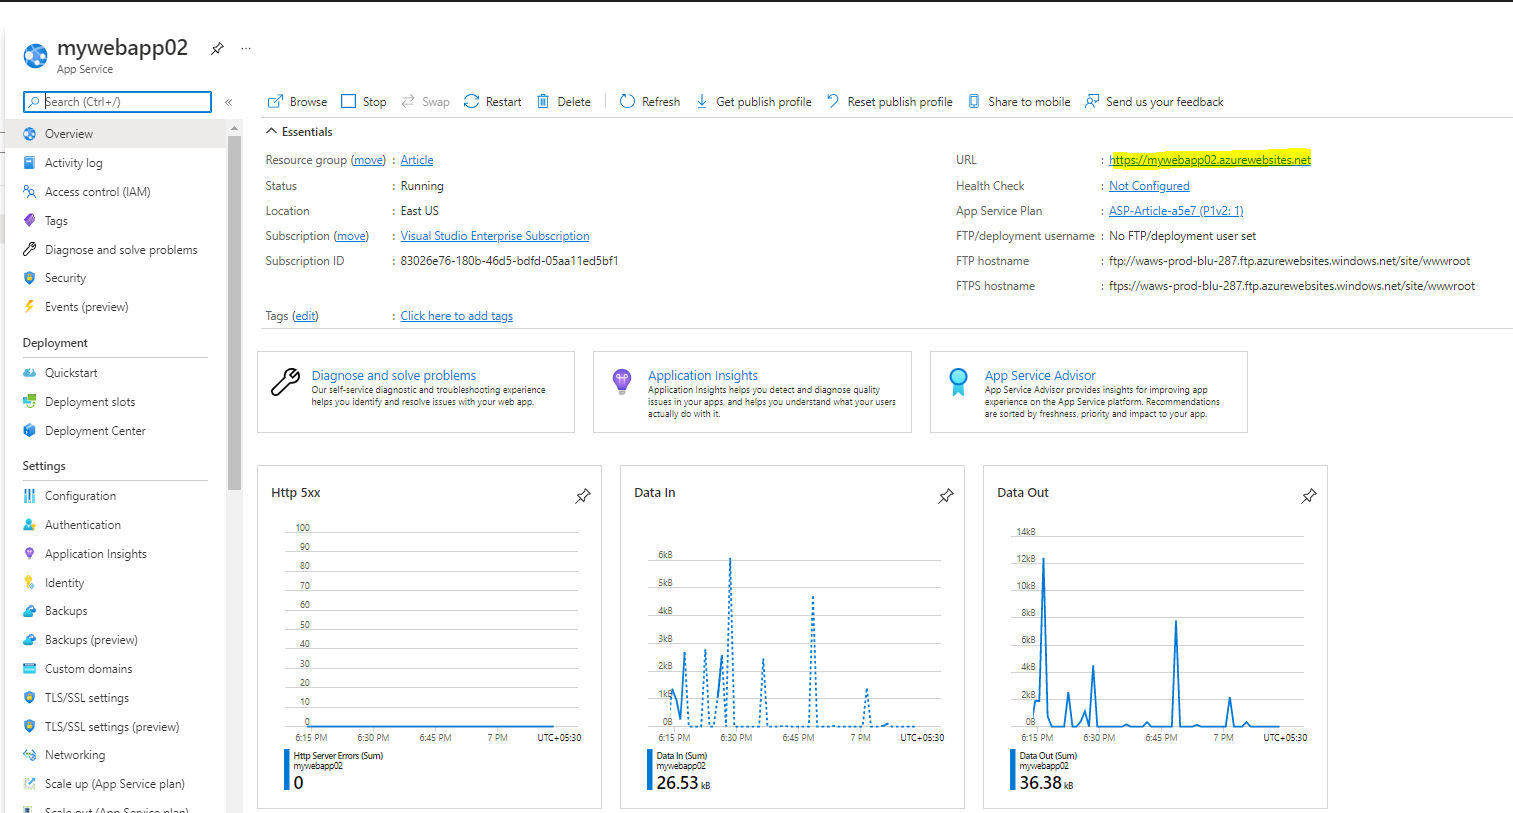
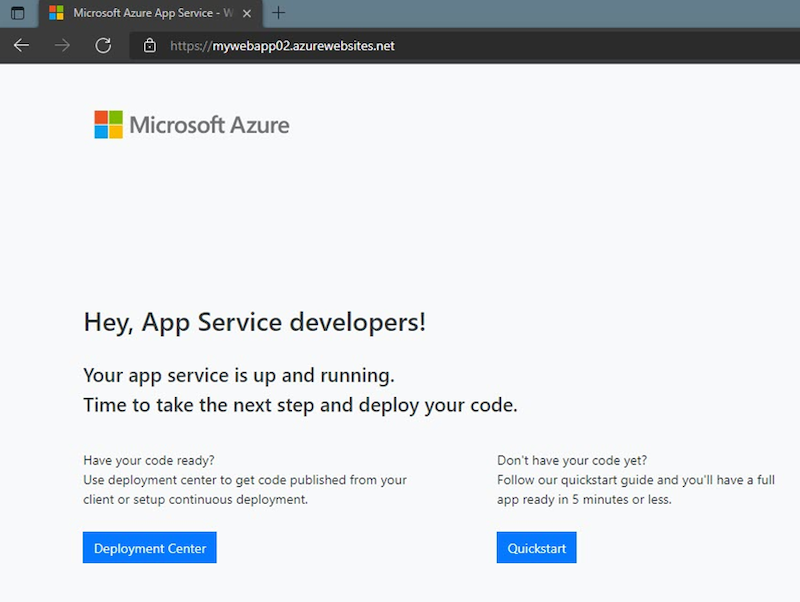
Paste the URL within the Net Browser and examine the app service operating or not.

Now you possibly can see your app service is up and operating
Now we have to safe the app service by non-public endpoint, so the app service shouldn’t be accessible to public and it solely entry by privately.
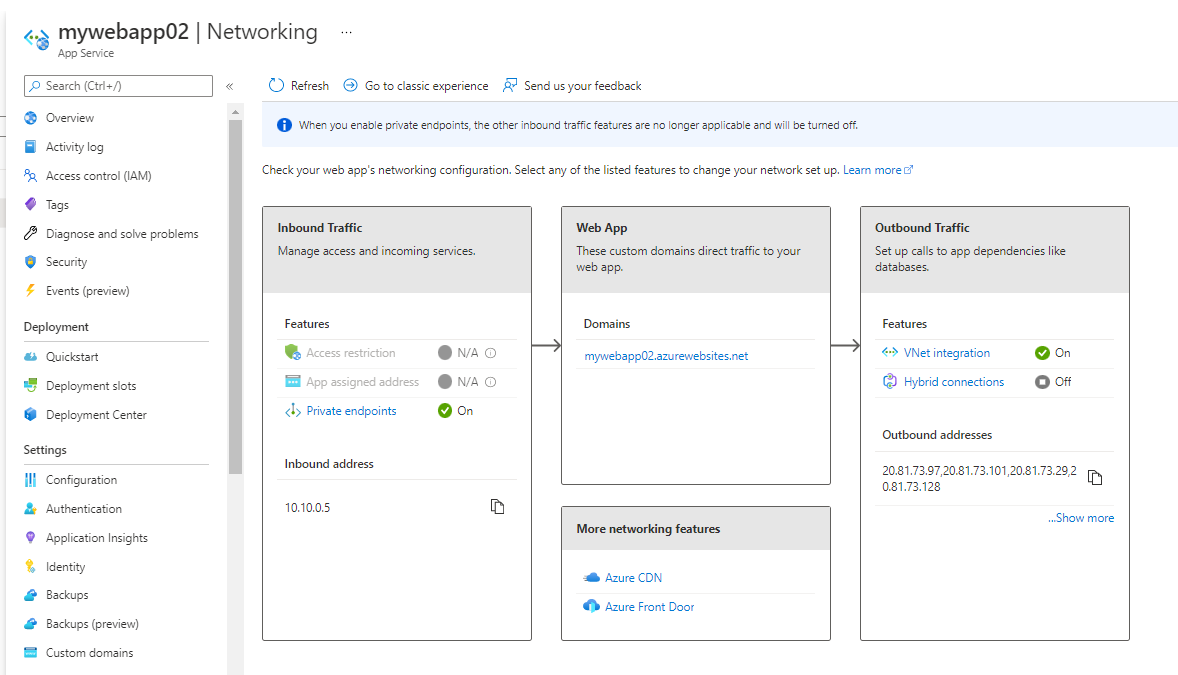
Navigate to Networking in App Service,

Click on Personal endpoints
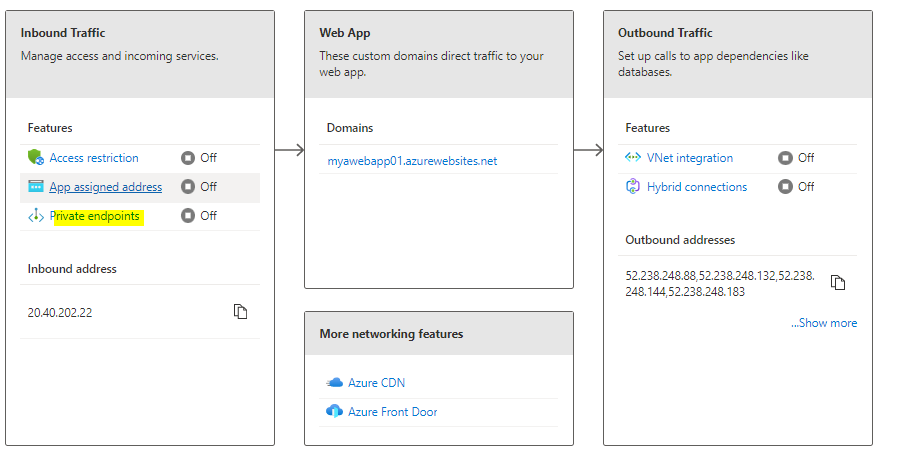
Click on ADD
And choose the beneath highlighted particulars,
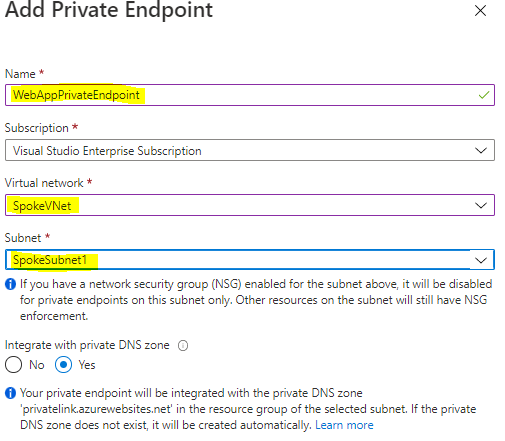
Click on OK
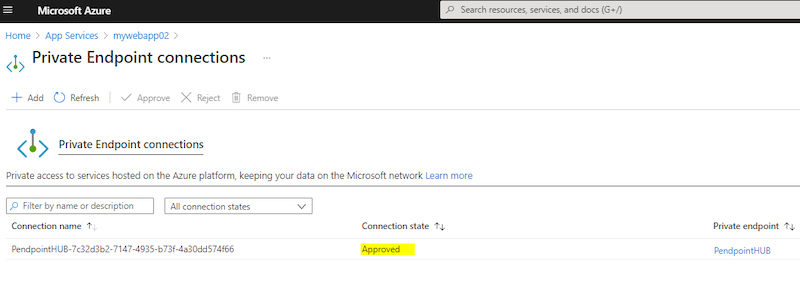
It’ll take 2 to 5min.
Now You possibly can see connection state is Authorized.
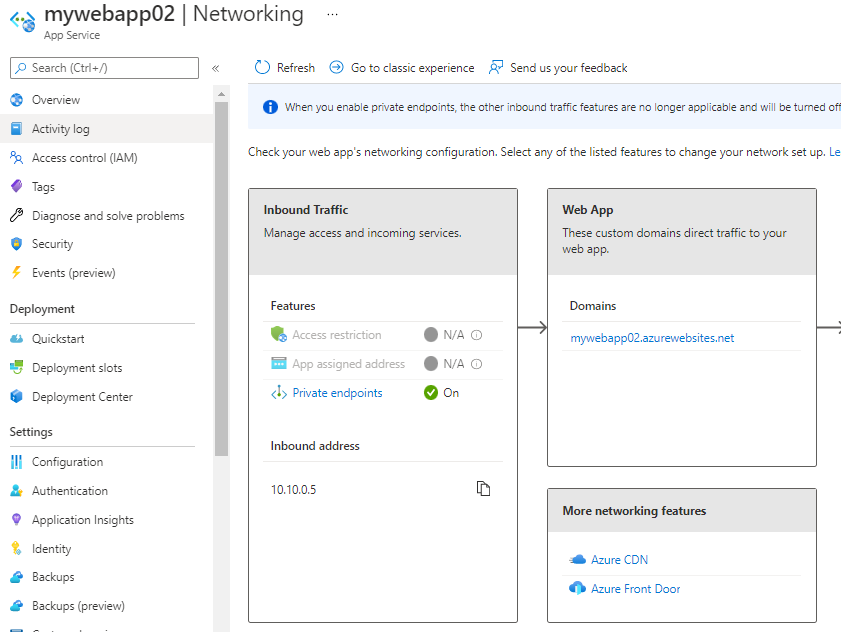
Additionally examine from Networking Tab is present On.
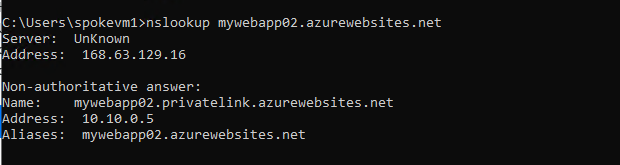
Do Nslookup, then you’ll get the non-public IP and Title
Now click on VNet integration underneath the Outbound Visitors.

Add VNet and Choose the HUBVnet and click on OK
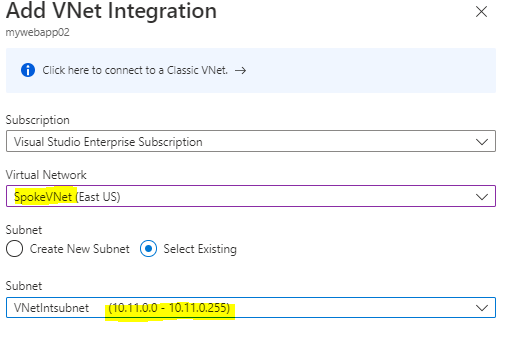
Now you possibly can see VNet Integrations standing is On.
Step 9
Go to the Net App and replica the URL of the appliance, paste the URL, now we are going to obtain an Error 403 – Forbidden web page.
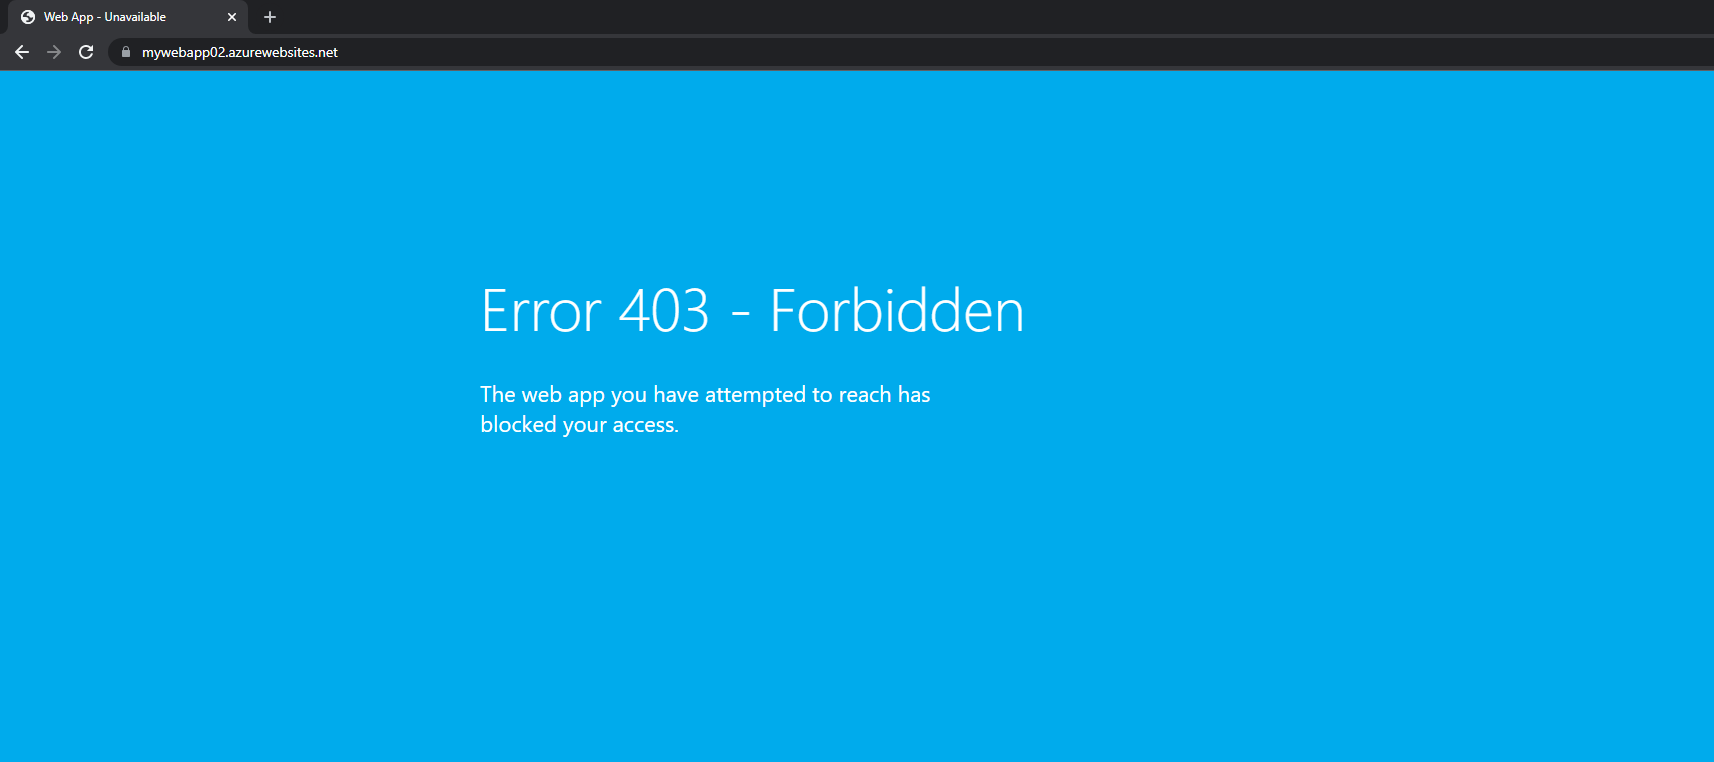
Now you possibly can attempt the identical as connecting the VPN Shopper. Then you’ll obtain the WebApp service is up and operating.
Please Notice: If you happen to obtain 403 error code within the P2S shopper, Then add a Host File and Attempt once more. Then you’ll obtain the WebApp service is up and operating.
Host File – You possibly can see the assigned non-public IP within the non-public endpoint as 10.10.0.5
Add the Host report as beneath,
10.10.0.5 mywebapp02.azurewebsites.internet
Abstract
We discovered easy methods to deploy an Azure Webapp, arrange a point-to-site VPN, arrange VNet Peering with Gateway Transit, and configure a personal endpoint on this tutorial. Please depart a remark within the remark field in case you have any questions.