Introduction
Azure Service Bus is a message dealer utilized by enterprises to ship and obtain messages or knowledge payloads between functions. This method is useful once we wish to keep away from utilizing APIs to ship and obtain knowledge between functions. This method can be very useful for microservices communication once we wish to change messages between a number of microservices. Queues are used for point-to-point communication. Message dealer makes use of the FI-FO method to ship messages from supply to vacation spot. It assures at the least one supply of a message until sure makes an attempt. As soon as the variety of makes an attempt exceeds on the receiver’s finish to acknowledge the messages, the messages are pushed into the useless letter queue. We are going to take a walkthrough of easy methods to obtain messages utilizing queues.
The messages are obtained and despatched utilizing these three protocols:
- AMQP – Superior Messaging Queuing Protocol
- SBMP – Service Bus Messaging Protocol
- HTTP – HyperText Switch Protocol
Setting messages can be very versatile in Azure Service Bus. Not each message or knowledge payload is beneficial. We are able to do numerous operations on messages to suit our state of affairs. We are able to acknowledge them, abandon it, defer the message and transfer the message to alternate queue i.e. Useless letter queue that won’t be obtained once more by regular means.
Approaches
There are two approaches supplied by Azure Service Bus SDK to obtain messages.
- Service Bus Receiver – It’s used to easily obtain the messages and carry out operations on them. It’s a vanilla implementation that does core operations.
- Service Bus Processor – It’s a wrapper round service bus receiver and works on an occasion based mostly mannequin to obtain messages and carry out operations on them. It accommodates a callback methodology to carry out operations on obtained messages.
For extra management, we should use a Service Bus Receiver.
Setup
- Azure Service Bus Occasion (Fundamental and above)
- Visual Studio 2022
- .NET 6
Provisioning Occasion and Creating Messages
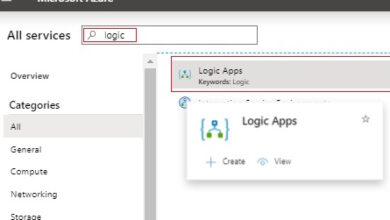
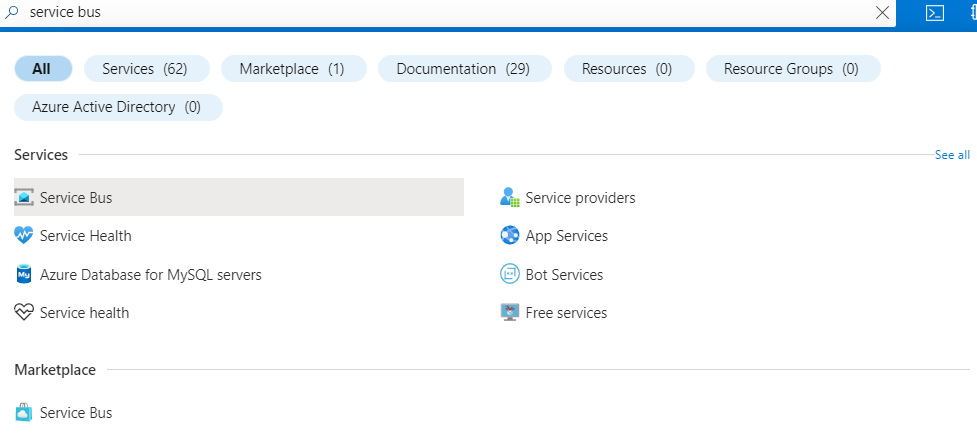
- Open portal.azure.com
- Search Service Bus
- Click on + Create
- Fill the under particulars,
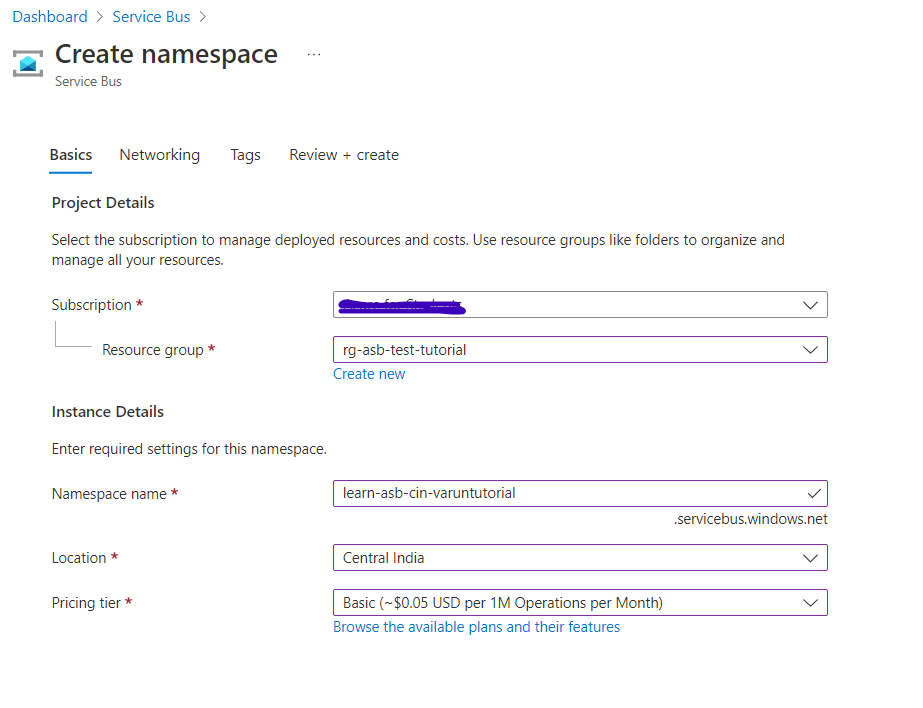
- Click on Subsequent, Subsequent and Create
- As soon as created, Click on Go to Useful resource.
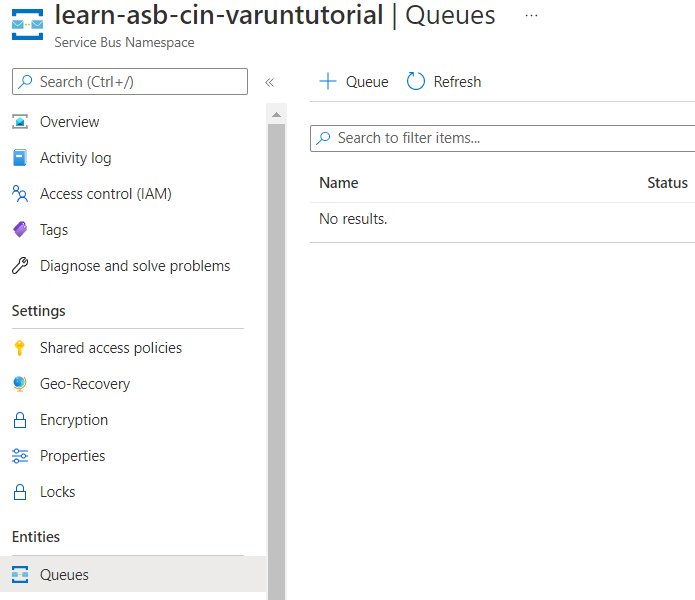
- Open Queues beneath Entities and on proper aspect click on ” + Queue”
- Fill the next configuration
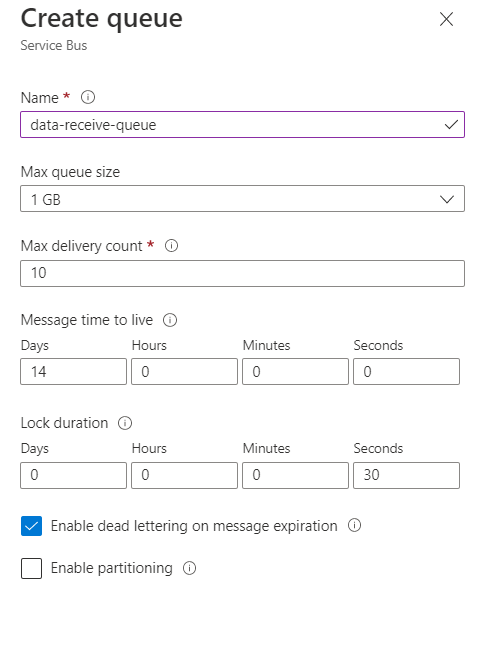
- Click on Create.
- Open Queue.
- Choose Service Bus Explorer (preview) beneath Settings.
- Choose Ship Tab
- Create a JSON payload {“id”:1,”message”:”obtained”}

- Click on Ship
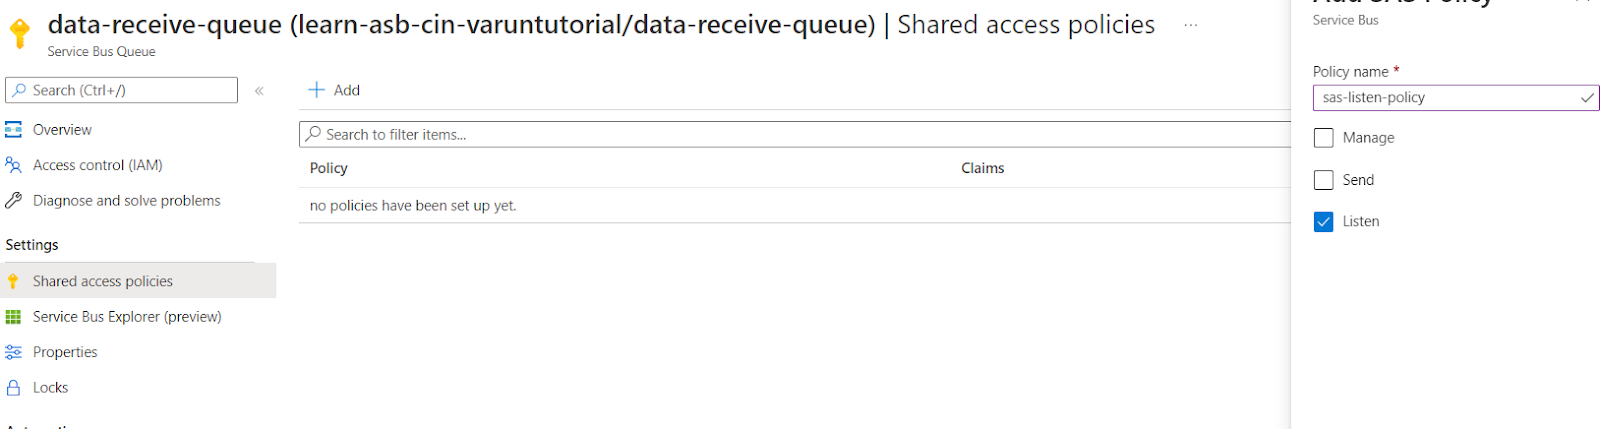
- Below Settings part choose “Shared entry insurance policies”
- Click on on “ + Add ”
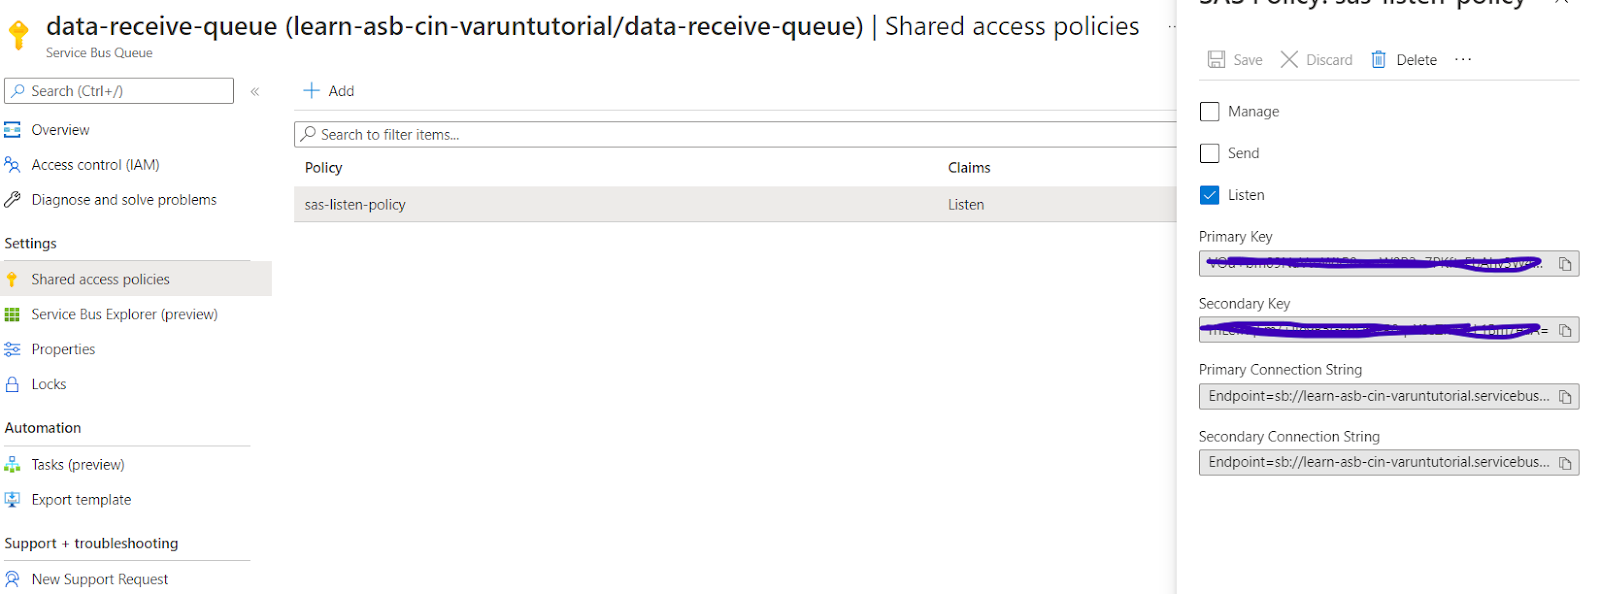
- Write coverage identify and choose the checkbox to hear and click on Create.
Be aware: We should all the time observe the precept of least privilege when assigning any permissions - Choose the coverage identify and duplicate Major or Secondary Connection String.
Code Walkthrough
- Create a .NET 6 Console Utility.
- Proper click on on the undertaking.
- Choose Handle Nuget Packages..
- Set up Azure.Messaging.ServiceBus!
Utilizing Service Bus Receiver:
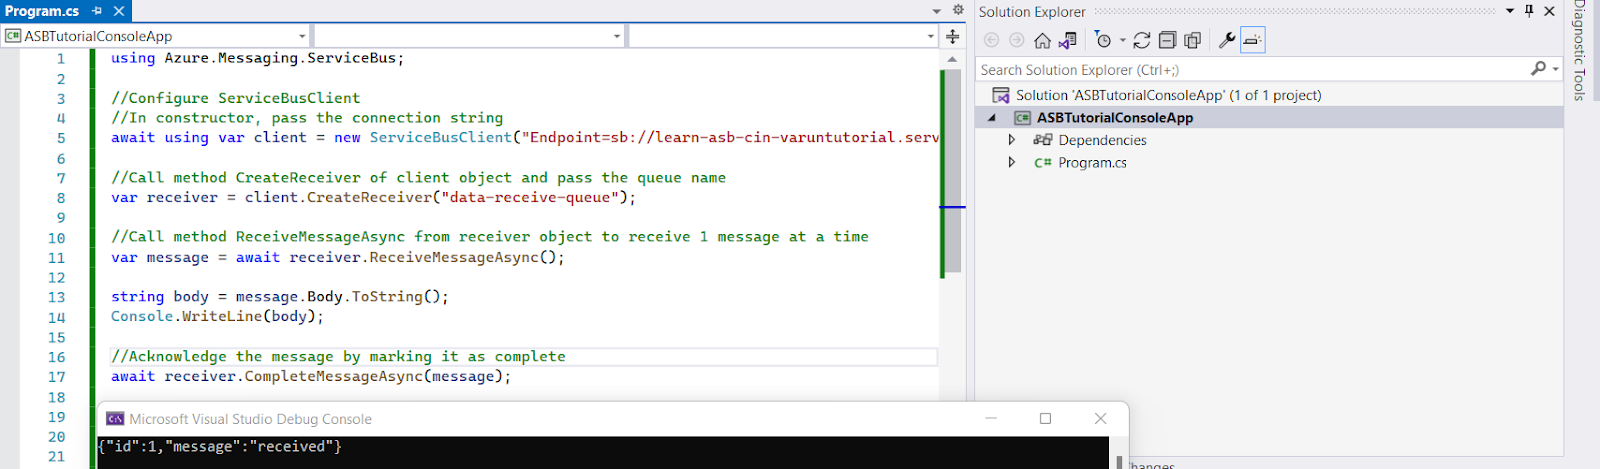
utilizing Azure.Messaging.ServiceBus;
//Configure ServiceBusClient
//In constructor, cross the connection string
await utilizing var consumer = new ServiceBusClient("Endpoint=sb://learn-asb-cin-varuntutorial.servicebus.home windows.internet/;SharedAccessKeyName=sas-listen-policy;SharedAccessKey=<eliminated>;EntityPath=data-receive-queue");
//Name methodology CreateReceiver of consumer object and cross the queue identify
var receiver = consumer.CreateReceiver("data-receive-queue");
//Name methodology ReceiveMessageAsync from receiver object to obtain 1 message at a time
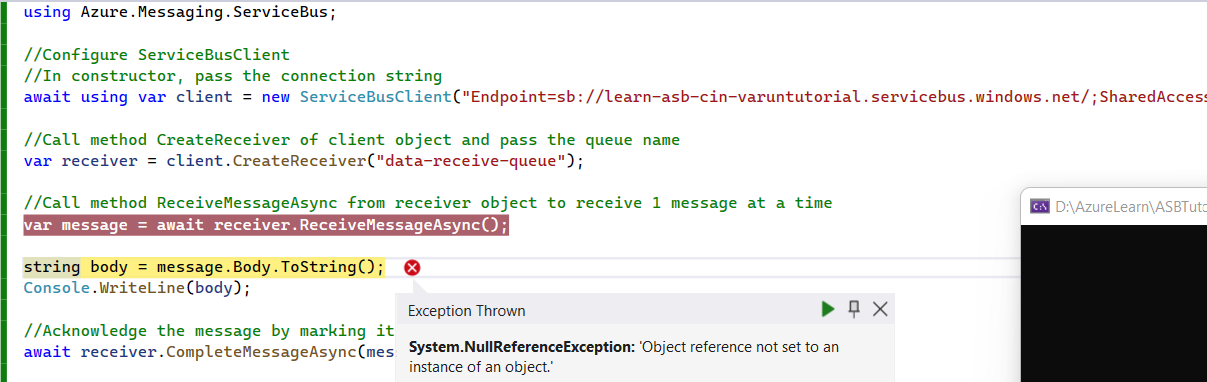
var message = await receiver.ReceiveMessageAsync();
string physique = message.Physique.ToString();
Console.WriteLine(physique);
//Acknowledge the message by marking it as full
await receiver.CompleteMessageAsync(message);
Now, once we rerun the above code we are going to get no response and software will break as there isn’t any exception dealing with as a result of the message has been processed and we have to add a message once more.
Utilizing Service Bus Processor:
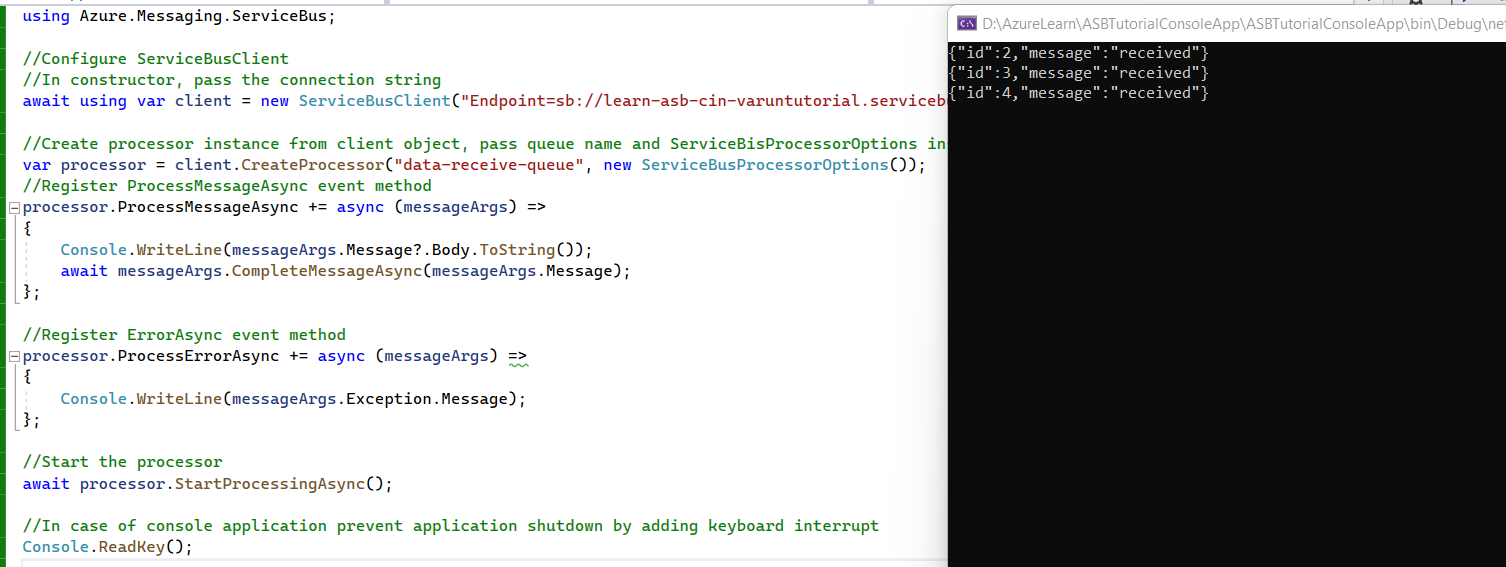
utilizing Azure.Messaging.ServiceBus;
//Configure ServiceBusClient
//In constructor, cross the connection string
await utilizing var consumer = new ServiceBusClient("Endpoint=sb://learn-asb-cin-varuntutorial.servicebus.home windows.internet/;SharedAccessKeyName=sas-listen-policy;SharedAccessKey=<Eliminated>;EntityPath=data-receive-queue");
//Create processor occasion from consumer object, cross queue identify and ServiceBisProcessorOptions occasion
var processor = consumer.CreateProcessor("data-receive-queue", new ServiceBusProcessorOptions());
//Register ProcessMessageAsync occasion methodology
processor.ProcessMessageAsync += async (messageArgs) =>
{
    Console.WriteLine(messageArgs.Message?.Physique.ToString());
    await messageArgs.CompleteMessageAsync(messageArgs.Message);
};
//Register ErrorAsync occasion methodology
processor.ProcessErrorAsync += async (messageArgs) =>
{
    Console.WriteLine(messageArgs.Exception.Message);
};
//Begin the processor
await processor.StartProcessingAsync();
//In case of console software stop software shutdown by including keyboard interrupt
Console.ReadKey();
Now push messages to the service bus explorer and we are going to get messages in realtime.
Be aware: To Cease Processor and Dispose the connection use
await processor.StopProcessingAsync();
await processor.DisposeAsync();
For consumer
await consumer.DisposeAsync();
That’s it!! Thanks for studying! Hope you appreciated it. Please be at liberty so as to add your feedback and recommendations.